Keep Fabric and Thread Samples in Your Sewing Space

Keep Fabric and Thread Samples in Your Sewing Space

Hero Lead Image

Location is everything

If you haven’t considered keeping samples of the fabrics and threads you work with on a frequent basis, I’m here for advocating that you start. I live in Mammoth Lakes, California, which is a small, out of the way town at 8,000ft altitude in the Eastern Sierra Mountains. The nearest sewing/fabric stores to me are a one hour drive south in Bishop, California. And If I want the convenience of larger, more well-known establishments, I have to drive 2.5 hours north to Carson City, Nevada. Needless to say, I do a lot of shopping online. This is my first argument for keeping a collection of samples in your sewing space. If you can’t readily get to a store, then being able to look at what you need and order online is a life saver.

1

Make exactly what they want

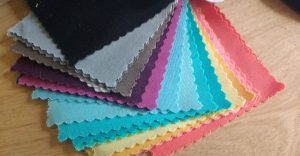
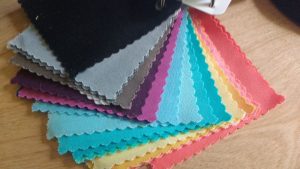
Sample swatches and cards are helpful for showing to both customers and friends and family that you may be sewing for. I try to never sew gifts as surprises. Sometimes I break this rule when I’m fairly certain the gift recipient will like what I’m making, but usually I don’t chance it. Why spend time and money on a handmade gift that someone may not like? I use my sample swatches of minky, for example, when I make gifts for my daughters or their friends. The kids can touch and feel the fabric, read the names of each color, and fall in love with the gift before it’s even finished.

2

How does it feel?

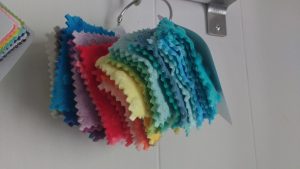
Speaking of feeling, many sewists I know don’t like to order fabric online because they like to feel the fabric in the store before buying. I understand where they’re coming from, but usually have to order online. Because of this, I’ve ordered samples of the brand of solids I like to use (Hawthorne Threads) because I already know how their fabric feels, looks, and washes. If you have a brand you love, look into getting sample cards or even buying charm packs of a line of fabric that you tend to buy over and over.

3

Samples versus supplies

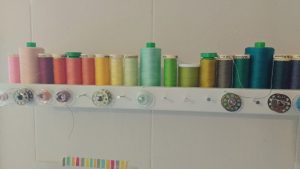
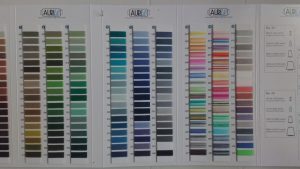
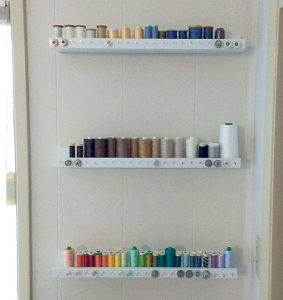
A supply can be a sample, but a sample can’t be a supply. I keep a lot of supplies on hand in my fabric stash and my thread wall and I often will check my supplies to see if they will work in an upcoming project as well. I can’t, however, keep EVERY color of thread on hand, nor can I buy ALL THE FABRIC, like I want to. When the colors I don’t already have on hand won’t work, then I turn to my thread sample card to see what I need to order.

4

What kind of samples do you keep on hand to make your sewing life easier?

———————————————————————————–
Charlotte Kaufman is a writer and sewist in Mammoth Lakes, California. She specializes in marine and home interiors and continues to fall more and more in love with quilting. You can follow her at charlottekaufman.com.
The Lost Straight Pin Dilemma

The Lost Straight Pin Dilemma

Let’s be honest. Sewing isn’t the most dangerous hobby. I’m not driving a Nascar race, flipping in the air off of a dirt bike, or taming poisonous reptiles. Overall, it’s a safe assumption that I’m not chancing my life by trying to finish a sewing project! But that doesn’t mean that there isn’t room for smaller injuries in the world of sewing, and one of those possibilities has surfaced a number of times on this blog: Accidentally sticking yourself with a straight pin.

Ouch!
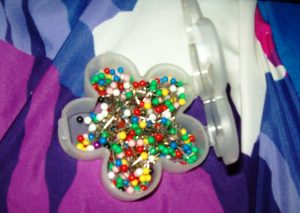
Don't misplace your straight pin container!

Don’t misplace your straight pin container!

Sure, it’s a minor injury. There’s no need to rush to the hospital, and you probably won’t break out a Tylenol bottle to help with the pain. Regardless, it is a discomfort, and the possibility of enduring that discomfort extends beyond your sewing session if you do what I’ve found to be one of the easiest missteps in sewing, which is losing your straight pins. I don’t mean misplacing your straight pin container either! I mean that once you put away your sewing materials and supplies, you find that there is at least one straight pin lingering in or around your sewing area.  Each of those straight pins could be a future discomfort waiting to happen, and every one could also bring you one step closer to buying more straight pins.

But it’s sooo easy to lose these things! How can a person keep from having it happen?
Like with thread and material, the type of straight pin you get can matter, so be sure you’re making a good choice!

Like with thread and material, the type of straight pin you get can matter, so be sure you’re making a good choice!

Sometimes it’s unavoidable…

For me, personally, I’m leaning toward the idea that I can’t completely prevent it. In fact, my leaving straight pins behind is kind of a running joke in my house. Other than using a pin cushion, the only advice I have to offer on that detail is to make the right choice when buying your pins. Like with thread and material, the type of straight pin you get can matter, so be sure you’re making a good choice! In my experience, ones with a bit more length to them seem to hold their places better than the shorter ones, and I think logic backs that up. The longer the pin, the more space you have to lock it in place in your fabric. If it’s locked in place, there’s less risk of it working its way back out of the material, which lessens the risk of a loose straight pin.
If it’s locked in place, there’s less risk of it working its way back out of the material, which lessens the risk of a loose straight pin.

If it’s locked in place, there’s less risk of it working its way back out of the material, which lessens the risk of a loose straight pin.

Even with those longer pins and pin cushion though, pins still might end up scattered around your work area. So when nothing you’ve done keeps your straight pins from falling to the floor, seat, etc., how do you find them to put them away and prevent someone from accidentally coming across one in a not-so-pleasant fashion? Here are some ideas!

Your own senses

This one is obvious, so let’s begin with it. Sometimes, just looking around your sewing area can let you find loose straight pins, and gently patting your hand (not pressing too hard since pins are, indeed, sharp) could help you detect them as well. I honestly don’t know how many pins I’ve found with these tactics, and I didn’t have to buy anything for them!
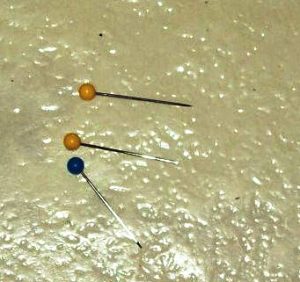
Found ya!

Found ya!

Shine a flashlight

Objects that are the color and/or texture of a straight pin reflect light, so if you shine a flashlight, you might get a glimmer in response that will lead you to a loose straight pin. Take your time as you do this so that you don’t look right over the pin! A few extra seconds for a better-done job could save you hassle and, as I mentioned, discomfort, in the future!

Use a vacuum cleaner

Okay, clearly, you might not want to vacuum up a straight pin for the sake of your vacuum cleaner! But as the link says, if you use an extension hose from your vacuum, you just need to put some kind of barrier over it to keep the pin out. A piece of cloth would work, and using the vacuum in this fashion would pull the straight pin out of whatever hiding place it’s in to a very obvious spot without damaging your vacuum cleaner. Simple, right?

Use a magnet

This method is plain, but effective! Just move a magnet around your work area, and any metal pin that’s close enough should be drawn to it. The strategy comes with very little hassle, and very little room for error unless your magnet is too far away from the pin. But so long as you’re thorough with covering the area, this is — in my opinion — the best tactic of the listed ones. It’s not as iffy as missing a flashlight glimmer, as unsure as eyeballing the area, or as cumbersome as breaking out (and readying) your vacuum cleaner. It’s so low-tech, most people can use it easily, and it’s cheap! What more could you ask for?

With these methods at your disposal, hopefully most of your loose straight pins can be found and preserved for future use instead of laying around for future injury!

Do you have a preference among them or know any other strategies for locating loose straight pins? If so, share your thoughts!

The Traveling Tailor

The Traveling Tailor

Sewing machines and supplies aren’t exactly the most portable things. Sometimes, when I’m not working fulltime on a show, I’ll get a one or two day job that requires me to schlep a machine and supplies to a work space. These are my least favorite kind of jobs – for no other reason than I have to transport my machine and a small kit of sewing supplies somewhere.

I live in New York City. I haven’t owned a car in over ten years.

What’s the big deal, you may ask, just throw it all in your car and go. Well, that’s the thing: I live in New York City. I haven’t owned a car in over ten years. The last time I drove was about two years ago. And I’m not a huge fan of Uber or even good old-fashioned yellow cabs. Cars are just not the most efficient way to get around the city. So, I’m usually dragging a sewing machine up and down the subway stairs to get to where I need to go.

On the go

I know I’ve recommended these machines before, but Brother makes some incredibly good and lightweight machines. I have two SC9500s. They are so lightweight that I carry them in a tote bag on my shoulder. I then use a backpack to carry my supplies: scissors, threads, rulers, chalk, a small collection of notions.

Other Brother machines that are very light weight are the CS5055 and the ES2000.

I also bike a lot, which is always the most efficient way to get around the city, and have been known to strap a machine (in a box) to the rear rack on my bicycle.

When going to a job that is only one or two days, sometimes it’s hard to figure out what to bring, especially if you’re trying to not lug your entire shop down the length of Manhattan and across the bridge to Brooklyn.

Here’s a list of what I usually bring to a short one-day job:

  • 1 pair of tailor’s points or small scissors
  • 1 pair of medium sized shears
  • 1 pair of pinking shears (because I’m certainly not bringing a serger along to finish seams.)
  • 1 gallon sized Ziploc of thread. Must have colors include black, grey, white, tan, a greeny-brown, nude, and a yellow-orange for topstitching on jeans.
  • 12” see through 2” wide ruler
  • 1 soft tape measure
  • Tailor’s chalk, red marking pencil, pencil, black disappearing ink pen
  • Seam ripper
  • Metal hem gauge ruler
  • Small container of straight pins
  • Extra bobbins for machine
  • Small collection of hand and machine needles (I always bring some leather needles and double needles, just in case.)
  • 1 gallon sized Ziploc of bias tape (black and white), elastics, twill tape, and hem tape.
  • Small containers of snaps and hook & eyes.
  • Muslin pressing cloth
  • Small collection of nude spandex and netting scraps and interfacings

Lighting is key

Sometimes it’s nice to bring along a small light of some kind. I often find myself sewing in inadequately lighted spaces. I tend not to bring a lamp because, well, the subway. I always make sure the light in the machine is working. And the flashlight on an iphone can be extremely helpful in especially dark circumstances.

Gear up

I’m not very high tech with my carrying cases but there are lots of really lovely ones out there if you’re not into backpacks and tote bags.

https://www.sewingmachinesplus.com/sewing-accessories-cases.php

The key is to keep everything super organized. And don’t worry about not having all the thread. Unless you’re topstitching, most things can be sewn with black, white, or tan. I know some tailors that only use those colors of thread. It really is ok if your thread doesn’t match exactly. And sometimes you just have to use what you have, especially if you are a traveling tailor.

Must Have Sewing Notions and Supplies

Must Have Sewing Notions and Supplies

Last week, I told you about my dream sewing room furniture. This week, I want to share with you my must have sewing supplies. And no, I don’t actually own all of them since I don’t yet have that dream sewing room. Call this my dream sewing supplies list, I guess.

Must Have Sewing Notions and Supplies

Dress Form

I adore making cute summer sundresses. Right now, I measure myself, cut along what I hope are the right lines in the pattern and hem it by hanging the dress on closet hanger. Not ideal, but so far at least, they’ve all come out fine. I’d love a dress form though so I could check the fit and make minor tweaks and modifications as I go. I’m kind of between dress form sizes right now, so I’d have to make a call on which size to get – or if money was really no object, just get both!

Amazing Sewing Scissors

Alright, so I do have a pair of fabric scissors. I couldn’t consider myself a sewer if I didn’t. But I don’t love them. The handles are hard plastic and someone (not naming any names) used them to cut paper at some point, which kind of screwed up the cutting surface. I’d really love a pair of fabric scissors with a softer handle, especially since breaking my right hand last year. Even better, the ones I linked to have a purple handle! That’s my favorite color. Definitely on my sewing supplies wish list.

How about you?

Long Ruler

I don’t necessarily need to cut long, straight lines making sundresses, but I do need to measure long stretches of fabric to line up pattern pieces. Right now, I use a soft measuring tape. I pin it down on one side and pull it taut to measure. It’s not ideal, but it gets the job done. A yard stick or long ruler would go a long way towards making measuring easier.

What’s on your sewing supplies wish list? Sewing Machines Plus probably has it! Check out the website and let yourself dream.

Different Types of Thread and When to Use Them

Different Types of Thread and When to Use Them

Have you ever gone to the fabric store and been overwhelmed looking at the vast assortment of thread for sale? If so, then fear not, for I will help to break down the mystery of thread and how to use it in all its various types.

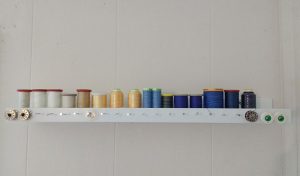
To start, consider where you are going to store your thread. I’m a highly visual person and I like to see what I have on hand. I also find looking at thread to sometimes motivate me or inspires me to begin on new projects. I created this thread display in my sewing room using Ikea picture frame shelves (Ikea Ribba) and I added small nails to hang my bobbins by the corresponding color of thread.

I added small nails to hang my bobbins by the corresponding color of thread.

I added small nails to hang my bobbins by the corresponding color of thread.

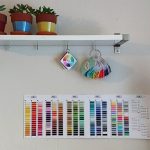
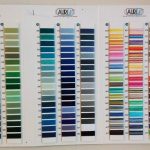
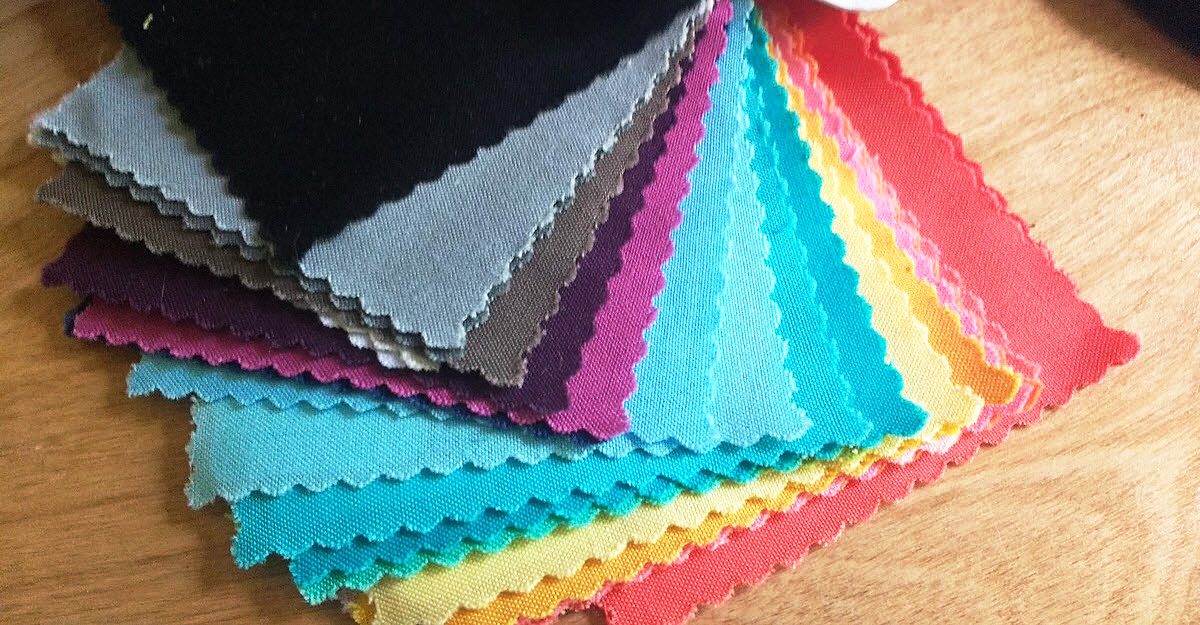
I live in a rural area, three hours from the nearest Joann Fabrics. Because of that I keep an Aurifil Thread Color Card so I can easily order the exact shade of thread I need. It also looks beautiful too, no?

Thread Weight

When choosing thread, consider the thread weight. A quick breakdown of Aurifil’s brand thread weights (and their many great brands of thread, including Guterman and Coats & Clark) looks like this:

12wt: Use it for sashiko & red work stitchery. This is the thickest thread in the Mako’ range.

28wt: It is strong enough to withstand the stress of hand quilting without needing to be glazed or waxed.

40wt: Favorite thread for machine quilting and all-purpose sewing. A little heavier to show off the quilting stitches.

50wt: Quilters love it for its piecing and quilting. A staple for every sewing studio.

80wt: This is the finest Egyptian cotton, for use by hand or machine. Your new ‘go to’ thread for applique and much more.

~ Thread descriptions from Hawthorne Threads

Buying at a fabric store is actually a little easier than sussing things out online because they divide thread into sections so you can quickly scan for ‘quilting’ or ‘embroidery’ or ‘heavy duty/jeans.’

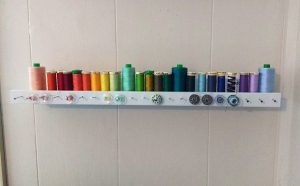
I keep my standard, quilting cotton weight threads organized by ROYGBIV (red, orange, yellow, green, blue, indigo, violet).

I keep my standard, quilting cotton weight threads organized by ROYGBIV (red, orange, yellow, green, blue, indigo, violet).

ROYGBIV: red, orange, yellow, green, blue, indigo, violet.

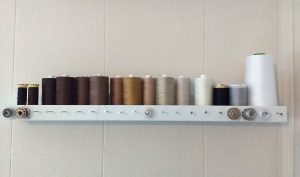
I also keep my neutrals and browns organized by gradient.

I keep my neutrals & browns organized by gradient.

I keep my neutrals & browns organized by gradient.

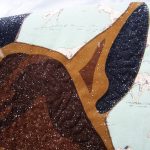
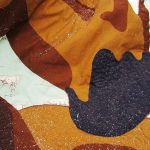
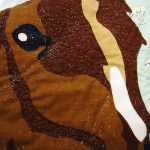
Buying a lot of shades of one color can greatly help when working on projects with a ton of variation in the same tone, like in this quilt I recently finished. I used five different shades of brown and black to finish the horse.


Utility/Novelty Threads

These are threads you reach for when you need to pull out the big guns or you are just doing something different. I use some of these heavy weight threads for upholstery, corduroy, vinyl, or very thick or unique fabrics.

I use some of these heavy weight threads for upholstery, corduroy, vinyl, or very thick or unique fabrics.

I use some of these heavy weight threads for upholstery, corduroy, vinyl, or very thick or unique fabrics.

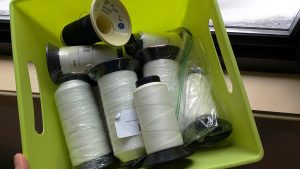
This is my tub of very heavy duty threads. I use them on marine projects and with my industrial sewing machine.

This is my tub of very heavy duty threads.

This is my tub of very heavy duty threads.

Variegated Thread

I saved these threads for last because they are my favorite. If you haven’t tried sewing with them yet, I encourage you to start today. The richness of their color variation is an absolute delight to the eye and often can take your projects to a whole other level.

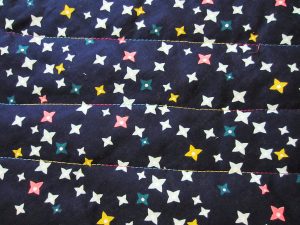
I used two spools of variegated thread on this quilt. The blue/rainbow you can see here.

The blue/rainbow you can see here.

The blue/rainbow you can see here.

And the gorgeous bright yellow here.

You can see the gorgeous bright yellow here.

You can see the gorgeous bright yellow here.

Of course, with different threads you will need different needles, but I’ll save the topic of needles sizes and shapes for another post. What are your favorite types of threads? Let us know in comments!
—————————–
Charlotte Kaufman is a writer and sewist in Mammoth Lakes, California. She specializes in marine and home interiors and continues to fall more and more in love with quilting. You can follow her at charlottekaufman.com.
New Year, New Challenges: The Psychology of Sewing

New Year, New Challenges: The Psychology of Sewing

How many times do we seriously plan things, and within days or hours, our plans change. I used to think I prefer knowing what will happen ahead of time so I can grasp the idea, plan it to my specifications, and control the outcome. Not very many things happen that way.

So last time I wrote, I had a nice New Year’s Resolution list made up for myself. I was ready to learn new things, implement new creative expressions, and sew a rug made of scraps. That was a few days before New Year’s Day.

Now, the middle of January, about 2 days ago, I was able to sit and sew a project I have been thinking about. Sewing is so therapeutic, you forget where you are and the daily chores of life. But now, my Resolutions have been pretty much scrapped. Time changes things so quickly.

Turn that frown upside down

Now, I’m finding myself in a position to decide how to decorate a new home we are building. “Wonderful, you say! Congratulations!” Blushing but thankful, I tell you, “Thank you, but the downside is I’m losing my room for sewing.” For now, I have a countertop that wraps around half the room where I can cut, sew, press, lay out patterns, and holds my computer. Plus tons of shelves for fabric, ribbon, thread, and many other non-sewing related supplies. What will I do?

We determined that I will use the large guest room upstairs for my sewing projects, but it will be deemed a guest bedroom as well. So, gone are the days, of leaving my projects in different stages, and not worrying about things left out. I have to be neat and organized ie. (no thread on the floor) so if we should get company, (my daughter visits frequently) that room will be presentable. OMG, such pressure! I’m already stressed. I can’t even get away and be creative because my room has to be in picture perfect order and stay that way (much like the rest of the house by the way, as my in-laws will be living with us).

So, I need your help! I will explain later. I’m making a checklist of some things, I need to purchase if I am going to continue my psychological sewing retreat. At least I have until late July to decide.

Making a list – checking it twice

First is a desk. I like this one. Nice and neat!

See it here:

Fashion Sewing Cabinets of America 8300 Cloud 9

Or:

Sylvia Design Model 1520 Quilters Work Station

Then a rolling bag to store the sewing machine out of sight while my guest suite is being occupied.

Bluefig TB 23Travel Bag 23″ Julie

Also a box of Aerofil Incredible Threadable Quilt Box Maderia Thread so I can keep the thread bobbins and thread and neatly put away.

Then there’s the fabric and trims, buttons and numerous other collections. That worries me most. I would love to hear your suggestions on how to scale back and organize and still have the ability to retreat to my passion in my changing lifestyle. I hope all will not be lost even with a more spacious house and elder care ahead. One never knows! As for you, my advice is:
Keep sewing, it’s good for the soul! Until next time.
DIY Fabric Gift Bags instead of Wrapping Paper

DIY Fabric Gift Bags instead of Wrapping Paper

DIY Fabric Gift Bags instead of Wrapping Paper

Ready for a DIY project that will last for years and is good for the environment (and your pocket book?) This year, instead of wrapping your gifts in holiday paper that will be thrown away after the presents are opened, consider making fabric gift bags instead. I made five different sized bags in under 20 minutes. Here is how.

Assemble your fabric.

Get all of the holiday-themed fabric scraps you’ve been hoarding. The sky is the limit on the sizes you can make as presents come in all manner of shapes, sizes and weights/heights.

DIY Fabric Gift Bags instead of Wrapping Paper

To keep this project FAST, you aren’t going to finish any of the seams, which means you need to use pinking shears, a serger or a zig zag stitch to finish your raw edges.

DIY Fabric Gift Bags instead of Wrapping Paper

Great deals on sergers here

If you’ve been thinking about getting a serger, SewingMachinesPlus.com has them on sale right now, right in time for the holidays. This Juki Garnet Serger is the one I’ve been looking at. I love that it comes with bonus feet and additional thread cones.

Square up your fabric, fold over, pin, and then sew a straight stitch around all three sides. Leaving the tops of the fabric gift bags exposed (but pinked) will give them a whimsical, handmade feel.

DIY Fabric Gift Bags instead of Wrapping Paper

Nice little folds

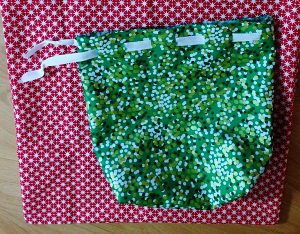
For this fabric, I decided to create box corners (think like a brown paper lunch bag).

DIY Fabric Gift Bags instead of Wrapping Paper

I also wanted to add a casual drawstring. To do this without creating a casing, I marked every 1.5″ and then snipped the openings. I love these Clover Chalk-Liner pens. They are an essential part of my sewing tool kit. They mark precisely and I can just sweep off the chalk when I’m done.

Ribbon feeding trick

I used a safety pin attached to the end of some twill tape to feed the twill through the holes I’d clipped to create the drawstring for this bag.

DIY Fabric Gift Bags instead of Wrapping Paper

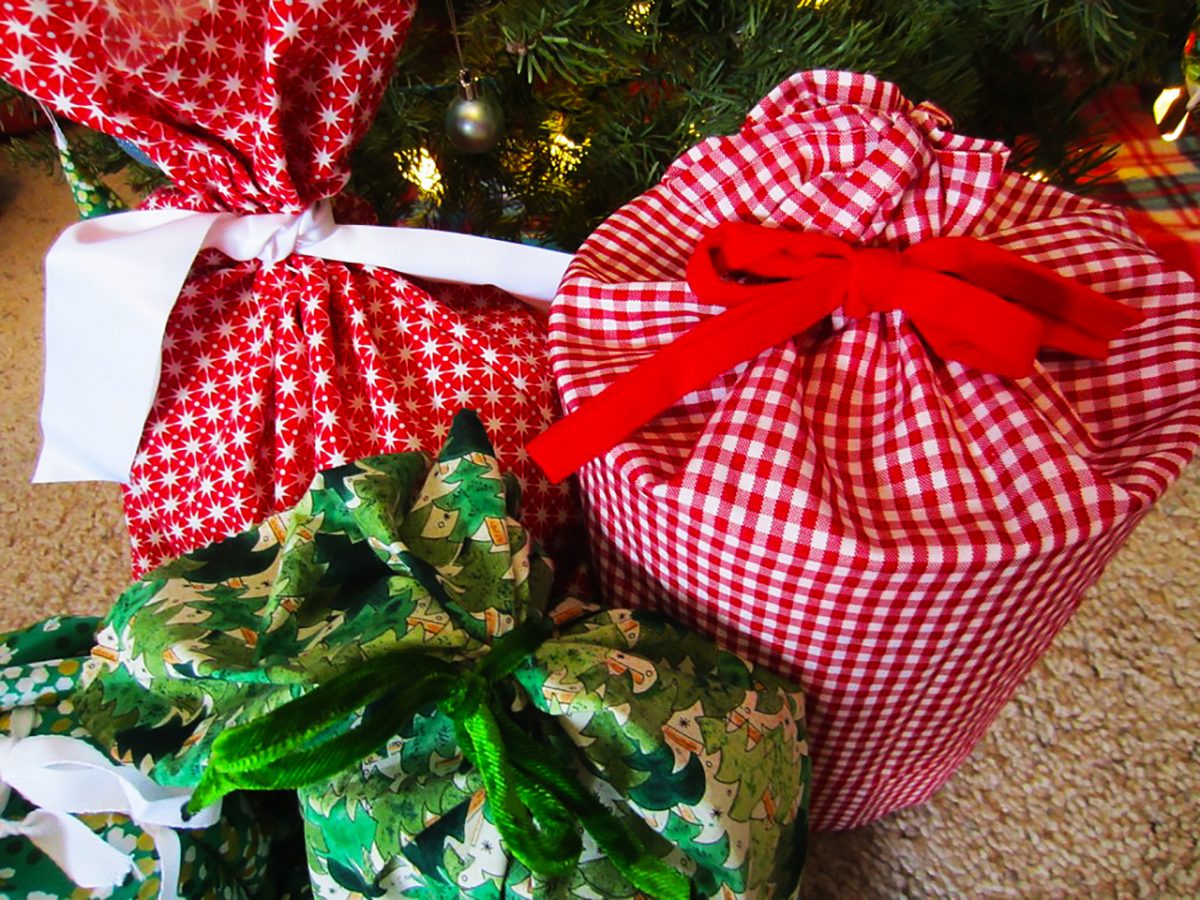
The green bag has box corners and will stand up easily once filled. The larger red bag behind it resembles a pillow case in shape and will be perfect for larger, bulkier gifts.

DIY Fabric Gift Bags instead of Wrapping Paper

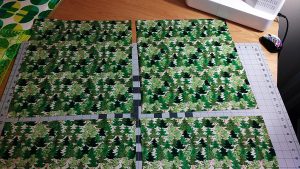
I had the most of this pine tree fabric. Because of the orientation of the trees, I couldn’t fold the double the fabric over to quickly create rectangular bags (if I did that, one side of the bags would have upside down trees). Instead, I cut four even pieces and then placed the pieces on top of each other (2 bags total), right sides together. Then I pinned, pinked and sewed them together.

DIY Fabric Gift Bags instead of Wrapping Paper

Last but not least

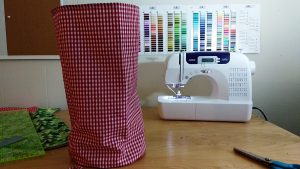
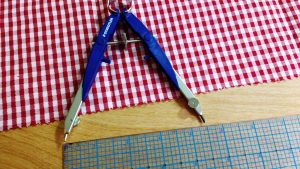
My final piece of fabric was a large, gingham napkin that I’d been holding onto. For this, I thought it’d be fun to create a barrel shape with a circular end. I dug out my compass to make the circle. I knew the circumference of the finished bag would be 25″ so I used the formula d = C/π. I then added .5″ on either side for seams and my diameter was just under 9″.

DIY Fabric Gift Bags instead of Wrapping Paper

Isn’t it darling? Now it was time to wrap some gifts (This was sooooo easy. So much easier than using traditional wrapping paper, scissors and tape).

DIY Fabric Gift Bags instead of Wrapping Paper

I used some trims I had on hand, a velvet green ribbon, a red fleece ribbon and some white satin binding to close everything up.

DIY Fabric Gift Bags instead of Wrapping Paper

I love that I can re-use these year after year and they are reminiscent of Santa’s bag of gifts too.

DIY Fabric Gift Bags instead of Wrapping Paper

Happy Holidays!

—————————–
Charlotte Kaufman is a writer and sewist in Mammoth Lakes, California. She specializes in marine and home interiors and continues to fall more and more in love with quilting. You can follow her at charlottekaufman.com.