Picking the Right Sundress Pattern

Picking the Right Sundress Pattern

Picking the Right Sundress Pattern

The hot weather means flowing, loose clothes that keep you cool while flattering your body. For me, it also means it’s time to sew! Sundresses are some of my favorite things to make. I’ve lost count of how many I’ve made over the years – most of them I still wear! The key to success with making a sundress is choosing the right pattern. The right sundress pattern will flatter your body.

Think About What You Want to Accentuate

We all have things about our bodies we like…and things we don’t. Start by thinking about the things you like about your body. Great legs? Go with a shorter length dress. Love your flat stomach? Make sure the dress is fitted at the waist. Adore your curves? Don’t be afraid to show them off with some well-placed darts. Keep all of these things in mind as you search for your sundress pattern. It’s easy to get pulled into a pattern that looks great on the package or model, but by keeping in mind what flatters YOUR body, you’ll be able to set aside any that won’t work.

Figure Out What You Want to Cover Up

Now, think about those parts of your body you want to cover up. Tummy not as flat as it used to be? Try an empire waist to accentuate other curves and avoid the cling around your stomach. Wish you were a little less curvy? Try something loose and flowy with material to match. Wish your legs were longer or skinnier? Go with a long sundress.

Pro tip: If you don’t like your arms, add a sheer shawl to the ensemble. Some patterns even come with the shawl included.

Match Your Skill Level

Picking the Right Sundress Pattern

When you’ve determined the style of sundress you want to make based on your body and what you like and dislike about it, look at patterns that match your sewing skill level. You’ll find that using these three factors it’s easy to narrow down your sundress pattern options to a manageable number. Then, pick the one you like best and hit the fabric aisles!

Every sundress I’ve made from a pattern chosen this way is one I still wear. Sundresses where I picked the pattern simply because I liked it and didn’t think about my body or my abilities were worn once, at best, and discarded. No one wants to see that happen after the effort of making a sundress. Instead, make a sundress you’ll love to wear using these simple steps to pick your pattern.

Working with Vinyl: Tips for a Beginner

Working with Vinyl: Tips for a Beginner

Imagine a summer day spent by the pool with your sunscreen on, your sunglasses perched on your nose, and a cup of your favorite drink beside you. A cool breeze blows by, and you can’t help but smile from your reclined position on your seat as you casually turn the page on the book you’ve been reading for the last half hour.

Then you set the book aside for the sake of refilling your drink — just when someone decides to do a cannonball into the swimming pool. The water flies upward and outward… and a huge splash lands right on your book. Suddenly, your poolside day of reading deteriorates with the knowledge that the book you were enjoying so very, very much has officially been subjected to the book-disease known as water damage.

This is not a good scenario for a book fan! In fact, it can put a damper on the rest of your poolside visit!

Splish splash
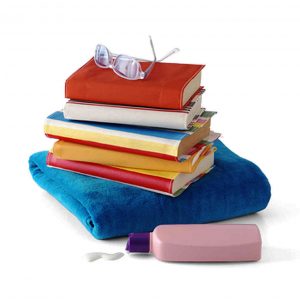
Create a waterproof book cover for relaxing day of reading by the pool.

Create a waterproof book cover for relaxing day of reading by the pool.

So how could this incident have been prevented? Well, you could’ve left the book at home, but there’s another possibility that would allow you that relaxing day of reading by the pool. That option is to create a waterproof book cover. You can find instructions for that concept here, but the step-by-step guide can lead to exploration if you want to properly create this book-protector.

That exploration centers around one important detail, and that’s the best approach for dealing with vinyl in regard to sewing. It is, after all, a much different texture and structure than more common possibilities like cotton and flannel, and if you want the best experience possible for putting together a vinyl-based book cover, looking into how it’s different and what to do about those differences can be beneficial.

Troubleshooting

It’s thick. While it’s not thick enough to be something that seems ridiculous to use, it’s thick enough to come with its own concerns. For instance, you might find that the needle you used to sew that cotton project doesn’t work very well for this vinyl concept. The thicker quality calls for something stronger to easily maneuver through the vinyl to create your book cover. According to one source, “[i]t’s best to use a needle designed for leather or vinyl…[like] Leather Needles from Schmetz” for the task so you don’t have to wrestle with your needle as you go — or maybe even ruin your needle because it bends under the pressure. If this is your first vinyl project, you might want to look for an applicable set of needles for the job!
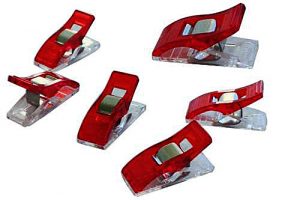
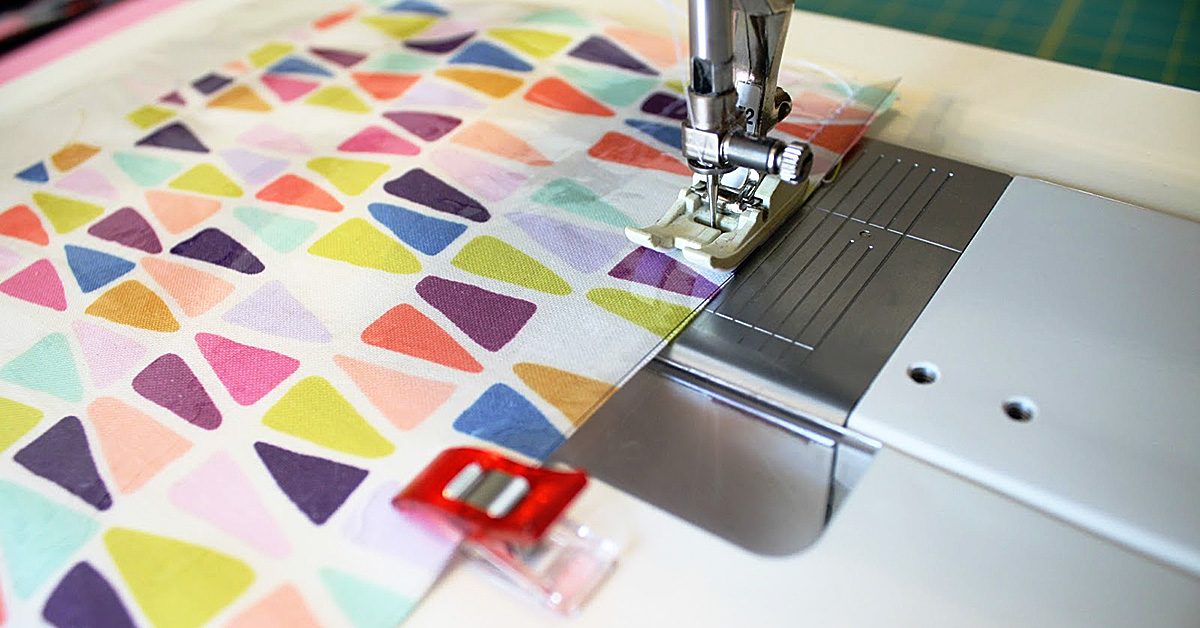
You may want to add Wonder Clips to your to-buy list for when you’re browsing through the store for your vinyl-sufficient needles.

You may want to add Wonder Clips to your to-buy list for when you’re browsing through the store for your vinyl-sufficient needles.

It’s not pin-cushion friendly. While the tiny holes that pin cushions can leave don’t really make much of a difference in flannel, they can make a very big difference in vinyl since they’re much more pronounced! To combat that issue, you might want to add Wonder Clips to your to-buy list for when you’re browsing through the store for your vinyl-sufficient needles. These things can keep your project on track by holding things in place without forever scarring the vinyl!

“You can’t iron your vinyl flat.” If there’s something that’s a staple in preparing material for sewing, it could be to iron all of the wrinkles out beforehand. Since that strategy doesn’t really work for vinyl (it “could melt” under the iron!), it leaves the question of what a person can do that make sure everything is even before that first stitch happens. A simple solution would be to use your hairdryer on the vinyl, which will cause it to “flatten out nicely.” No bends, no damage, and no worries as you dive into making your stitches for your waterproof book cover!
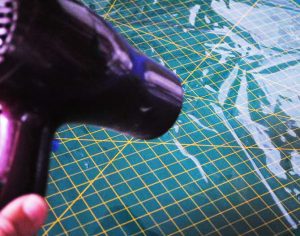
A simple solution would be to use your hairdryer on the vinyl

A simple solution would be to use your hairdryer on the vinyl

It might not stay in place. One of the things I personally don’t like about using a silk fabric is that it’s so easy for it to slip out of form and throw off your pinning, cutting, and sewing. And, well, vinyl doesn’t seem to want to stay in place either because of its texture. While this might make it perfect for the waterproof detail, it complicates the sewing process just a bit! This complication though is no reason to throw in the towel for this project since painter’s tape can be used to hold the vinyl in place without damaging it at all. It’s an extra purchase for the project, but it can keep things neat and orderly as you go to create a better, easier-made product.
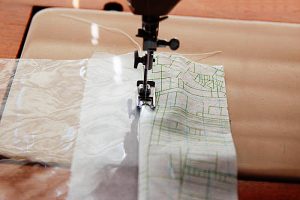
Use tissue paper to preventing sticking.

Use tissue paper to preventing sticking.

It might stick to your sewing machine. To my thinking, few things are more frustrating in the world of sewing than having material that won’t feed through your machine correctly, and since vinyl can stick, this could be a headache waiting to happen! It doesn’t have to ruin the experience though! You could use tissue paper on “the side [of the machine] that is having trouble” while you feed the vinyl through to keep it from touching that part of the machine, thus preventing the sticking. Once you’re finished, this tissue paper “will easily tear off” to become but a memory of a sewing hack you employed!

If you use these tips, tricks, and suggestions, you might find using vinyl is not so difficult that you have to remove it from your list of materials to use. And if you can use it, don’t hesitate in protecting that new paperback from the swimming pool splashes with its own book cover! It’s one step closer to that wonderful possibility of a summer vacation, poolside read!

Summer Trends: Embroidery

Summer Trends: Embroidery

Summer Vacation 2017 is upon us!

Summer Vacation 2017 is upon us!

Summer Vacation 2017 is upon us, and as could be the case for any season and time frame, it’s showing up with its own trends. There are a number of these that you can apply to your sewing, but the one that I primarily want to focus on is embroidery. According to one source, “[t]he biggest trend that is coming in 2017 is definitely embroidery,” which makes it a popular topic to explore and try your hand at. For me personally though, it isn’t my main focus in sewing, so there’s plenty of room for me to learn and grow within that category. What better way could I have to do those things than to explore and research for the sake of a new blog post?

Start at the beginning

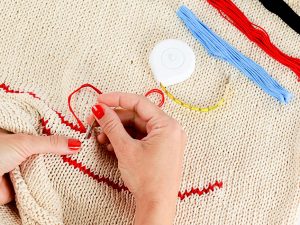
Let’s start with the very basics, like what exactly embroidery is. In regard to the world of sewing, that definition has been given as the following: “Embroidery is ‘thread art’ used to embellish a garment, hat or some other product by adding a sewn pattern. Generally, this sewn pattern includes a design and can also include lettering and/or monograms.” If you find that a bit too far-fetched of a definition though, think of it like drawing artwork on a product or fabric. Just as you would take a marker, colored pencil, or crayon to create an image on paper, “thread or yarn” can be used in embroidery to build the picture you mean to make.

Clearly, embroidery has changed over the years, but the long-reach of this style of artwork speaks volumes to its appeal & application.

Clearly, embroidery has changed over the years, but the long-reach of this style of artwork speaks volumes to its appeal & application.

Embroidery, as it happens, is not a new concept either. It dates back to prehistoric times — “to Cro-Magnon days or 30,000 BC” — so prominently that “fossilized remains of heavily hand-stitched and decorated clothing, boots and a hat [have been] found.” Clearly, embroidery has changed over the years, but the long-reach of this style of artwork speaks volumes to its appeal and application. If it has remained for so many millennia and through the technological changes within the later centuries, it’s safe to say that it’s a topic and technique that has captured interest through the passage of time!

Your only limitation is your own imagination

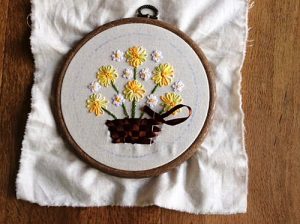
One reason for that appeal is clear since, because of the many forms embroidery can take, the possibilities for design are almost limitless. If you want a picture of a flower, a bird, a house, a doughnut, or a dragon on your work, you can add any of the above — or whatever else you have in mind — so long as you don’t over-exceed your own abilities. If you can physically create it, you can do it! It’s important to note though that this is one area that merits consideration since if you try for something too large-scale on your first embroidery project, you could fall short and become discouraged with the whole process. When you start off with such a bad experience, it can be a psychological obstacle to overcome if you want to better yourself in the field. Keep in mind then where you are with embroidery, and choose projects that are fitting for your level.

If you can physically create it, you can do it!

If you can physically create it, you can do it!

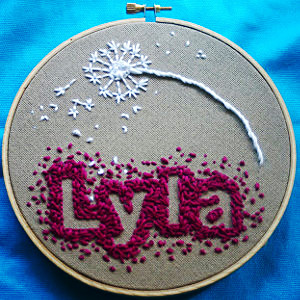
In essence though, embroidery can be incredibly personal and project-specific. You don’t just have to rely on the fabric at your disposal to create a work that’s perfect for you and your purpose. If you want to sew a blanket for a friend’s baby shower, for instance, you could add to whatever adorable fabric you use for that work by personalizing it with the baby’s name. If you’re making some kind of wedding gift, you could add the wedding date right onto the material. That truly is a beauty of embroidery. Whatever you want, if you physically can do it, it’s an option — even if you have to use an embroidery pattern to make it happen!

Unlock your creativity & see where it takes you

Add to whatever adorable fabric you use by personalizing it with a name.

Add to whatever adorable fabric you use by personalizing it with a name.

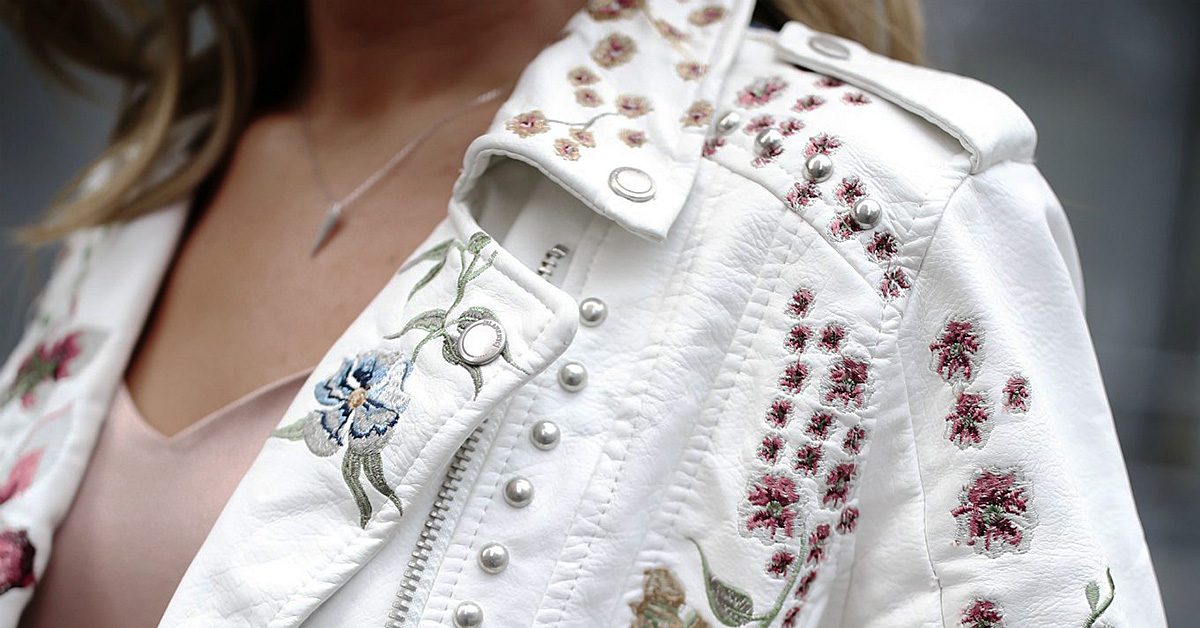
Of course, this can be applied to your clothing, as is evidenced by the notion that “Gucci, Dolce & Gabbana and McQueen” have all been credited with embracing this trend. The level of creativity involved with this clothing idea, again, can’t be overstated because you can tailor your designs to what you have in mind. If you want a blue top with a colorful butterfly on the left shoulder, you could make that happen even if you can’t find it in stores.

Overall, I honestly don’t know if there’s a more creative way to make your own items unique, so if you want to create a piece that’s as yours as you can manage, you might want to step into the world of embroidery! It’s trendy this summer, and a number of the popular embroidery concepts are very spring/summer-inspired — like flowers and birds. All in all, if ever there was a perfect time to step into this creative category, it’s now!

Beach Towels for Sewing Projects

Beach Towels for Sewing Projects

Much like the aforementioned buttons on a previous Pete the Cat related post, trends can show up for a while and eventually become memories. As they’re in the mainstream of their field though, it can be fun to jump on board and partake in them! These trends can bring brand new concepts, images, and characters to life, or they can just offer a new twist on something that’s familiar and ordinary. Those familiar and ordinary details are the case for the trend that will be explored in this post: Beach Towel Sewing Projects.

When I first saw that this was actually a thing, I was perhaps a little interested, but maybe just as uncertain. I’m not even sure what would lead to this trend beyond a creative eye that’s often looking for new possibilities. Whatever the reason for the trend’s existence, you can find a number of projects that are beach-towel based through some online browsing time or the links given in this post.

I think this beach towel concept is such a unique option for sewing projects, and I guess that’s for two reasons. One, using extra beach towels for projects could be a wonderful way to get your creative mind going while clearing out your closet space. Two, the end results to these possible products are so fluffy that they draw my attention like a child going after a stuffed animal! Maybe you share that appreciation, and maybe you don’t! Still, these are good options for how to put no-longer-used (or brand new) towels to use for your sewing hobbies!

This quirky accessory could stand out on your next beach adventure.

This quirky accessory could stand out on your next beach adventure.

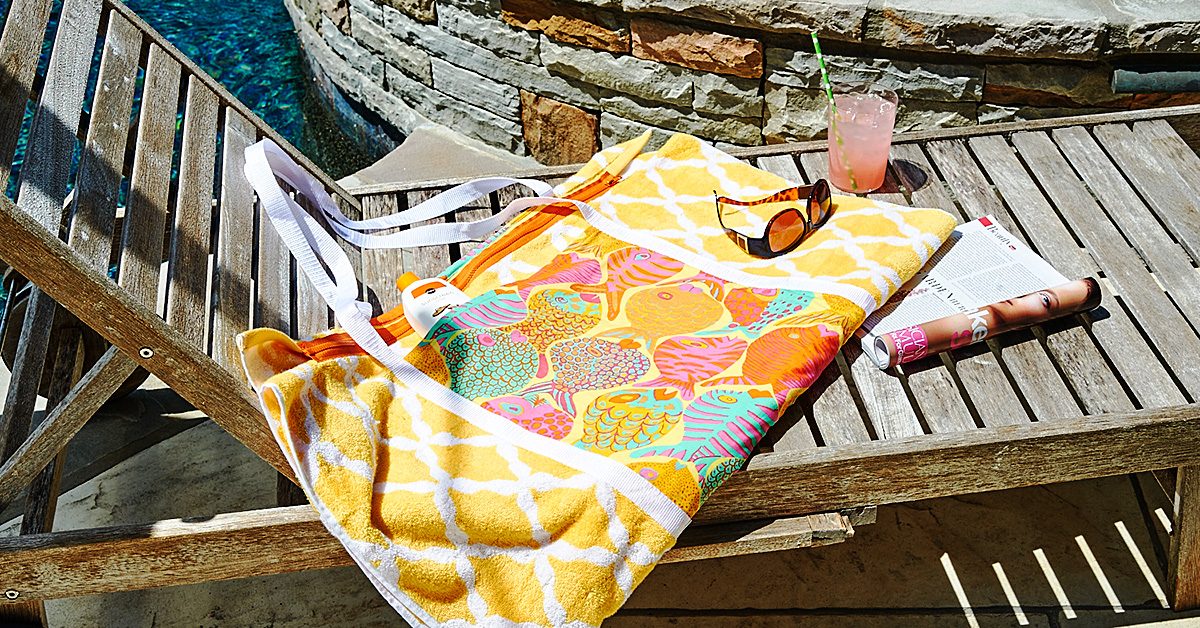
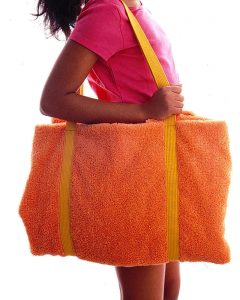
First on the list, how about a beach towel tote? This quirky accessory could stand out on your next beach adventure, and it would be large enough to hold your sunscreen, your Frisbee, your sunglasses, and whatever else you could fit into this decently-sized bag! You can use something plain-colored like what’s shown in the image, or you can choose a more dynamic print on the beach towel to increase its stand-out quality! The needed supplies are few, and the unique look of it could be worth your sewing time! Why not give it a try?

While they lack the larger size of a tote, these can still be spaces to hold some of your beach bring-alongs.

While they lack the larger size of a tote, these can still be spaces to hold some of your beach bring-alongs.

But, then, maybe you’re more of a backpack person? If so, no worries! You can make one of those using a beach towel as well! While they lack the larger size of the tote, these can still be spaces to hold some of your beach bring-alongs, like sunscreen and a book to read in the sun. And, obviously, the use of these products wouldn’t need to be limited to the beach. Anywhere that you might think to bring a purse, these could be options if it’s a setting you’re comfortable using it in. Considering the site says this project can be finished in less than 24 hours, it might be worth your time to give it a shot!

If you’re looking for an option that deals a bit less with the carry-stuff-along-with-me aspect, there are possibilities to explore in other categories as well—like stuffed animals! These toys are a wonderful fit for this beach towel option because of that fluffy quality I mentioned earlier. If you’re going to make a stuffed animal toy—maybe a dog—it makes sense that the dog has fur, right? I personally like this elephant idea, but it’s very possible that I never got over the spotted elephant on Rudolph! If you prefer a different animal to make into a toy, browse through your options and find the right colored beach towel to match the standard coloring of that animal—unless you really do want a spotted elephant or something as out of the ordinary!

An intriguing option for creative towels use.

An intriguing option for creative towels use.

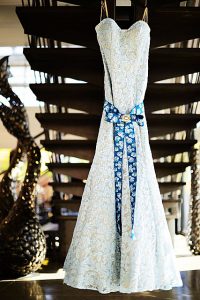
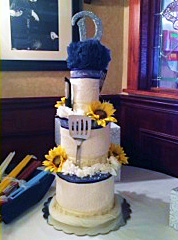
There’s also the option of creating something from a beach towel for the sake of gift-giving, if towels are a part of a gift you have planned for someone. One such option that stuck out to me was a bridal shower cake. True, this might require something less bulky than a beach towel and wouldn’t necessarily help to clean out your closet, but it’s still an intriguing option for using towels in general for creative endeavors. This cake is a method of giving very typical housewarming gifts, like towels and other items, in a lovely and out-of-the-box manner. It’s unique and striking, and a way to show the gift recipient that you cared enough to craft something artistic with your gift just for the sake of presentation. A towel cake, after all, is more memorable than some towels and utensils waiting in a box or a gift bag!

This cake is a unique twist on giving very typical housewarming gifts.

This cake is a unique twist on giving very typical housewarming gifts.

For a beach trip, a random toy, or a bridal shower, there are interesting projects that can make use of towels! These are just a handful of them, but maybe they’ll get the ideas rolling in your head enough to spark your interest!

Prepping Your Sewing Room for Summer

Prepping Your Sewing Room for Summer

I’ve come up with a few tricks over the years to let the fresh air in while keeping my sewing projects organized.

I’ve come up with a few tricks over the years to let the fresh air in while keeping my sewing projects organized.

With the warm weather rolling in, it’s time to open the windows. I love the feel of fresh air blowing through the house and cleaning the stagnant air out. It does present a few sewing challenges though. Fabric and patterns get blown around if I’m not careful. I’ve come up with a few tricks over the years to let the fresh air in while keeping my sewing projects organized.

Positioning

In my house, the air blows in from some directions more than others. I use this to my advantage and position my sewing table and supplies in such a way that they’re not directly inline of the strongest gusts. This usually takes care of most of the issues with supplies blowing around.

Paper Weights

Well, maybe they should be called Fabric Weights. Personally, I use clean rocks I’ve found on hikes, but anything that holds down the fabric and pattern pieces you’re not actively using will do. They look pretty and keep everything neatly in place while you enjoy the summer air.

Opposing Force

It sounds counterintuitive, but it seems to work when I do it right. If it’s a particularly breezy day, I’ll turn a fan on facing into the breeze coming in the window. When the balance is right, my sewing supplies wind up in a pocket of non-blowing air. It takes practice to find the right direction and speed and doesn’t always work. I prefer the first two tricks, but I’ll resort to this one if I’m really struggling with the wind.

I find that sometimes the breeze from an overhead fan or air conditioner can cause my sewing projects to blow around too. I’ve found that fabric weights are usually the best solution there since I want to feel the cooling effects of the air conditioner and/or fan.

What other tricks do you do to keep yourself comfortable and keep your fabric and pattern pieces from blowing around?