Keep Fabric and Thread Samples in Your Sewing Space

Keep Fabric and Thread Samples in Your Sewing Space

Hero Lead Image

Location is everything

If you haven’t considered keeping samples of the fabrics and threads you work with on a frequent basis, I’m here for advocating that you start. I live in Mammoth Lakes, California, which is a small, out of the way town at 8,000ft altitude in the Eastern Sierra Mountains. The nearest sewing/fabric stores to me are a one hour drive south in Bishop, California. And If I want the convenience of larger, more well-known establishments, I have to drive 2.5 hours north to Carson City, Nevada. Needless to say, I do a lot of shopping online. This is my first argument for keeping a collection of samples in your sewing space. If you can’t readily get to a store, then being able to look at what you need and order online is a life saver.

1

Make exactly what they want

Sample swatches and cards are helpful for showing to both customers and friends and family that you may be sewing for. I try to never sew gifts as surprises. Sometimes I break this rule when I’m fairly certain the gift recipient will like what I’m making, but usually I don’t chance it. Why spend time and money on a handmade gift that someone may not like? I use my sample swatches of minky, for example, when I make gifts for my daughters or their friends. The kids can touch and feel the fabric, read the names of each color, and fall in love with the gift before it’s even finished.

2

How does it feel?

Speaking of feeling, many sewists I know don’t like to order fabric online because they like to feel the fabric in the store before buying. I understand where they’re coming from, but usually have to order online. Because of this, I’ve ordered samples of the brand of solids I like to use (Hawthorne Threads) because I already know how their fabric feels, looks, and washes. If you have a brand you love, look into getting sample cards or even buying charm packs of a line of fabric that you tend to buy over and over.

3

Samples versus supplies

A supply can be a sample, but a sample can’t be a supply. I keep a lot of supplies on hand in my fabric stash and my thread wall and I often will check my supplies to see if they will work in an upcoming project as well. I can’t, however, keep EVERY color of thread on hand, nor can I buy ALL THE FABRIC, like I want to. When the colors I don’t already have on hand won’t work, then I turn to my thread sample card to see what I need to order.

4

What kind of samples do you keep on hand to make your sewing life easier?

———————————————————————————–
Charlotte Kaufman is a writer and sewist in Mammoth Lakes, California. She specializes in marine and home interiors and continues to fall more and more in love with quilting. You can follow her at charlottekaufman.com.

Gifts for Grads Who Love to Sew

Getting through school requires determination, persistence and intelligence.

Getting through school requires determination, persistence and intelligence.

Getting through school requires determination, persistence and intelligence. Graduating seniors have earned the recognition and gifts their family bestows. We’d like to throw our hat in the ring and congratulate all graduates this year too! To help them celebrate, we have some great gift suggestions for grads who love to sew.

Sewing Totes

As your graduate heads out into the world for the next phase of their life, they’ll want to have their sewing machine and supplies with them. Sewing totes are the perfect way for them to pack up all their sewing gear safely and transport it to this next step on their life and for all the subsequent moves to come. The variety of colors, styles and sizes means you’ll find the perfect sewing tote for your graduate.

Embroidery Hoops

Not all of this year’s grads will embroider, but those who do will love getting a gift of embroidery hoops. Try getting them a variety of shapes and sizes so they’ll have plenty on hand for future projects. And know that any time they use one of the hoops you gave them, they’ll think of you while working on their embroidery project. Those warm memories will work their way into the project, making it that much more special.

Sewing Furniture

Many new graduates begin by moving into a place of their own – with or without roommates. Help them get set up and make their place comfortable with sewing furniture. Whether they’ll have a separate sewing room or a small space in the corner of a shared apartment, the right sewing furniture will help them feel more comfortable and settle into their new living arrangements.

Garment Care

With luck, the graduate in your life has a job lined up. Whether they do or not, they’ll need to look their professional best on the on the job hunt and in the workplace. Garment care items will help them do just that. They work well on both store-bought and handmade items, so your graduate who loves to sew may wind up sharing these gifts with their roommates and coworkers.

Graduates who love to sew may also appreciate gift certificates to fabric stores or to our website. What will you buy your grad this year?

Optimal Lighting in Your Sewing Room

Optimal Lighting in Your Sewing Room

In my house, one of the best times to get some sewing done his after everyone house has gone to bed. The only problem with this is the lighting. As I’ve gotten older, I’ve found that the regular lighting in the room is not sufficient for a sewing project. Instead, I’ve come up with some ways to bring a little more light to my sewing area without taking up valuable sewing surface space.

Clip-on lights

I used to have one of these as a kid, clipped on my headboard. It was great for reading in bed at night. Now I have one clipped to my sewing desk. The head bends and swivels so I can change the angle to bring lighting to the appropriate area. Much easier than trying to do this with a flashlight between my teeth! I also have a clip-on light with a longer neck attached to the back of my chair. It comes up over my shoulder and provides lighting to the shadow areas closest to my body.

Bulbs

I use higher wattage bulbs to increase the total amount of light available. Personally, I prefer 120-watt (or equivalent LED) bulbs to provide light for close sewing work.  Since that’s too bright for the daytime any regular lights in the room have three-way switch options. This way everyone can have the amount of light they need for whatever activity they’re doing.

I use higher wattage bulbs to increase the total amount of light available.

I use higher wattage bulbs to increase the total amount of light available.

My daughter uses the sewing room for her own projects and does not like as much light as I do. Also, the three-way light option means that I can have less bulb lighting during the day and more natural lighting if I prefer.

I have a friend who has an overhead light with four bulbs. When she turns it on, she can choose to have either sets of two or all four bulbs lit. By placing lower wattage bulb in two of the lights and higher watt bulbs in the other two, she’s able to maximize her options.

What other ways do you work with the natural and artificial lighting in your sewing room to give you the best view?

Prepping Your Sewing Room for Summer

Prepping Your Sewing Room for Summer

I’ve come up with a few tricks over the years to let the fresh air in while keeping my sewing projects organized.

I’ve come up with a few tricks over the years to let the fresh air in while keeping my sewing projects organized.

With the warm weather rolling in, it’s time to open the windows. I love the feel of fresh air blowing through the house and cleaning the stagnant air out. It does present a few sewing challenges though. Fabric and patterns get blown around if I’m not careful. I’ve come up with a few tricks over the years to let the fresh air in while keeping my sewing projects organized.

Positioning

In my house, the air blows in from some directions more than others. I use this to my advantage and position my sewing table and supplies in such a way that they’re not directly inline of the strongest gusts. This usually takes care of most of the issues with supplies blowing around.

Paper Weights

Well, maybe they should be called Fabric Weights. Personally, I use clean rocks I’ve found on hikes, but anything that holds down the fabric and pattern pieces you’re not actively using will do. They look pretty and keep everything neatly in place while you enjoy the summer air.

Opposing Force

It sounds counterintuitive, but it seems to work when I do it right. If it’s a particularly breezy day, I’ll turn a fan on facing into the breeze coming in the window. When the balance is right, my sewing supplies wind up in a pocket of non-blowing air. It takes practice to find the right direction and speed and doesn’t always work. I prefer the first two tricks, but I’ll resort to this one if I’m really struggling with the wind.

I find that sometimes the breeze from an overhead fan or air conditioner can cause my sewing projects to blow around too. I’ve found that fabric weights are usually the best solution there since I want to feel the cooling effects of the air conditioner and/or fan.

What other tricks do you do to keep yourself comfortable and keep your fabric and pattern pieces from blowing around?

How to Store Your Fabric Scraps

How to Store Your Fabric Scraps

It only took me six months, but I finally organized my fabric scraps after our move.

It only took me six months, but I finally organized my fabric scraps after our move.

It only took me six months, but I finally organized my fabric scraps after our move to this new town and new house. When we made the move, I dumped my two huge bins of scraps into a few shopping bags and tucked them away until this glorious moment when they would not only be sorted, but have a place to reside.

Bits and pieces

Why should one keep & organize fabric scraps?

Why should one keep & organize fabric scraps?

Why should one keep and organize fabric scraps? Here are some reasons to consider.

  1. Fabric is expensive. Long sized strips, and smaller pieces can be reused for a vast amount of projects. The internet is a trove of fabric scrap project ideas.
  2. Out of sight, out of mind. The reverse of this is true as well. When you have your scraps visible, you are much more likely to use them and be aware of what you have available.
  3. Have a favorite color? It probably shows in the types of fabric you buy. Take a look at your pile of scraps and try to use up more of that color before you buy a few more yards.
  4. Many people cut their scraps to standard sizes. If you have a size of fabric you constantly seem to go to, make your life easier by making your own pre-cuts out of scraps.

Scrap bags

I ultimately made 9 bags of folded scraps.

I ultimately made 9 bags of folded scraps.

I ultimately made 9 bags of folded scraps. They included the following (from left to right):

  1. All of my precut Layer Cakes (10” x 10” squares)
  2. All of my other-sized precuts
  3. Pinks
  4. Whites
  5. Yellows, tans and oranges
  6. Greens, teals and aquas
  7. Blues and purples
  8. Heavy duty fabric scraps (canvas, Sunbrella, etc)
  9. Utility fabric scraps (batting, white out fabric, mesh, etc.)

One of these things is not like the others…

Bag #10 holds all of my selvage edges & very thin strips of fabric.

Bag #10 holds all of my selvage edges & very thin strips of fabric.

There is also a 10th bag (but it didn’t fit well in the group photo above). This holds all of my selvage edges and very thin strips of fabric. I have a huge wish list of projects to make from selvage edges. Perhaps I’ll write a post soon showing you the world of possibility with saving those thin strips!

A place of and for my own making

Welcome to my fabric corner.

Welcome to my fabric corner.

This is my fabric corner. The upper shelves hold my larger stash of fabrics, so pieces that are a fat quarter size or larger. The lower shelves hold my iron on top, and my fabric scraps in the bins below.

Dirty little secret: I just tuck larger pieces in wherever I find room.

Dirty little secret: I just tuck larger pieces in wherever I find room.

I’d love to tell you that I have my larger pieces organized in some kind of fancy way, but I really don’t. I just tuck them in wherever I find room.

Behold! A place for everything & everything in its place.

Behold! A place for everything & everything in its place.

Can you see how lovely the organization of these scraps is? The easy access and keeping them visible by my work space means I’m often including them in my daydreaming when it comes to new sewing projects.

Do you store your fabric scraps? If so, tell us where or how you do!

———————————————————————————–
Charlotte Kaufman is a writer and sewist in Mammoth Lakes, California. She specializes in marine and home interiors and continues to fall more and more in love with quilting. You can follow her at charlottekaufman.com.
Design Your Dream Sewing Room

Design Your Dream Sewing Room

I’ve never been lucky enough to have a whole room dedicated to sewing. I’ve always kept my sewing machine and accompanying needs in a closet and pulled them out when needed. For a few hours, while I sew something, the machine takes up the dining room table. I also use the table for cutting and measuring. If it’s larger pieces, the floor gets called into action as a cutting surface. That hasn’t stopped me from thinking about what my dream sewing room would look like. Here’s what I’ve come up with. How does it align with your dream sewing room idea?

Storage

Organization and storage are critical in a sewing room. I’m not a fan of tangled thread spools or bobbins I can’t find. I hate having to search for my measuring tape and it really irks me when someone “borrows” my fabric scissors and uses them on something else. I bet you know that feeling! So, the first thing my dream sewing room would have is a way to organize all those supplies in a tidy and efficient manner. Something like this cabinet. I also adore this thread tray.

Sewing Table

It needs to be sturdy and stationary. I’m not a fan of things rolling away from me while I try to work.

Next, I’d want the perfect place for my sewing machine to sit permanently rather than pulling it out each use. It needs to be sturdy and stationary. I’m not a fan of things rolling away from me while I try to work. It also needs to be open in the back so I can stretch my legs without banging my knees or feet. Something like this adjustable height table would be ideal for me.

Cutting Surface

The final piece of furniture my dream sewing room needs is a cutting surface. I want it sturdy and stable, but also with the ability to measure and pin to. I’ve created this ideal using two pieces. First, a sturdy table with side extensions. I love that I can drop one or both sides down if I’m working on a smaller project. Second, a cutting mat. By laying this on top of the table and fastening it down with glue or Velcro or double sided tape, I’ll have a sewing surface with the ability to measure built in.

You may notice I didn’t include a chair. That’s because I already have my ideal sewing chair and it happens to live in my dining room.

What does your dream sewing room look like?

Storing Your Fabric

As I wind down in the steps for making my quilt, I’m finding that I have fabric scraps left over from the endeavor that I really don’t want to toss. One of the problems though is that I have a very lacking fabric storage setup. In fact, it consists of stuffing fabric into a remarkably unprofessional Hello Kitty pail (Note: I don’t even like Hello Kitty). Once that happens, I put the pail into my closet. Since said closet kind of overflows at times, the method is even more lacking than it would otherwise be.

I want to keep this fabric, but I’d like to have a better strategy of doing so. That idea had me browsing some possibilities online, and some of the options I saw were pretty basic.

Simple Solutions

For instance, clear storage bins or canvas bins.

For instance, clear storage bins or canvas bins.

For instance, clear storage bins or canvas bins. While these are simple and efficient ideas for keeping my fabric in order, the truth of the matter is that they’re also, at the moment, things that would probably end up getting stashed away in my closet. As one of the qualms is that my fabric is stored in my closet, neither option fixes that detail.

At least, not alone. If I had a method of storing those bins out in the open, they’d work fine. In any event, the insufficiency could certainly lead to more searching in regard to the best (complete) fabric storage option.

The most fitting right now is the notion of keeping excess fabric pieces in a jar.

The most fitting right now is the notion of keeping excess fabric pieces in a jar.

So during my search, did I have find the perfect one? That might be a complex question since I’m not sure there is a perfect one, but I did find some that are worth mentioning. The most fitting right now is the notion of keeping excess fabric pieces in a jar. I’m not sure I’d ever considered using my extra fabric in a way that actually makes it decorative even before I use it for a sewing project, but I like this concept. Most of the fabric that I have remaining is block-ish, and that smallness of leftovers seems spot-on for the store-in-a-jar method. All I’d have to do is get a jar, fold up my scraps nicely, and let the storage add accent to a room before the pieces potentially add accent to a future project. A similar idea is to store those scraps in kitchen bowls or strainers, like you can find here, or maybe a flower vase.

A similar idea is to store those scraps in kitchen bowls or strainers, like you can find here, or maybe a flower vase.

A similar idea is to store those scraps in kitchen bowls or strainers, like you can find here, or maybe a flower vase.

One is to take the drawers out of a dresser, and once the furniture has been treated so that it looks finished and ready, fabric can be stashed where the drawers used to be.

One is to take the drawers out of a dresser, & once the furniture has been treated so that it looks finished and ready, fabric can be stashed where the drawers used to be.

Two of the more intriguing fabric storage options I found might be more suitable for a time when/if I have more room and/or extra cash. One is to take the drawers out of a dresser, and once the furniture has been treated so that it looks finished and ready, fabric can be stashed where the drawers used to be. I adore this idea, but it’s a project itself! Be aware though that if you don’t want to go through all the sanding and painting to prepare the furniture, you could still use a dresser, drawers intact.

Be aware though that if you don’t want to go through all the sanding and painting to prepare the furniture, you could still use a dresser, drawers intact.

Be aware though that if you don’t want to go through all the sanding and painting to prepare the furniture, you could still use a dresser, drawers intact.

Another option is this square shelf idea that hangs on the wall. This one is particularly of interest if, like me, your bedroom, sewing room, etc. is already pretty full of furniture. When that’s the case, going upward seems like a reasonable option, and that’s exactly what this shelf would do! Being the nerd I am, this square setup appeals to me more than a different shelf idea might because it’s comic-book-ish, but that’s not to say that squares are the only possibility for this method. In fact, you might find that you have some kind of old furniture around your house that can be repurposed for this prospect — like a headboard. There might be plenty of possibilities if you spread your imagination to find them!

Another option is this square shelf idea that hangs on the wall.

Another option is this square shelf idea that hangs on the wall.

Another option is a lot simpler, but might cost more — and that’s to buy a piece of furniture that’s specifically for this purpose. This hutch, for instance, makes a wonderful and aesthetically pleasing storage area for fabric, and other than price and space, I wouldn’t hesitate to have one of these in my home.

This hutch makes a wonderful storage area for fabric, and other than price & space, I wouldn’t hesitate to have one of these in my home.

This hutch makes a wonderful storage area for fabric, and other than price & space, I wouldn’t hesitate to have one of these in my home.

But as breathtaking as these furniture options are, the truth of the matter is that I’ll probably have to start with something easier and more money-friendly. Given that the majority of my current fabric collection is scraps and/or block-ish pieces, my best bet for advancement might be the jar or strainer method, which I’m okay with!

Still, someday, that hutch, that shelf, or that dresser would be a wonderful addition to my sewing life!

New Year, New Challenges: The Psychology of Sewing

New Year, New Challenges: The Psychology of Sewing

How many times do we seriously plan things, and within days or hours, our plans change. I used to think I prefer knowing what will happen ahead of time so I can grasp the idea, plan it to my specifications, and control the outcome. Not very many things happen that way.

So last time I wrote, I had a nice New Year’s Resolution list made up for myself. I was ready to learn new things, implement new creative expressions, and sew a rug made of scraps. That was a few days before New Year’s Day.

Now, the middle of January, about 2 days ago, I was able to sit and sew a project I have been thinking about. Sewing is so therapeutic, you forget where you are and the daily chores of life. But now, my Resolutions have been pretty much scrapped. Time changes things so quickly.

Turn that frown upside down

Now, I’m finding myself in a position to decide how to decorate a new home we are building. “Wonderful, you say! Congratulations!” Blushing but thankful, I tell you, “Thank you, but the downside is I’m losing my room for sewing.” For now, I have a countertop that wraps around half the room where I can cut, sew, press, lay out patterns, and holds my computer. Plus tons of shelves for fabric, ribbon, thread, and many other non-sewing related supplies. What will I do?

We determined that I will use the large guest room upstairs for my sewing projects, but it will be deemed a guest bedroom as well. So, gone are the days, of leaving my projects in different stages, and not worrying about things left out. I have to be neat and organized ie. (no thread on the floor) so if we should get company, (my daughter visits frequently) that room will be presentable. OMG, such pressure! I’m already stressed. I can’t even get away and be creative because my room has to be in picture perfect order and stay that way (much like the rest of the house by the way, as my in-laws will be living with us).

So, I need your help! I will explain later. I’m making a checklist of some things, I need to purchase if I am going to continue my psychological sewing retreat. At least I have until late July to decide.

Making a list – checking it twice

First is a desk. I like this one. Nice and neat!

See it here:

Fashion Sewing Cabinets of America 8300 Cloud 9

Or:

Sylvia Design Model 1520 Quilters Work Station

Then a rolling bag to store the sewing machine out of sight while my guest suite is being occupied.

Bluefig TB 23Travel Bag 23″ Julie

Also a box of Aerofil Incredible Threadable Quilt Box Maderia Thread so I can keep the thread bobbins and thread and neatly put away.

Then there’s the fabric and trims, buttons and numerous other collections. That worries me most. I would love to hear your suggestions on how to scale back and organize and still have the ability to retreat to my passion in my changing lifestyle. I hope all will not be lost even with a more spacious house and elder care ahead. One never knows! As for you, my advice is:

Keep sewing, it’s good for the soul! Until next time.

9 Cutting Tools for your Sewing Room

9 Cutting Tools for your Sewing Room

Do you know the difference between scissors and shears? I didn’t so I looked it up and now I can edify us all. Scissors usually have equal-sized finger holes and are under 6″ in length. Shears have one hole that is bigger than the other and their blade lengths are normally longer than 6″. The terms scissors and shears are often used interchangeably and for the purposes of this article, I flip back and forth between them.

Fabric scissors

These are the scissors you hide. Or keep locked away. Or you write in Sharpie on them. DO NOT USE. CLOTH ONLY. MOVE AWAY FROM MY SCISSORS. If you haven’t convinced your family to stay away from your fabric scissors, then move to the second pair below.

These are the scissors you hide.

These are the scissors you hide.

All purpose scissors

THESE are the pair you hand people who want to use your fabric scissors. Keep them sharp so no one is ever tempted to grab the pair you keep for working on your stash.

THESE are the pair you hand people who want to use your fabric scissors.

THESE are the pair you hand people who want to use your fabric scissors.

Heavy duty shears

When your regular fabric scissors won’t cut it. I’ve used these to cut canvas, Sunbrella, and leather. Don’t let your friends or family use these for everyday use. They’re heavy duty. Emphasize that by saying it in a low voice, “Sorry, these are heavy duty.”

Don't let your friends or family use these for everyday use.

Don’t let your friends or family use these for everyday use.

Snipping scissors

Snipping scissors, or scissors with very short, sharp blades are genius for cutting threads as you sew.

Snipping scissors, or scissors with very short, sharp blades are genius for cutting threads as you sew.

Snipping scissors, or scissors with very short, sharp blades are genius for cutting threads as you sew.

Pinking shears

Pinking shears are what you need if you are working with fabric that ravels or if you plan to leave a cut edge exposed. Pinking shears do what zig zag stitching or serging does, they stop fabric from unraveling. They are genius. You should get a pair.

You should get a pair.

You should get a pair.

Herb cutters, fringe scissors

Yes, bring the kitchen into the sewing workshop. These scissors are frequently used to quickly chop up herbs, but in the sewing room they create fringe.

Bring the kitchen into the sewing workshop.

Bring the kitchen into the sewing workshop.

Perhaps you want to make some fringe-cut garland? These would be your tool. They work best when you put the fabric back towards the center of the scissors and stop cutting before you reach the tips. If you have a LOT of tiny snips like this to make, however, you’ll want to see the next pair of scissors.

If you have a LOT of tiny snips like this to make you'll want to see the next pair of scissors.

If you have a LOT of tiny snips like this to make you’ll want to see the next pair of scissors.

Rag quilt scissors

For when you aren’t messing around. Rag quilt scissors have short, sharp blades that let you snip through chunks of fabric to create the famous look of rag quilts.

For when you aren't messing around.

For when you aren’t messing around.

Pro Tip: If you get a pair, make sure to get them spring loaded. Your hands will thank you!

My oldest made this rag quilt with and I snipped it right up with rag quilt scissors. Just put on a TV show you can zone out to and start clipping.

My oldest made this rag quilt with and I snipped it right up with rag quilt scissors.

My oldest made this rag quilt with and I snipped it right up with rag quilt scissors.

Rotary cutter

Rotary cutters are becoming more and more popular. Once you learn how to cut fabric with them, your fabric scissors may start to see a lot less use.

Goodbye fabric scissors!

Goodbye fabric scissors!

Ye olde kitchen drawer scissors

Also known as ‘household scissors’ or ‘the scissors you can do just about anything with and mom won’t get mad.’ They are the unsung hero of your scissors quiver because they keep the rest of your tools safe.

The scissors you can do just about anything with and mom won't get mad.

The scissors you can do just about anything with and mom won’t get mad.

What types of cutting tools do you use in your sewing room? Let us know in comments!

—————————–
Charlotte Kaufman is a writer and sewist in Mammoth Lakes, California. She specializes in marine and home interiors and continues to fall more and more in love with quilting. You can follow her at charlottekaufman.com.
Sewing Room Organization Tips and Projects

Sewing Room Organization Tips and Projects

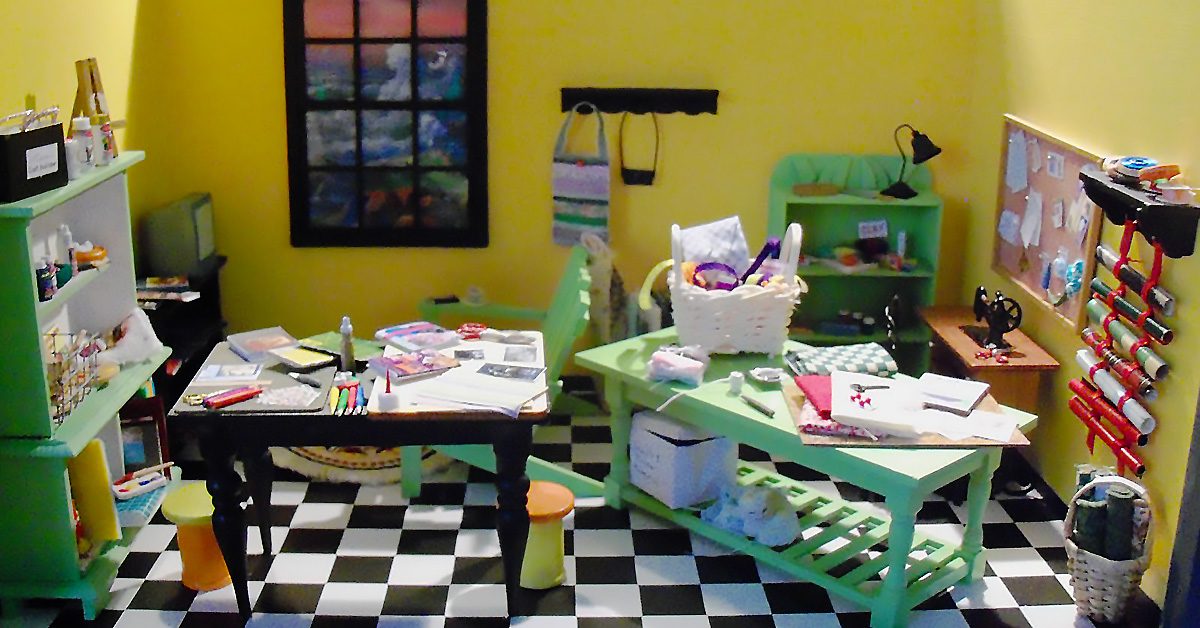
Organization and layout are important factors for any sewing room. In my own small room, I have tried many things that didn’t work well, and I have found many things that do.

What are the most important factors to consider in any sewing room?

I think it boils down to these major factors:

  • Machines
  • Workspaces
  • Storage- of tools, instructional materials, and the “stash.”

Sewing Room Machines

We must keep our machines at the top of this list because neglecting to consider them can be disastrous.

One cannot sew without a trusty machine- and some sewing machines are anything but! You need reliable machines. Have both a trusty mechanical model for backup and an electronic or computerized model. If you want to sew like a pro, you need a serger as well.

You may also like to have a quality embroidery machine, a cover stitch machine, or a long arm quilter.

I listed machines at the top of the sewing room considerations based on my own experience. No mess is as important to clean up and take care of as the machine itself. Do not ever neglect to clean inside your machine! Your sewing machine will break if you do not clean under the bobbin case. And you must clean inside your serger often, for the same reason.

Avoid unnecessary repair bills by cleaning machines with a brush after every project. You must also oil your mechanical machines and sergers. Electronic machines will need oiling at Sewing Machines Plus or your local repair shop. Do not try to oil these at home. Your mechanical machine will serve you during these times.

Sewing Room Workspaces

You need ample workspaces for various tasks:

  • Machines and Sewing
  • Cutting
  • Pressing
  • Layout/ Design

You can save space by creating a design wall for layout, rather than relying on table space for this. Consider ease of moving between the workspaces to create an efficient room.

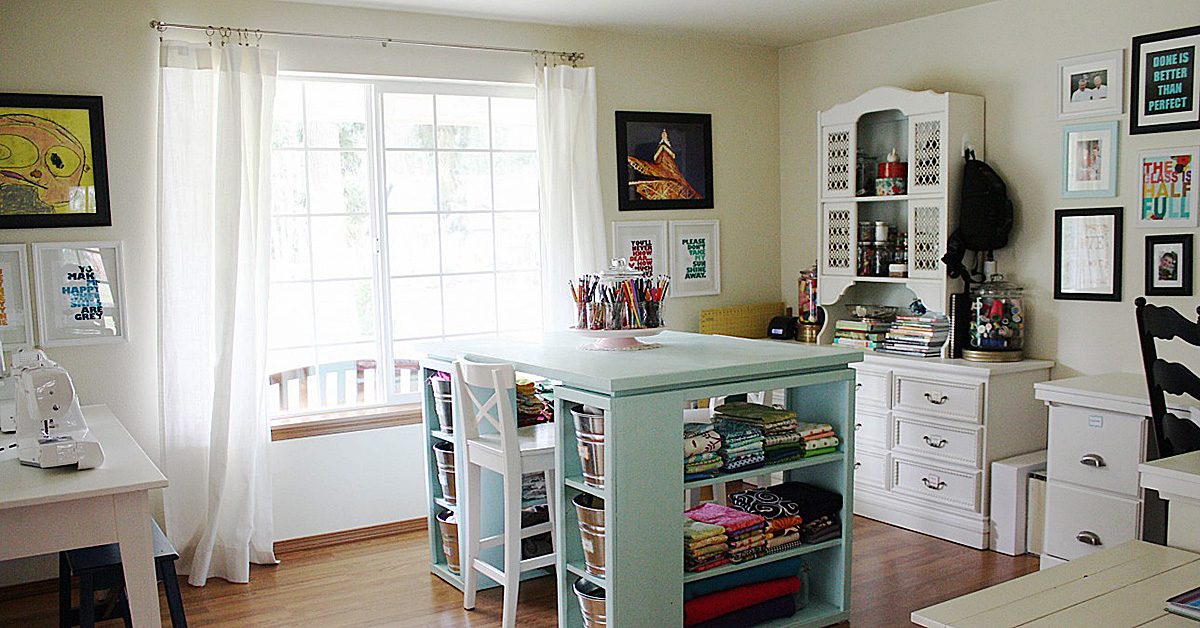
What I have found to work best in my space is to have both a large table and a counter-top style desk. These are both best kept clear. My machines are covered on shelves and it is easy to take them down and set up on the sewing desk or the table. Sewing Machines Plus has a huge selection of sewing desks and tables to choose from; click here to see these now.

I like to set up in a few different configurations, depending on what I am sewing. I place the sewing machine and serger both on the long desk when making patchwork or small projects. Or, for larger projects, I place one on the table and one on the desk, with my chair rolling back and forth between the two. If I am sewing a quilt, I set my machine on the edge of the table so that the entire table is able to support the quilt. Otherwise, I prefer the machine to be on the desk and to keep the table clear for cutting.

The iron and board or space for ironing needs to be nearby as well. I keep my large ironing board set up in the laundry room and have a folding board mounted on the wall in my sewing room.

Sewing Room Storage

You can break storage in your sewing studio down into a few categories:

  • Tools
  • Information- patterns, books
  • Stash- Fabric and supplies

    For tools, what is most important is that what you need is at hand when you need it.

    For tools, what is most important is that what you need is at hand when you need it.

Storage is where your options are endless and creativity comes into play.
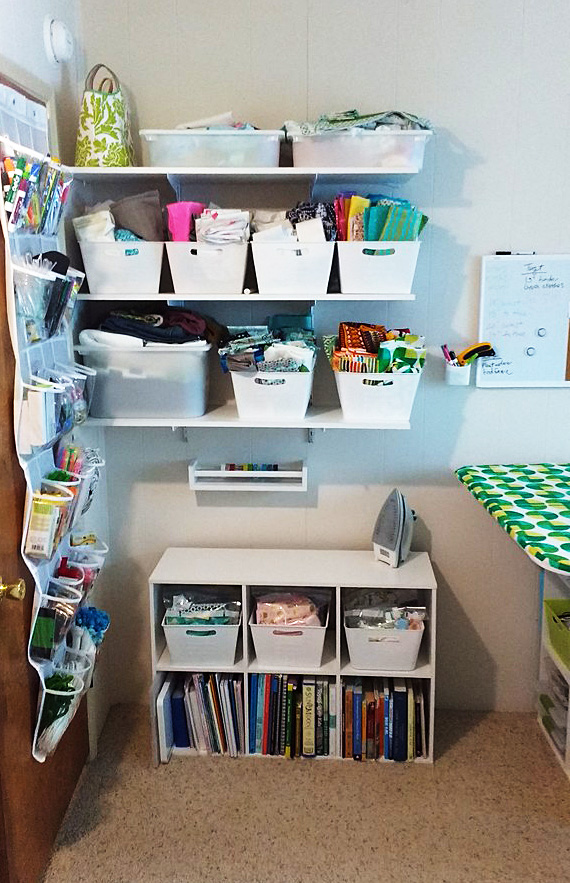
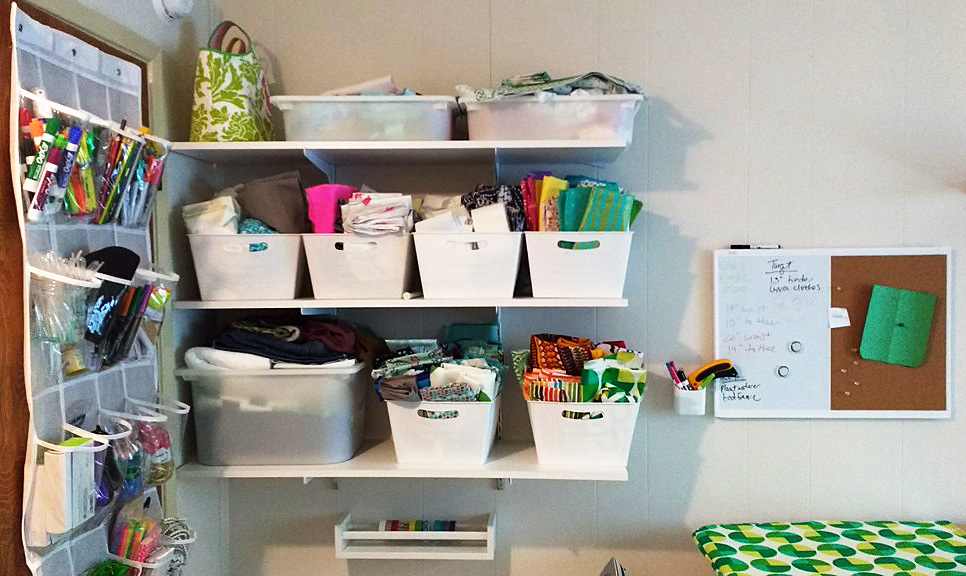
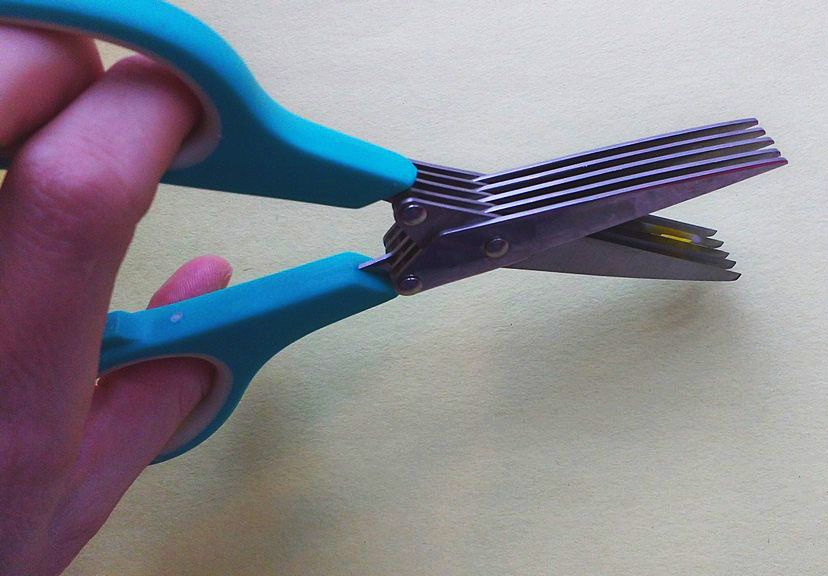
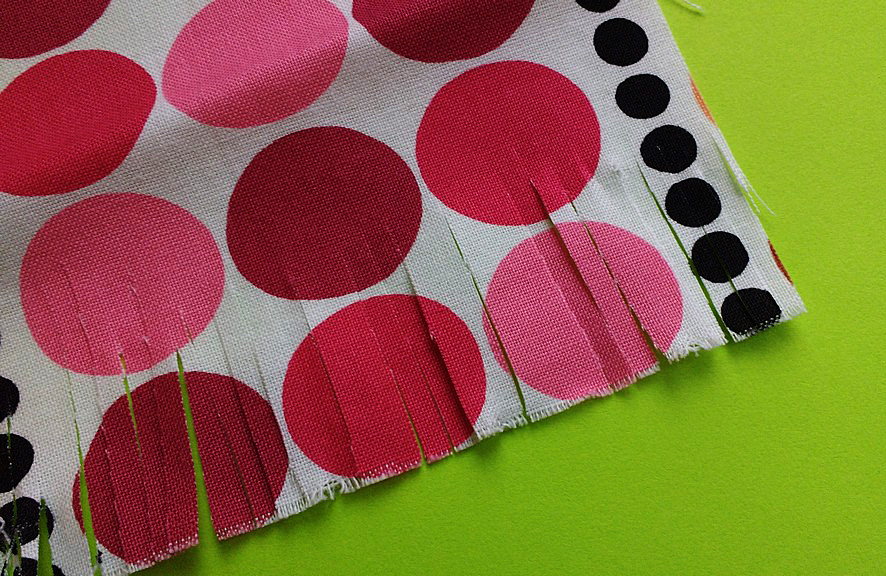
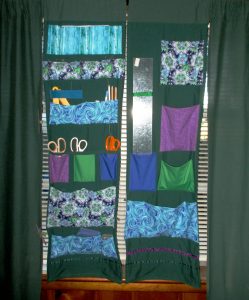
Tools

For tools, what is most important is that what you need is at hand when you need it. This issue was problematic for me in the past because of grabby toddlers. So I designed this custom solution to keep my tools neat, in my reach, and away from kids.

You can also use drawers, boxes, or bins for storing tools.

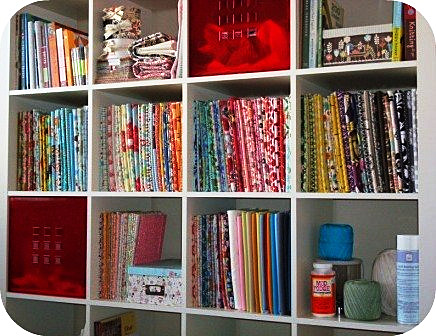
Info – Patterns, Books, Magazines

This was made from a spare leftover patchwork block.

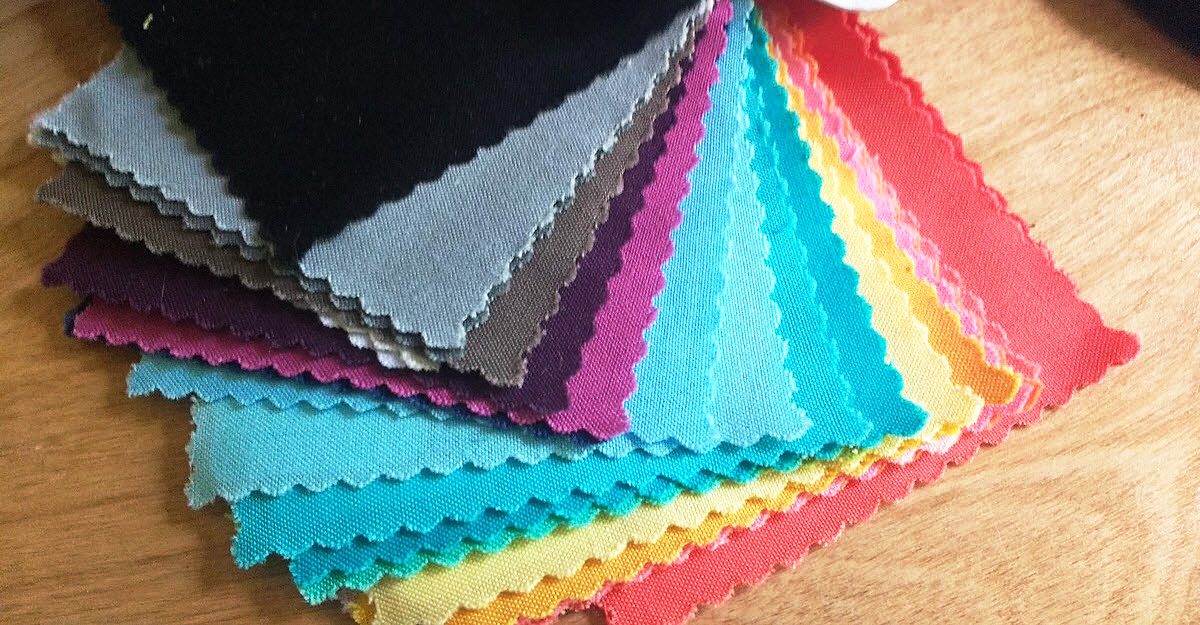
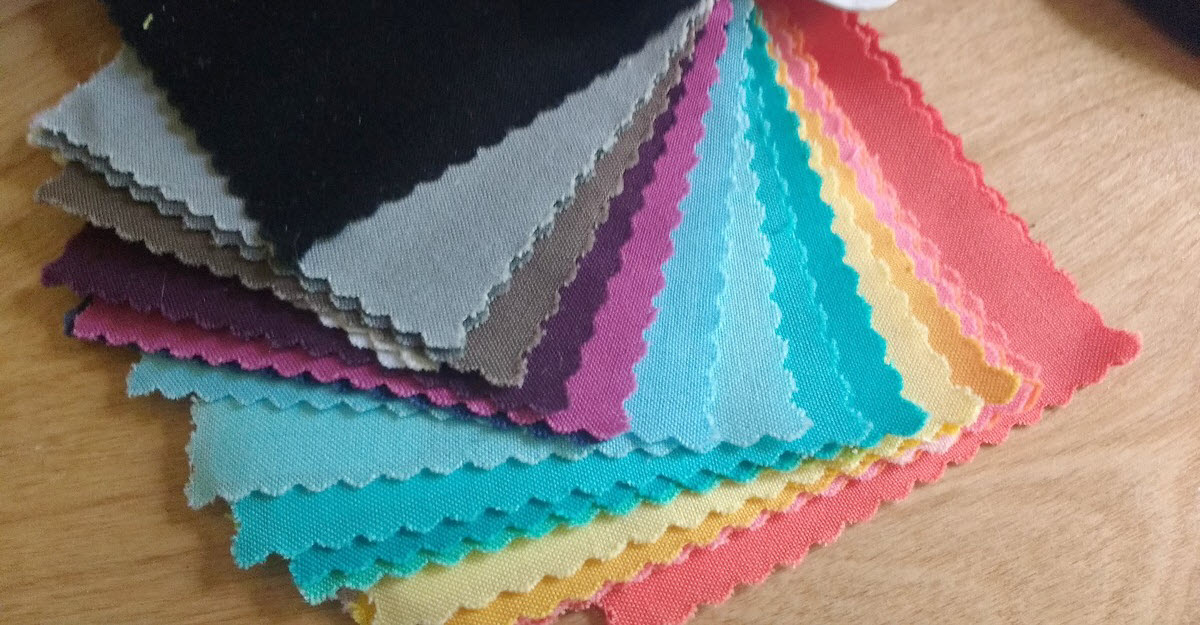
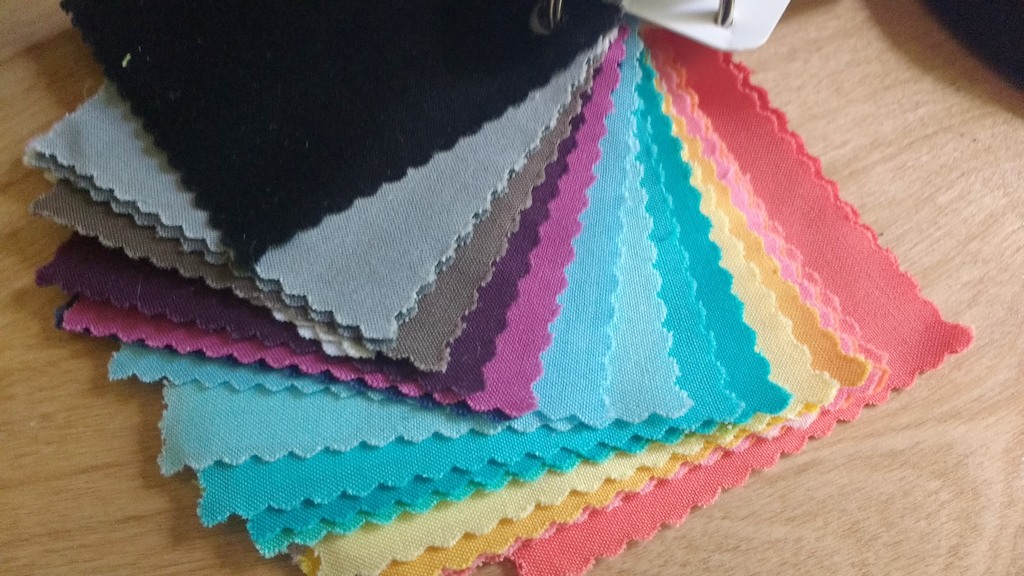
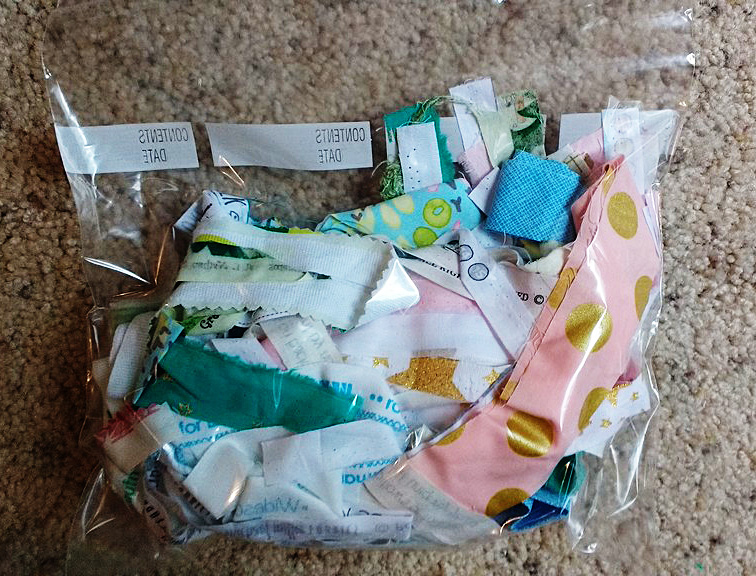
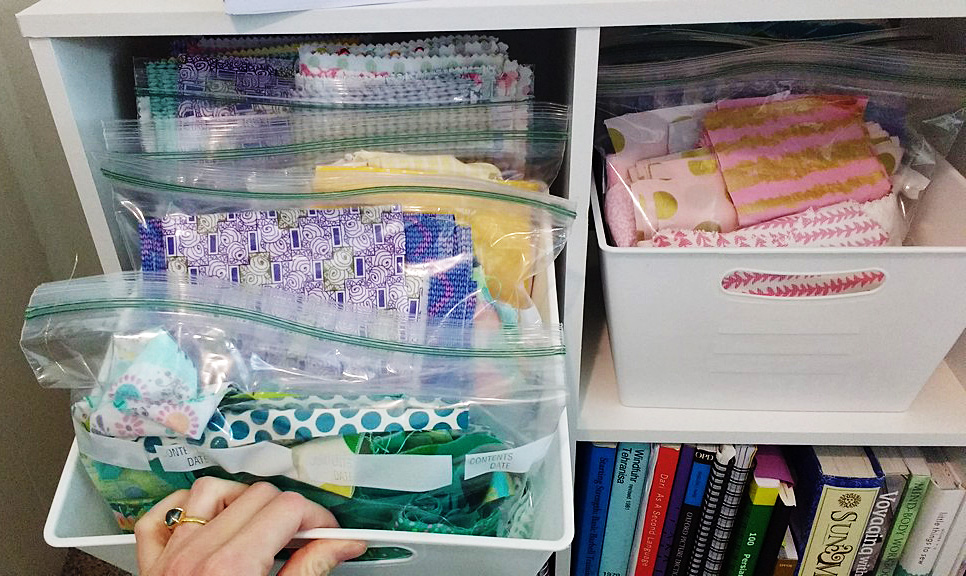
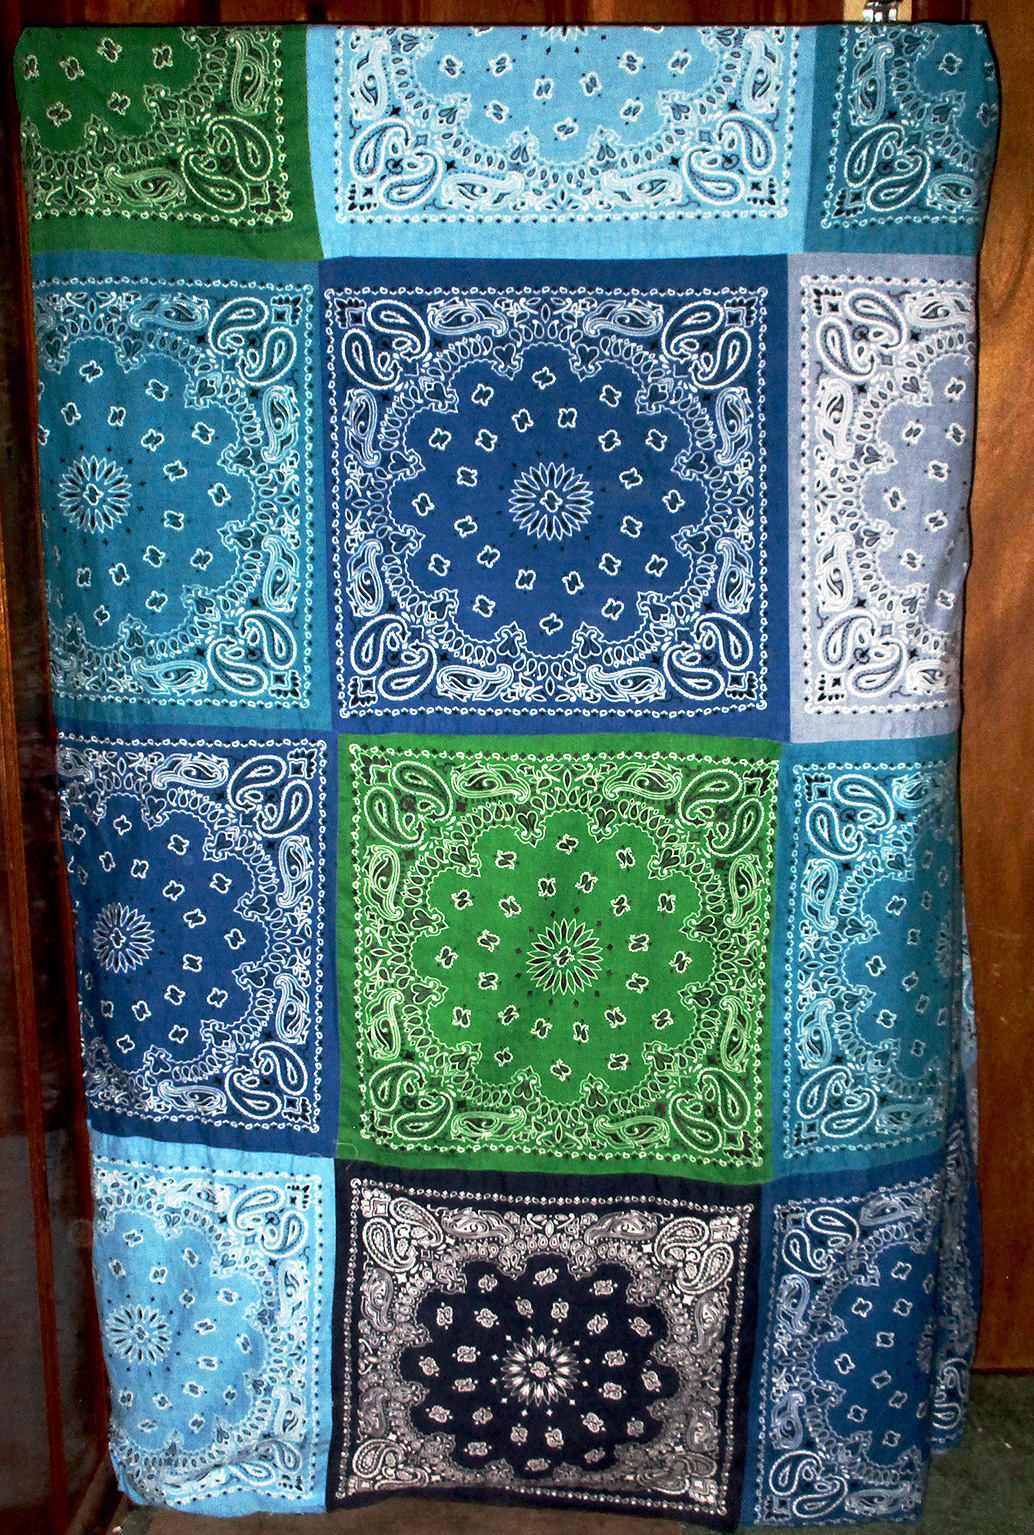
I store packets of patterns organized by type in banker boxes, some of these contained in Ziploc bags. I keep favorite and often used patterns in this oversized pocket for ease of reach. This was made from a spare leftover patchwork block.

I store books and magazines on shelves.
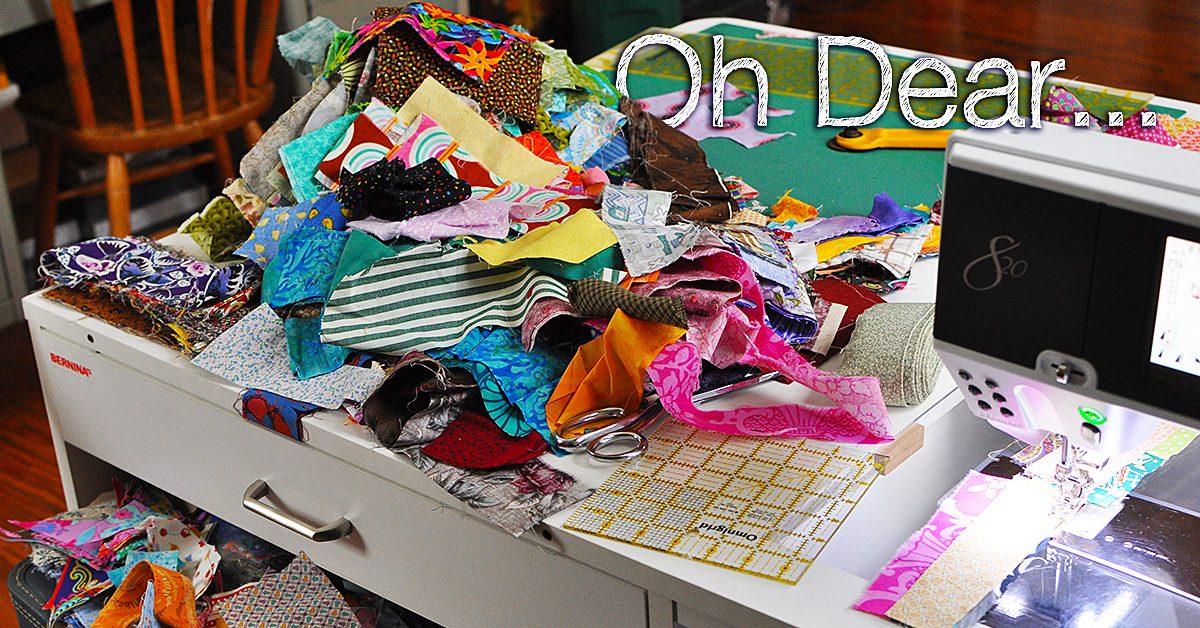
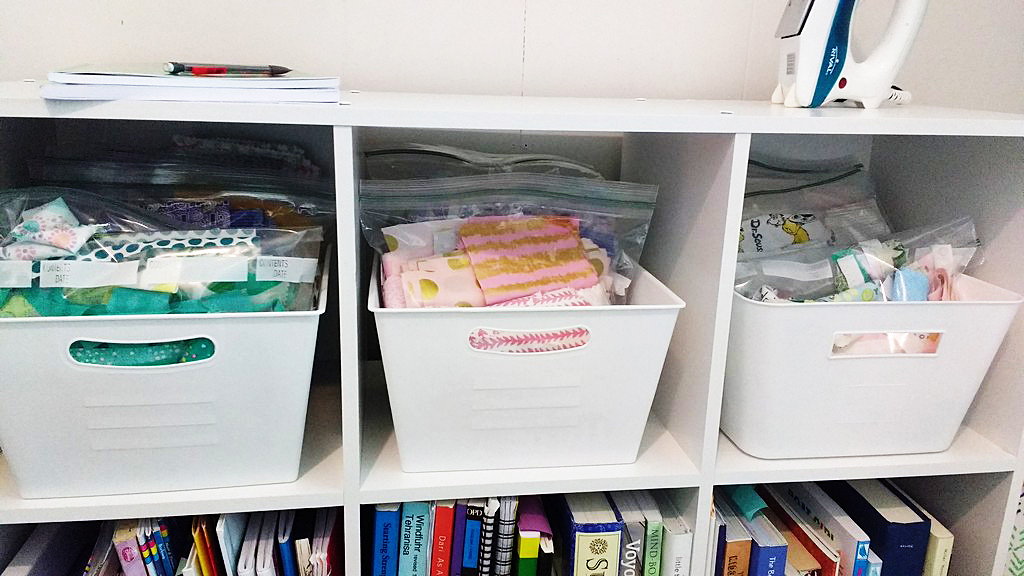
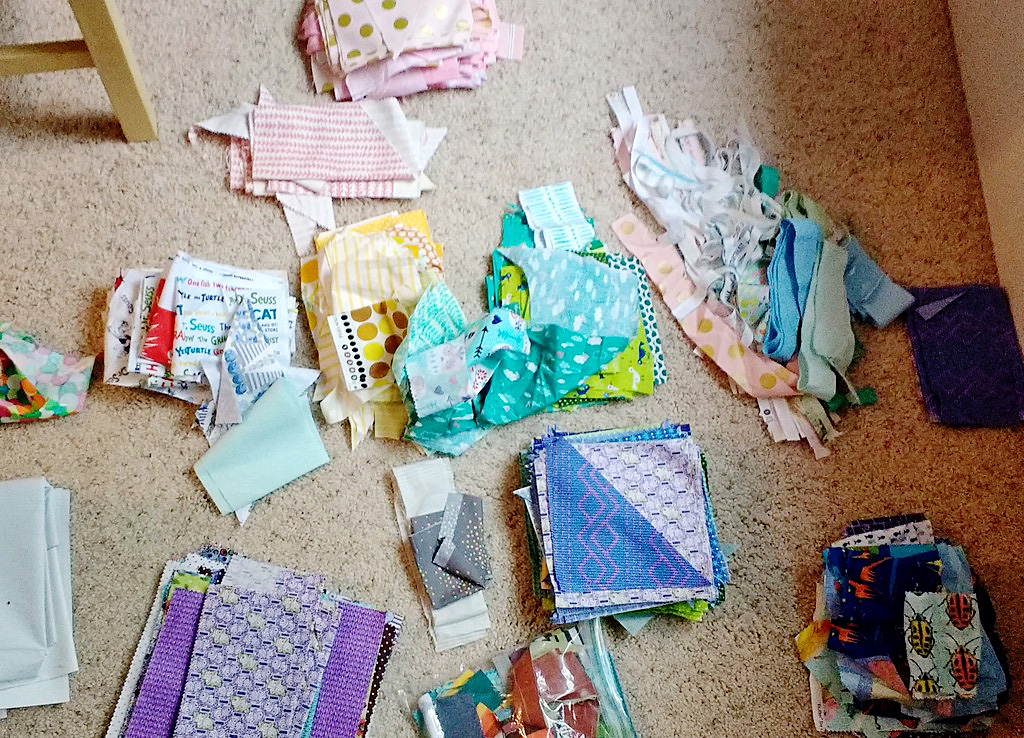
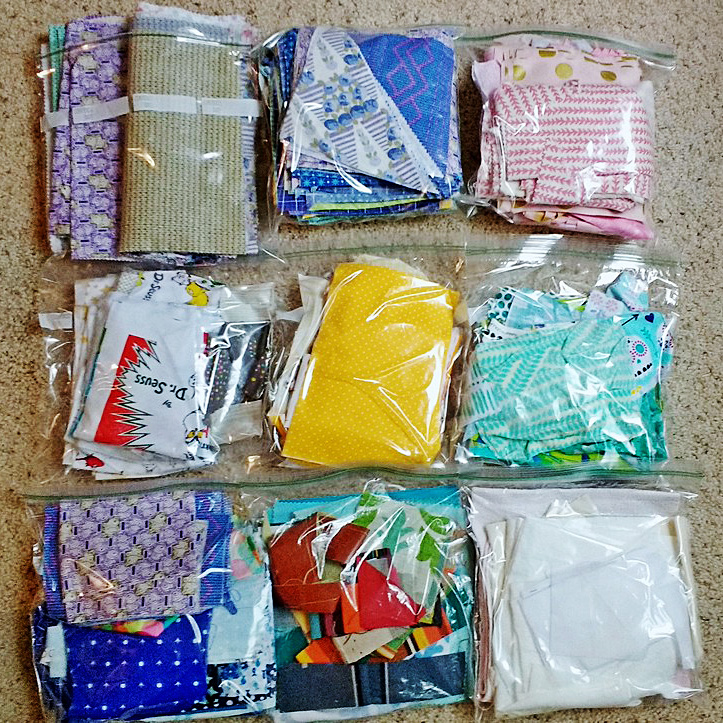
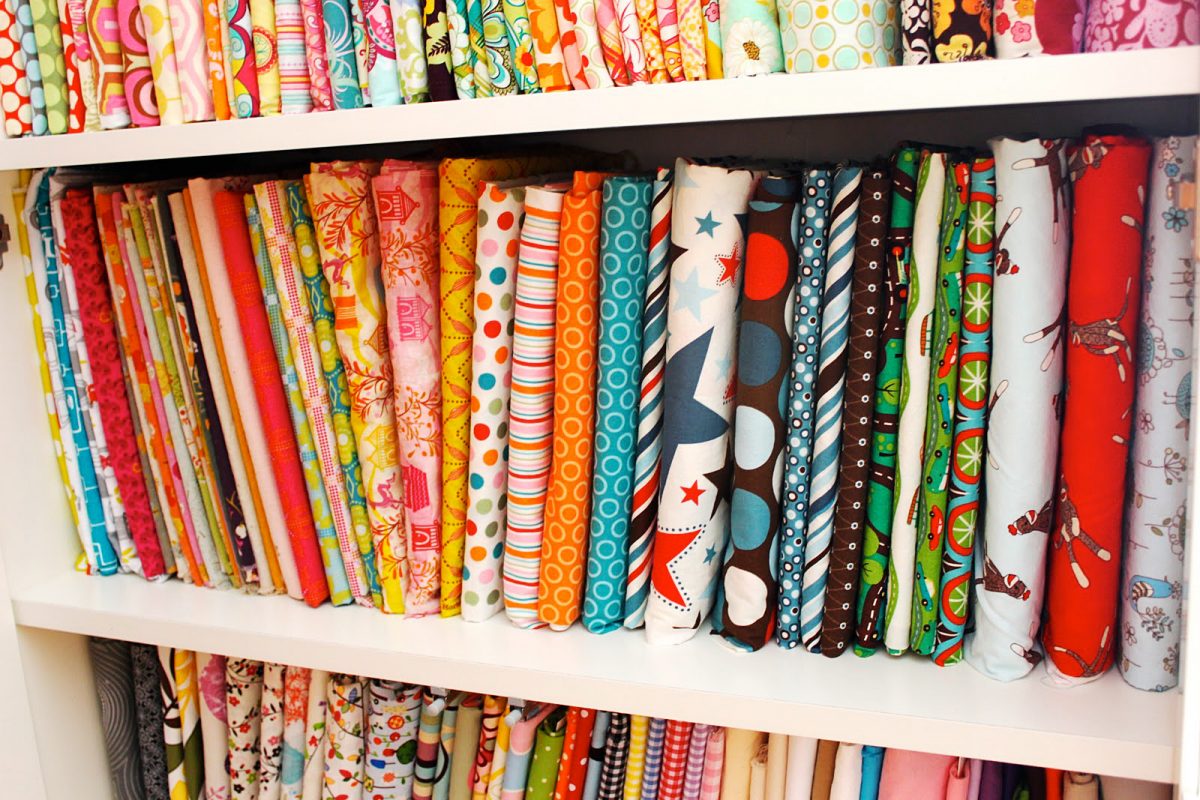
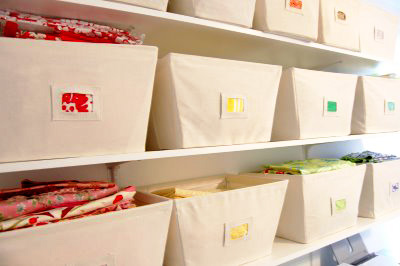
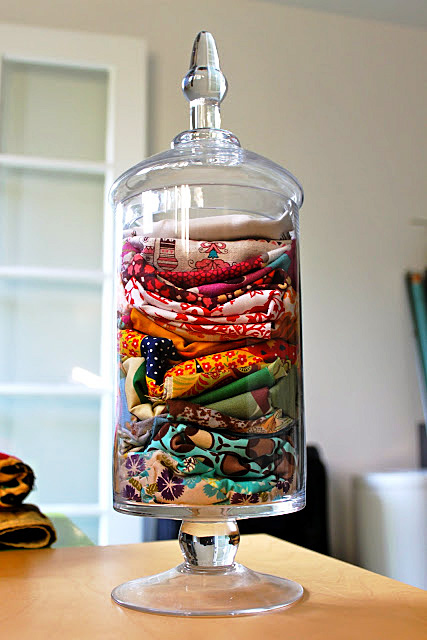
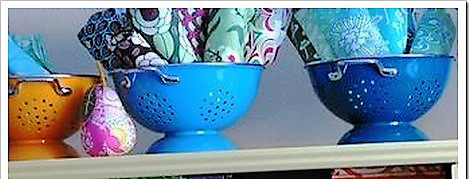
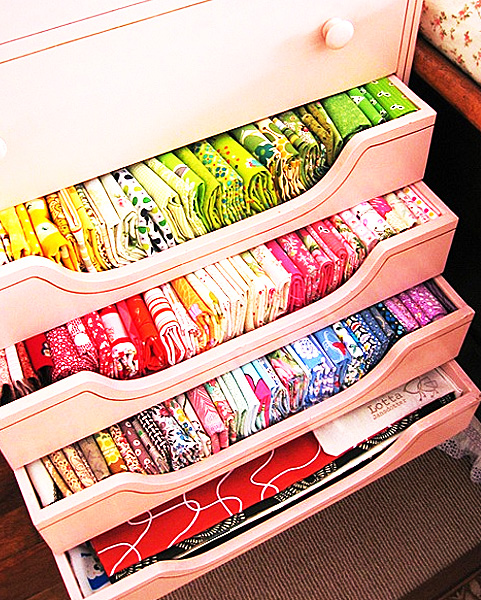
The “Stash”

Fabric

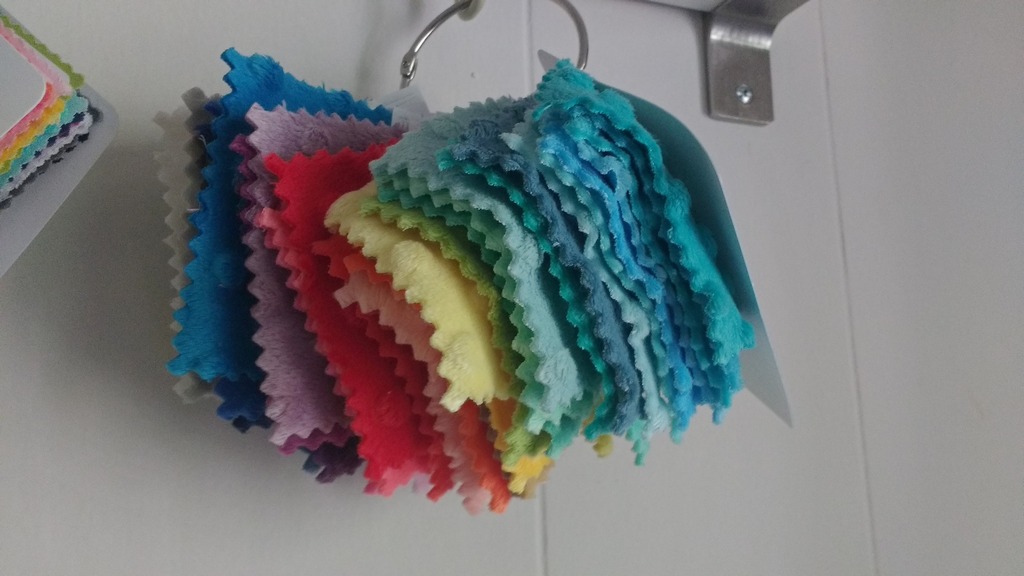
Fabric storage has been covered before on this blog. I won’t repeat the excellent points made in that post. But, as she said, fabric left in the open collects dust. And in the case of my sunny sewing room, colors can fade. Design your space for utility rather than aesthetic considerations only. For example, I once experimented with a rainbow of sorted stacks of fabric on a shelf. This looked lovely, but I don’t recommend this method! Those stacks were not easy to pull from without making a mess.

So I have settled on storing my fabric in covered boxes. I store quilting cottons by color, and other fabrics according to type. Dress weights are together, and knits are in a box of their own, for example. Here is the most helpful tip I have with regard to fabric storage: for the most part, let the fabric live at the store! No longer do I browse sale tables or buy yards of fabric with no particular project in mind. Quilter cottons are the only exception. But I never buy more than a yard of any fabric except as needed for particular projects.

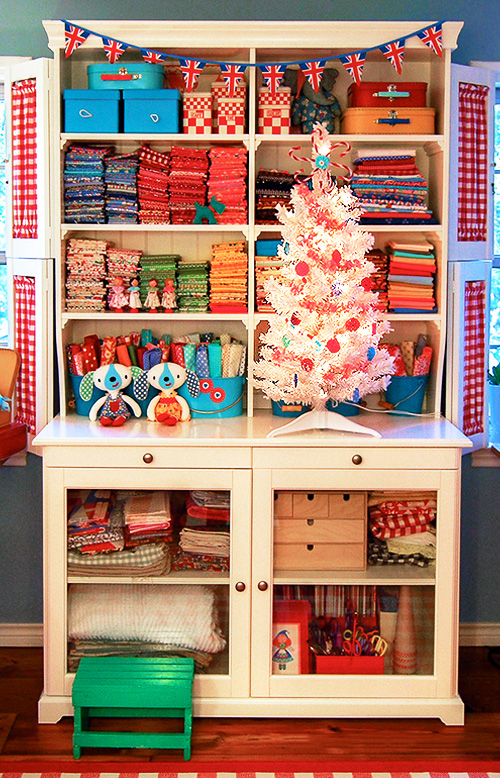
Notions and Other Supplies

Reduce visual clutter & beautify your creative space with a creative shelving cover!

Reduce visual clutter & beautify your creative space with a creative shelving cover!

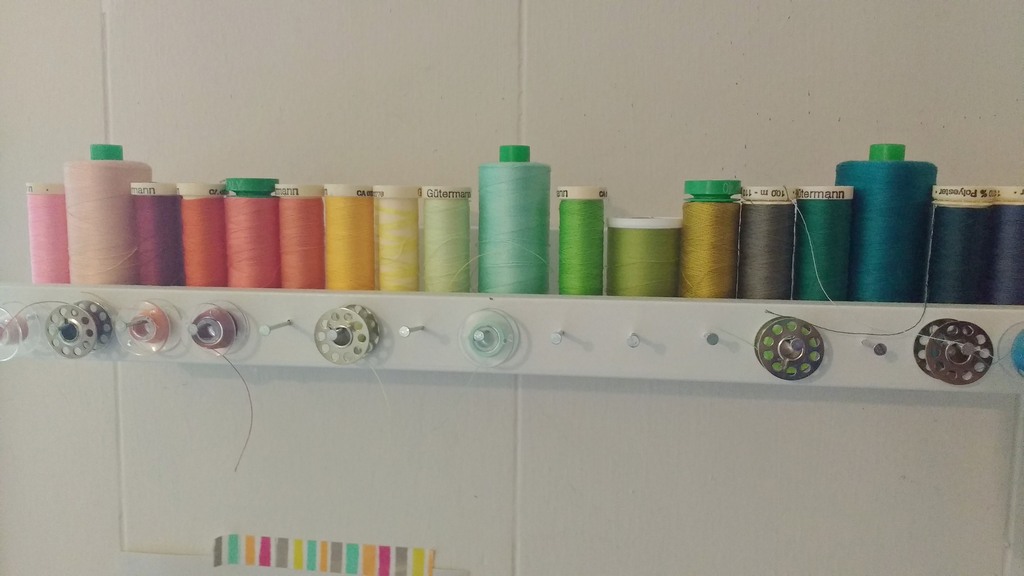
I do find it helpful to keep a good stash other supplies. I use a chest of drawers and small bins. These sort and store elastics, trims, ribbons, bias bindings, lace, velcro, and buttons. I also keep serger threads and tools sorted in a smaller, plastic drawer unit in reach of that machine. Sewing spools hang on a wall mount rack with a clear dust cover for protection.

I hate having dust land on fabrics and supplies, so I made a cover for one of my shelving units. I have enjoyed having my books, magazines, and other items shielded by this. It is easy to pull the cover back and find needed supplies. And it reduces visual clutter and beautifies my creative space.

Trusty machines, ample workspaces, and easy storage contribute to a well-ordered sewing room. The most important factor in your sewing room, though, is you! Create a space that works and that you love and then go there and make stuff as often as you can!