It's National Sewing Month!

It’s National Sewing Month!

As a writer, I was well aware there’s a National Novel Writing Month (NaNoWriMo) that happens in November. As a person who sews though, I had no idea there was a month dedicated to sewing, until this week. Imagine my surprise to find that not only does National Sewing Month exist, but it’s this month — September! Essentially, I found this detail out with less than a month left to officially celebrate, but I suppose learning late in the month is better than having to wait until next year to utilize the concept.

I was surprised as well that this status isn’t something that a random sewing fan made up. Rather, this is something that Ronald Reagan declared back in the 1980s. That’s right. This is a former president’s declaration, and it pretty much boggles my mind that something like a sewing month would be noted by a President of the United States. It seems solid evidence that the world of sewing is more far-reaching and popular than what I might have thought when I first dove into it.

Now that I’m aware — and maybe you are too because of this post — that this month is dedicated to sewing, the question arises about how to celebrate it. There are plenty of options to do so, but seeing as how over half of the month is already gone, whatever celebrating you do would have to be fairly quick-paced! Regardless, there are still ways to fit your celebration into your end-of-the-month schedule, like with these possibilities!

Make a quick project

While some sewing projects can take a long time to make, other projects can be done in a day or less — and these are great prospects at this point for celebrating National Sewing Month before it ends. This concept can vary depending on how fast you are with sewing. For instance, something like a quilt might be a project that one person can finish in a week while another person requires longer. A guiding factor for this possibility then is your own ability and time frame. If you can manage a bigger project, go for it! But if you feel more comfortable with something smaller, like a fabric coaster or throw pillow, choose one of those options. As long as you have enough time to wrap up the loose ends before October 1st, you’re in good shape!

A great idea for this project would be to work on a homemade gift that you can give someone later in the year for a Christmas present. This can give you space to craft that gift and an excuse to revel in a month dedicated to sewing. Win/win, right? If you’re looking for sewing projects, Sewing Machines Plus has free project ideas available here that you can browse through to find a National Sewing Month project.leaf-flower-petal-celebration-heart-food-1250761-pxhere.com

Take a sewing class

Sure, a number of programs that you can take have specific start and end times, and you can’t just decide for those options that you’re going to start a class right now. For other possibilities though, there’s room to maneuver, particularly if you take a class you can finish in a virtual setting with timed videos. Craftsy, for instance, has classes with videos of certain lengths, and if you schedule your time effectively, you can finish one of them by the end of the month.hand-needle-girl-woman-vintage-tool-706616-pxhere.com
One other option would be to start a program this month even though you know it’ll extend farther than the beginning of October. Penn Foster programs, as an example, can allow you that kind of freedom to simply decide to register for a class today and work your way through at a personal pace. It’ll extend beyond September, but September can still be the month that led to you making the choice to enroll.

Buy a new piece of equipment

If you want to treat this month as something worth celebrating, why not go all out and buy yourself a gift for the prospect? You could even extend the prospect outward by buying small sewing supplies for friends and family who enjoy sewing as much as you do, like new thread or fun pattern kits. This way, you can spread the enjoyment of National Sewing Month beyond your own personal collection.hand-sewing-sewing-machine-art-design-handicraft-759263-pxhere.com
That doesn’t mean you should feel bad about adding to your own sewing stash though, and there are plenty of ways to build your supplies in honor of the month. If you need a new sewing machine and can splurge just a bit, celebrate Sewing Month by bringing your dream sewing machine home. Check out Sewing Machine Plus’s site for possibilities on the matter!

Smaller details, like a new sewing kit or interesting fabric, can also be ways to celebrate the month if your budget won’t allow for a new sewing machine, and a few extra dollars can lead to a tiny contribution to your sewing supplies in honor of the month. If you can work even a new pack of straight pins into your budget, it’s a method of celebration!

In any event…

I feel a bit of camaraderie with my fellow sewing fans this month, given our shared interest that was valid enough for a president to declare a month for it.

So to these fellow craftsmen, happy National Sewing Month!

One Day Sewing Projects

One Day Sewing Projects

one-day-sewing

Sometimes I don’t want a big sewing project. If I’m pressed for time or simply need to fill an afternoon or one day out of the weekend, I don’t necessarily want to start a project that will take days, weeks, or months to complete. Nor do I want the hassle and expense of shopping for supplies for a larger project. I just want to sew for a couple of hours and have something to show for it. If that’s ever happened to you, these sewing projects you can do in a day are the perfect solution.
Circle Skirt

Make this for yourself or your daughter…or making a matching mother/daughter pair. This circle skirt can be done in just a couple of hours and it’s perfect for whirling and twirling when it’s done. Unless you have large amounts of the same fabric on hand (cause you just buy fabrics you like when you see them, maybe?) you’ll need to hit the store for material. If you’ve got enough fabric on hand, you’re good to go.

Vendor Apron

Are you the one they ask to help out with bake sales, garage sales, and other school fund raisers? You need this vendor apron to keep your notepads, pens, and other supplies close at hand. It’s super simple to make with an old pillowcase or one you fell in love with at the thrift store and now need a use for. Make a bunch so the whole PTA will have one.

Trendy Fashion Tank

With this awesome pattern there’s no need to spend your hard earned money on brand name t-shirts and tanks. The trendy fashion tank is patterned after a popular JCrew top, but made by you. You’ll need jersey sheets or another source of that same material to make this pattern. Flat jersey sheets can be bought at discount stores for around $7, so it’s well worth the investment to make this shirt yourself.

Hair Bows

Not only do these work up fast, they’re a great way to use up your scraps. Hair bows never really go out of style, so make a bunch. Give them as gifts or sell them at craft fairs. Depending on the material you choose they can be vintage, modern, or anything in between. No matter what, they’re sure to be a hit!

The next time you’re looking for a quick project, try one of these projects. They take a day (or less in most cases) and leave you with a great finished piece, a feeling of accomplishment, and instant gratification. Many of these projects are also great for sew sewers since they can quickly see the results of their efforts.

Getting Through a Sewing Lull

Getting Through a Sewing Lull

Tell me if this sounds familiar. You’re a little bored. You’d love to work on a sewing project, but you’re also in between projects. You don’t have any events coming up and you don’t have the urge to create something new for your wardrobe, or anyone else’s. I call this a sewing lull. In my freelance writing and book writing careers, I sometimes experience the same thing. Over the years, I’ve found some techniques to get through those lull periods without going stir crazy from boredom.

Go Back to Your Joy

Go Back to Your Joy

Why did you start sewing in the first place? Was it to make something specific or was it simply because it was a skill you wanted to learn? Think about what gives you the most joy when you sew. For me, it’s one of two things: either wearing something I’ve made and getting complimented on it or giving something I made to someone and seeing their joy. Tap into what you love about sewing. Then…

Expand Your Repertoire

If you’re like me, you usually have a few favorite things to make. Use your sewing lull to expand your repertoire. If you usually make clothes, try making a stuff toy or blanket. Maybe go really big and learn a completely different sewing skill, like quilting or embroidery. As long as it taps into the reason(s) you started sewing, love sewing, in the first place, you’ll have a winner.

Run with Scissors

Okay, don’t really run with scissors. It’s dangerous.

Okay, don’t really run with scissors. It’s dangerous.

Okay, don’t really do this. It’s dangerous. What I mean is step outside your comfort zone, disregard what usually holds you back and leap into a new sewing skill, project or technique without taking time to talk yourself out of it. Maybe there’s something you’ve been wanting to try for years, but your pragmatic side has been holding you back. This sewing lull is the perfect time to throw caution to the wind and give it a shot.
I find these three things get me through any lull, sewing or writing, and I learn some new things along the way. At the same time, it also helps me reconnect with why I love what I do – we all need that reminder sometimes, right.

DIY: Reversible Tote Bag Tutorial

DIY: Reversible Tote Bag Tutorial

It is easy to sew a reversible tote bag; even beginners can make this project.

It is easy to sew a reversible tote bag; even beginners can make this project.

It is easy to sew a reversible tote bag; even beginners can make this project.

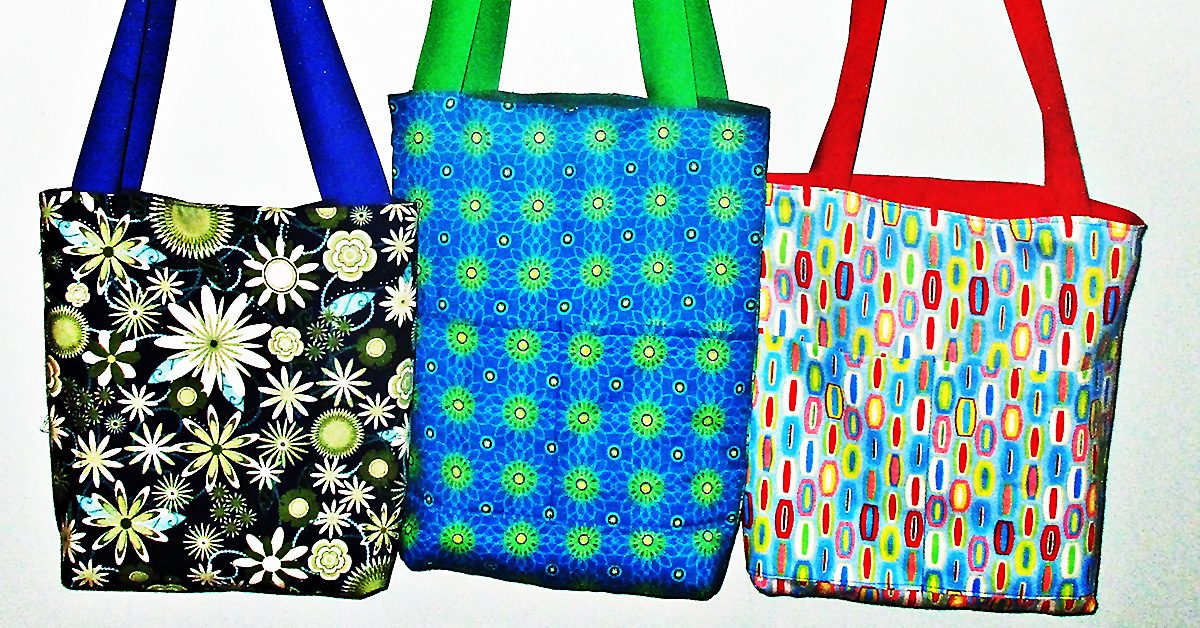
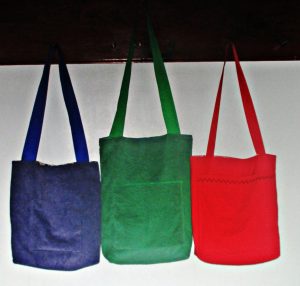
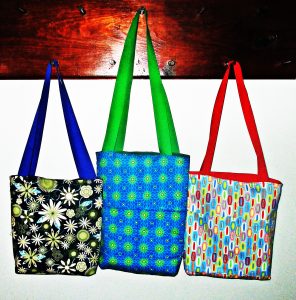
You can make these in any size. My three examples are each sized slightly differently.

To make one reversible tote bag, you need 2 different bag fabrics. Depending on the sturdiness of your fabrics, you may also need medium weight interfacing or fusible fleece. You can make your bag handles from long rectangles of one or both of these fabrics, or you can use grosgrain ribbon, as I have here.

Reversible tote bag step one: cut bag pieces

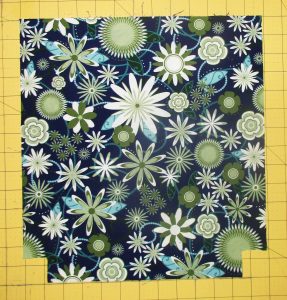
Measure & mark 1.5” from both sides of the bottom corners & cut these little squares out.

Measure & mark 1.5” from both sides of the bottom corners & cut these little squares out.

Cut two squares or rectangles of each fabric to your preferred dimensions. I made these using 13” x 14”, 14” x 15” and 13” x 17” rectangles, and I have made them both much smaller and much larger.  The 13” x 17” is big enough for my laptop. But ribbon handles aren’t a good idea for a laptop bag; follow the directions for making stronger fabric handles if you plan to carry your computer.

Then measure and mark 1.5” from both sides of the bottom corners and cut these little squares out. Do this for all four pieces of your bag fabric.

Step two, optional: interfacing

If you choose to make your reversible tote bag from home decor fabric and/or canvas, you won’t need to use interfacing.

If you are using quilter’s cottons or similar lightweight fabrics, cut fusible fleece or interfacing to fit two of the bag pieces. Follow package directions to fuse fleece or interfacing to the wrong side of both pieces of one bag fabric.

Step three, optional: pockets

You can make pockets on one or both sides of your reversible tote. The easiest way to make pockets is to start with a rectangle, fold it right sides together, and sew all around, leaving an opening for turning. First topstitch the opening closed, then pin and sew the bottom and sides of the pocket to the bag.

You can make a long rectangular pocket that stretches the full width of your bag, or make square patch pockets and sew them in the middle of one or more of the bag pieces.

Step four: sew two bag bodies

Take both pieces of one of the bag fabrics and sew along the bottom and side seams with right sides together. Press seams open. Now, miter the corners by lining up the side and bottom seams you just sewed at the middle of the new seam you will form from the square cut out. Sew these seams.

Repeat with the pieces of the second bag fabric.

Step five: handles

Use a soft measuring tape or even a string hung over your shoulder to determine how long you want your straps to be. I like long shoulder straps, so I usually cut mine about 30 inches long. If you prefer to carry your tote on your arm, cut yours shorter. You need two.

I saved time making these bags by using grosgrain ribbons to make easy straps. To do this, just cut two pieces of ribbon to your desired length.

To make fabric handles, cut two long rectangles to your desired length measurement by twice your desired strap width. Apply interfacing to the wrong side of your fabric if you like.  Fold lengthwise right sides together and press. Sew along the long open edge, then turn. Press again.  Now top-stitch along both long sides.

There is no need to finish the short ends as these will be concealed between the two sections of the bag.

Step six: assembly

They are handy for carrying books, notebooks, your computer, clothes for overnight or the gym.

They are handy for carrying books, notebooks, your computer, clothes for overnight or the gym.

Insert one bag into the other, with right sides together. If your placed pockets on one side of each bag body, insert them together so that the pockets are on opposite sides. Push down the corners to make sure both bag pieces are lined up well at the bottom. Then line up the side seams from both pieces and pin these together.

Take one strap and hold one end in each hand so that the loop hangs down. Be sure it isn’t twisted and insert it between the two bag parts on one side. Measure in from the pinned side seams on each side to be sure the straps are centered. About three inches in is a good guideline, but eyeball your bag to decide on exact strap placement. Just measure the distance between strap and side seam on both sides to be sure they are even. Pin, then repeat on the other side with the other strap.

Now sew together along the top edge.  You will have to leave an opening big enough for turning; I sew across all the straps and leave the opening on one side.  Turn everything right sides out. Both sides of the reversible tote will be pointing out.

Stick your hand into the opening and poke all the corners out from the inside. Then push one bag body into the other so that it becomes a bag with handles at the top. Return to your ironing board and press. Pay attention to the edges still open from turning; you want to press the raw edges inward and neatly align for top-stitching this opening closed.

Now stitch all the way around the top of the bag and you’re done.

Make more!

Reversible tote bags are easy to sew in a hurry & the possible variations are endless.

Reversible tote bags are easy to sew in a hurry & the possible variations are endless.

Reversible tote bags are easy to sew in a hurry and the possible variations are endless. Make them in different sizes and try different fabrics and trims. Use tie-dye, quilting, appliqué, fabric paints, or any other embellishment you like.

They are handy for carrying books, notebooks, your computer, clothes for overnight or the gym. You can use them as a shopping bag, your purse, or for handmade gift giving. Pick out some pretty fabrics and make a bunch. Happy sewing!

Working with Vinyl: Tips for a Beginner

Working with Vinyl: Tips for a Beginner

Imagine a summer day spent by the pool with your sunscreen on, your sunglasses perched on your nose, and a cup of your favorite drink beside you. A cool breeze blows by, and you can’t help but smile from your reclined position on your seat as you casually turn the page on the book you’ve been reading for the last half hour.

Then you set the book aside for the sake of refilling your drink — just when someone decides to do a cannonball into the swimming pool. The water flies upward and outward… and a huge splash lands right on your book. Suddenly, your poolside day of reading deteriorates with the knowledge that the book you were enjoying so very, very much has officially been subjected to the book-disease known as water damage.

This is not a good scenario for a book fan! In fact, it can put a damper on the rest of your poolside visit!

Splish splash

Create a waterproof book cover for relaxing day of reading by the pool.

Create a waterproof book cover for relaxing day of reading by the pool.

So how could this incident have been prevented? Well, you could’ve left the book at home, but there’s another possibility that would allow you that relaxing day of reading by the pool. That option is to create a waterproof book cover. You can find instructions for that concept here, but the step-by-step guide can lead to exploration if you want to properly create this book-protector.

That exploration centers around one important detail, and that’s the best approach for dealing with vinyl in regard to sewing. It is, after all, a much different texture and structure than more common possibilities like cotton and flannel, and if you want the best experience possible for putting together a vinyl-based book cover, looking into how it’s different and what to do about those differences can be beneficial.

Troubleshooting

It’s thick. While it’s not thick enough to be something that seems ridiculous to use, it’s thick enough to come with its own concerns. For instance, you might find that the needle you used to sew that cotton project doesn’t work very well for this vinyl concept. The thicker quality calls for something stronger to easily maneuver through the vinyl to create your book cover. According to one source, “[i]t’s best to use a needle designed for leather or vinyl…[like] Leather Needles from Schmetz” for the task so you don’t have to wrestle with your needle as you go — or maybe even ruin your needle because it bends under the pressure. If this is your first vinyl project, you might want to look for an applicable set of needles for the job!

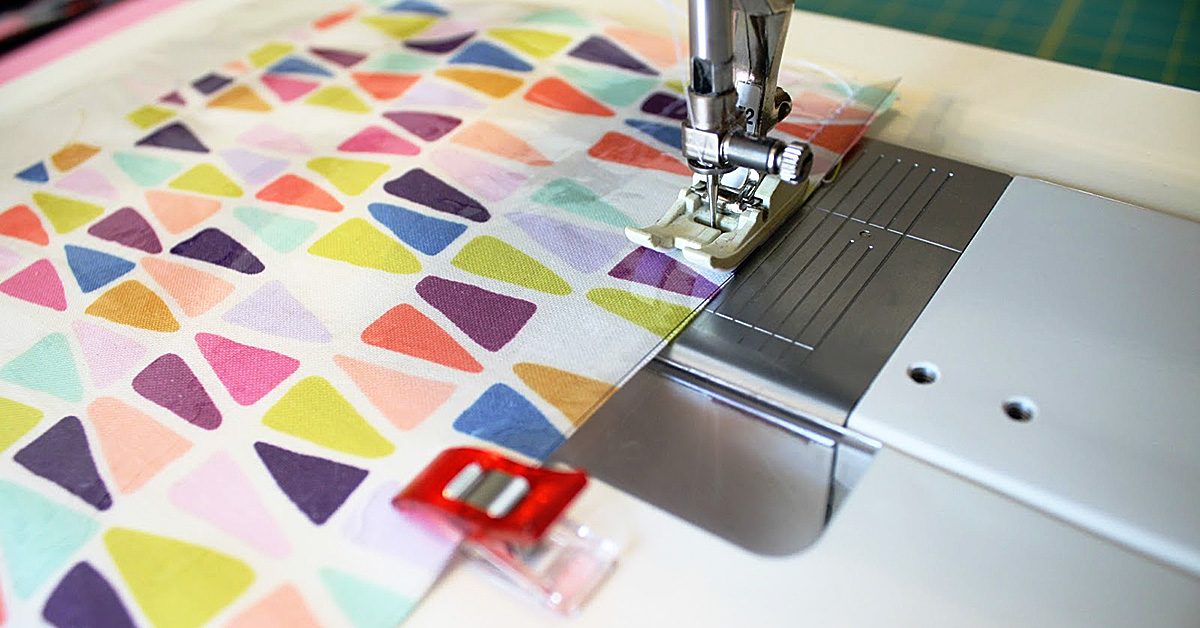
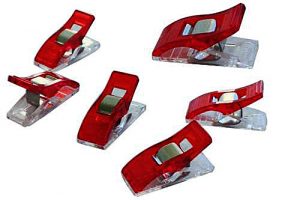
You may want to add Wonder Clips to your to-buy list for when you’re browsing through the store for your vinyl-sufficient needles.

You may want to add Wonder Clips to your to-buy list for when you’re browsing through the store for your vinyl-sufficient needles.

It’s not pin-cushion friendly. While the tiny holes that pin cushions can leave don’t really make much of a difference in flannel, they can make a very big difference in vinyl since they’re much more pronounced! To combat that issue, you might want to add Wonder Clips to your to-buy list for when you’re browsing through the store for your vinyl-sufficient needles. These things can keep your project on track by holding things in place without forever scarring the vinyl!

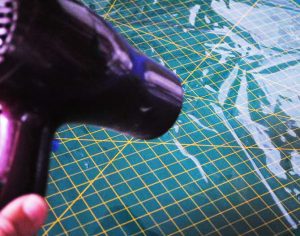
“You can’t iron your vinyl flat.” If there’s something that’s a staple in preparing material for sewing, it could be to iron all of the wrinkles out beforehand. Since that strategy doesn’t really work for vinyl (it “could melt” under the iron!), it leaves the question of what a person can do that make sure everything is even before that first stitch happens. A simple solution would be to use your hairdryer on the vinyl, which will cause it to “flatten out nicely.” No bends, no damage, and no worries as you dive into making your stitches for your waterproof book cover!

A simple solution would be to use your hairdryer on the vinyl

A simple solution would be to use your hairdryer on the vinyl

It might not stay in place. One of the things I personally don’t like about using a silk fabric is that it’s so easy for it to slip out of form and throw off your pinning, cutting, and sewing. And, well, vinyl doesn’t seem to want to stay in place either because of its texture. While this might make it perfect for the waterproof detail, it complicates the sewing process just a bit! This complication though is no reason to throw in the towel for this project since painter’s tape can be used to hold the vinyl in place without damaging it at all. It’s an extra purchase for the project, but it can keep things neat and orderly as you go to create a better, easier-made product.

Use tissue paper to preventing sticking.

Use tissue paper to preventing sticking.

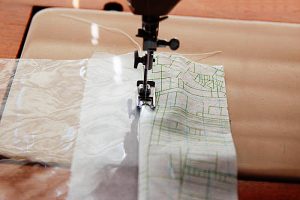
It might stick to your sewing machine. To my thinking, few things are more frustrating in the world of sewing than having material that won’t feed through your machine correctly, and since vinyl can stick, this could be a headache waiting to happen! It doesn’t have to ruin the experience though! You could use tissue paper on “the side [of the machine] that is having trouble” while you feed the vinyl through to keep it from touching that part of the machine, thus preventing the sticking. Once you’re finished, this tissue paper “will easily tear off” to become but a memory of a sewing hack you employed!

If you use these tips, tricks, and suggestions, you might find using vinyl is not so difficult that you have to remove it from your list of materials to use. And if you can use it, don’t hesitate in protecting that new paperback from the swimming pool splashes with its own book cover! It’s one step closer to that wonderful possibility of a summer vacation, poolside read!

Prepping Your Sewing Room for Summer

Prepping Your Sewing Room for Summer

I’ve come up with a few tricks over the years to let the fresh air in while keeping my sewing projects organized.

I’ve come up with a few tricks over the years to let the fresh air in while keeping my sewing projects organized.

With the warm weather rolling in, it’s time to open the windows. I love the feel of fresh air blowing through the house and cleaning the stagnant air out. It does present a few sewing challenges though. Fabric and patterns get blown around if I’m not careful. I’ve come up with a few tricks over the years to let the fresh air in while keeping my sewing projects organized.

Positioning

In my house, the air blows in from some directions more than others. I use this to my advantage and position my sewing table and supplies in such a way that they’re not directly inline of the strongest gusts. This usually takes care of most of the issues with supplies blowing around.

Paper Weights

Well, maybe they should be called Fabric Weights. Personally, I use clean rocks I’ve found on hikes, but anything that holds down the fabric and pattern pieces you’re not actively using will do. They look pretty and keep everything neatly in place while you enjoy the summer air.

Opposing Force

It sounds counterintuitive, but it seems to work when I do it right. If it’s a particularly breezy day, I’ll turn a fan on facing into the breeze coming in the window. When the balance is right, my sewing supplies wind up in a pocket of non-blowing air. It takes practice to find the right direction and speed and doesn’t always work. I prefer the first two tricks, but I’ll resort to this one if I’m really struggling with the wind.

I find that sometimes the breeze from an overhead fan or air conditioner can cause my sewing projects to blow around too. I’ve found that fabric weights are usually the best solution there since I want to feel the cooling effects of the air conditioner and/or fan.

What other tricks do you do to keep yourself comfortable and keep your fabric and pattern pieces from blowing around?

80s Prom Dress Hack

80s Prom Dress Hack

For the most part, I use my sewing skills for myself, and my immediate family. Sometimes, however, I get to help friends out. As was the case this week when my friend, Tania, asked if I could help her with a costume for a party this weekend. The theme was 80s Night and she had found an authentic 80s Prom Dress that ALMOST fit her. She just needed the dress to work for that one night. I was game to help her make it happen.

Verdict

When she brought over the dress I assessed three main issues:

  1. The zipper was broken on the left side of the plaque.
  2. There were two rips to the right of the right-side zipper.
  3. Her rib cage was wider than the fit of the dress. We would need to somehow expand the torso piece of the dress to get it to fit her for an evening.
I decided to extend the circumference of the dress by creating a fabric plaque that would be sewn onto the left side of the zipper opening.

I decided to extend the circumference of the dress by creating a fabric plaque that would be sewn onto the left side of the zipper opening.

The good news is that these were all problems I could tackle. I decided to extend the circumference of the dress by creating a fabric plaque that would be sewn onto the left side of the zipper opening (I cut off the broken zipper) and would attach via Velcro to the right side of the zipper opening.

The good news is that these were all problems I could tackle.

The good news is that these were all problems I could tackle.

Resourceful fabric recycling

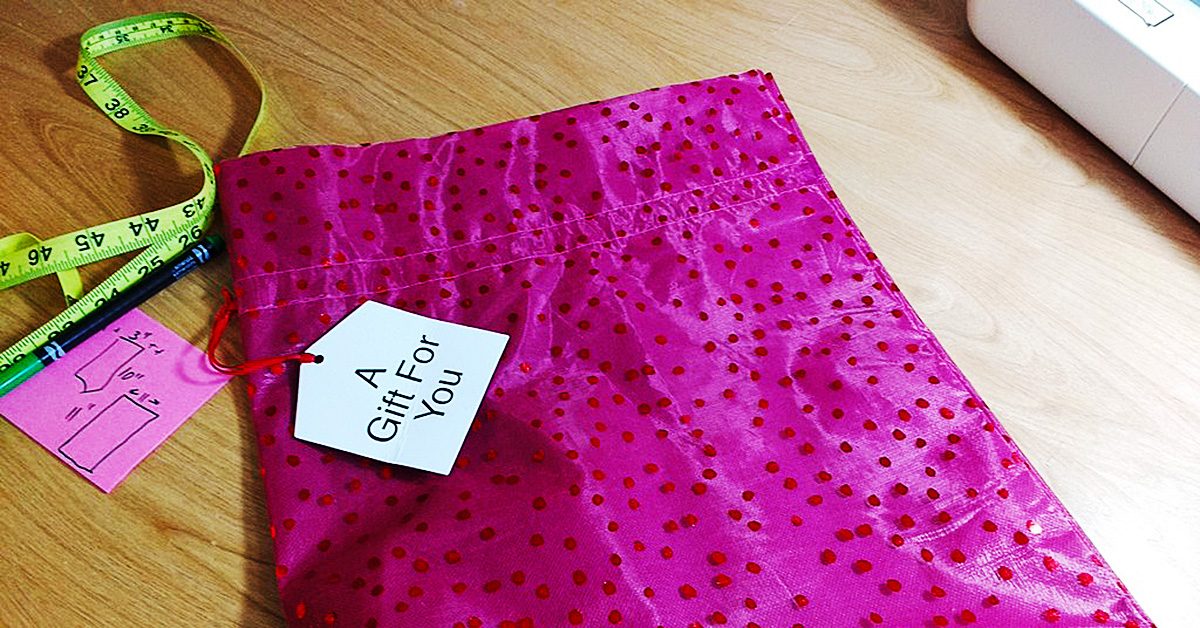
Tania brought two gift bags with her that we planned to use as extra fabric. They were glittery and shiny and would match the dress and the theme of the party. From the red bag I cut out the larger plaque.


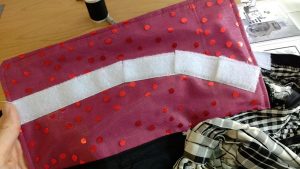
I sewed it directly onto where the zipper would have zipped up on the left side of the dress opening.

I sewed it directly onto where the zipper would have zipped up on the left side of the dress opening.

I sewed it directly onto where the zipper would have zipped up on the left side of the dress opening.

Patches?! We don’t need no stinking patches

Then I tackled the holes. I used the gray gift bag fabric to support the fabric under where the rips were and then zig zag stitched several lines of stitching to patch the rips (Remember this just needed to work for one night).


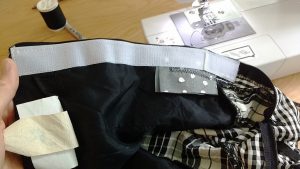
Here you can see the gray gift bag fabric on the underside of the dress. I sewed Velcro to the right side of the dress opening, sewing right over the invisible zipper.

Here you can see the gray gift bag fabric on the underside of the dress.

Here you can see the gray gift bag fabric on the underside of the dress.

Measure twice – cut once

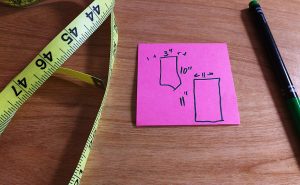
For this part, I had her put the dress on and then we fit the dress to exactly the width she felt comfortable in. I used my Clover Chaco-liner Pen to draw a line where the other side of the Velcro needed to be sewn on. The curve at the end is where the lower portion of the still working zipper zipped up to meet the straight line of the back piece.

The curve at the end is where the lower portion of the still working zipper zipped up to meet the straight line of the back piece.

The curve at the end is where the lower portion of the still working zipper zipped up to meet the straight line of the back piece.

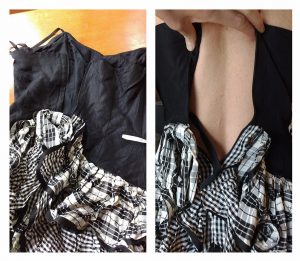
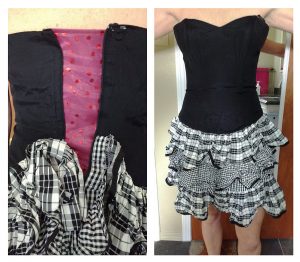
Ta da!!! The red fabric + Velcro expanded the corset piece perfectly. On the right you can see her in the dress after we’d finished. The dress is a little roomy in the bust, but she will be wearing a strapless bra to fill that in.

I’m so glad I could help my friend out with my sewing skills.

I’m so glad I could help my friend out with my sewing skills.

I’m so glad I could help my friend out with my sewing skills.

Have you ever helped someone DIY a costume?

———————————————————————————–
Charlotte Kaufman is a writer and sewist in Mammoth Lakes, California. She specializes in marine and home interiors and continues to fall more and more in love with quilting. You can follow her at charlottekaufman.com.
DIY Home Sewing Projects

DIY Home Sewing Projects

Is it just me, or do an awful lot of jackets and sweaters come without a loop or tag to hang them with? I get it that many have hoods, and you could hang them from the hood, or even the back neck of the jacket, but there is nothing like a solid loop to quickly hang your jacket up.

Another problem is that many hooks are sharp or pointy and if you hang a jacket from the neckline or hood you end up with a bump in the fabric from the imprint of the hook. This is no bueno when you’ve spent good money on the jacket in the first place.

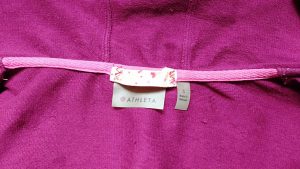
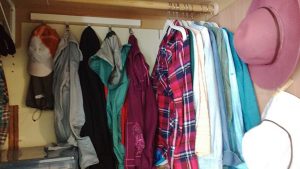
I like to add jacket loops using double fold binding I have on hand.

I like to add jacket loops using double fold binding I have on hand.

Let’s Sew!

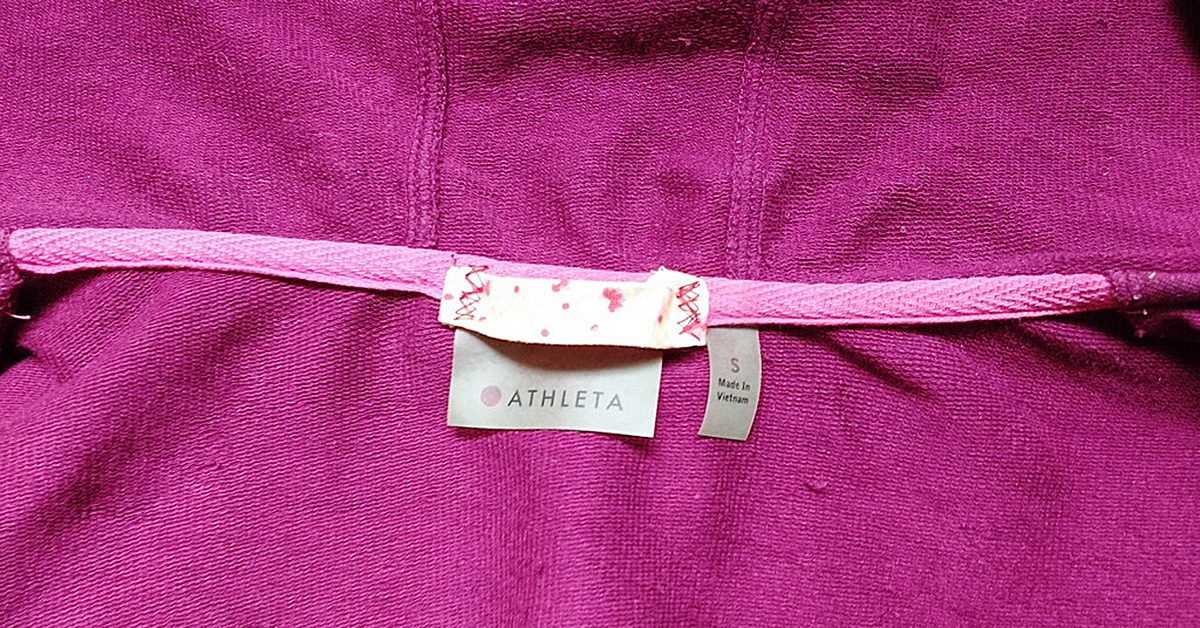
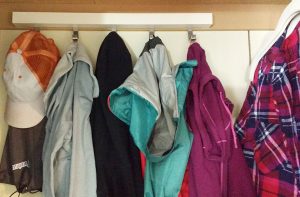
It’s times like these when you need to put your sewing skills to use. I like to add jacket loops using double fold binding I have on hand. I sew it on with a zig zag stitch and I find the stitching to be very inconspicuous on the exterior neckline (and it’s often hidden by the hood anyway.)

I find the stitching to be very inconspicuous on the exterior neckline (often hidden by the hood).

I find the stitching to be very inconspicuous on the exterior neckline (often hidden by the hood).

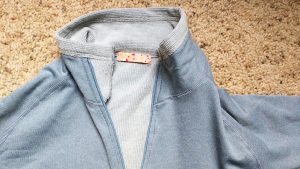
I used the same binding on this gray pullover. I love the pop of color it gives the jacket.

I used the same binding on this gray pullover.

I used the same binding on this gray pullover.

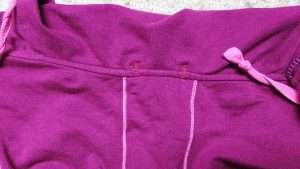
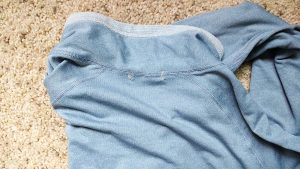
The zig zag stitching is barely noticeable from the back view. Perfect.

The zig zag stitching is barely noticeable from the back view.

The zig zag stitching is barely noticeable from the back view.

Now I can hang both jackets without the metal hooks on that hanger digging into the fabric of either jacket.

Now I can hang both jackets without the metal hooks on that hanger digging into the fabric of either jacket.

Now I can hang both jackets without the metal hooks on that hanger digging into the fabric of either jacket.

The gray hoodie is on the left and the maroon jacket is on the right. I love organization and I love that I made it happen with my sewing skills!

The gray hoodie is on the left & the maroon jacket is on the right.

The gray hoodie is on the left & the maroon jacket is on the right.

Handy dandy skills

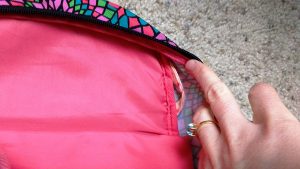
Here’s something else I fixed by knowing how to sew. My daughter’s backpack had no loop on the interior of the backpack for carrying a house key. There was a loop on the exterior, but that’s not very safety conscious, is it?

I took matters into my own hands and modded out the backpack by sewing in my own loop (again with that pretty flowered binding in the photos above). Now she can securely carry a house key tucked safely inside her backpack.

I took matters into my own hands & modded out the backpack by sewing in my own loop (again with that pretty flowered binding in the photos above).

I took matters into my own hands & modded out the backpack by sewing in my own loop (again with that pretty flowered binding in the photos above).

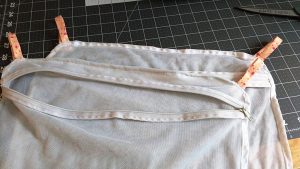
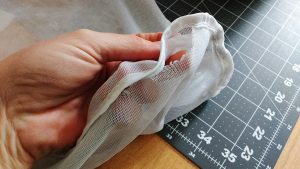
I bought two lingerie bags at Target a while ago and one has started to fray at the seam. While lingerie bags are fairly inexpensive, I knew I could save this one by flipping over the seam and sewing a zig zag stitch.

I bought two lingerie bags at Target a while ago & one has started to fray at the seam.

I bought two lingerie bags at Target a while ago & one has started to fray at the seam.

I also added hanging hooks on each side of the bags. I again used that pretty pink binding and now I have no more. At least it will live on in infamy in all of these great home DIY projects I’m showing you.

I also added hanging hooks on each side of the bags.

I also added hanging hooks on each side of the bags.

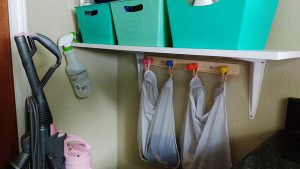
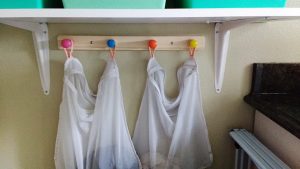
I installed these hooks by our laundry and cleaning station and hung the lingerie bags there.

I installed these hooks by our laundry & cleaning station and hung the lingerie bags there.

I installed these hooks by our laundry & cleaning station and hung the lingerie bags there.

This easy access makes it a breeze for my small kids to put things like their tights and other delicates right into the bags so I have everything ready for laundry day.

This easy access makes it a breeze for my small kids to put things like their tights and other delicates right into the bags so I have everything ready for laundry day.

This easy access makes it a breeze for my small kids to put things like their tights and other delicates right into the bags so I have everything ready for laundry day.

What kind of modifications have you made to home items with your sewing skills? Let us know in comments!

———————————————————————————–
Charlotte Kaufman is a writer and sewist in Mammoth Lakes, California. She specializes in marine and home interiors and continues to fall more and more in love with quilting. You can follow her at charlottekaufman.com.
Pet Sewing Project Roundup

Pet Sewing Project Roundup

Do you have four-legged family members? I’ve got four cats. They’re my kids. My fur babies won’t take well to clothes, but I often imagine how cute they’d look in certain outfits. They’re also not awesome about sleeping in beds I make them, but that doesn’t stop me from trying! If your four-legged family members are better about using or wearing the projects you make them, check out these cool projects.

Dog Boots

Does your dog hate going out in the snow? Make them a set of boots. Their feet won’t get cold and the boots protect their pads from the salt and sand used to keep you from slipping. They’re also adorable and stylish. The grippy bottoms on these boots help your dog keep their balance and the fleece lining dries out quickly.

Each boot takes less than 10 minutes to make and fit on any of their four feet. The quick and easy nature of these boots means you don’t have to worry about making new ones when they inevitably wear out. If you’ve got a small dog, you might be able to make these dog boots with your scrap stash.

Pet Beds

Does your pet destroy blankets trying to make themselves a bed? Or maybe, like my cats, they take up more space on the bed than they give you? Show them you love them and save yourself money on new blankets or a bigger bed with these cute pet beds. They come in three sizes and styles suitable for any pet. Each one has a contrasting inner pillow for added comfort. Give your pet a comfortable place to sleep and choose easy care fabrics so you can wash it any time you need!

Dog Coat

Pet Sewing Project Roundup

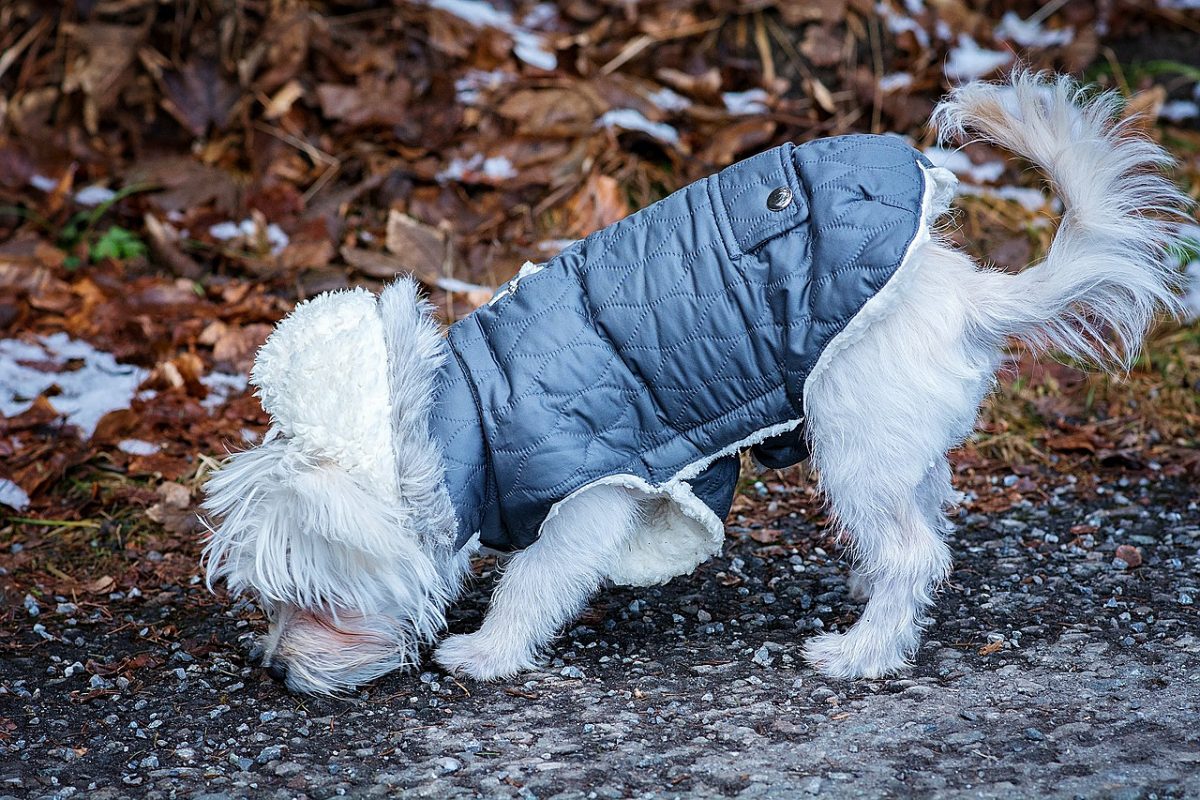
Dogs who get shaved regularly as part of their grooming regimen feel the cold more deeply than those who keep their full body of fur. Help your dog withstand cold weather by making them a dog coat (Note: this can also be adapted to make a coat for hairless cat breeds). Depending on your dog’s tolerance, you can add additional lining for more insulation or use snaps or buttons instead of Velcro if your dog is skittish with noises.


Dog Pullovers

Does your dog already have a coat, but still looks cold? Maybe they need a hood! Or maybe they’ll just look adorable with a hood pulled up and their nose peeking out. Either way, try this cute pullover pattern. It comes in four sizes, so you’ll be sure to find one that fits your pup – big or small.

What items have you sewed for your pet? Take some pics and share!

DIY – Elegant Upscale Apron

Elegant upscale apron

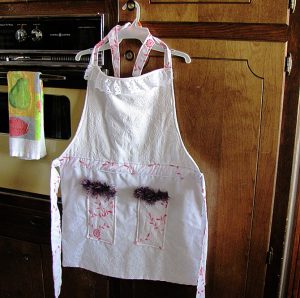
Elegant upscale apron

A cherished friend gifted me some very beautiful, elegant materials. She purchased them long ago with the intention of making an apron but never got around to it. I thought, “How wonderful, I’ll surprise her by making it for her!” I designed this apron to be elegant and classy while also being functional. This Elegant Upscale Apron really hit the spot. She adores it and I hope you will too!
***ProTip: When making clothes of any type, washing and ironing before sewing are extremely important!! Measurements are based on material already washed. If they aren’t washed before sewing, they may shrink by an inch or more when washed later on, resulting in the clothing being too small to wear.
Level: Beginner
Time to Complete: In A Weekend
Sewn By Machine: 3/8″ straight stitch unless otherwise specified
Sewn By Hand: Purple thread to sew pocket accents

**Tip: Iron cut pieces before sewing and in between each step. This helps in the sewing process as well as setting the stitches to lessen unraveling with age. And the extra bonus-the end results tend to look more professional as a result. 


Materials:

These fabrics are relatively thin. Aprons generally require a thicker material to help resist staining of clothing underneath. I used a piece of thicker off-white fabric as the backing to keep the elegant style while serving as an effective apron as well. The thicker backing also eliminates the need for a middle layer of batting. 

Top:

Measurements for Top – 14″ W<
Measurements for Bottom End – 23″ W
Length at middle – 18″ L

Skirt:

1 – 23″ W x 18″ L – Lace Fabric
1 – 23″ W x 18″ L – Backing

Neck Ties:

2 – 3″ W x  20″ L – Same material as used for Pockets

Waist Ties:

2 – 4″ W x 23″ L -Same material as used for Pockets

Neck Accent:

– 13″ W

Waist Accent:

1 – 23″ W x 3″ L Accent-Same material as used for Pockets

Pockets:

25″ W x 14″ L – Same material as used for Waist Accent
2 – 5″ W x 14″ L – Backing

Pocket Accents:

2 – 5″ W – Snazzy Boa

Purple Thread:

To sew pocket accents (boa) on by hand
Cut fabric pieces.

Cut fabric pieces.

**Tip: When I’m  ready to cut my fabric, I place the line to be cut at the end of my cutting board. I use the end of the board to guide the scissors. This results in a straighter, cleaner cut.

Instructions:

I recommend using fabric scissors instead of a roller when cutting these materials. I found the embroidery and embellishments in these materials are a little too much for the roller to cut through with one or even two strokes.

These are my favorite fabric scissors. Great slicing with minimal fraying.

  1. Wash and iron all material except pocket accents unless you use a washable material for pocket accents.
  2. Cut out all material using the above measurements.
    • I cut the boa accent pieces a couple of inches longer than needed, about 7 in. in case the hand sewing with the clear thread makes it a little shorter. When done, I cut off the extra.
    • After I measured the top section of the apron, I used a pencil to trace the curve from top to bottom. Then I folded the top in half and cut the curve on both sides so they would be symmetrical.
  3. Skirt
    • Pin and sew with the lacy fabric and backing right sides together, leaving a couple inches on one end to pull the fabric right side out after sewing. Cut diagonally outside the corners to help create more well-shaped corners after turning right side out. Turn right side out and iron.
  4. Top
    • Pin and sew fabric and backing for top, right sides together. Leave an opening to pull the top right side out. Trim corners. Turn right side out.
    • Top stitch around the top part of the apron, making sure to stitch closed the opening used to pull the fabric through.

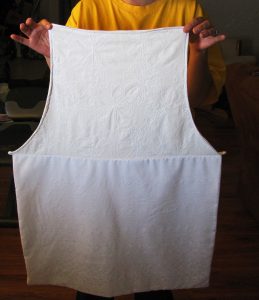
      Top and skirt sewn into one piece.

      Top and skirt sewn into one piece.

  5. Sew the top and skirt together, right sides together. Iron with the seam pointed down.
  6. Pockets
    • Pin and sew with 1/8″ seam the fabric and backing for the two pockets right sides in. Leave an opening in the top of the pockets. Trim corners, turn right side out and iron.
    • Top stitch with 1/8″ seam the top of the pockets only, making sure to sew the opening closed.
  7. Waist Accent Piece
    • Fold accent piece in half, right sides together. Iron to make crease for accurate sewing. Sew with 1/8″ seam the length or the strip, leaving one end open. Trim corners and turn right side out. Iron to create flat strip. Top stitch with 1/8 in. seam the open end closed.
      **DO NOT top stitch around strip yet. That will be done when sewing the accent piece to the apron.
  8. Waist and Neck Ties
    • Fold all 4 waist and neck straps in half, right sides together. Iron to make crease to help with accurate sewing.
    • Sew 1/8″ the length of the strip, leaving one end open. Trim corners and turn right side out. Iron to create flat straps.
    • Top stitch 3/8″ around each strap.
  9. Time to put all the pieces together. Yay!!
    • Place the accent strip on top of the apron over the seam where top and bottom pieces were joined.
    • Place one of the waist ties at the same spot but on the underside of the apron.
    • Sew the accent strip and waist tie with the X box often found to be used for ties since it creates a stronger hold.
    • Pin accent strip over the seam of the apron, making sure it is straight and level. Iron.
    • Top stitch the accent piece to the apron.
    • Sew the other waist tie on back of apron. Top stitch accent strip with waist tie behind, the same as with the other, using the X box to secure the waist tie.

      Putting it all together.

      Putting it all together.

    • Sew neck ties onto the top corners of the apron using the same X box.
  10. Hand sew boa pieces onto pockets. If you have a material more suited for machine, sew them on.
    • I couldn’t find clear thread anywhere, which is what I prefer to use with embellishments like these. So instead I used a purple thread closely matching the color of the boa.
  11. Sew both pockets on the apron using 1/8″ seam.

Pre-heat the oven. Put on your new Elegant Upscale Apron. Time to bake!

Stacey's Stitches

Stacey’s Stitches 

Hi all! I’m Stacey Martinez 🙂

I love to design imaginative custom items for my active, crazy family. Bright

colors and beautiful fabrics sing “Stacey, Stitch Me!”

Let your imagination inspire you to breathe personality into every stitch!

Please feel free to post comments, questions, and pictures of your own Elegant Upscale Aprons. I can’t wait to see your creations!