Tell-Tale Traits of a Primitive Quilt

Tell-Tale Traits of a Primitive Quilt

As I step further into the world of sewing, I find that there’s plenty of information out there that I didn’t even know to look for. My primary focus in sewing has been patchwork designs, and I definitely continue to hold a passion in regard to that style of work. I’d love to have a patchwork purse, patchwork clothing, patchwork pillows…
My primary focus in sewing has been patchwork designs, & I definitely continue to hold a passion in regard to that style of work.

My primary focus in sewing has been patchwork designs, & I definitely continue to hold a passion in regard to that style of work.

But I’m not sure I fully realized how many other avenues there are to plan out a quilt before I started looking, and those are details that can be interesting finds! Some of them, though, require a bit of an explanation to truly understand what a quilt of that nature is, and this post will explore one of those types in particular.

Once upon a time

I was in a social media marketing program where, for two of the classes, I had to keep a blog for a business. For one course, I used my author career as the business. For the other, I created a could-someday-be-real quilt company. It was fine, by the way, for the company to not actually be real in the current world!

The idea was that we were to explore marketing concepts through the blog and end up with a marketing plan — at least generally — by the end of the semester. During that quilt-company semester, I came across the idea of a primitive quilt, which was a fairly new phrase to me. At the time, I focused mostly on the social media presence of one particular company, but I find myself now thinking on what exactly a primitive quilt is.
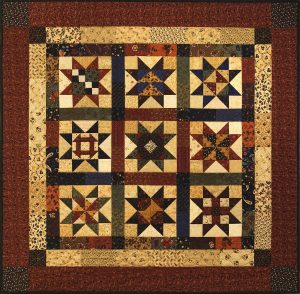
During that quilt-company semester, I came across the idea of a primitive quilt, which was a fairly new phrase to me.

During that quilt-company semester, I came across the idea of a primitive quilt, which was a fairly new phrase to me.

If I claim to be quilter, after all, it might help to know the basic terminology!

After research and consideration of a number of quilts with the label of “primitive,” I offer you a number of details that help to make a primitive quilt… Well, primitive! Note: These are commonalities — not necessarily requirements through and through!
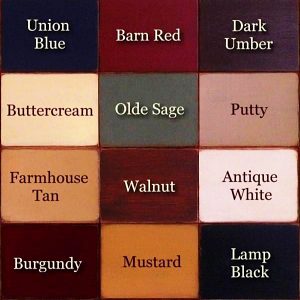
A primitive quilt will make use of neutral colors, though things like dark red & dark blue can make appearances.

A primitive quilt will make use of neutral colors, though things like dark red & dark blue can make appearances.

Basic Coloring

By this, I don’t mean a color-equivalent to no-artificial-flavoring! I mean that the colors are typically more straightforward than neon oranges and vivid pinks. Instead, a primitive quilt will make use of neutral colors, though things like dark red and dark blue can make appearances. These quilts often employ the colors that you might think of when words like “rustic” come to mind — which rationalizes why red and blue are used in regard to red barns and blue skies. In the end, if you plan on making a primitive quilt, you might want to keep the lime green fabric stored away for another project!

Simple Fabric Patterns

Like the coloring, the fabrics, too, are less elaborate than what might be common for a more vividly styled work. Typically, patterns — rather than fabrics — steal the focus in primitive quilts, so no fabric should be so busy or stand-out that it takes attention above and beyond the level of the quilt pattern as a whole. For this, solid colors or very simple patterns on your fabric are your best bet for forming your primitive quilt.

Basic Shapes

Don’t fancy it up!

Don’t fancy it up!

While the overall quilt might have a remarkably interesting visual in regard to its structure, the pieces of fabric that make up that visual are often based on the simplest of designs, like triangles, squares, and rectangles. This doesn’t mean that only geometric shapes can be used for your quilt though! Other shapes can come into play, but make sure to keep them simple to provide that outdated appearance that’s so synonymous with the rustic, primitive design. Think to yourself what the simplest method of delivering an object or shape is — don’t fancy it up!—and you could have the right look!

Empty space

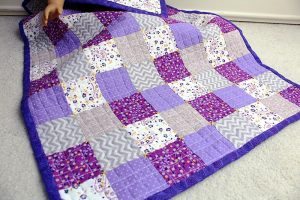
The patterns for primitive quilts are structured, but those empty spaces between the distinct pattern formations can be just as organized. Now, this isn’t necessarily the case for every quilt! It’s not unheard of though for darker, geometric patterns of multiple fabrics to be separated by pieces of lighter fabric that are larger than any individual dark piece. It creates an overall repetition to the quilt, and the result is an almost soothing effect in that the contrast softens the appearance to something calming and steady. As I said, this tactic might be more pronounced in some primitive quilts than others, but don’t be shocked if you notice it fairly often for quilts of this style.
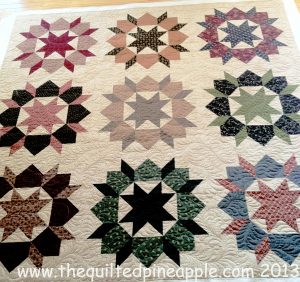
Geometric patterns of multiple fabrics to be separated by pieces of lighter fabric that are larger than any individual dark piece.

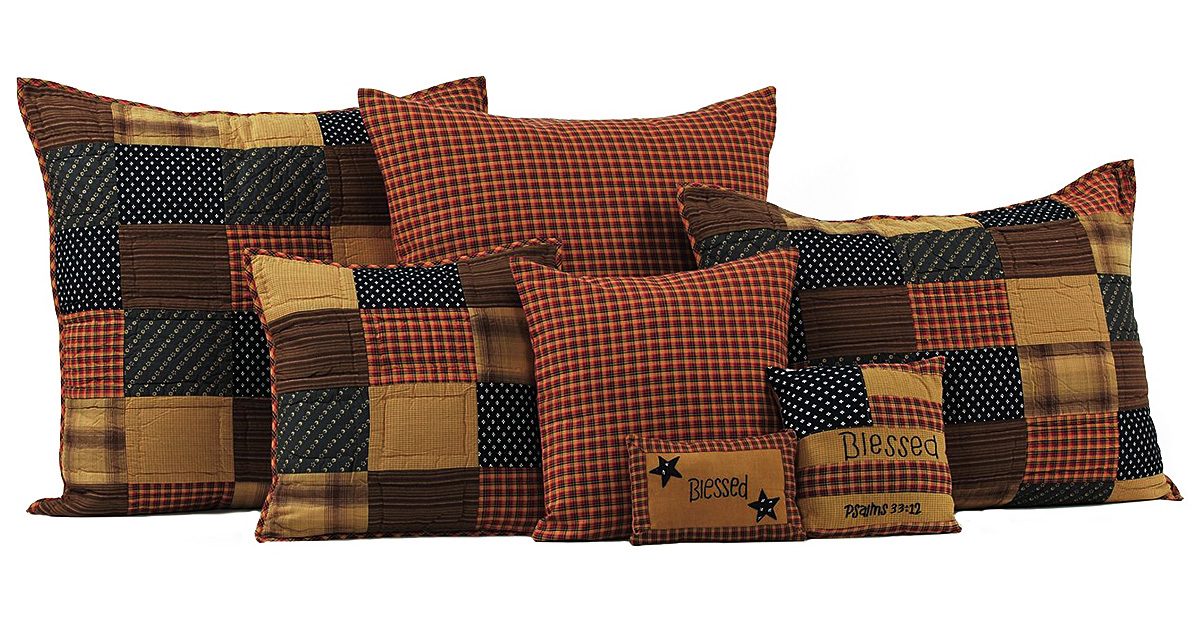
Geometric patterns of multiple fabrics to be separated by pieces of lighter fabric that are larger than any individual dark piece.
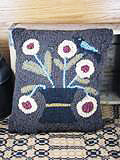
If you keep these things in mind, you’re on your way to planning a primitive quilt!


References:
Alcorn, J. (2014, September 10). What Is Primitive Home Decor? Retrieved from: https://www.primitivestarquiltshop.com/blogs/quilt-shop-gathering-place/24406593-what-is-primitive-home-decor
Craftsy. (2017, April 24). Can You Spot a Primitive Quilt? Retrieved from https://www.craftsy.com/blog/2017/04/primitive-fabric/
Cactus & Succulent Fabrics for You to Love

Cactus and Succulent Fabrics for You to Love

California’s deserts are super blooming right now thanks to a long and wet winter. While we still have over 15 feet of snow in the ground here in Mammoth Lakes, California, I am not immune to dreaming of spring and the beauty of a flowering desert.

With that in mind, I give you NINE fabric lines featuring cacti, succulents, and the beauty of the high and low deserts.

Desert blooms

First we start with Rae Ritchie’s debut collection, Desert Bloom.

First we start with Rae Ritchie’s debut collection, Desert Bloom.

First we start with Rae Ritchie’s debut collection, Desert Bloom.

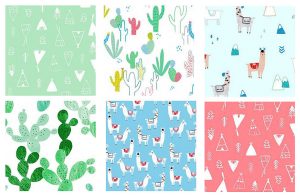
Lovely llamas

If you are looking for something with a little more ‘prickly’ whimsy, check out No Drama Llama by Dear Stella House Designer.

If you are looking for something with a little more ‘prickly’ whimsy, check out No Drama Llama by Dear Stella House Designer.

If you are looking for something with a little more ‘prickly’ whimsy, check out No Drama Llama by Dear Stella House Designer.

Not satisfied with the selection of llamas above? Don’t fret, here are more Lovely Llamas by Michael Miller.

Not satisfied with the selection of llamas above? Don’t fret, here are more Lovely Llamas by Michael Miller.

Not satisfied with the selection of llamas above? Don’t fret, here are more Lovely Llamas by Michael Miller.

California dreaming

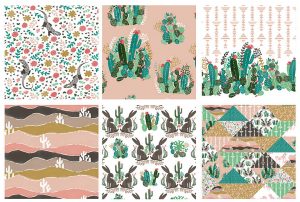
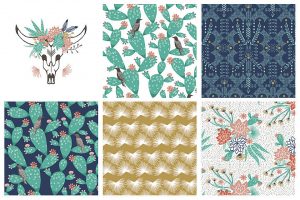
Hawthorne Thread’s Palm Springs line brings us deep into California with cacti, lizards, geometry, and the sweeping vistas of a desert skyline.

Hawthorne Thread’s Palm Springs line brings us deep into California with cacti, lizards, geometry & the sweeping vistas of a desert skyline.

Hawthorne Thread’s Palm Springs line brings us deep into California with cacti, lizards, geometry & the sweeping vistas of a desert skyline.

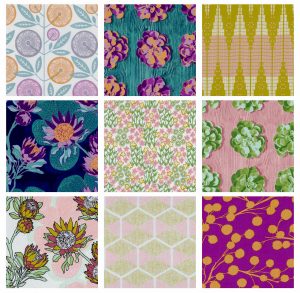
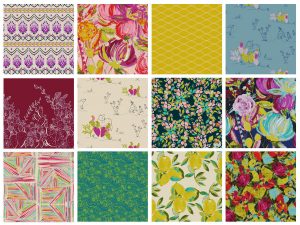
Joel Dewberry’s Cali Mod fabric continues with the California theme. He absolutely knocks it out of the park with images of succulents that look like a Warhol painting, and vibrant and metallic colors combined.

He absolutely knocks it out of the park with images of succulents that look like a Warhol painting, and vibrant & metallic colors combined.

He absolutely knocks it out of the park with images of succulents that look like a Warhol painting, and vibrant & metallic colors combined.

Back into the desert

The next two lines are both by Hawthorne Threads and they each coordinate with the other, as well as with Palm Springs above. Here you have Mojave by Hawthorne Threads.

Here you have Mojave by Hawthorne Threads.

Here you have Mojave by Hawthorne Threads.

And this is Coyote, also by Hawthorne Threads. They basically have the market cornered on any type of desert, cacti, or succulent-themed fabric you could want. The motifs make me want to sew a super lightweight quilt and wrap myself in it on a porch somewhere in Joshua Tree as I watch the sunset.

The motifs make me want to sew a super lightweight quilt & wrap myself in it on a porch somewhere in Joshua Tree as I watch the sunset.

The motifs make me want to sew a super lightweight quilt & wrap myself in it on a porch somewhere in Joshua Tree as I watch the sunset.

Heading to Arizona

Bari J. Ackerman’s fabric line, Sage, moves us from the California deserts to her home state of Arizona. These fabrics are individually works of arts, together, they are really visually stunning. The maximalist floral and fruit prints combined with repetitive patterns, bright colors, cacti, and desert animals render me incapable of picking a favorite fabric. I love and want them all!

I love & want them all!

I love & want them all!

Succulence

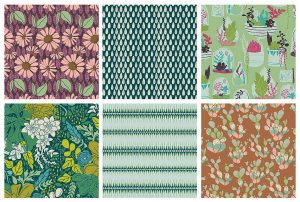
Lastly you have Bonnie Christine and Art Gallery Fabric’s Succulence line. The only plants I can keep alive are succulents; it’s nearly impossible to kill them. They thrive in amazing conditions. Bonnie has paid homage to this amazing ability to survive with even tiny amounts of water in this retro-inspired line of succulent fabrics.

Lastly you have Bonnie Christine & Art Gallery Fabric’s Succulence line.

Lastly you have Bonnie Christine & Art Gallery Fabric’s Succulence line.

Did I miss any? Do you have any other favorite cacti, succulent, or desert-inspired fabrics you love? Let us know about them in comments!

———————————————————————————–
Charlotte Kaufman is a writer and sewist in Mammoth Lakes, California. She specializes in marine and home interiors and continues to fall more and more in love with quilting. You can follow her at charlottekaufman.com.
DIY Chicken Aprons and Hen Saddles

DIY Chicken Aprons and Hen Saddles

Who knew chickens wore clothes?

Who knew chickens wore clothes?

When my girlfriend, Ella, asked me if I could make her a ‘chicken apron’ I thought perhaps she meant something like a heavy duty cover for when she is out in her yard working with her chickens. I of course said yes, but she quickly corrected me and explained that the aprons in questions were actually for her chickens.

Who knew chickens wore clothes?

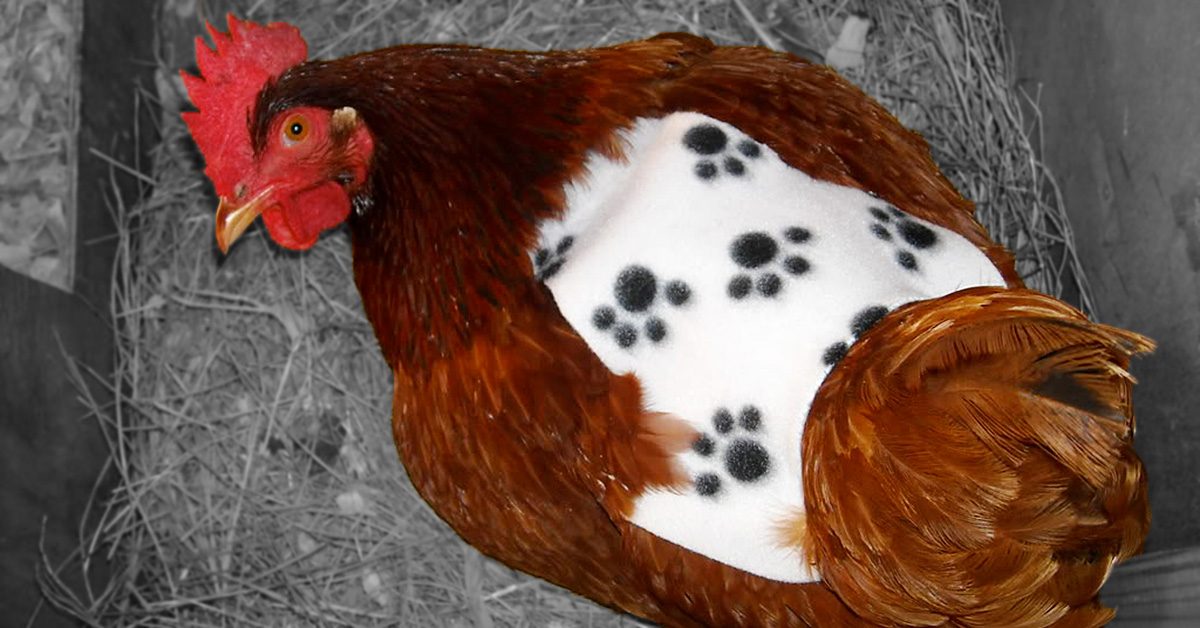
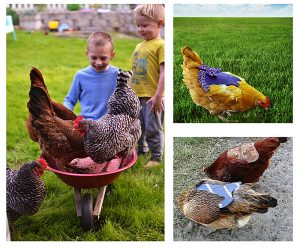
It turns out that other chickens can be mean and may pick on or peck a member of their brood (even to death). Additionally, roosters can sometimes be too aggressive with hens. Chicken aprons, also called chicken capes, or hen saddles, can protect their backs from the claws of the roosters.

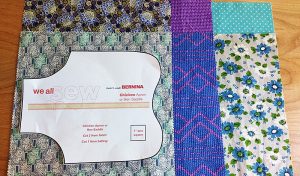
While I often create my own patterns when I sew, creating something like this for Ella’s chickens was beyond me. She found me a free pattern, which you can also follow here, and I got to work.

Heads up that this project is perfect for any pre-cut layer cakes (10″ x 10″ squares) you may have on hand.

Photo credit, left to right: Ella Sherman, MyPetChicken.com & WeAllSew.com.

Photo credit, left to right: Ella Sherman, MyPetChicken.com & WeAllSew.com.

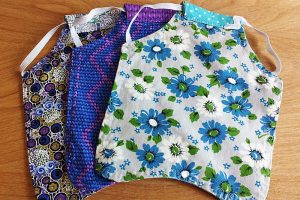
My oldest daughter helped me pick out some fabrics and we sent a picture for Ella to choose from. I planned to make her three reversible aprons.

Here’s another interesting thing we learned

Never dress your chickens in pink, or red; it brings out their cannibalistic instincts and could result in the chicken getting pecked to death. Red & pink = no no.

Beware of chicken scratch. Red & pink = no no.

Beware of chicken scratch. Red & pink = no no.

Sketch it out

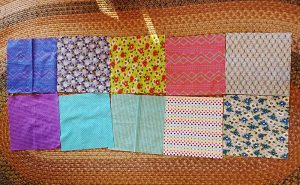
With my six fabrics decided, I drew out a pattern on each one. All of these are layer cakes squares I had in my fabric stash.

All of these are layer cakes squares I had in my fabric stash.

All of these are layer cakes squares I had in my fabric stash.

Ella lives in Southern California so she didn’t need any type of warmth or real thickness for batting. Still, I wanted them to be crisp, so I added a layer of Pellon 931TD, Fusible Midweight Interfacing to one side of each apron.

I wanted them to be crisp, so I added a layer of Pellon 931TD, Fusible Midweight Interfacing to one side of each apron.

I wanted them to be crisp, so I added a layer of Pellon 931TD, Fusible Midweight Interfacing to one side of each apron.

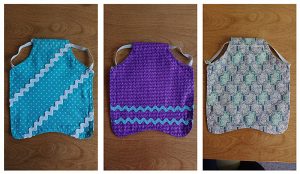
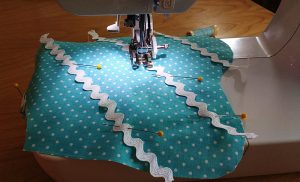
Once three of the sides had interfacing, I turned to decoration. If you plan to add rick rack or bows, do it before you sew the sides together.

Once three of the sides had interfacing, I turned to decoration.

Once three of the sides had interfacing, I turned to decoration.

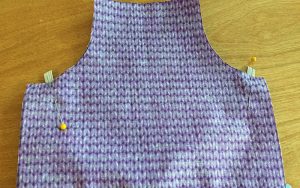
Cut out a 10.5″ piece of elastic for each bib. You will pin each end where the arm (wing?) holes would be.

You will pin each end where the arm (wing?) holes would be.

You will pin each end where the arm (wing?) holes would be.

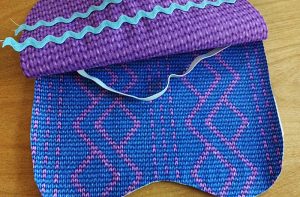
Place the layers, right sides together and pin (here you can see the elastic sandwiched between the layers).

Here you can see the elastic sandwiched between the layers.

Here you can see the elastic sandwiched between the layers.

Ok, here we go…

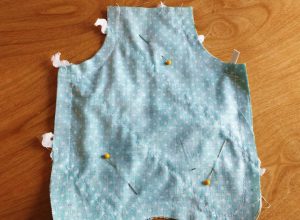
This is how it should look before you begin sewing. The pattern I used called for a ½” seam allowance, probably because it also called for thick batting. Choose your own seam allowance and sew all the way around, leaving only the neck hole completely open.

This is how it should look before you begin sewing.

This is how it should look before you begin sewing.

Here’s how mine looked after sewing all the way around. I trimmed away the excess fabric and made small snips around the inner and outer curves so they would lie flat once I turned the fabric right sides out.

Here’s how mine looked after sewing all the way around.

Here’s how mine looked after sewing all the way around.

Two important things to do once you’ve turned the fabric

  1. Take your time and run your fingers along the inside seam, popping the fabric out so it shows a great shape.
  2. Iron! I both ironed and starched mine once I had turned them.

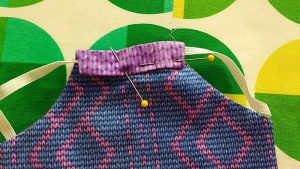
Next, turn the neck hole down first a ½ inch then another ½ inch. Tuck the piece of elastic into where you’ve turned it, creating a casing. You will sew across the bottom of the folded fabric, taking care not to catch the elastic. When you are done, you should be able to move the piece of elastic freely back and forth in the casing.

When you are done, you should be able to move the piece of elastic freely back & forth in the casing.

When you are done, you should be able to move the piece of elastic freely back & forth in the casing.

Top stitch!

Have fun with your top stitching. I used a different decorative stitch on each apron.

And there you have it

This is easily a 20 minute project if you have all your supplies at hand. It’s wonderful for layer cakes and if you have friends who own chickens, these would make great handmade gifts.

It’s wonderful for layer cakes & if you have friends who own chickens, these would make great handmade gifts.

It’s wonderful for layer cakes & if you have friends who own chickens, these would make great handmade gifts.

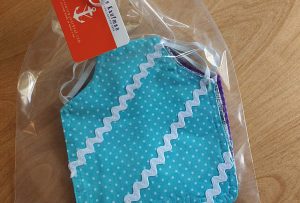
Pop your presents in some pretty wrapping and send them off to be wild with some hens!

Pop your presents in some pretty wrapping and send them off to be wild with some hens!

Pop your presents in some pretty wrapping and send them off to be wild with some hens!

Have you ever made chicken aprons or a unique piece of clothing for an animal? Tell us about it in the comments!

———————————————————————————–
Charlotte Kaufman is a writer and sewist in Mammoth Lakes, California. She specializes in marine and home interiors and continues to fall more and more in love with quilting. You can follow her at charlottekaufman.com.
It Takes a Village

It Takes a Village

I was thinking about writing a post this week about some of the favorite things that I’ve made throughout the years. But, once I really started trying to decide, I realized I had way too many ‘favorites’ to put in just one post, mainly because I’ve made a ridiculous amount of stuff. Truth be told, I can’t remember a lot of it.

Also, ‘favorite’, is a bit of a shifty word. I have favorites for all kinds of reasons: favorite fabric, favorite pattern, favorite last minute construction miracle, favorite vintage piece, favorite thing made without a pattern, favorite complicated pattern, favorite funky design detail, favorite sewing technique.

So, I decided instead to write a little about some of the most memorable things I’ve made. Most (perhaps all) of them listed here were for HBO’s Boardwalk Empire, designed by John Dunn and Lisa Padovani.

And speaking of designers…

I just want to clarify that every show and movie has a Costume Designer. Sometimes, on low budget and indie or college productions, the costume designer is the same person who also makes and shops the clothes. This is not the case on any mid to high budget shows. It takes a village to create the finished product. I didn’t design anything for Boardwalk Empire or any of the other major television shows and movies I’ve worked on as a tailor and pattern maker. I just make what is in the designer’s head.

How do I know what’s in the designer’s head?

Sometimes I get a sketch, sometimes pictures and photos from magazines and catalogues, sometimes vintage garments to use as a starting point, and sometimes it’s just a conversation with a scribbled line drawing on a manila oak tag.

And one other thing about the village: I made the patterns for all of the pieces to follow but, most times, I had the help of very talented tailors in the construction of the finished product.

A (partial) list of most memorables:

Outfit from an existing vintage pattern.

Outfit from an existing vintage pattern.

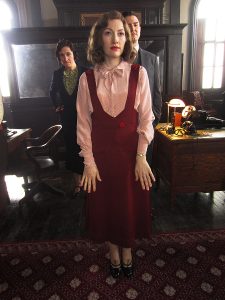
I used an existing 1930s vintage pattern for this ensemble. I altered the pattern slightly for fit. It’s a bit hard to see in the photo, but the jumper has an asymmetrical over lap opening in the front (that button is functional.) If I recall correctly, I did put together the blouse but I know that the jumper was constructed by one of the tailors in the shop, Amy.

Showgirl ensemble:

Showgirl ensemble.

Showgirl ensemble.

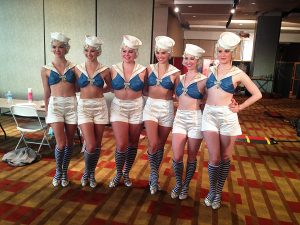
We made quite a few showgirl ensembles for Boardwalk but the sailor girls were my favorite. The trickiest part of any of the showgirl things was always the time constraints. We routinely had a week (at most) to construct the outfits, and this was on top of all the other things we were making and altering. Thankfully, the actresses playing the showgirls remained the same throughout the season so once I had their measurements I was able to pattern (relatively) efficiently and go straight to fabric without doing any sort of mock up. Any showgirl extravaganza was always a true group effort, as in the day before the costumes were needed, almost every single person in the shop was working on them.

Costume involving fish:

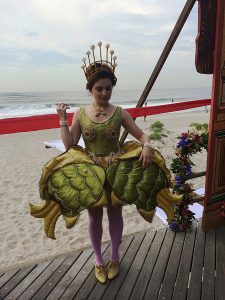
Costume involving fish.

Costume involving fish.

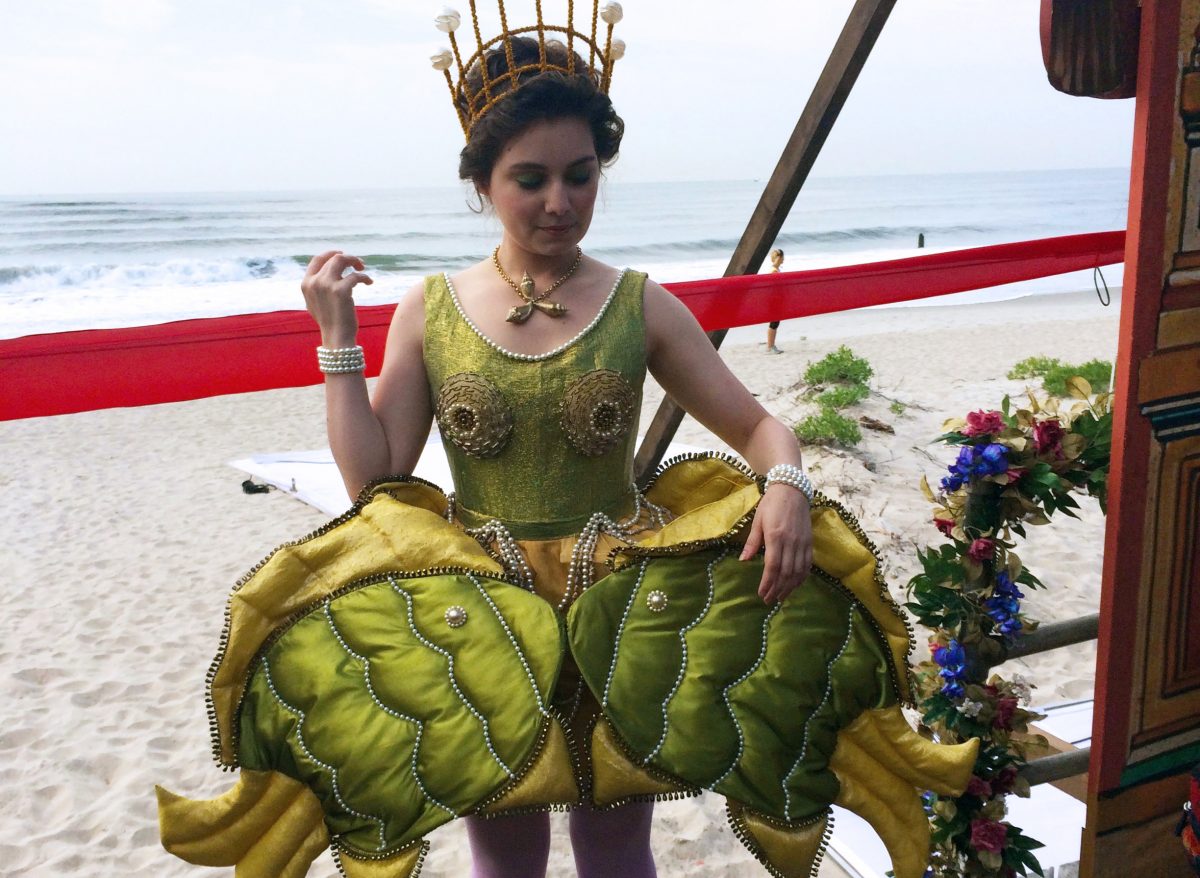
We made two of these for the final season of Boardwalk Empire. The fish have batting and wire in them to make them slightly three dimensional, and there are two more on the back. These took an especially long time as all the pearl trim had to sewn on by hand.

Complete outfit in shortest amount of time:

Complete outfit in shortest amount of time.

Complete outfit in shortest amount of time.

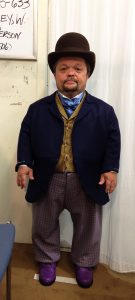
I will always remember this one. I had literally two days to get this done. On the morning of the first day, the actor came in for measurements. I started patterning as soon as he walked out the door. John (designer) found fabric he wanted to use that we already had in house so I was able to cut as soon as my patterning was done. I handed off the jacket pieces to one person and the pants to another and I put together the vest. The very next afternoon, I did the fitting. As you can see from the photo, the only changes needed were a sleeve and pant hem. This illustrates the importance of proper (and extensive) measurements.

Strangest costume:

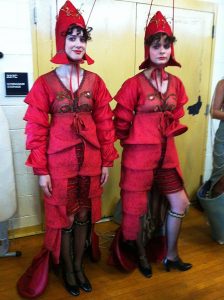
One of the oddest costumes I’ve made were these lobsters, again for Boardwalk.

One of the oddest costumes I’ve made were these lobsters, again for Boardwalk.

One of the oddest costumes I’ve made were these lobsters, again for Boardwalk. I think the over bodice and sleeves were attached to the tail bit and it was put on like a coat, snapping and tying center front. I do remember the use of quite a large amount of wire.

Most adorable:

Most adorable.

Most adorable.

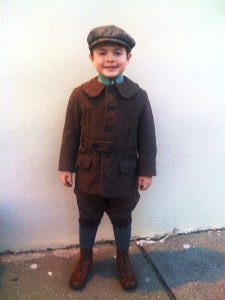
I patterned all of the boys’ things for Boardwalk. The principal men’s suits were made by Greenfield’s in Brooklyn but the in house shop that I ran always did the suits and jackets for the younger boys.

So that’s a short list of some of my most memorable projects. There are definitely many more though. One of the best things about my job is that there is always something new to make.

Sewing Circles for Charity

Sewing Circles for Charity

Many people have items related to charitable donations on their new year’s resolutions list. If you’re one of them, you can use your sewing skills to spend more time with other sewers and achieve your charitable donation goals for the year by having a charity-focused sewing circle. Here’s how to get started.

Get out in your community and find a cause to support.

Pick a charity

Sewing Circles for Charity

Are there local organizations that would appreciate handmade items? Perhaps a shelter would appreciate clothing items or hospital would appreciate baby hats? Animal rescues may appreciate blankets or pet shirts. Get out in your community and find a cause to support! Ask to speak to the director or someone in charge of community relations. Tell them you want to contribute handmade items on a regular basis and see what they can use. Once you find a charitable organization in your community and understand their needs, you can get started planning and promoting your group.

Find a pattern

Once you know what the charity needs, find an easy to make pattern. It should be simple enough for a beginner to make while interesting enough to engage more experienced sewers. Make sure you have numerous copies and bring them with you to each sewing circle so newcomers or anyone who forgot theirs can get a copy without hassle.

Pick a date, time, location

Will this group be in your home? Do you have space for several sewing machines to run simultaneously? If not, you’ll need to find somewhere more suitable. Local libraries, churches or community centers may be able to host your sewing circle. Make a few calls, send a few emails. Most people and organizations rally around good causes so it shouldn’t take long to find a suitable place.

Working with their availability and yours, pick a recurring date for the sewing circle. Once a month is a good frequency. It’s often enough to keep people interested and excited, but not so often as to feel like a burden. Decide what time of day you’d like to meet and get that room booked with your site.

Invite and promote your sewing circle

Facebook and other social media outlets can be a great way to promote your sewing circle. Create a public event and include all the details about the charity as well as meeting time, location, etc. Invite your friends who sew and encourage them to invite others. See if the location hosting your charity sewing circle is willing to promote the event too. Ask the charitable organization if they’re willing to promote it to their members and donors.

Post fliers (with permission) in community centers, craft stores, fabric stores, senior centers, etc. Include an appealing photo or graphic along with the text information to entice people to look at it.

No matter how you promote it, make sure people understand what they need to bring (fabric, sewing machine, etc.) Also, be sure to include contact information as well in case people have questions.

Collect finished projects

As the charity sewing circle meets over the course of several weeks or months, projects will be completed. Collect them and deliver them to the designated charitable organization. Be sure they understand about your sewing circle – they may promote it to their members and donors now that they’ve seen results. Keep doing this on a regular basis and provide any feedback from the charity to group members. This will keep them engaged and motivated to continue donating.

A Pleating Problem

A Pleating Problem

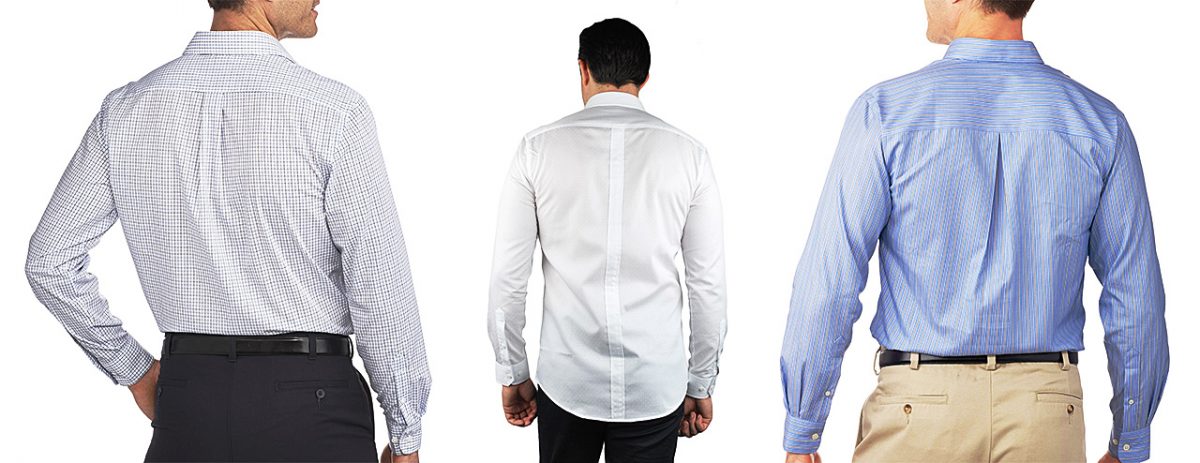
You know the back pleats that are almost always present on the back of button front dress shirts? The ones that are sewn into the shirt body where it attaches to the yoke? Sometimes there are two, one on each side and sometimes, often on women’s shirts, there is a single big one at the center back. They exist for the purpose of ease, or freedom of movement but, what they really do, is just create a whole lot of extra unruly fabric and make a shirt look as if it is too big.

The camera adds ten pounds…

It’s basically true that the camera adds ten pounds so most things in film and television are fit without extra (usually un-needed) fabric mucking up the svelte look.

I spend a lot of time taking these pleats out of shirts, partially because they seem to be in almost all shirts except for ones specifically called ‘slim fit’ and, truth be told, it’s a rather complicated alteration if done correctly.

Step One:

Take things apart. Separate the shirt back from the yoke. If you have two side back pleats, you don’t have to take the whole thing apart. You can stop after the pleats are free on either side and leave the center part still attached. If you have a center pleat, you’ll have to take the whole seam apart. Note how much fabric is in the pleat or pleats. This will tell you how much to take out of the side seam.

Step Two:

Take more things apart.

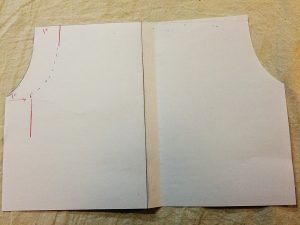
Take apart the back arms eye. I usually go an inch down from the shoulder seam to the underarm side seam. Then take apart the side seams. Basically, the entire shirt back needs to be free so you can recut it.

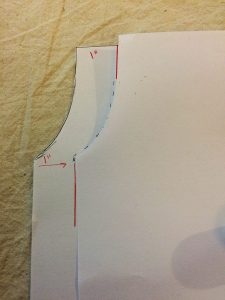
Paper diagram illustrating marking new arms eye and side seam lines on the shirt back piece.
Paper diagram illustrating marking new arms eye and side seam lines on the shirt back piece.
Step Three:

Redraw the arms eye and side seam lines.

Lets say your shirt had a center pleat that 1” on either side, or two ½” folds on each side. From this, you know that you want to take an inch out of each side the entire way down the back piece.
Slice up of new arms eye line.

Slice up of new arms eye line.

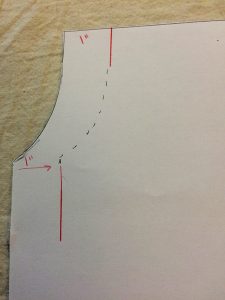
To redraw the armhole, mark 1” in at the top of the armhole curve and 1” in at the top of the side seam. Then fold your back piece, using the opposite side as a guide as to where to draw the curve.

Mark the side seam line 1” in all the way down through the hem.

Folding one side over to use as guide for redrawing the arms eye seam.

Folding one side over to use as guide for redrawing the arms eye seam.

Step Four:

Sew the back piece to the yoke, lining up the centers first and pinning out from there.

Step Five:

Sew the back armseye along your newly marked seam line.

Step Six:

Sew the side seam. You should use the original line on the front piece and your new line on the back piece.
Step Seven:

Give everything a nice press and you’re done.

Sometimes, designers like to make a shirt even more fitted by having their tailors add side back darts. This is extremely common in the film business. If you ever watch Hawaii Five-0, check out the button front shirts that Scott Caan wears. They are altered to within an inch of their life. They fit him like a glove. And they all have side back darts. Whenever I see them, I think, “Oh, a tailor got a hold of that shirt.” If they’re not custom made for him, then they have definitely been through the back pleat extraction/side back dart procedure.

Next time you’re watching your favorite show, pay close attention to the button front dress shirts. You’ll start to notice side back darts everywhere!

Getting In

Getting In

Whenever I tell people what I do for a living (Tailor and Pattern Maker for film and television) they inevitably say one of two things.

“Wow. How did you get into that?” or “What a cool job!” Sometimes acquaintances will ask me if I can talk to their niece or son or daughter’s friend or cousin or something and give them advice on how to ‘break into’ the business.

I’m never entirely sure what sort of advice to give. As Hunter S. Thompson said (or maybe didn’t say depending on who you ask),

The TV business is a cruel and shallow money trench, a long plastic hallway where thieves and pimps run free, and good men die like dogs. There is also a negative side.

There is some truth in that Hunter quote. Especially now when the major networks are increasingly concerned with cost and ratings and everyone wants to do more (and more) with less money. Period television is quite popular right now. The only problem with that is that period television is hard, perhaps the hardest genre.

“But, why?” you may ask, “It looks like so much fun!”

The Devil is in the details

Here’s the thing: period TV is expensive. You have to dress every single background actor and actress as well as the principals. On shows such as Law and Order, often the background (BG) performers are wearing something selected from their own personal closet. What generally happens is that the BG will come to work with a few clothing options. An assistant designer will usually pick which of these options is best and that’s what the actor will wear. Most people don’t have closets full of 1920s or 1880s clothing so, on a period show, the entire costume is provided, fit, and altered. This takes more time and manpower which, in turn, takes more money.

TV is also fast – faster than filming a movie. Most shows shoot an episode in 8 to 10 days, with at least a day or two when they are shooting two episodes at once. (We call those tandem days.) Because of this, you never really get any down time. On a movie, there is most always a point where you’re over the hump – you’ve established all the costumes needed. Or you’re working on something where all the action takes place on the same day and no one changes their clothes. Then, all you need to worry about is multiples and the rest of the work is up to the set costume crew who keep track of continuity and make sure everyone looks how they should in front of camera.
Do your thing & do it GREAT

I guess if I were to give one piece of advice I would say to become really good at the thing you want to do. Then, figure out how to do it very quickly if needed. I may have said this before (I say it a lot) but there are lots of good tailors and pattern makers out there. What there isn’t a lot of are exceptional tailors and pattern makers who can also work really fast. If you want to work in TV and film that will definitely give you an advantage.

As far as finding TV and film jobs, talk to people, contact your city’s (or state’s) film commission. Word of mouth is still the best way to find a job in this business.

Mind your manners

And be nice to everyone, even if you think they have no ‘influence’ or are looking for the same kind of job as you are. You never know who knows who and you never know when someone might need help because they have more work than they can handle on their own.

Oh, and that “What a cool job!” comment… Some days it is and some days it isn’t. I can assure you there is nothing glamorous about it but, at the same time, it is also rarely boring.


As Pinned: Sewing Alterations in the Film Biz

As Pinned: Sewing Alterations in the Film Biz

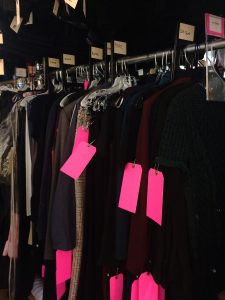
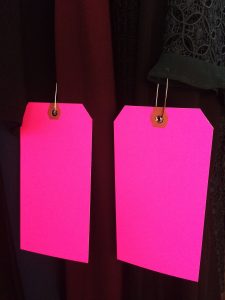
Most film and television costume departments in New York City use bright pink oak tags to identify a garment as needing an alteration.

Most film and television costume departments in New York City use bright pink oak tags to identify a garment as needing an alteration.

Most film and television costume departments in New York City use bright pink oak tags to identify a garment as needing an alteration. Larger (and usually period) shows, like Boardwalk Empire, The Deuce, The Get Down, have two or three Costume Fitters who run the fittings for the background actors. They keep everything organized in the fitting rooms, take measurements and photos, assist the designers, do a lot of the pinning (unless something really wacky is going on, then they’ll usually call the Head Tailor in to check it out), and write the alteration notes on the tag.

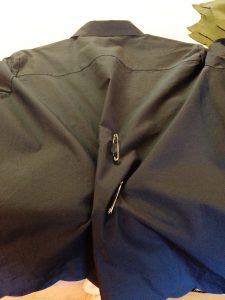
Inevitably, a high percentage of alteration notes will read something like: “Take in as pinned” or “CB as pinned”. ‘CB’ means center back if you didn’t know. And ‘AP’ is the abbreviation for ‘as pinned’.

So, anyway: “Take in as pinned.”

Measure twice, cut once.

Take in as pinned

Here’s the thing, even if I pinned the alteration myself in the fitting room, ‘take in as pinned’ shouldn’t necessarily be followed literally. Seriously. It is indeed true that humans in general are not always symmetrical but it’s rare that you honestly need to take in one side more than the other. I also cannot tell you how many times an initial, “he has one arm longer than the other” turned out to be a jacket not sitting evenly upon the shoulders.

The garment can, of course, be lopsided to begin with – always a possibility if you’re dealing with vintage clothing. Measuring is always a good idea. As my Dad always says, “Measure twice, cut once.” He was talking about lumber and carpentry but the same advice applies to sewing as well.

I usually mark (or just measure) the pinned out alteration with chalk or wax on the wrong side of the garment. Then I take the pins out and assess the situation. If two side back seams were pinned in and one is considerably larger than the other, even them out. Do the same thing on both sides.

This is actually one of the top five laws of sewing – if there are laws of sewing.

I just pin everything out in through the center back then figure out later the best place to take it out.

I just pin everything out in through the center back then figure out later the best place to take it out.

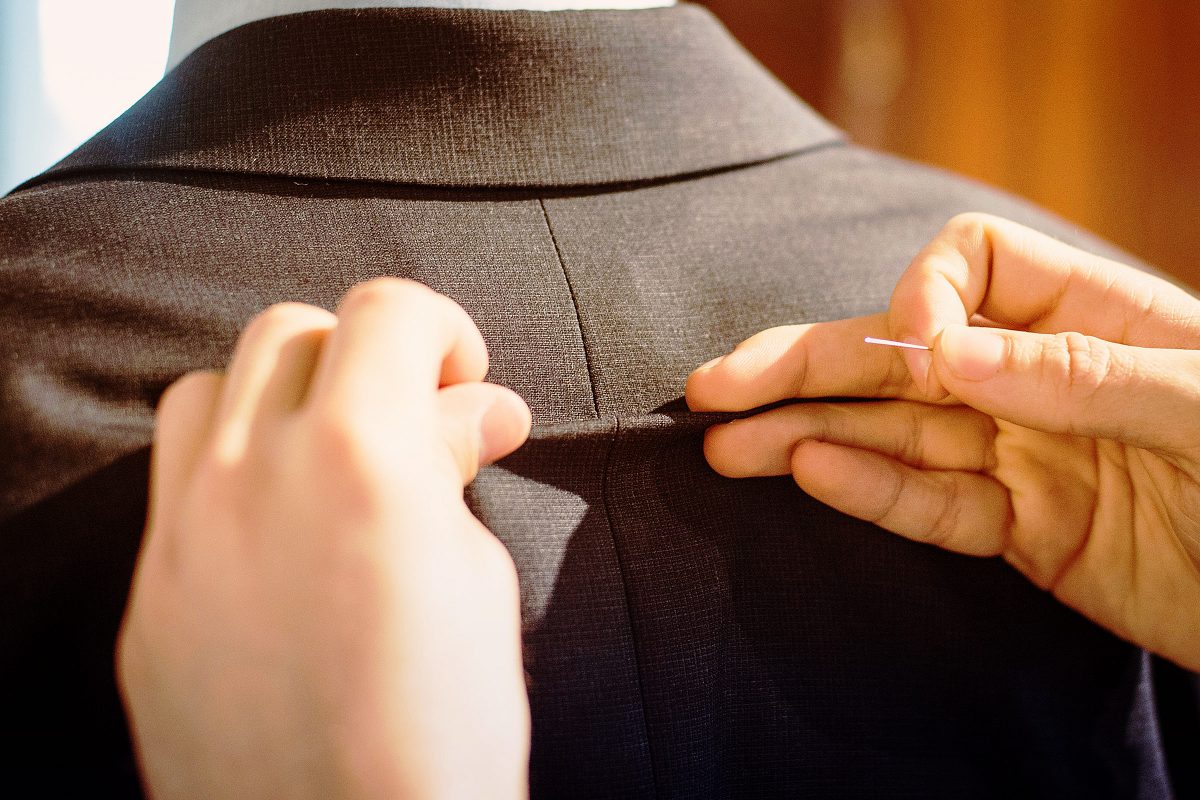
I often only pin one side of a thing. More often, I just pin everything out in through the center back then figure out later the best place to take it out. A large amount will look better if you distribute it through more than one seam.

For example, if you pinned out 5 inches at the center back waist of a shirt or jacket, split the amount up between the center back, side back and side seams. The end result will look much better.

An alteration I do a lot is taking in the backs of men’s button front dress shirts. Unless it’s a slim cut John Varvatos, most men’s dress shirts are excessively roomy in the back. The quick and easy solution to this is to add side back darts.

If I have time, and the shirt has back pleats going into the yoke, I’ll take the whole back off and take out the pleats – re-cutting the bottom part of the armseye and the side seams. This can take quite a bit longer, especially if you are dealing with a shirt by Brooks Brothers, who insist on gluing their side seams as well as sewing them.

Take in as pinned.

Take in as pinned.

Speaking the same language

At Blindspot, since I’m the Head and only tailor, we just put blank pink tags on the garments as indications that they need altering. If I pinned it, I don’t need any notes. The Costume Designer for the show is also an excellent tailor (which is rare) so if I wasn’t in a fitting for some reason, he can easily tell me what needs to happen – often without pinning.

He’ll come to me and say, “I threw this on so and so, it just needs to be taken in about this much in the back.” Then he’ll show me by pinching an amount out with his fingers.

Tailoring and patterning is indeed a language all its own and it’s a beautiful thing when you work with someone who speaks it as well as you do.

Sew Fine Dress Making

Sew Fine

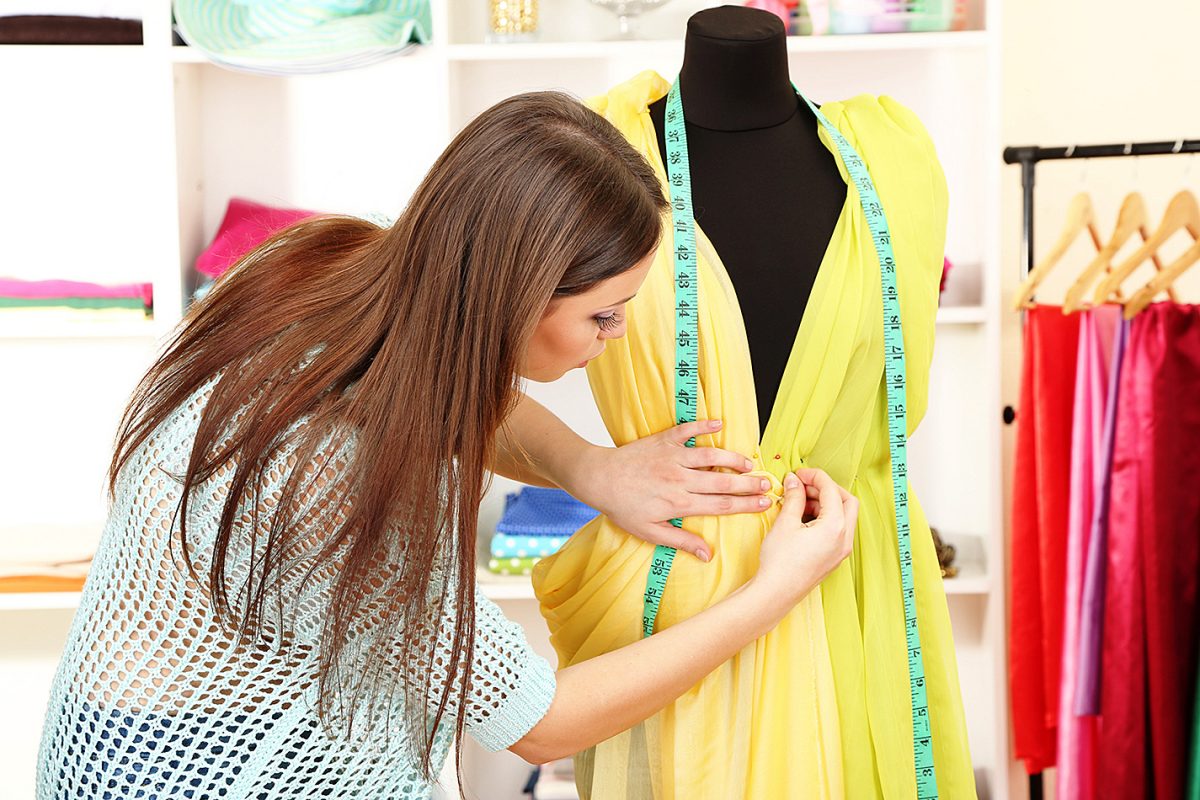
Need the perfect dress for an upcoming special event? Instead of perusing rack after rack of unimaginative, pricey finery consider making it yourself. Not only will you get exactly what you’re looking for, it’s a sure thing that no one else will be wearing the same dress as you.

Points for Originality

Even if you’re not a someone who designs her own patterns, making and wearing your own dress will definitely get you noticed. You’ll look stunning and you’ll be wearing something completely unique. In this day and age when everyone wants to be recognized for their personality and individual contributions, you’ll certainly earn points for wearing something stunning that you made yourself.

Your Choice

Rather than trying to find something that shows off your style, fits your budget and looks great on you from the limited selections in department store – making a dress yourself means you’ll be able to choose the style, fit and fabric that’s best for you. Show off your natural beauty with a dress that accents your coloring and body type.

Works for Formal Functions Too

Formal events like galas or weddings may not seem like that best opportunity to make your own dress, but it’s actually a great time to do so. Making a more formal dress may take a bit longer, but the results will amaze everyone. If you’ve never taken on something like this, trust me, it’s not as hard as you think!

There are some extra steps like creating the tulle under layer(s), feeding the whale bone (plastic) bodice pieces and/or adding lace or other details. Although these seem intimidating, anyone with basic sewing skills can do them – you just have to be willing to try.

Show It Off

Show It OffAfter all the hard work you put in to making your amazing dress, show it off at the big event. Get up, dance, strut your stuff to and from the buffet table, and when people start complimenting you on your attire, don’t be afraid to say you made it. Although you don’t want to overshadow the guest of honor (unless it’s you, of course) there’s nothing wrong with showing off your finery.

If you can, add some handmade accessories to complete the look. Items like hand made, one-of-a-kind jewelry, scarves or shawls will give your dress the final splash and pizazz it needs. If you don’t make any of these items yourself, maybe you’ve got some crafty friends who do and would like to contribute to your amazing look.

Remember

A few points to remember:

  1. Hem with shoes in mind. If you’re wearing heals to the big event, make sure you have those shoes on when determining hem length so the dress will fall correctly.
  2. Event location. If the event is going to be indoors or outdoors, you may need incorporate layers or a cover up depending on the time of year and your sensitivity to cold/heat.
  3. Make a muslin first. If you’re at all unsure about the dress you’re going to make – how well it’ll fit or will look on you – take the time to make a muslin demo piece first. It does extend the length of time it takes you to arrive at the finished product, but it can also mean the difference between a project you love and one you don’t.
How to Exercise Self-Control in the Fabric Shop

How to Exercise Self-Control in the Fabric Shop

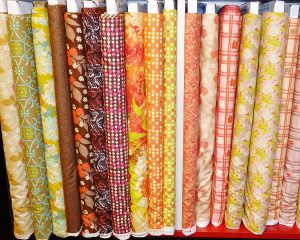
How to Exercise Self-Control in the Fabric ShopWith so many beautiful colors and textures, it can be really hard to resist buying up ALL the fabric in the store. Things like budget, project specifics, and potential use fly away in the midst of gorgeous bolts. If you’re like most people, though, buying every bolt of fabric isn’t actually feasible. Following these tips will help you stay in control of your bolt buying and your bank account.

Bring Your Pattern

Bring your pattern with you, even if you know how much fabric you need. Having it physically in your hands – in the way of grabbing endless bolts – helps you remember why you’re in the fabric shop and actually prevents you from grabbing every bolt you see. It’s a way to ground yourself in the heaven of the fabric store.

Don’t Drop In

It may be tempting when out running other errands to simply drop in to the fabric shop for a break. Don’t do this. Without a specific project in mind, it’s far too easy to buy reams and reams of fabric that will only wind up in your stash supply and may falter there for years without being used. Instead, schedule your fabric shop trips to coincide with specific projects.

Make Fabric Shopping an Event

Instead of making fabric shopping a stop on the tour de errands, make it a special event. Allow yourself lots of time to luxuriate in the bolts of fabric before you have to make a purchase. The more time you spend, the fewer “must have” fabrics will leap off the shelves and tables at you. When you’ve narrowed the selection down, it’ll be much easier to choose just the right one for your project without bringing home a bunch of other options too.

Bring Your Budget

Although it’s not possible to bring your bank or an ATM, you can bring other physical reminders of your budget. Even a piece of paper with a number on it would be sufficient. The goal is the same as with bringing your pattern – having something to hold on to helps you remember you can’t buy every bolt in the store and also keeps your hands busy so they can’t grab every bit of fabric in sight.

What else do you do to control yourself in the fabric shop?