I use fabric drawstring bags to organize everything. My girls have a set I created for them for traveling; the bags hold their socks, underwear, and toys. I used a separate set for my own travels and also have a bag I use to transport my gym shoes in my backpack (so the shoes don’t get the interior of my bag dirty.)
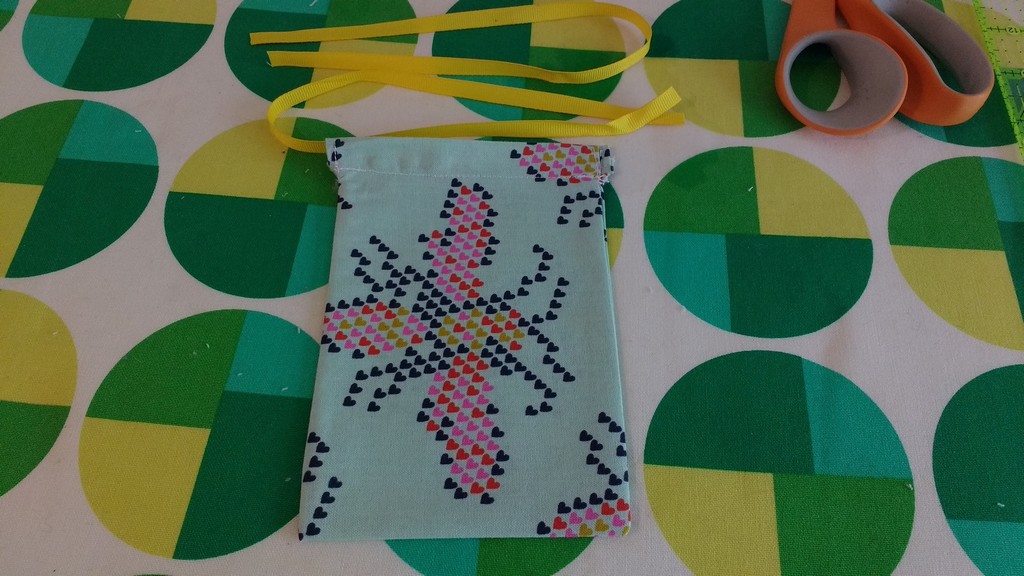
Any time I have a new need, I whip up a bag or some bags for the job. For this project, I wanted a small pouch to hold my ear plugs and eye mask. I’m a writer and I spend a lot of time writing in coffee shops and libraries (yes, sometimes libraries can be loud). And when I travel overnight, I also bring my sleep mask.
Don’t throw that away!
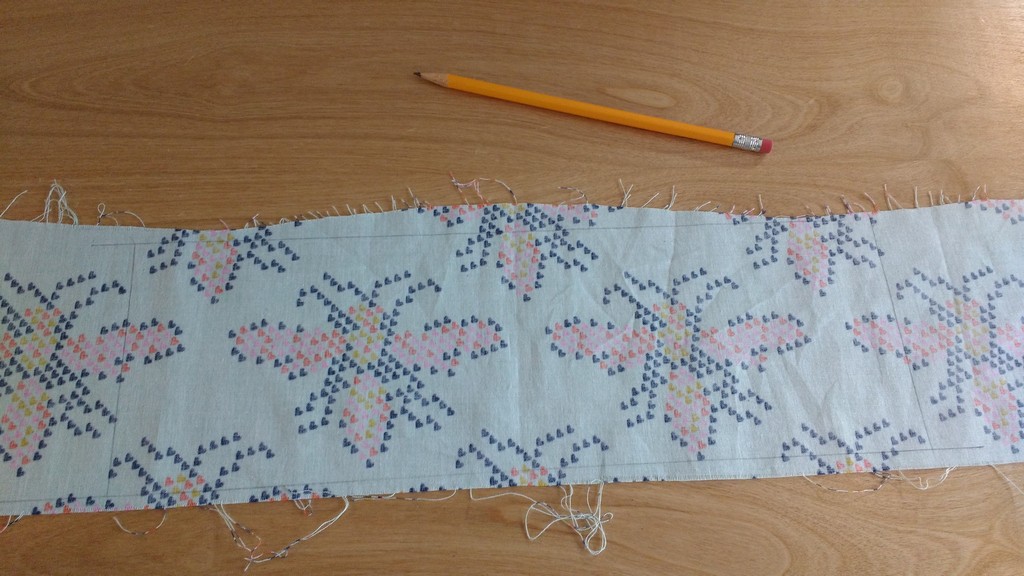
This is a piece of scrap fabric a girlfriend sent to me. “I bet you could use this,” she said. And she was right.
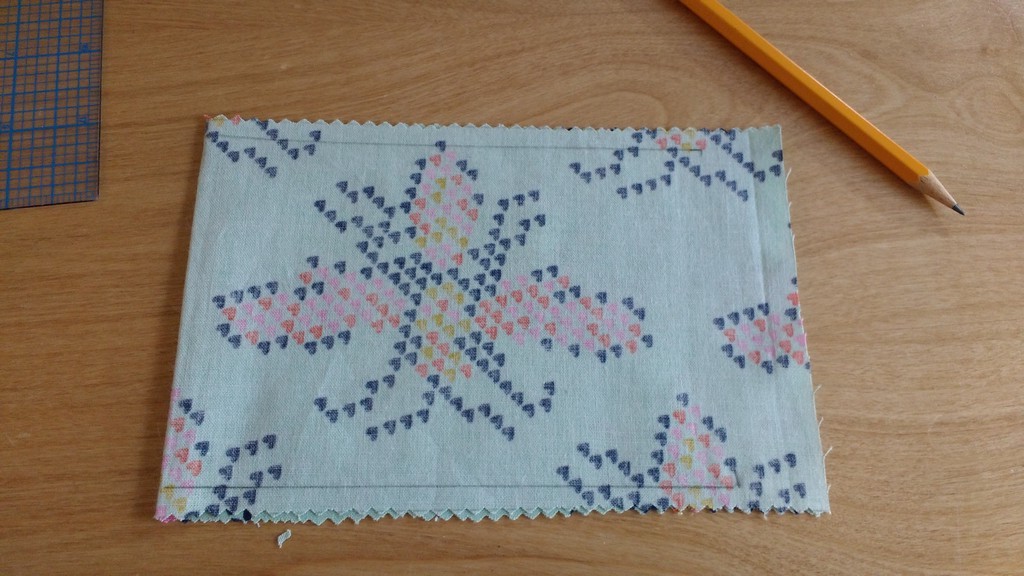
I drew a rectangle 15.5”x 5.5” (centering the pattern.)
I cut out the long sides of the rectangle with pinking shears and regular fabric scissors on the shorter ends.
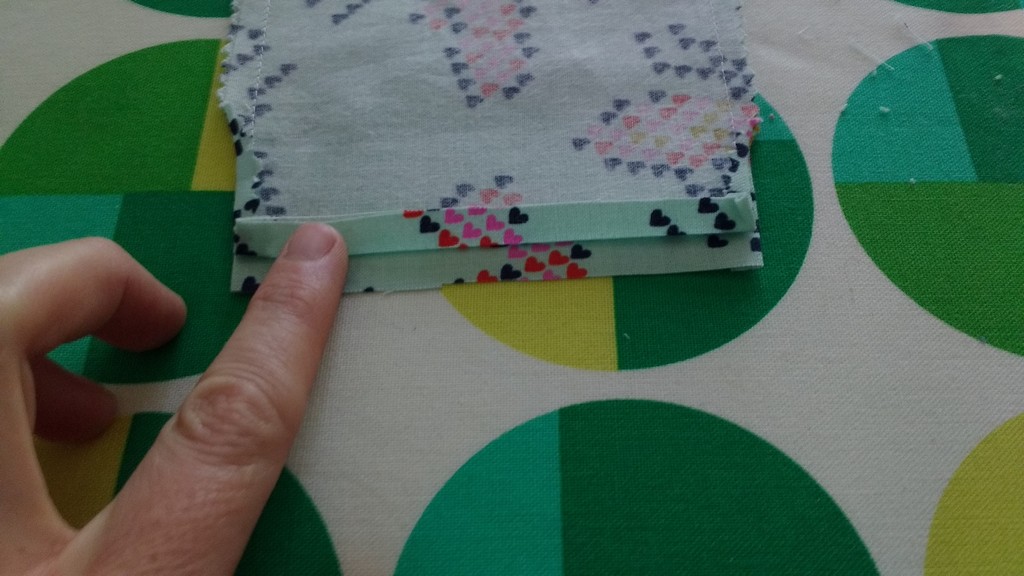
Next, I folded the fabric over, right sides together and drew a ¼” seam on each side. (If you can eyeball this, go ahead). The seam stops on each side 1.75” from the top. Start at the bottom and sew to that spot, back tacking at the end of the seam (on both sides.)
I snipped just a tiny bit on all four sides of the bag and then folded the seams in all four sides. First I finger pressed, then I ironed and starched them down.
Let’s straighten this out
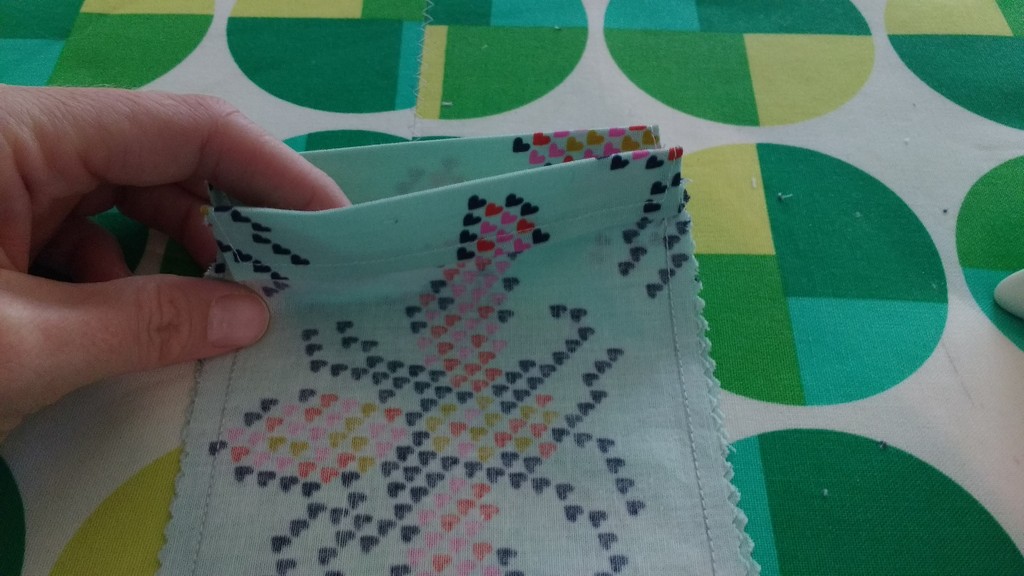
Next I folded the top of the front and back down ¼” inch and ironed and starched as well.
Now I did a supporting seam starting at the side seam and going around the top of the fabric to the other seam. Do this on both sides.
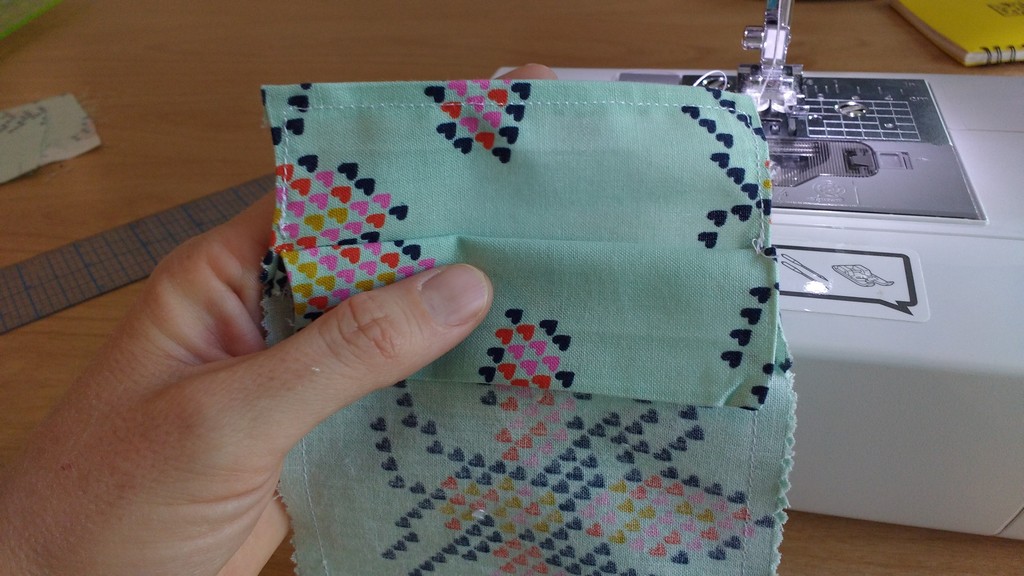
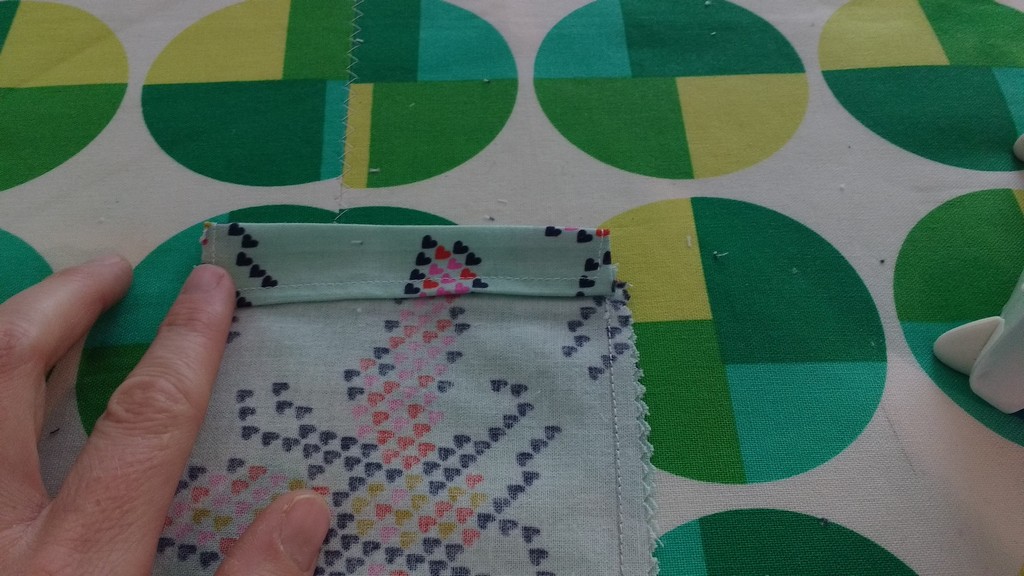
Now fold each top down to meet the top of the sewed side seam. You should see how the drawstring casings will be formed now. Iron and starch each folded side down.
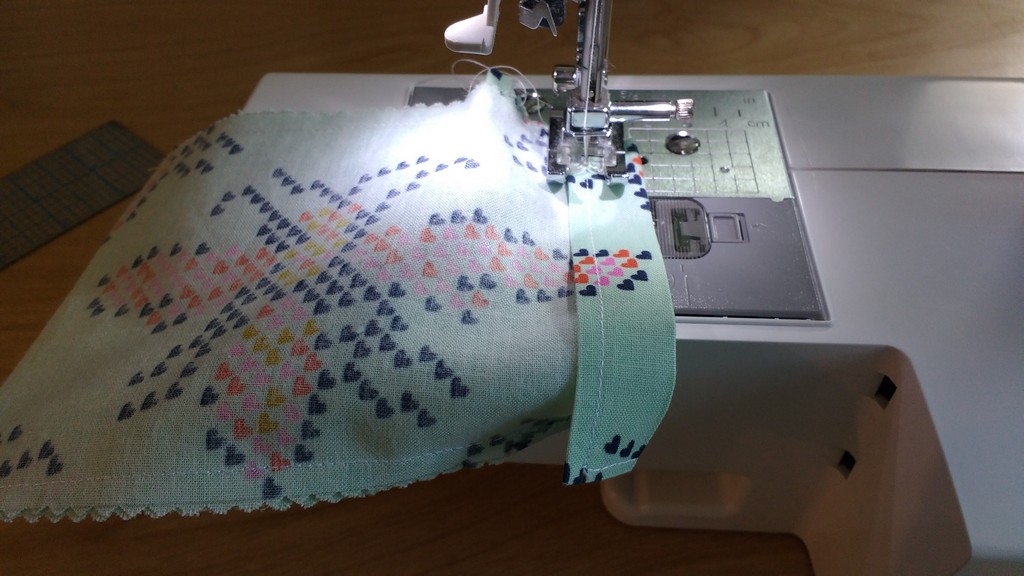
Sew across each side from the side seam across to the other side seam. I used the stitching I did prior as a guide for where to sew. Make sure you don’t catch the other side of the bag while you sew.
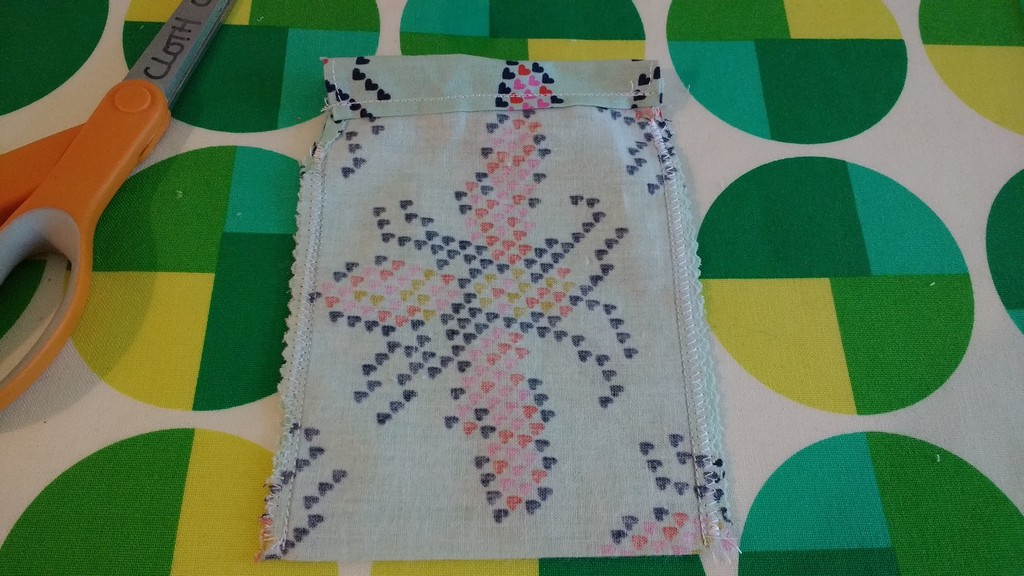
Lovely! Look how nice it looks inside out. Imagine how great it will be when you turn it right sides out! First I zig zag stitch the sides and trim the bottom corners before turning.
Now to tie it all together…
Whoohoo! Give it one more iron and starching to take it to the next level. Then measure out enough ribbon for a double drawstring.
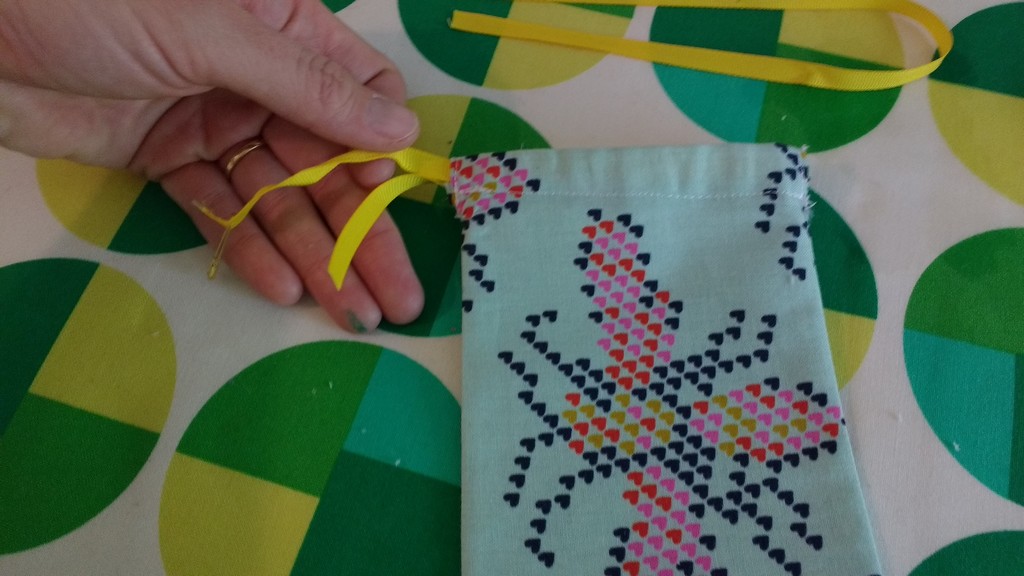
I used a safety pin to feed the ribbon through each side and around.
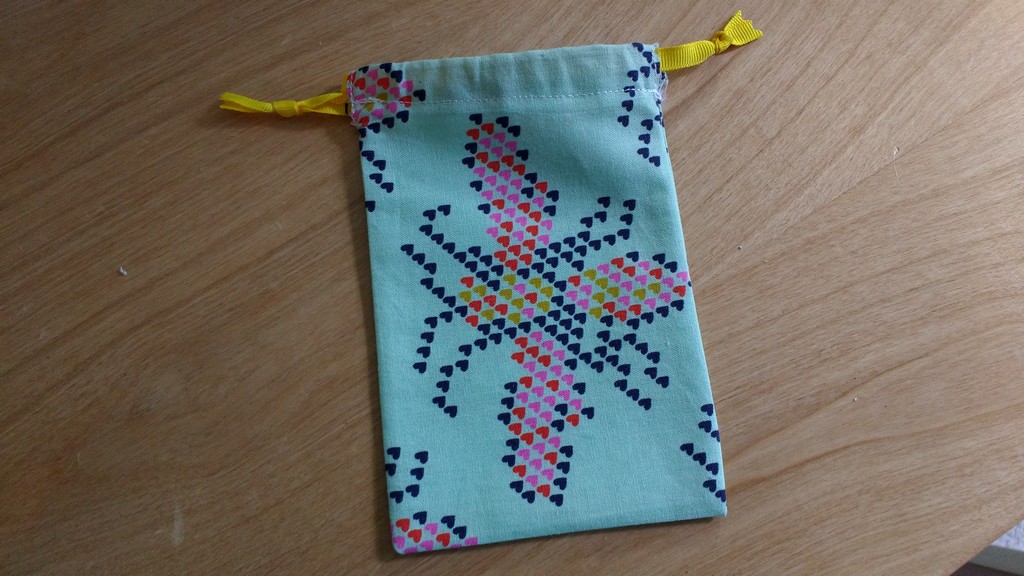
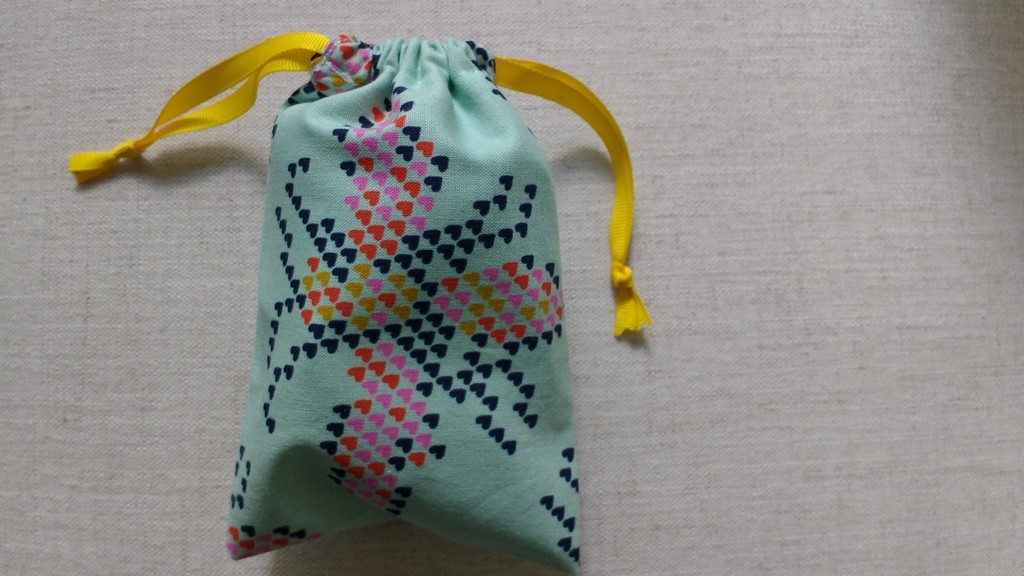
Tie a not on the end of each piece of ribbon, use pinking shears on the end of the ribbon, and you are finished!
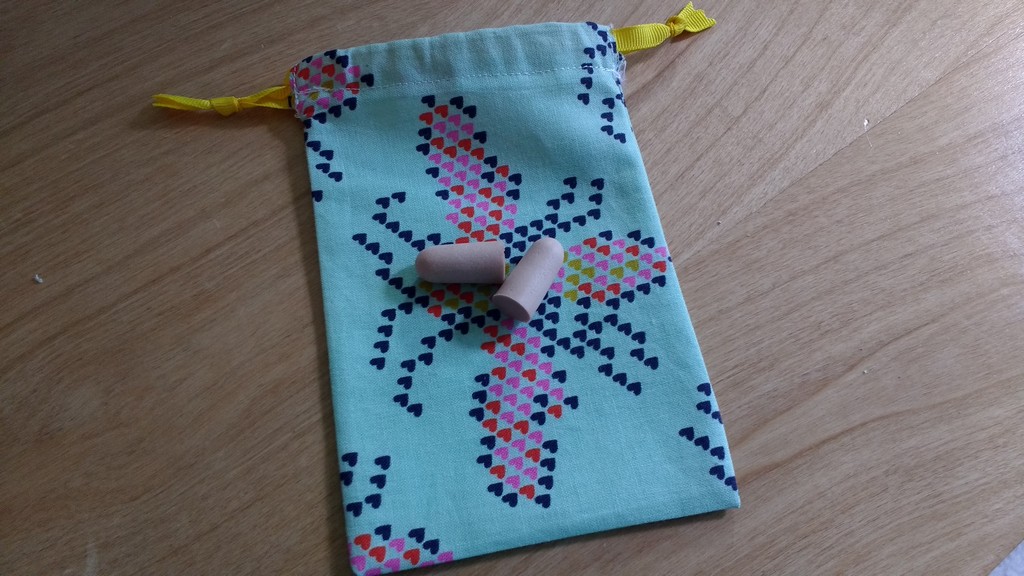
This is perfect for slipping in my bag when I’m going out to write.
And my eye mask fits in beautifully too.
———————————————————————————– Charlotte Kaufman is a writer and sewist in Mammoth Lakes, California. She specializes in marine and home interiors and continues to fall more and more in love with quilting. You can follow her at charlottekaufman.com.
Bento bags are a popular Japanese style of bag, more properly called azuma bukuro (or fukuro. Bukuro and fukuru are different pronunciations of the same word, which is a blend of two words that translate to “good fortune” and “bag.” Azuma is the historical name for the eastern region in Japan now known as Kanto and Tohoku).
These are also sometimes called Japanese market bags, triangle bags, even origami bags, although there are other styles called origami bags, too.
I discovered bento bags a few weeks ago myself, and I am so glad that I did, because these are incredibly useful. I told you in January that I planned to sew for Christmas in July, and I’ve actually been doing this since June. So I’ve been making lots of bento bags as wrappings for the gifts I am sewing now. And for my own personal and household use, too.
There are different ways to sew bento bags. Whichever method you use, they end up the same shape. It is useful to know how to make these both ways, though, so that you can use scraps to make them. You might choose one way over the other depending on what size fabric scrap you have.
How to sew bento bags from rectangles
To make a bento bag from rectangles, you need two same sized rectangles that are three times as long as they are wide. Your rectangles could be 5″ x 15″ for a small bento bag, 6″ x 18″, 7″ x 21″, 8″ x 24″, 9″ x 27″, or any size, as long as it is three times as long as it wide.
Choose most any fabric you like to make these. Use 2 layers of cotton or linen for a soft and relaxed bag, or try denim or canvas for a sturdier bag that holds its shape well.
One rectangle will be the outside of your bento bag; the other is the lining. Align these with right sides together and sew around all four sides, leaving an opening for turning. Turn, press, and sew this opening closed.
Now place this lined rectangle with the outer fabric on top, and fold into thirds, with the lining fabric folded over the front. Sew two seams attaching each outer third of the rectangle to the center at opposite ends.
Then, sew across the two outer corners of the bag to box the corners. The shape and size of the bag will differ depending on how deeply you box these corners. Or you can choose not to box them at all.
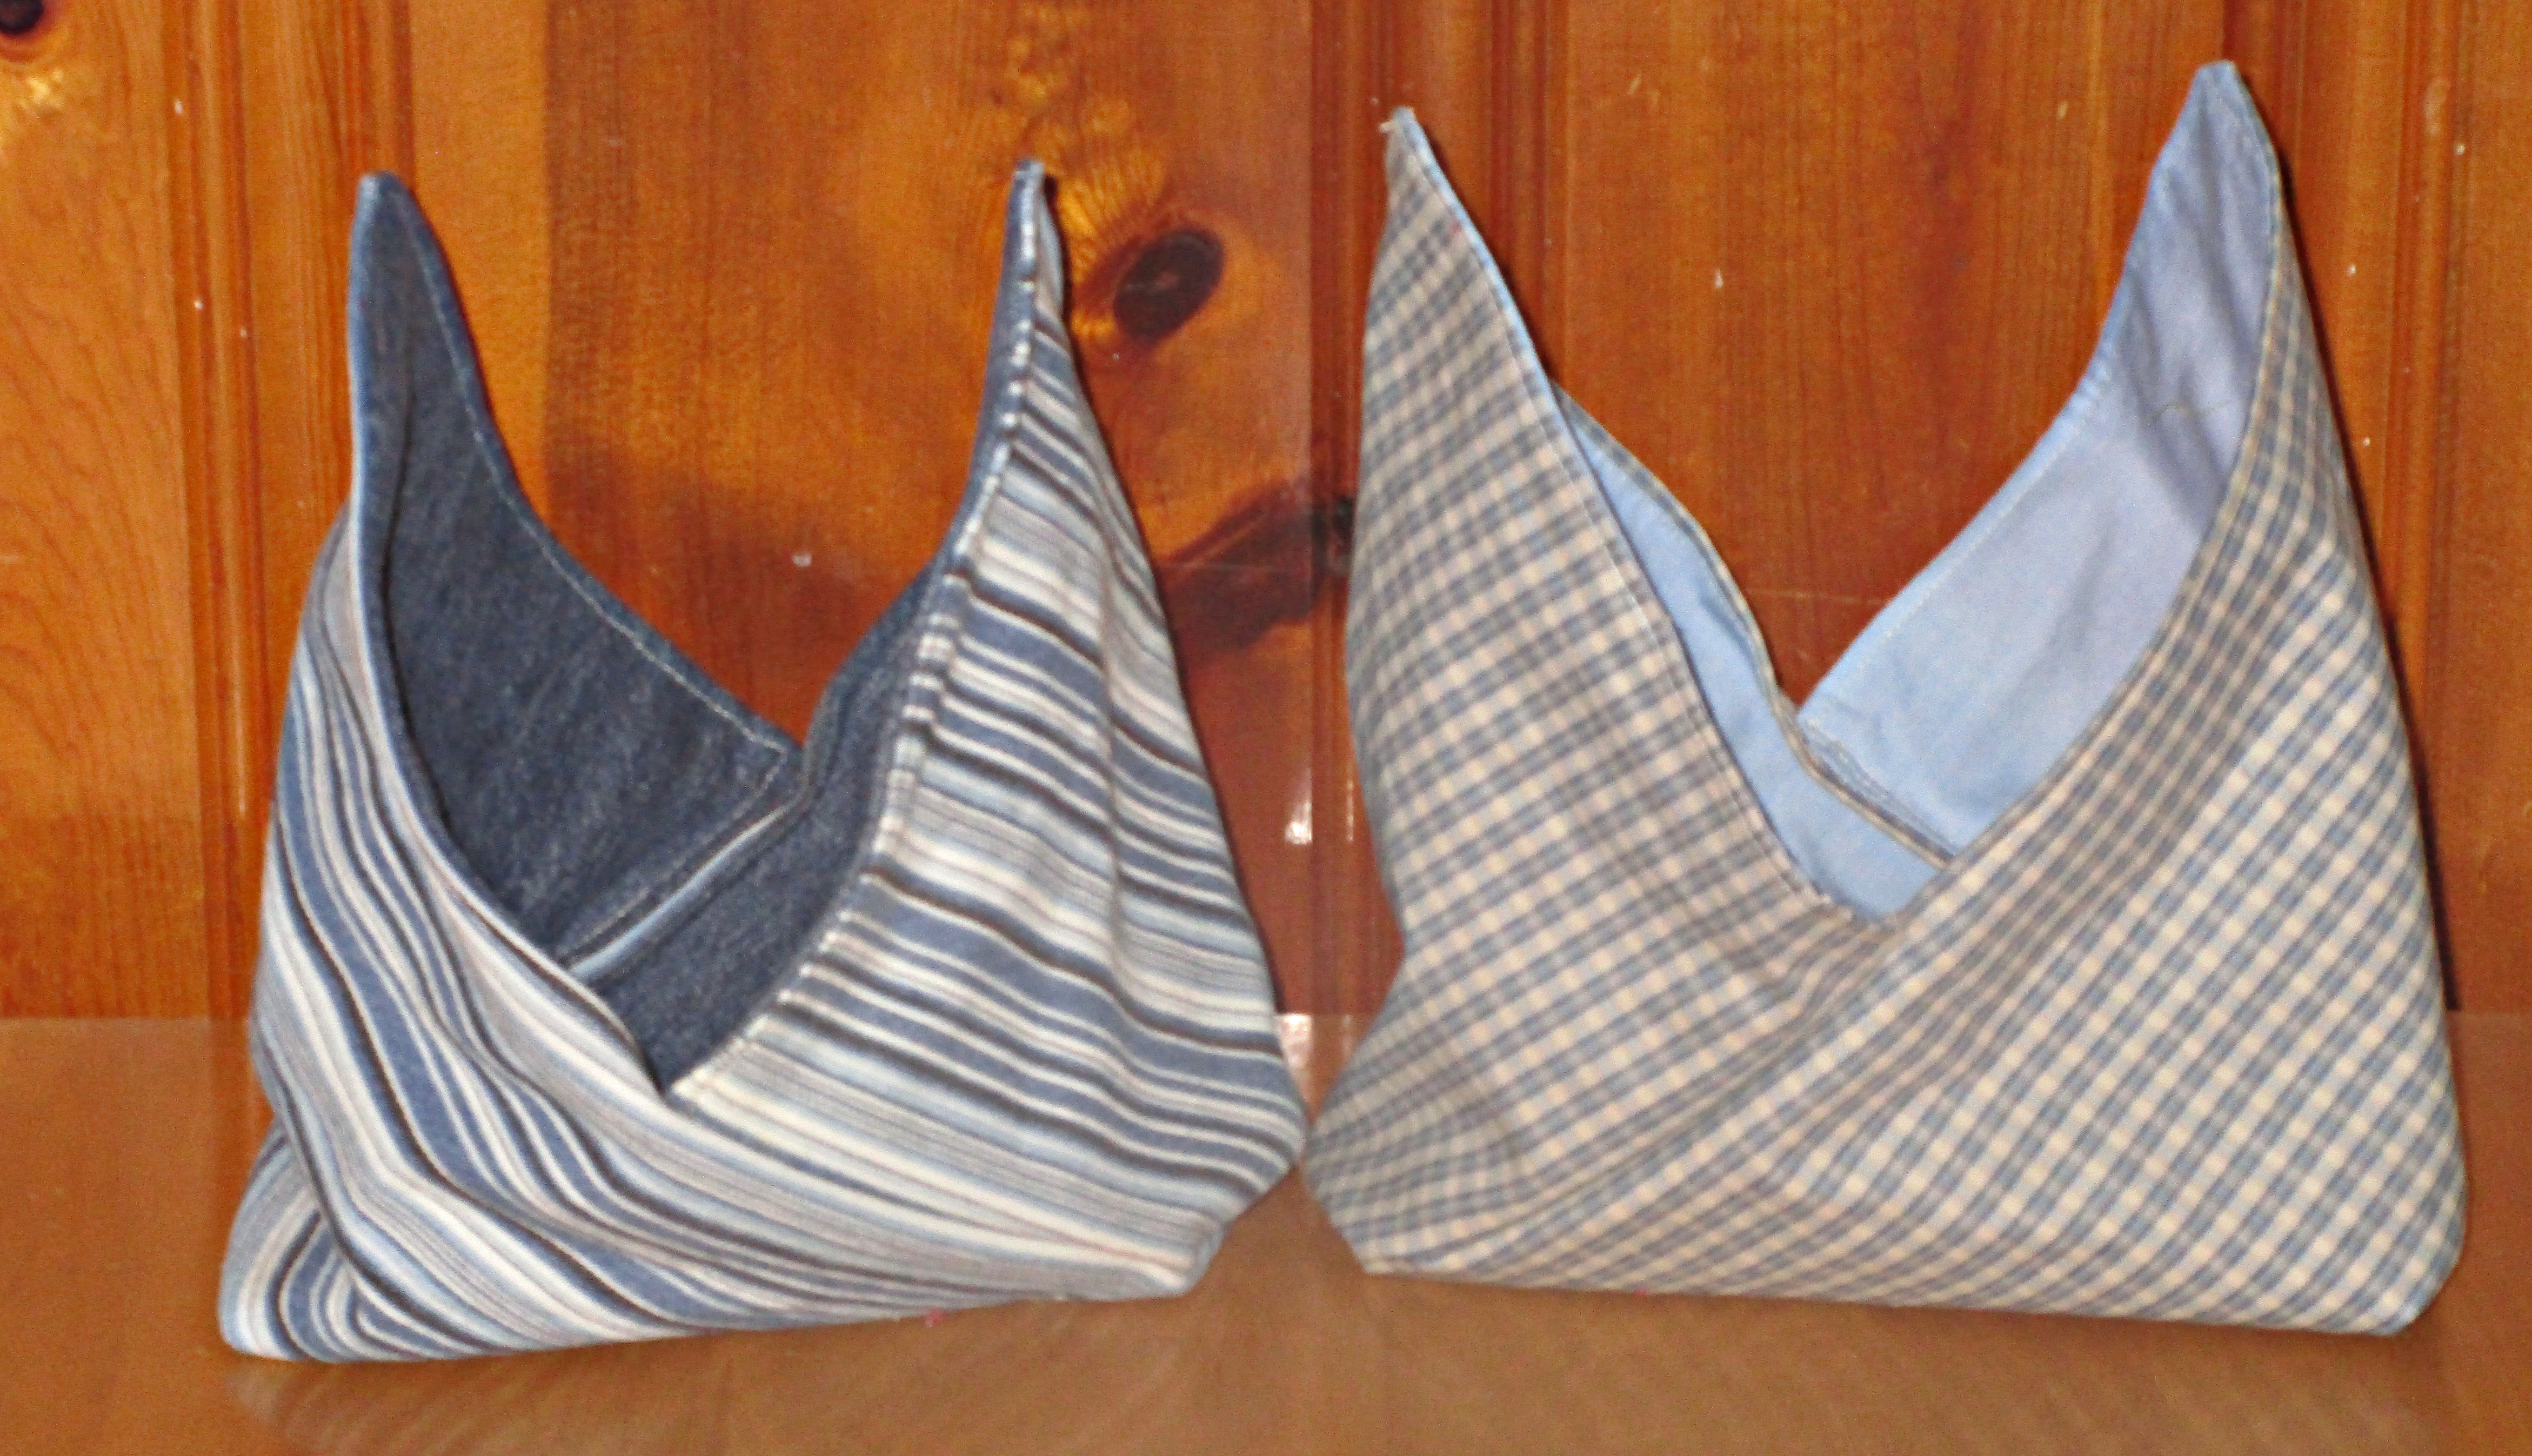
Turn right side out and your first bento bag sewn from rectangles is complete. I’m betting you will make many more.
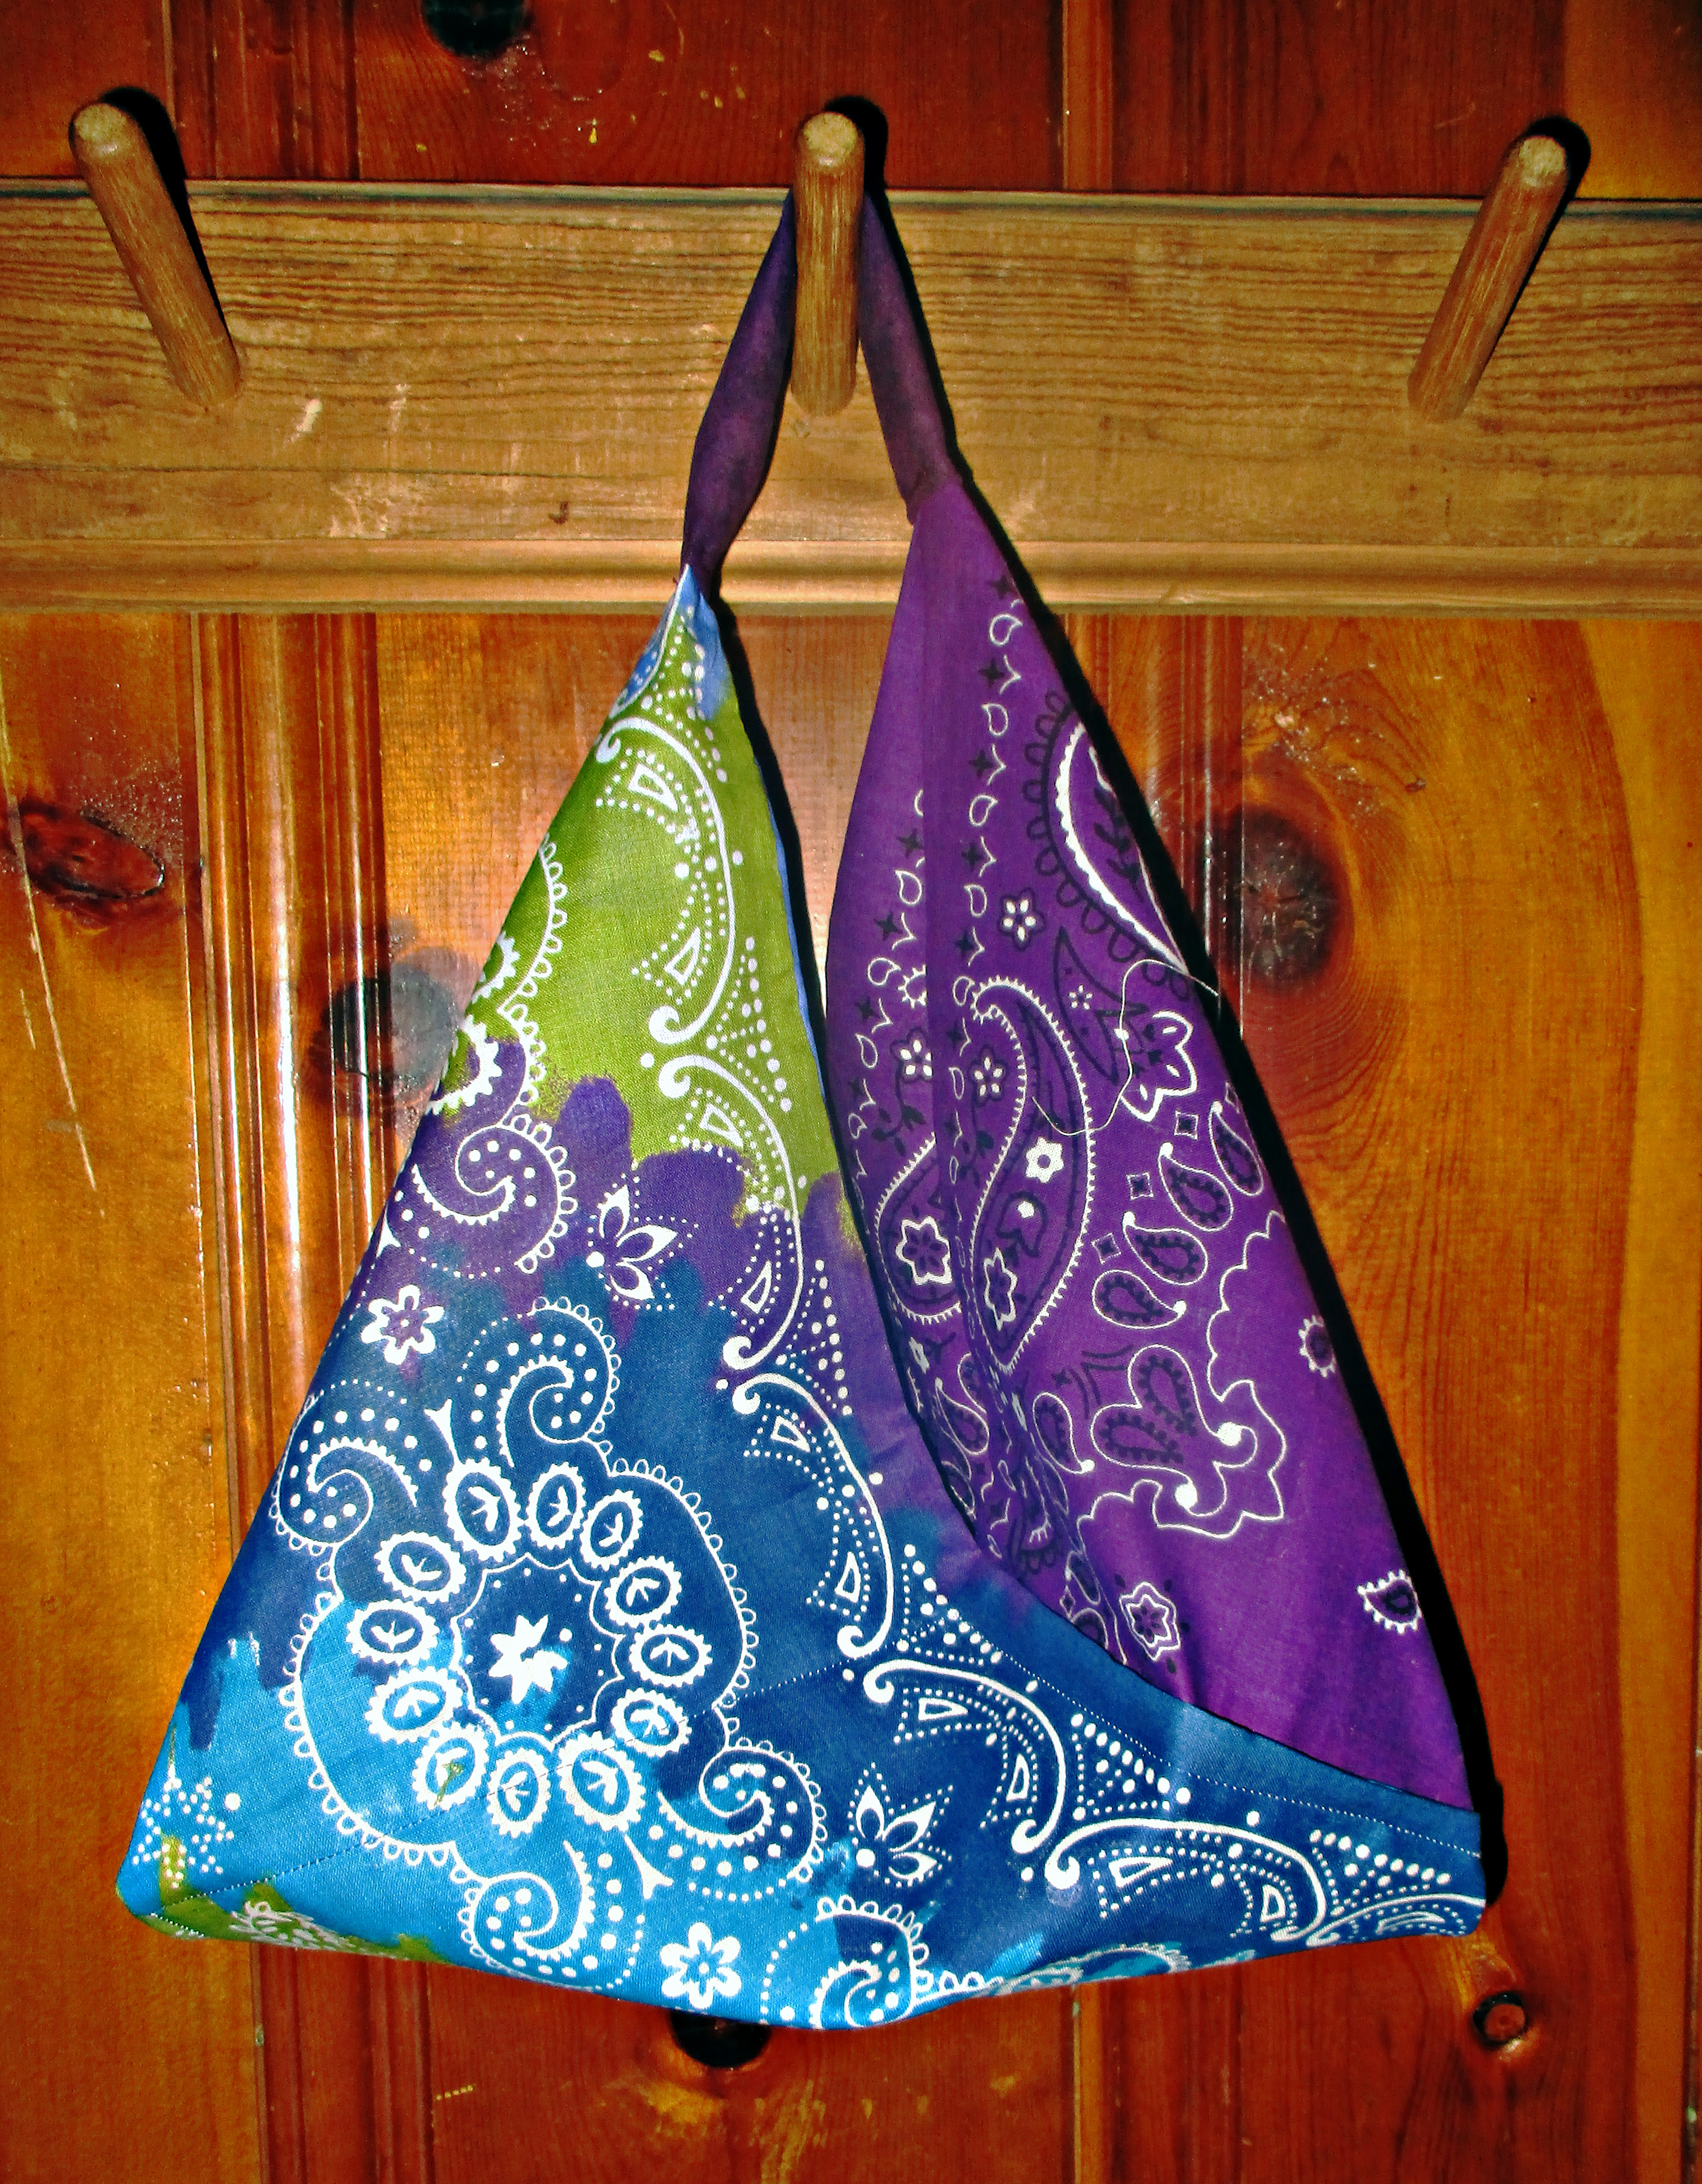
I made these bento bags from rectangles.
Sew bento bags from squares or triangles
There a couple of different ways to construct these from squares and triangles. Here are two slightly different variations on one method:
Take two same sized squares of fabric. They could be the same fabric for a bag with outsides and linings the same, or two different fabrics for a bag that will show both fabrics on both sides. If you want to use this method to make a bag with one fabric showing on the outside and one other fabric for the lining, you will need to first cut a square of each fabric in half diagonally and start the next step with four triangles rather than two squares.
Now you will either fold your squares in half diagonally with right sides together to form right triangles, or lay two different triangles right sides together, if you cut them as described above. Sew these together with an opening. Turn triangles right sides out, press, and sew the opening closed.
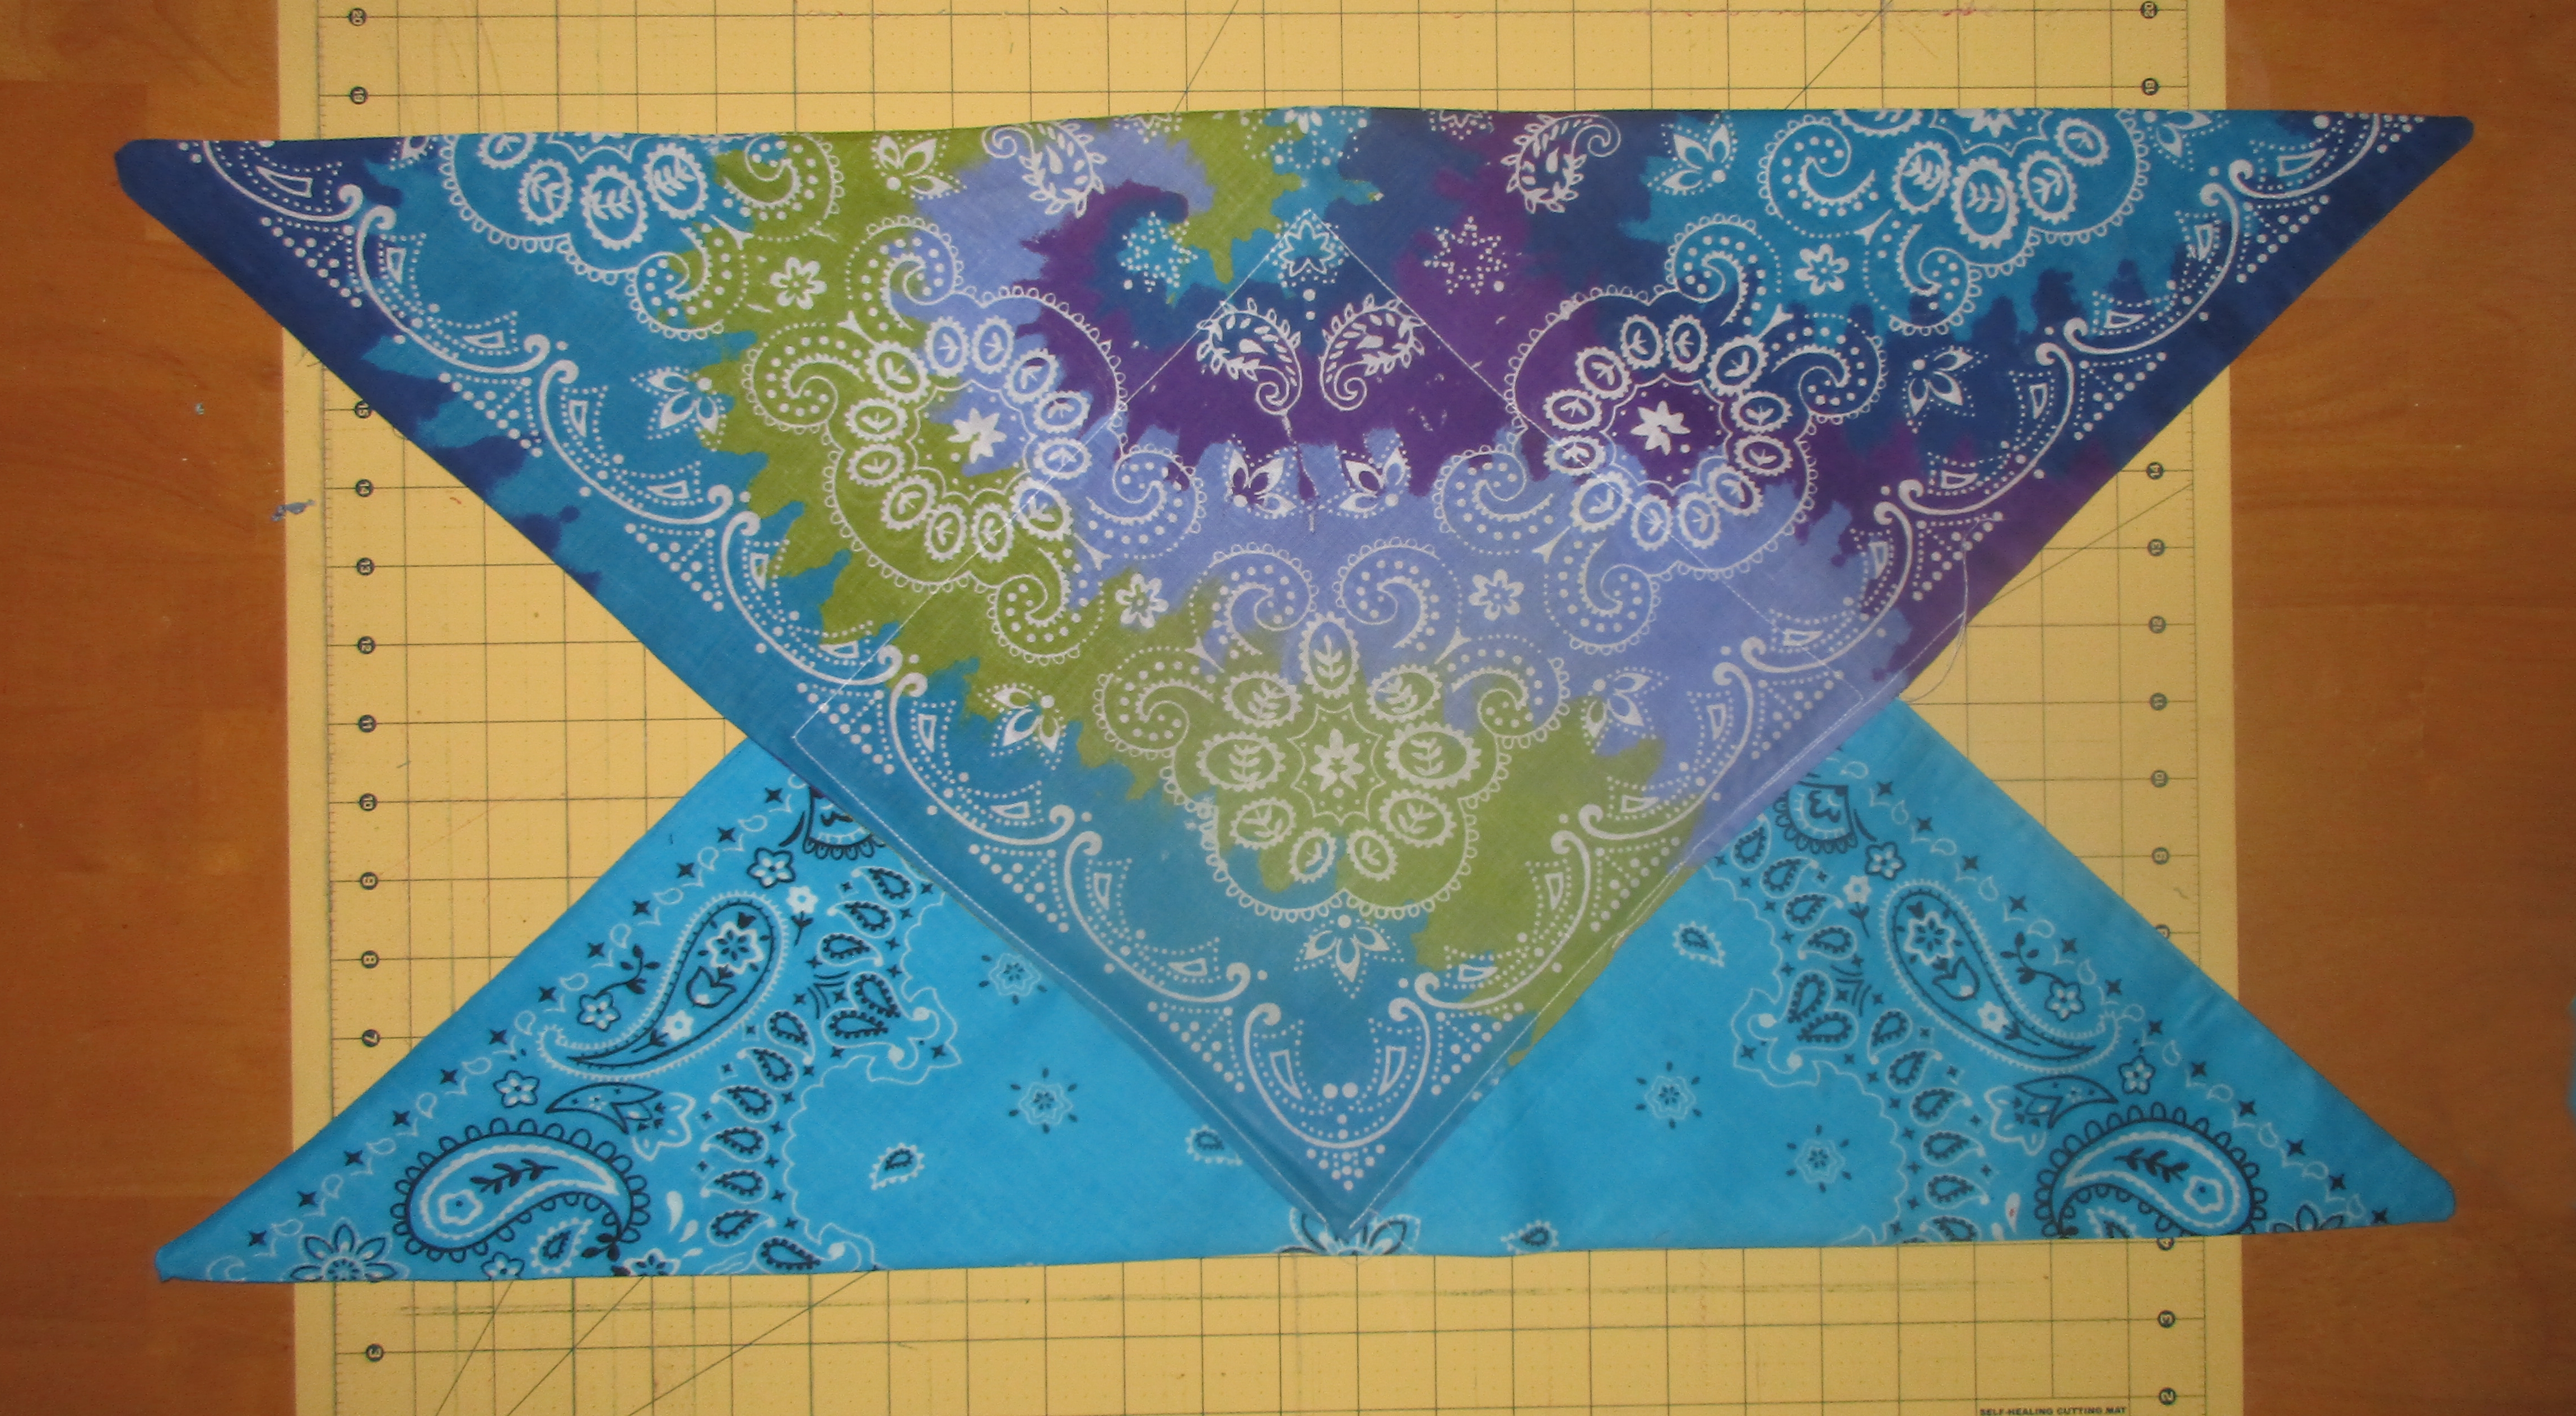
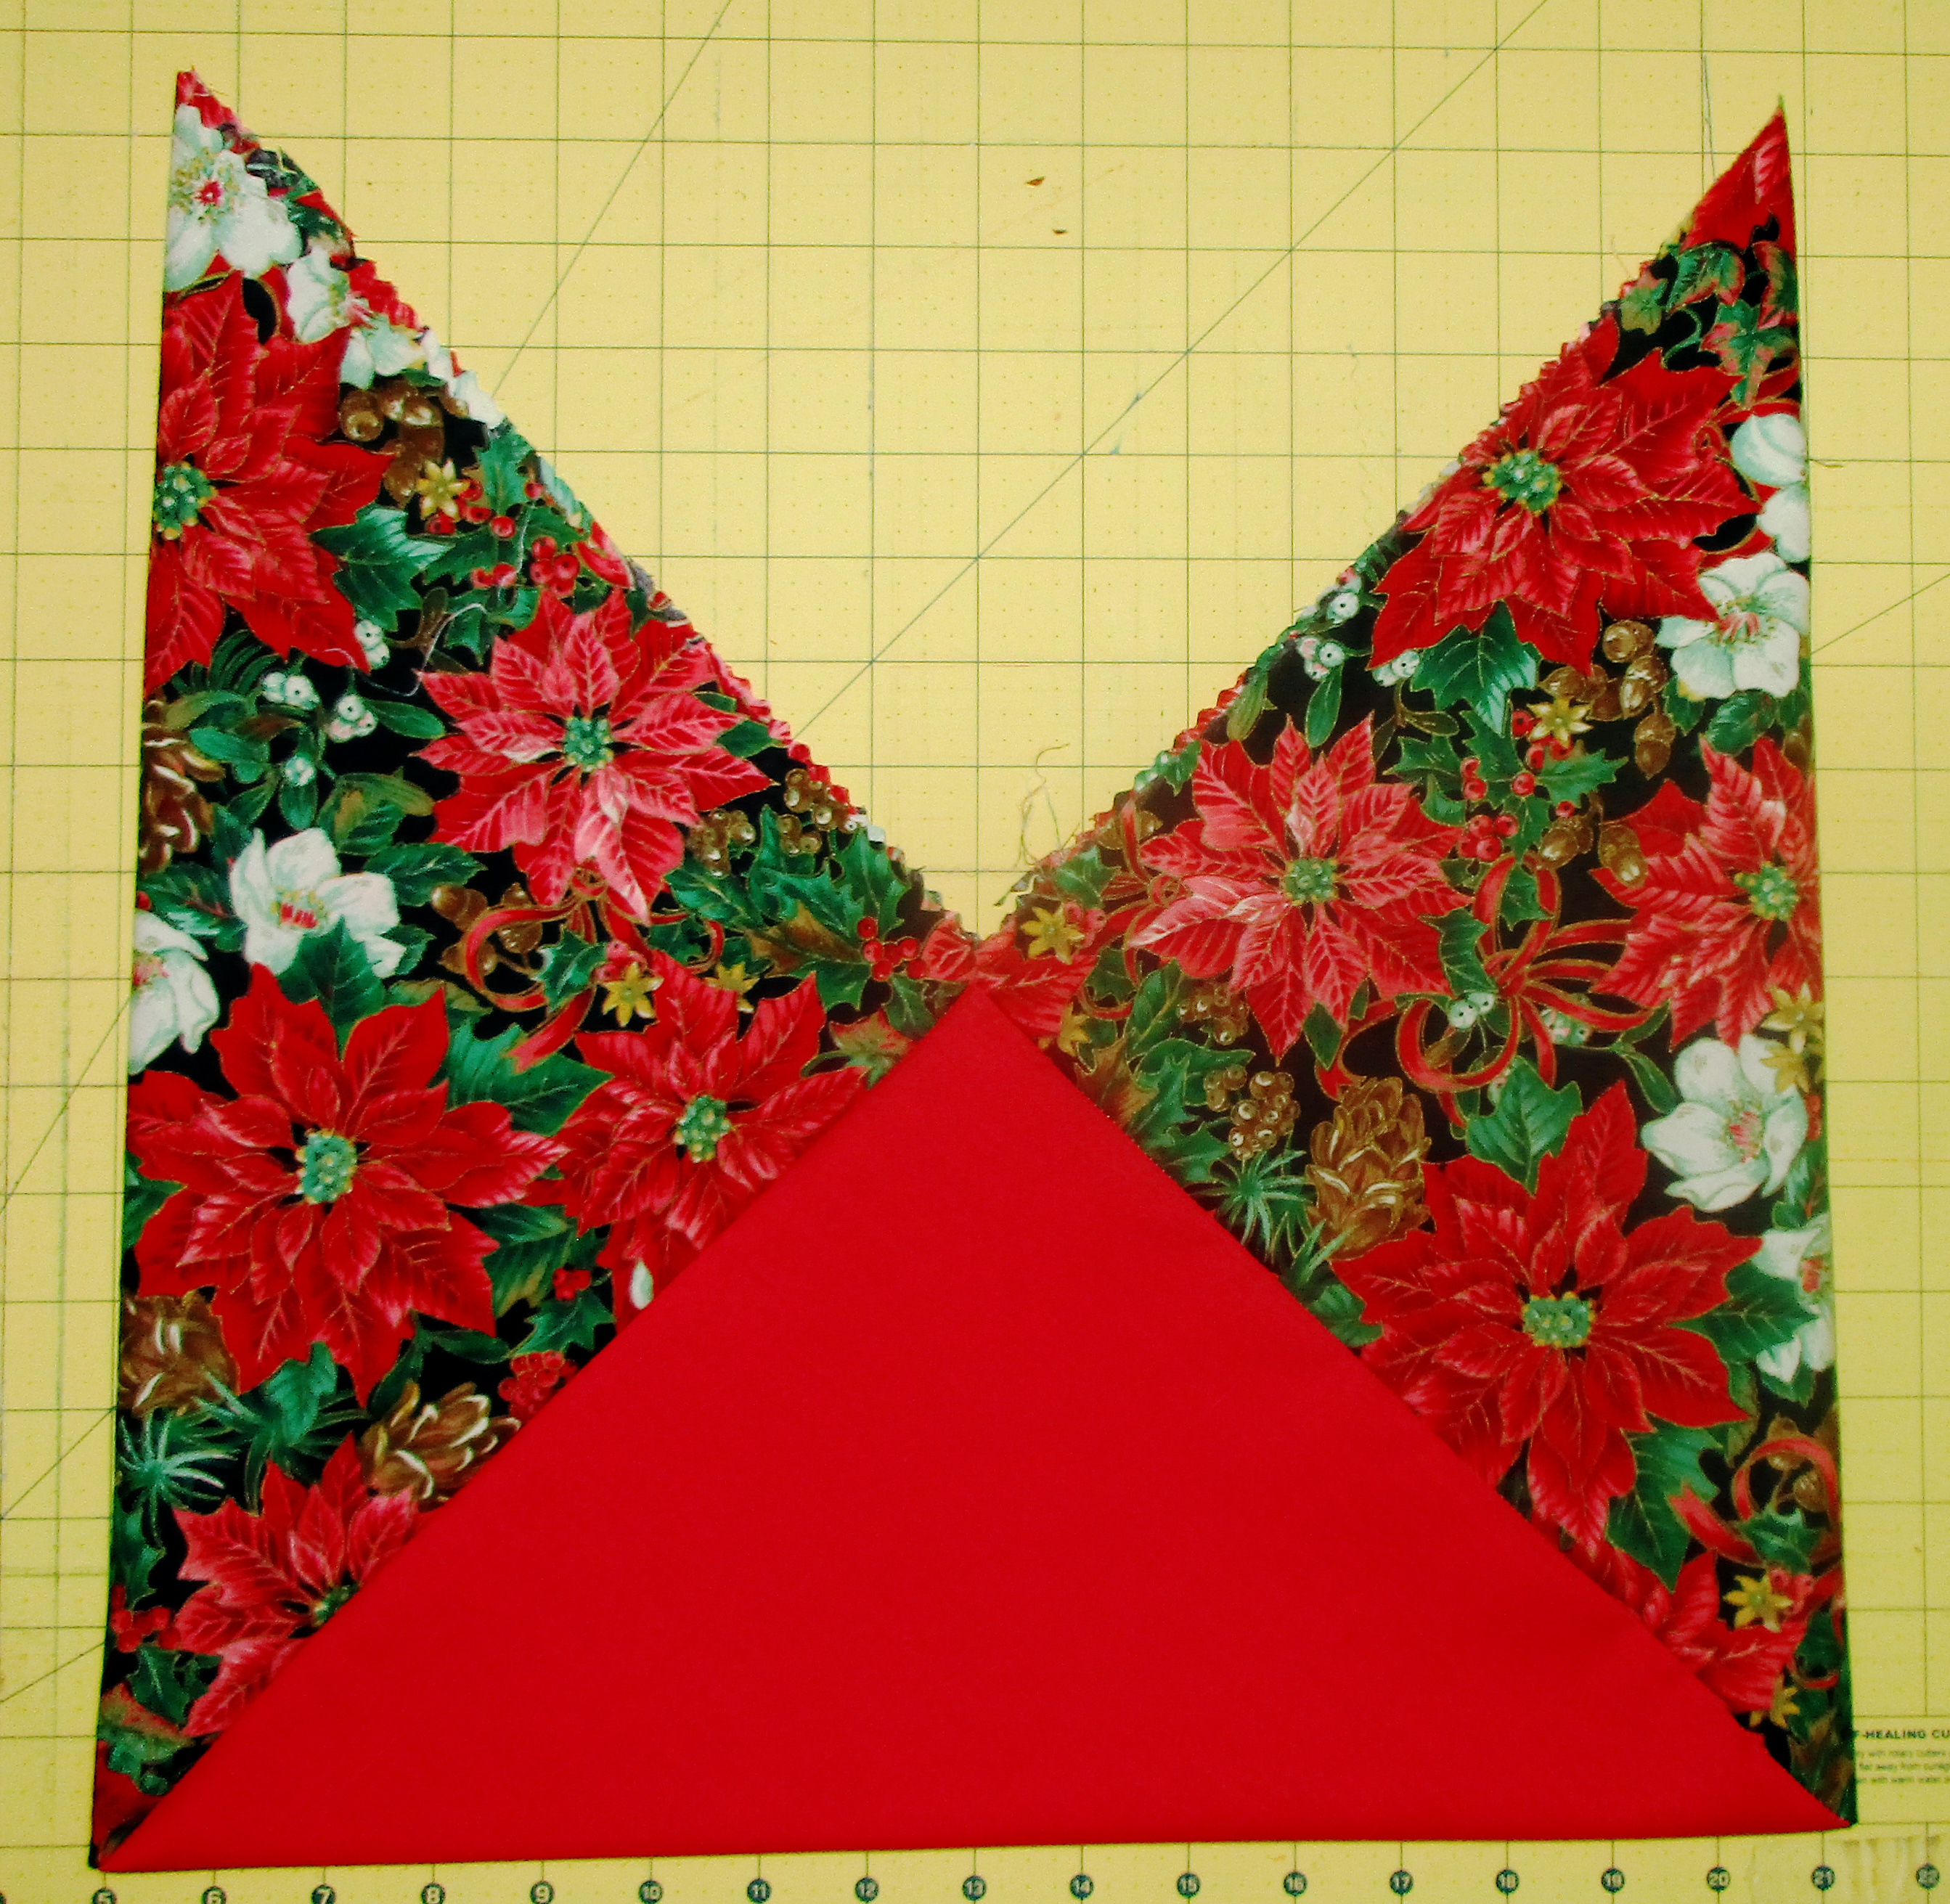
Then lay one triangle on top of the other at the right angles, forming a square where they overlap. Sew down along the edges of this square.
Overlap triangles at the 90 degree angles,and sew the square these form.
Now fold bag with right sides together and sew along both side seams. Box the corners and turn right sides out.
One More Way
Yet another way to make these is to start with three same sized squares, or six for a lined bag. You can use smaller scrap squares for this method than you can for the previous method, since this way uses more of them.
Sew two sides of one square to two sides of another square. Then sew two sides of the third square to the other two sides of the middle square.
You could line these as in the above methods, by sewing outer and lining squares right sides together and turning. Make three of these lined squares and then sew together.
This one is made from three squares. I’ll make the lining the same way & sew the two together.
Or you could sew the bag and lining pieces separately, forming two bags. Then put them right sides together and sew, leaving an opening. Turn, press,and stitch opening closed. Sewing it this way creates a reversible bag, by the way.
What to do with bento bags
Now you know a few different ways to sew bento bags. You can probably think of plenty of things to do with them on your own, but here are quite a few ideas from me for how to make use of these handy bags.
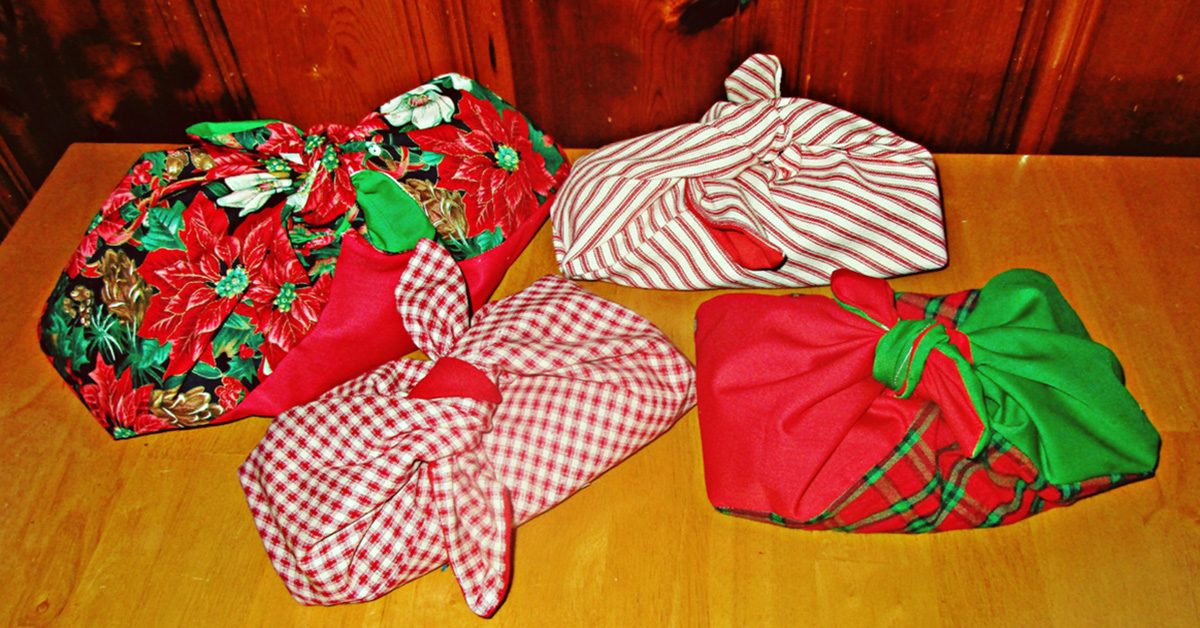
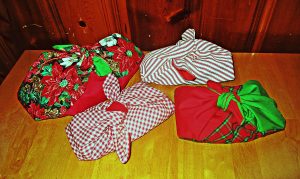
Gift bags
These make “re-useful” wrappings because rather than just being a fabric gift bag, the recipient can then use it for some handy purpose like any of the ideas below.
These are for summer birthday gifts.
And these are for holiday presents.
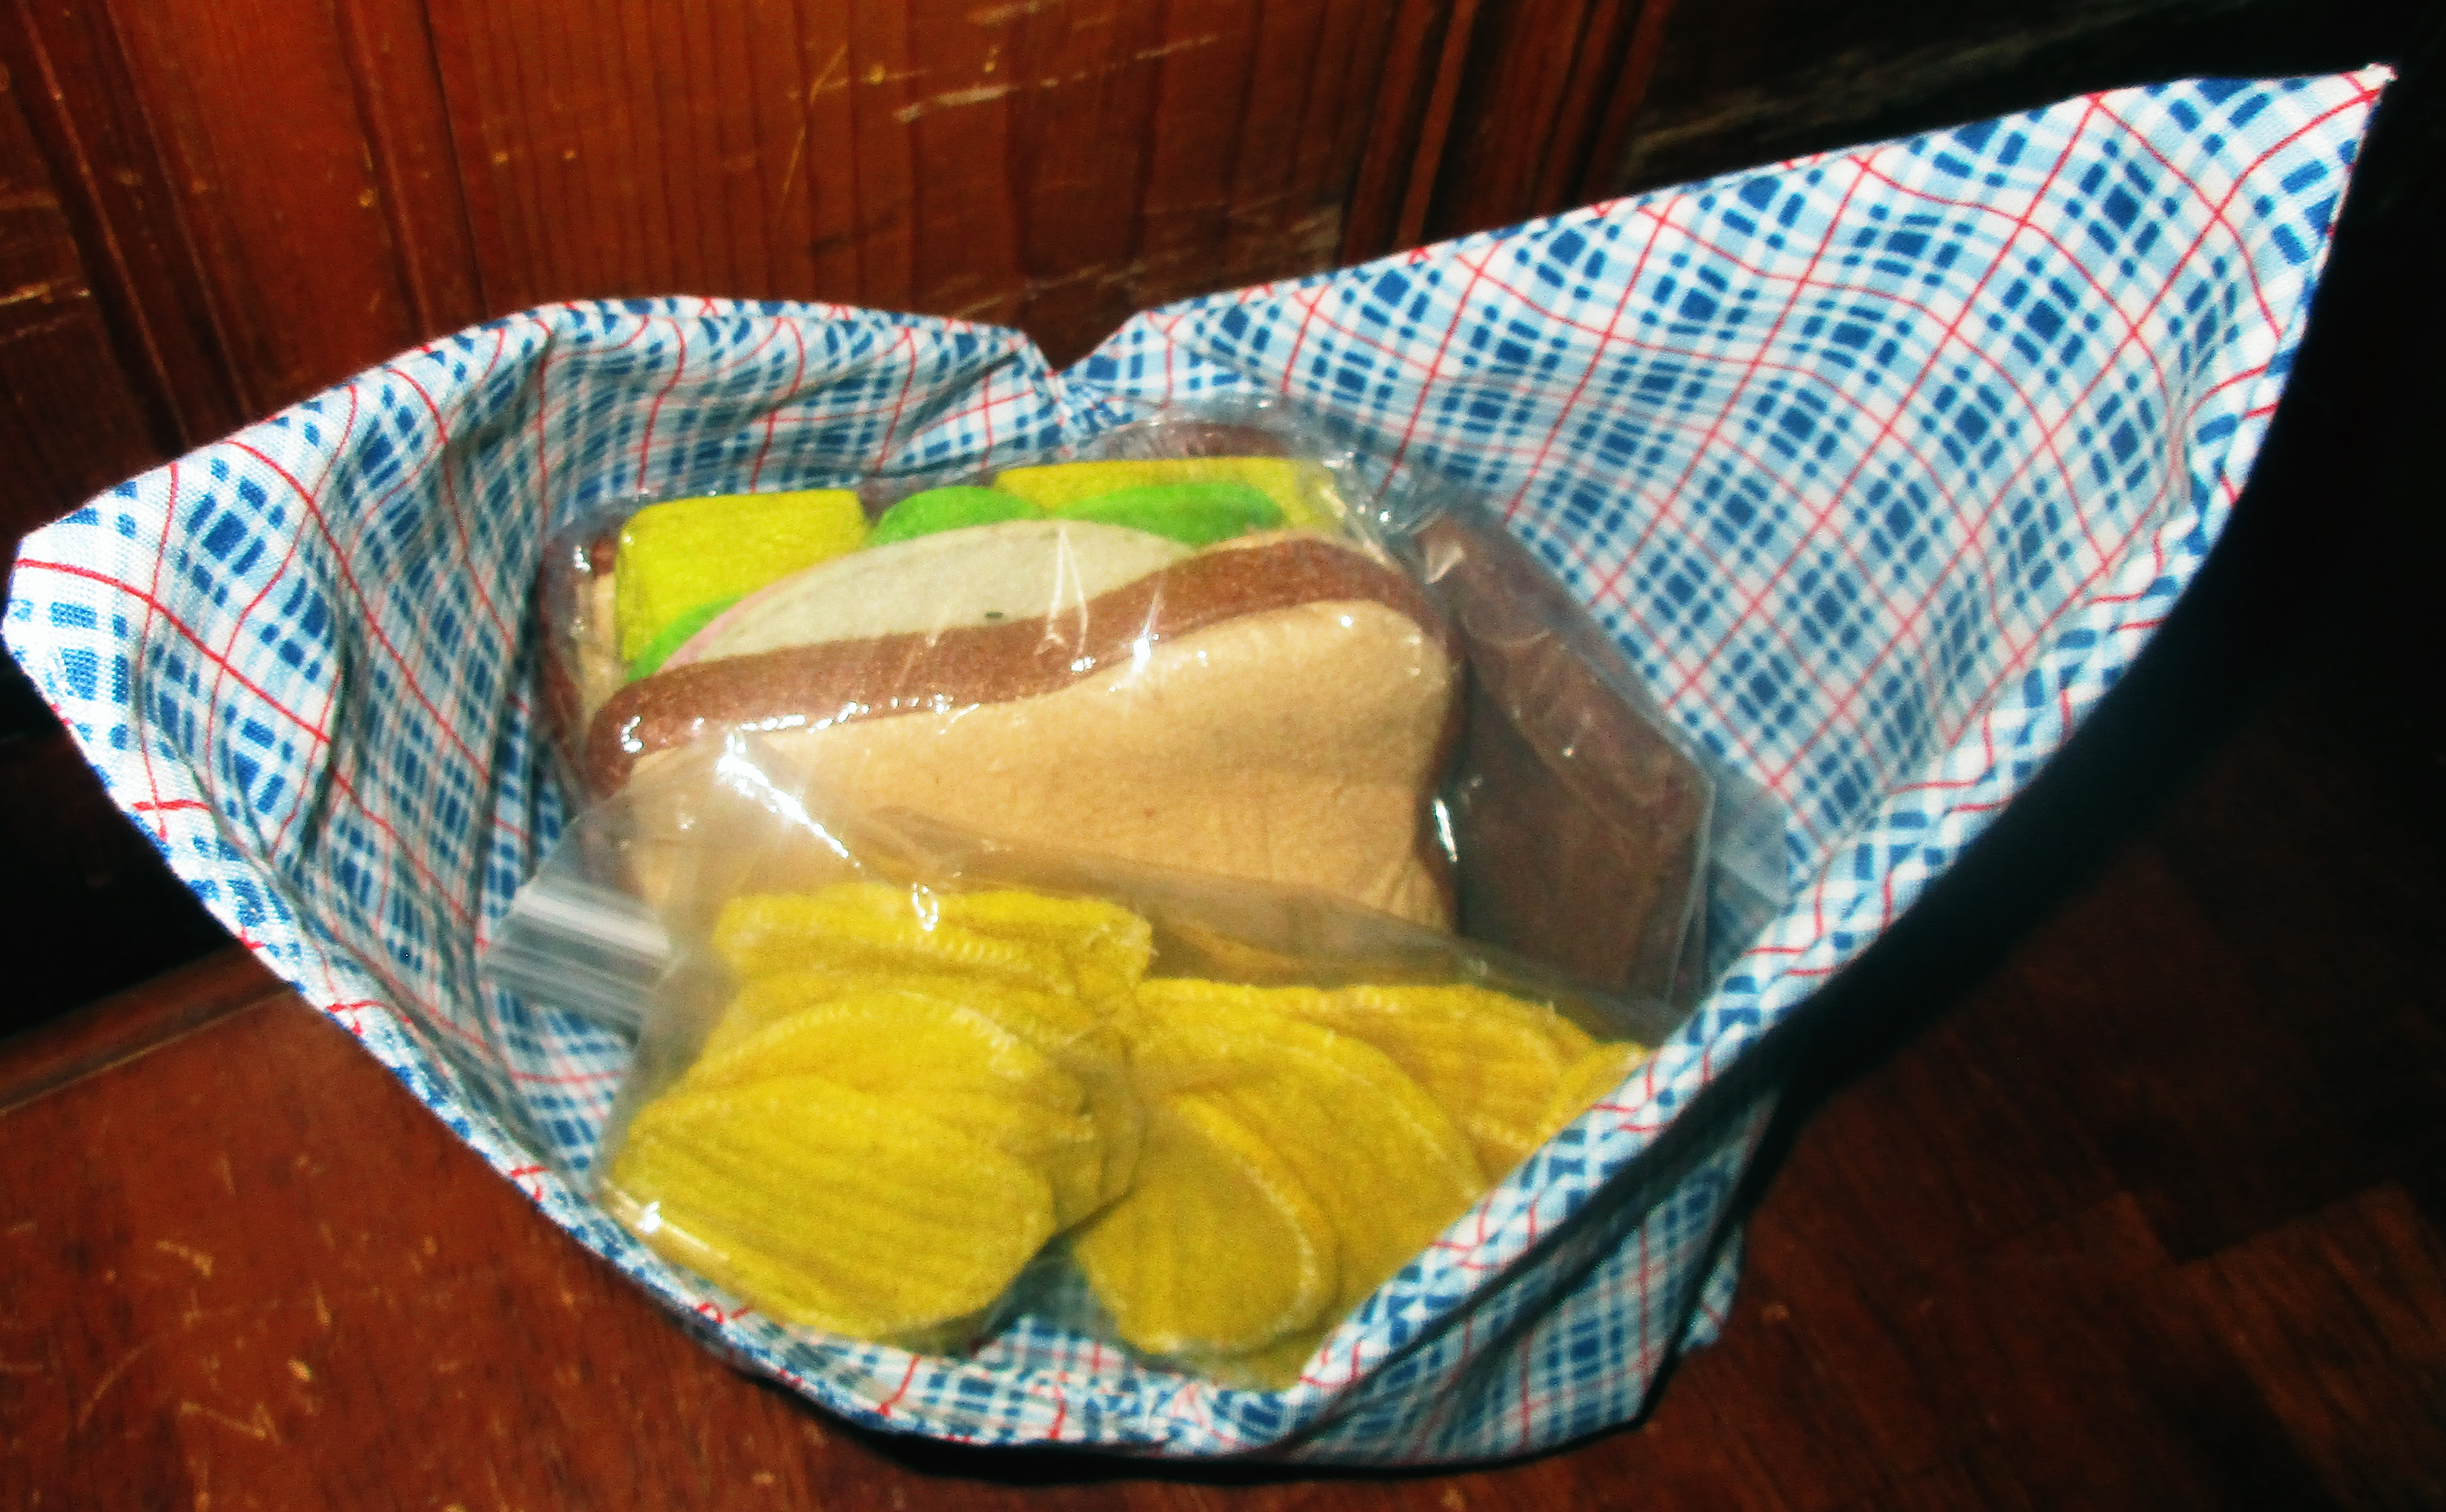
Lunch sack
I first found out about these bags when I saw an anime character on TV using one to carry her bento boxed lunch. You can use these to carry your lunch as a pretty package whether you also use a bento box or not.
Your lunch will taste much better than this felt example lunch! Just tie bag closed to carry.
Bread basket and cloth all-in-one
I’m thinking they are perfect for wrapping loaves of bread as gifts, and these can go straight to the table for serving the bread and keeping it covered, too
Grab and go sack
For pencils, yarn or knitting supplies, small patchwork pieces, works-in-progress: anything you need to keep together and carry along.
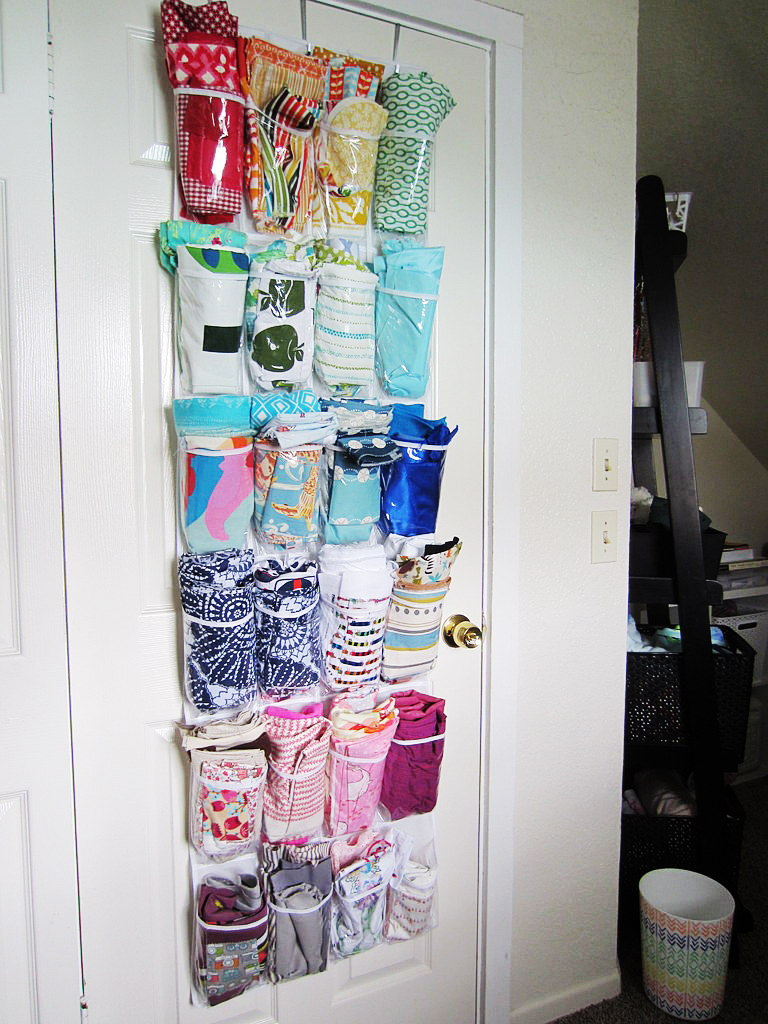
Sort-able storage
Make a set for sorting nails or other hardware; fabric, scraps, or trim; cords, wires, or anything else. I plan to make a rainbow set for myself to sort small pieces of fabric and scraps by color. This could be a solution for organizing tools, a kitchen junk drawer, or bead and jewelry supplies collection, too.
Basket / bin
You can make these with interfacing or even quilted for sturdiness. Especially when these are small, they will nicely stand up and hold things on a bureau, desk, counter, or table. Or stand one in a dresser drawer or cabinet.
Harvest bucket
Sew another strip of fabric to connect the two ends and it becomes a handy tool for harvesting your garden.
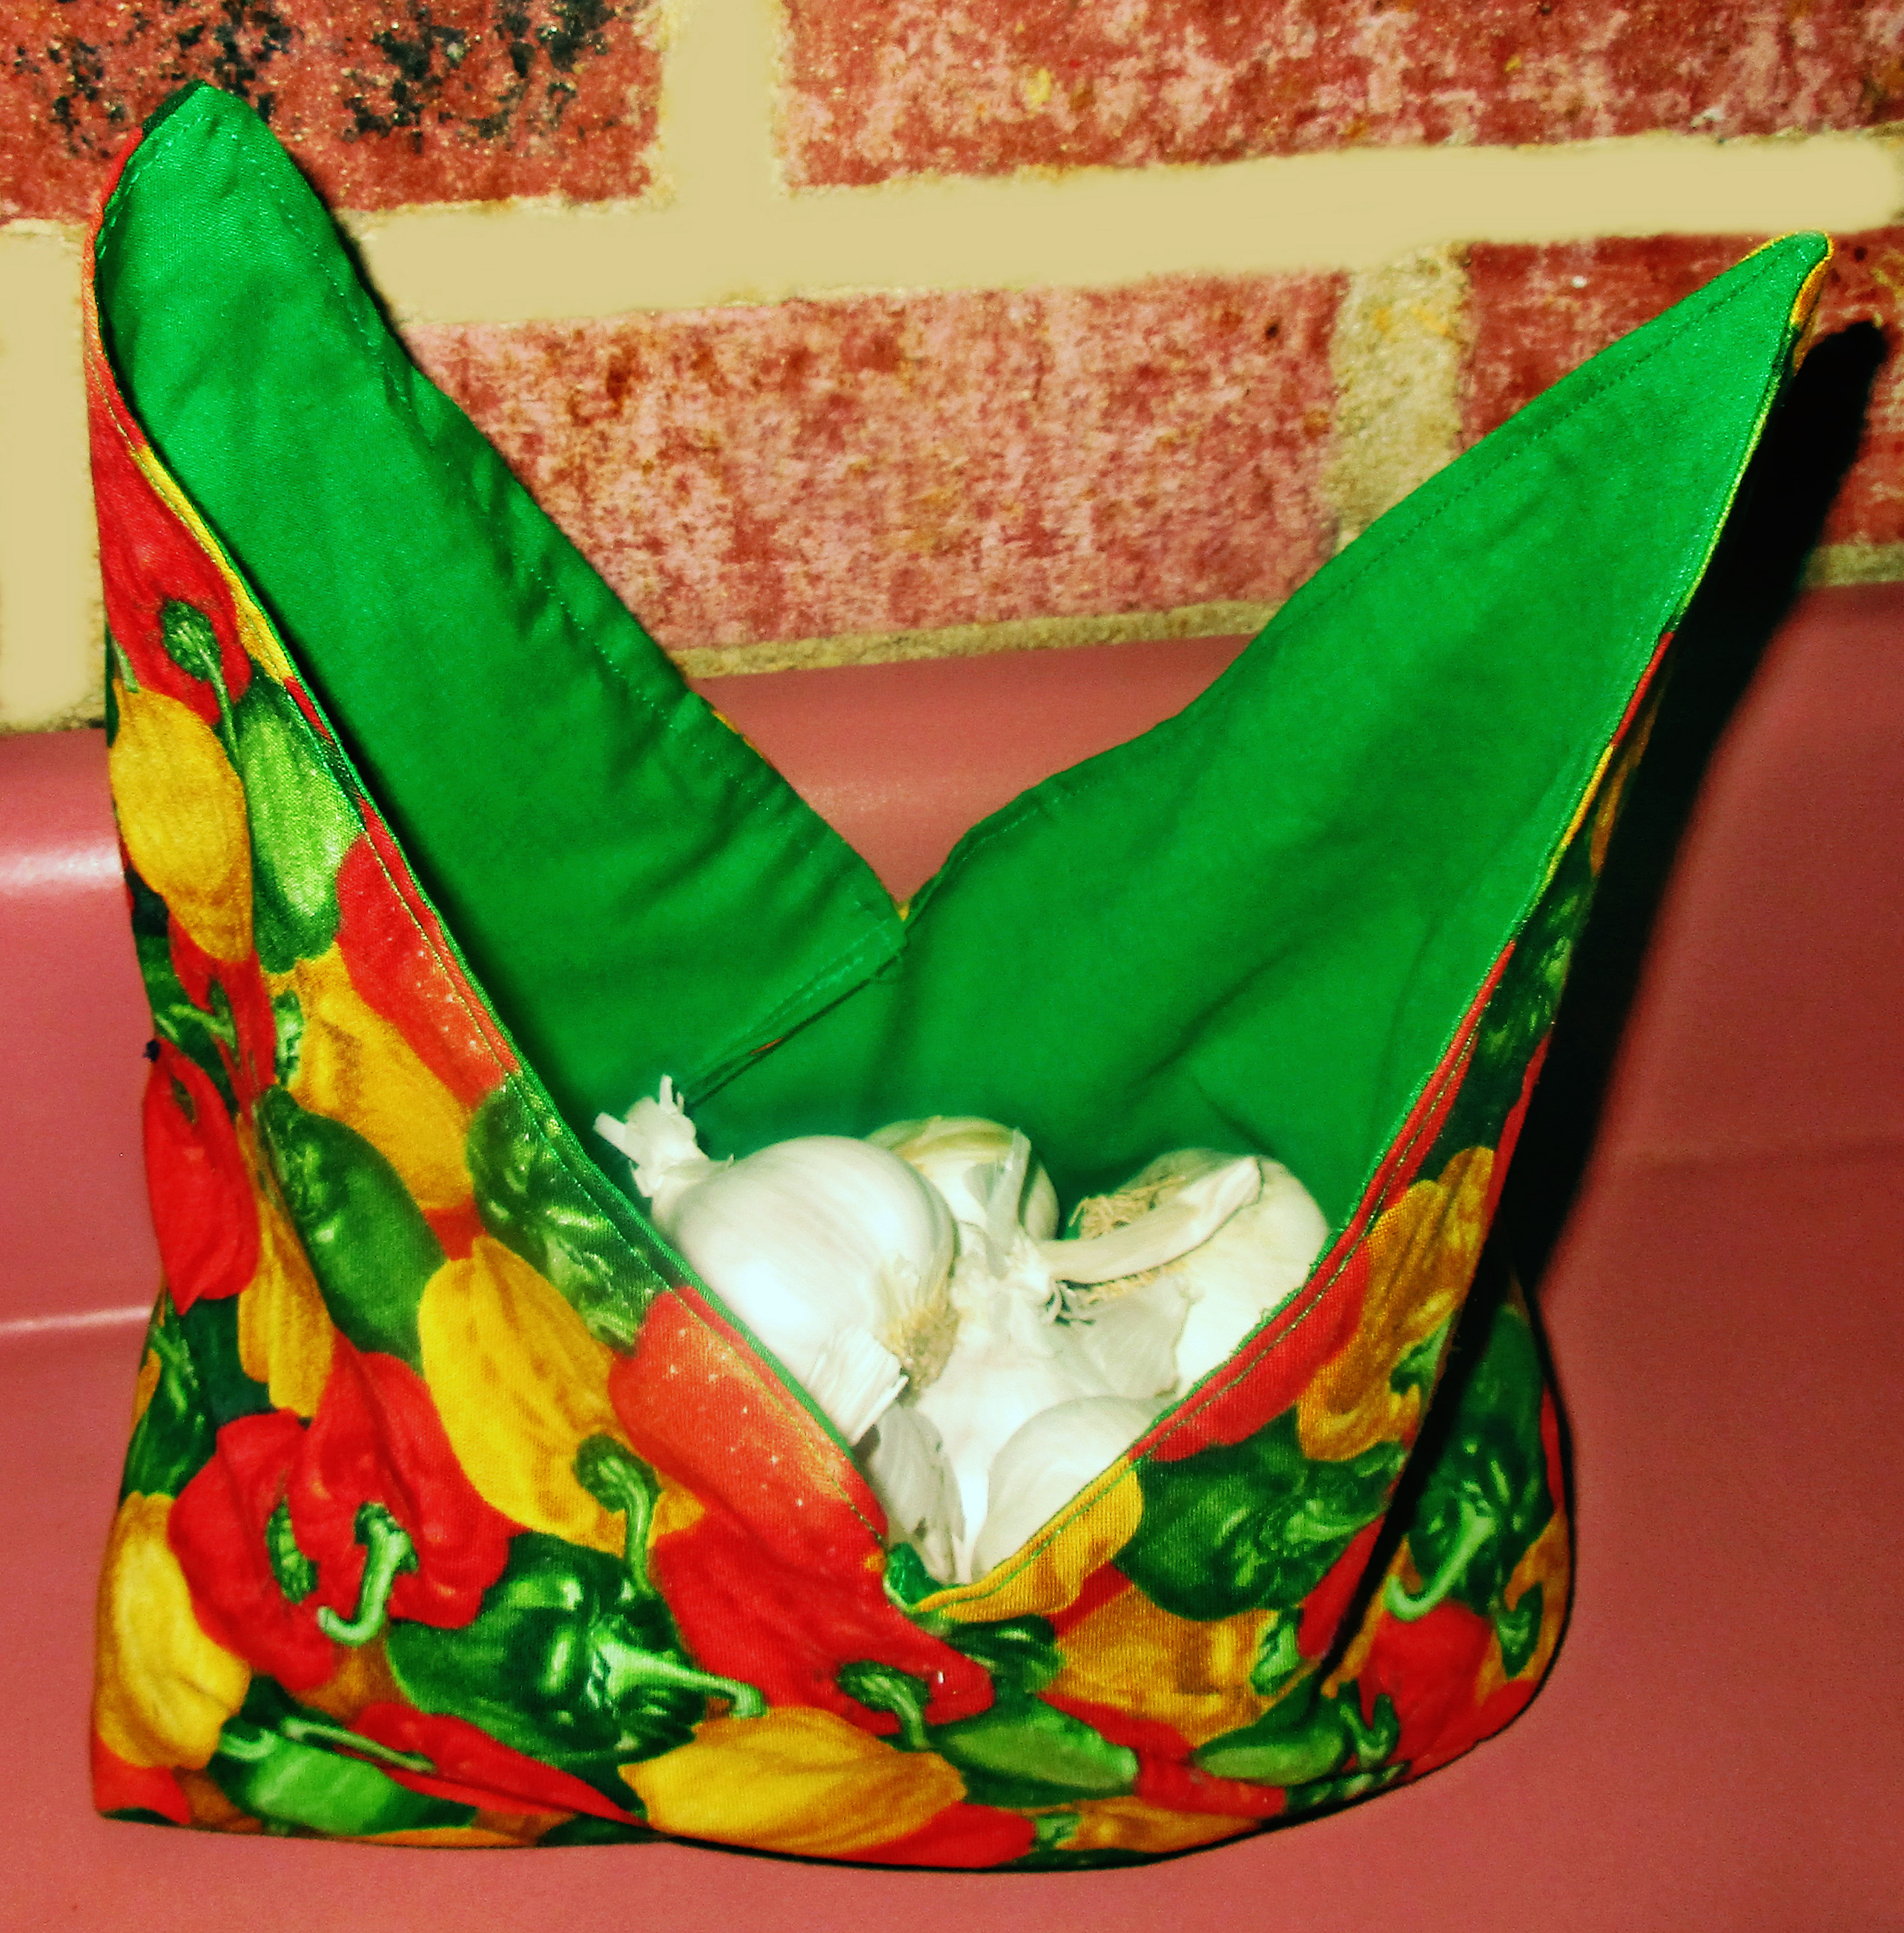
Produce bags
For separating fruits and vegetables on the counter or to use while shopping. Unlike many reusable bags, bento bags are easily machine washable.
Use them to harvest or store produce.
Purse or shopping bag
Sew a strip for a handle and carry a bento bag, small or large, as a casual purse or a shopping bag.
Make a strap by sewing a wide or two narrow rectangles into a tube, then tuck raw ends under & insert the ends of your bento bag, then sew.
Add to this list by sharing your ideas for how you will use these in the comments below. Happy sewing!
Sewing room organizing can be a constant battle. That’s because creative folks make lots of things, including what my dear calls “creative explosions.” I just call these big messes. You know what I mean: quilt trimmings & other scraps on the floor, piles of fabric or other supplies on the table, idea books scattered about, bins & boxes pulled out with their contents askew and similar messes.
I battled this kind of mess for years. But I seem to have finally developed the skill of keeping order in my creative room. For example, the days between Christmas and New Year have historically been sewing room organizing time for me. But last year after Christmas, I was surprised when I realized I didn’t have any sewing room organizing to do. In years past, I have worked busily making gifts, moving from one project to the next, and letting messes pile up around me until the holiday passed.
I can’t stand to do that anymore. Instead, I clean up thoroughly after every project, before moving to the next. Since learning to do this, and by vigilantly following a few other rules that I have discovered which help to ensure order, I have enjoyed my creative pursuits more than ever before. I think these sewing room organizing rules will help you, too, if you haven’t discovered them for yourself yet.
Whether you need to clean up after your own creative explosions or you want to prevent their occurrence in the first place, keep these rules in mind.
Sewing room organizing rule one: machines first
It might not sound like sewing room organizing, but the very first thing to do is to give all of your machines a thorough cleaning. This is the most important task in cleaning up messes in the sewing room.
If your floor is littered with threads and clippings, I guarantee your machines have similar build-up inside. And continuing to sew with a dirty machine will cause it to break! So get your chosen brush and sweep and clean every machine in your room really well.
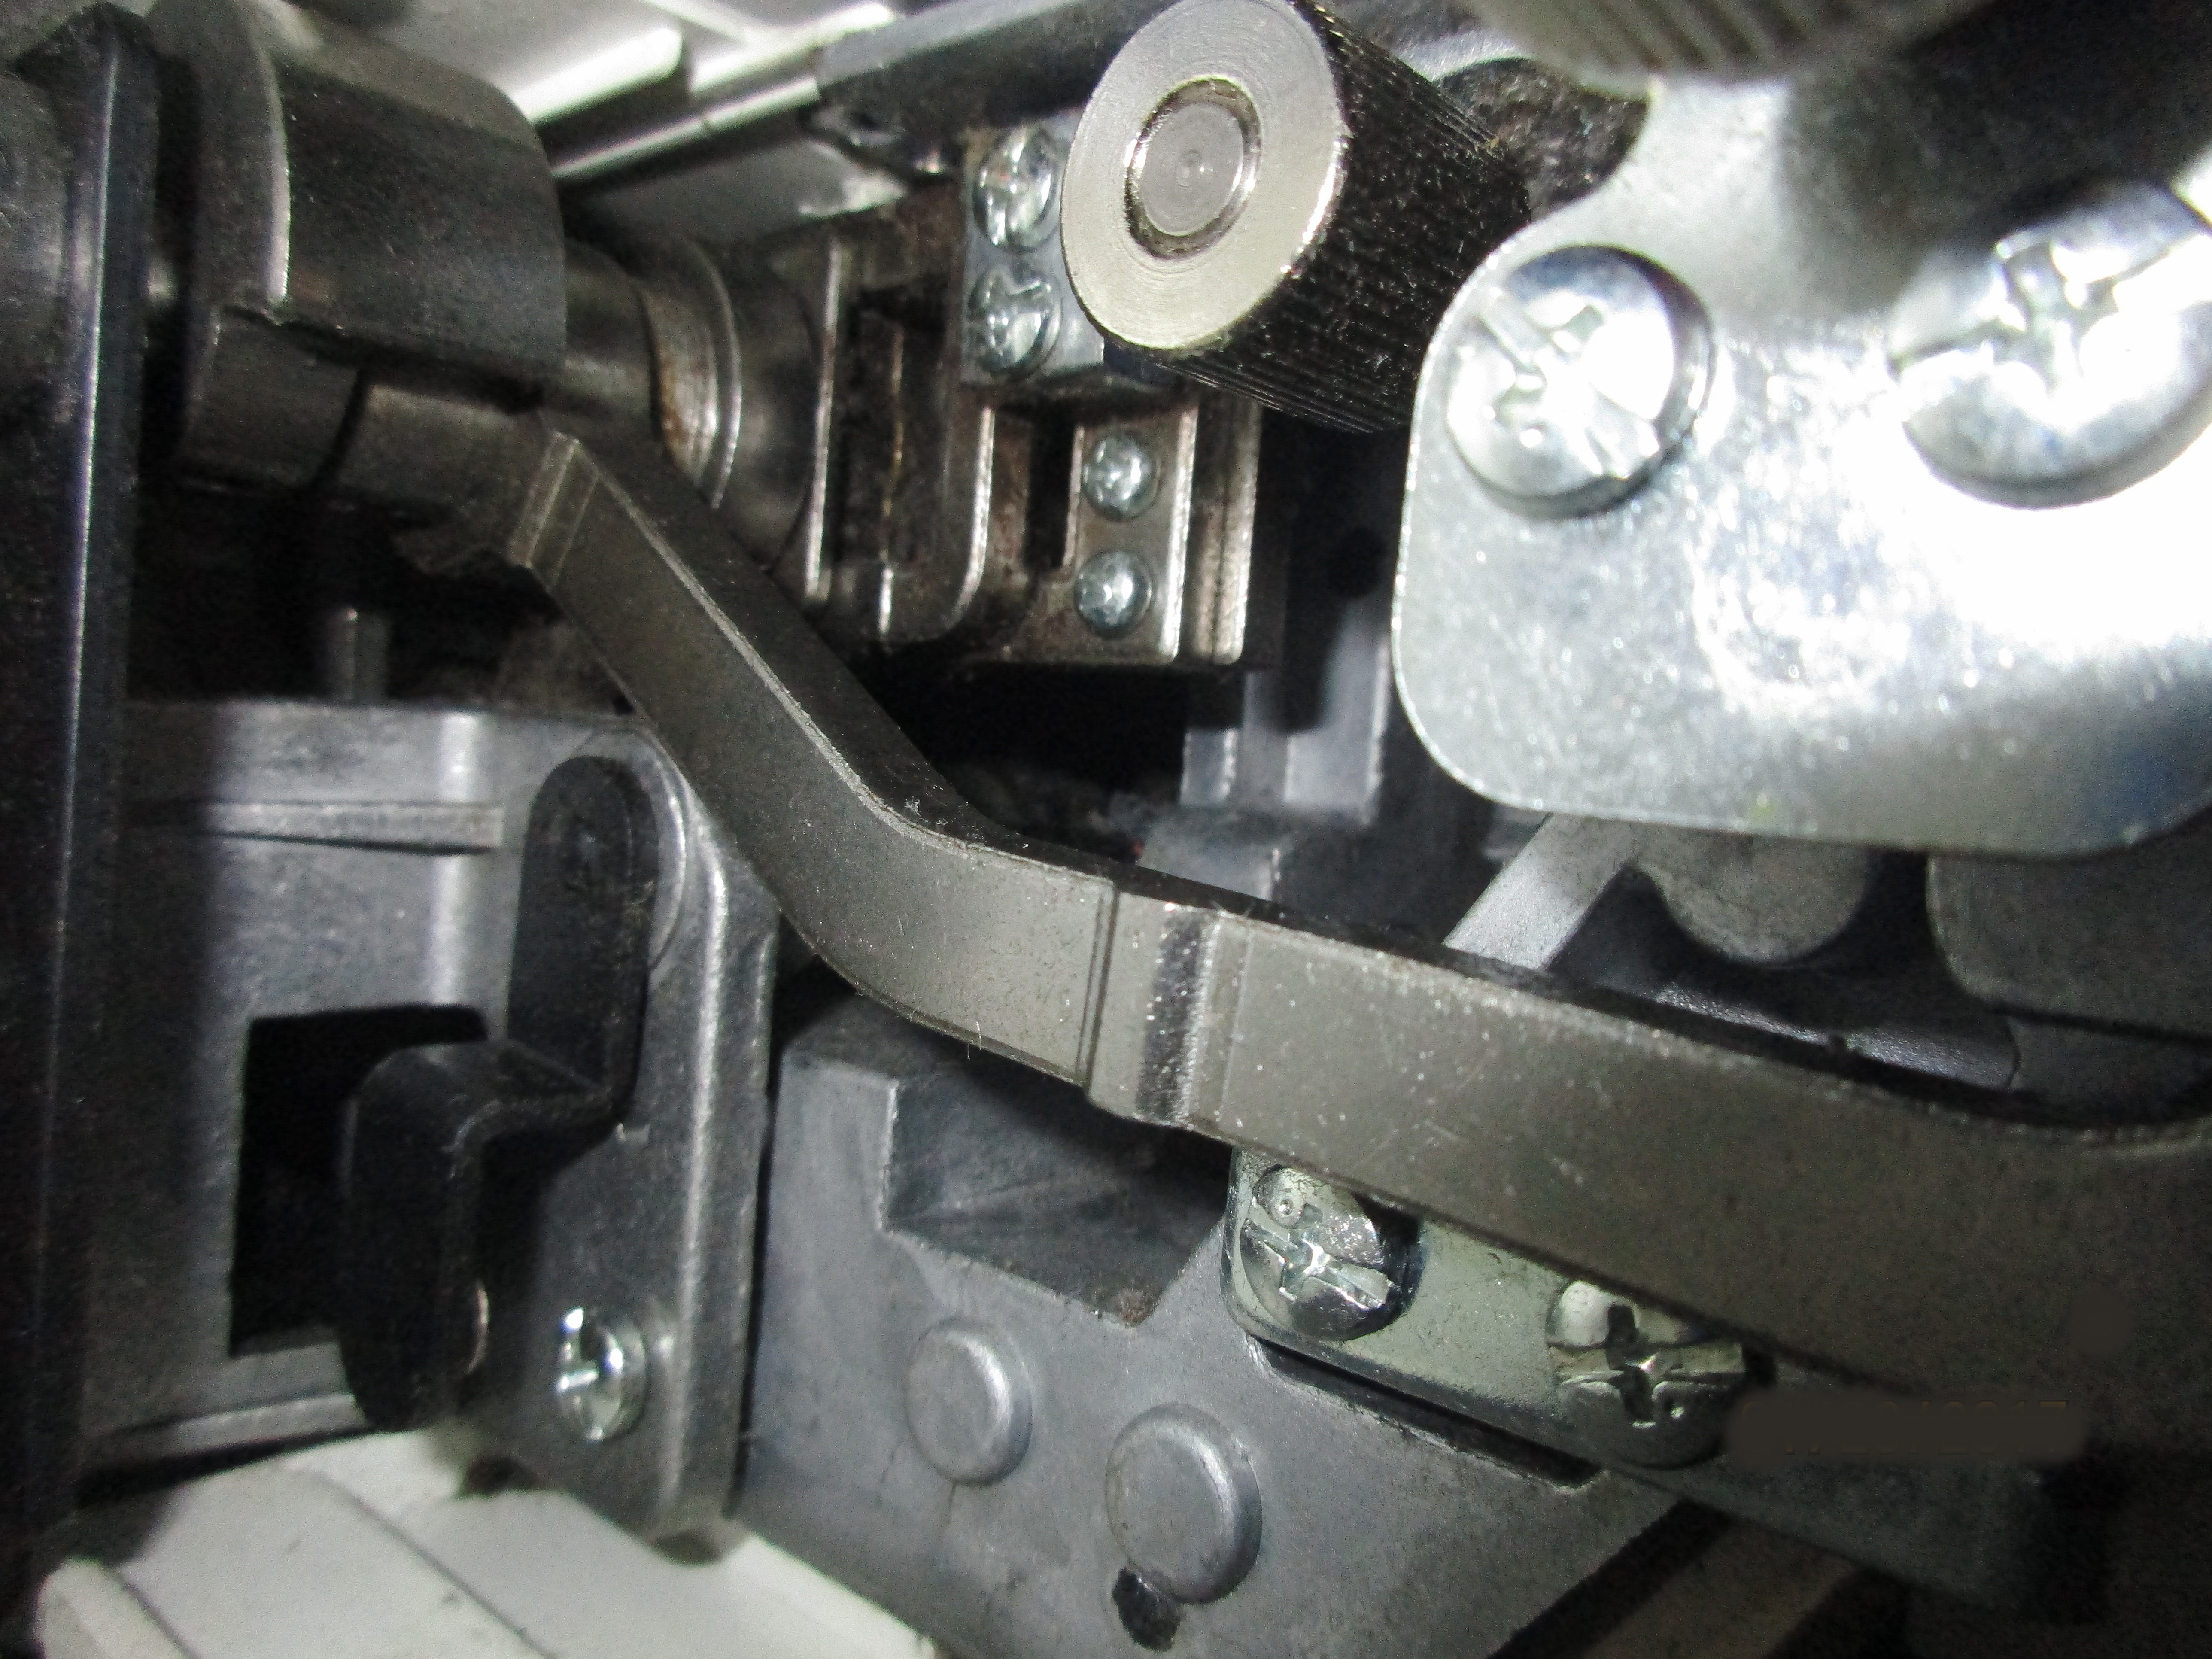
It’s easy to miss a spot.
Keeping machines clean
For sewing machines, remove the bobbin casings and take particular care in cleaning out inside and behind these. For sergers, sweep out every nook and cranny. When you think you’ve gotten it clean, sweep it out again. It’s easy to miss multiple spots. You can spend a lot of time sweeping out a serger repeatedly, and still not get it completely clean. Unless you have a magic tool, that is. The best thing you can buy to ensure a longer life for your machines is a tiny vacuum attachment to help get them really clean.
Always cover your machines to prevent unnecessary build up of dirt or dust when these are not in use. If your machine did not come with a hardcover, you can sew a pretty one yourself.
After cleaning, oil your mechanical-only machines according to their user manuals. Don’t oil your computerized or electronic machines at home; take them to Sewing Machines Plus or your local repair shop for yearly maintenance. Go ahead and take them in now so this will be done. If you cannot be without them right now, schedule this on your calendar to be handled as soon as possible. If you neglect your machine maintenance you will regret it. For future reference, a good plan to avoid being without your machines when you need them is to send them out for maintenance while you are on vacation.
Sewing room organizing rules 2 & 3:
Have ample workspaces
Keep them clear
After your machines, the most important things to consider in sewing room organizing are your workspaces. It is not possible to work efficiently without ample space. If you are using more than one machine, such as a sewing machine, a serger and a coverstitch or embroidery machine, you need enough space to have them all set up. You also need table space for cutting and layout.
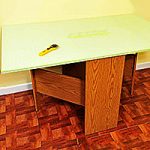
It is best to have the largest table that will comfortably fit in your room in order to provide ample space for working. I have a kitchen table in my room that I keep clear for cutting, and separate desks for my machines. I reconfigure machine placement depending on the project, however. When I am working on a bed sized quilt, I place my machine on the big table, so it can support the quilt. Having multiple workstations enables flexibility.
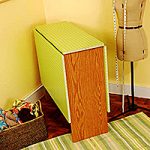
The Arrow Pixie cutting table doesn’t take up much space when folded compactly.
Keep tabletops clear.
If your sewing room lacks enough space to house such a large table, Sewing Machines Plus has an excellent option for you to consider. The Arrow Pixie cutting table doesn’t take up much space when folded compactly, but opens to provide table space for both cutting and sewing. It even has measurement guides and comes with a cutting board. It’s super cute, too.
Keep tables clear!
Ample work space will do you no good if they are covered with unfinished projects, supplies, or irrelevant items. My favorite rule for making sure that my creative space stays organized and is always ready for working is to keep all work spaces clear. I do not allow myself to store any items on top of my table top or desks, other than machines, of course. But because I reconfigure my machine placement according to what I am working on, I prefer to store most of them, covered, on shelves.
This way, you can keep your table and desks clean and shining, waiting for you to make something new whenever it suits you.
Other rules to remember
There are several other rules that have helped me to keep my sewing room neat and organized. Following these rules will help to keep your room working well for you, too.
You can’t organize clutter; keep unnecessary items out of your room.
Be creative with storage. For example, to maximize working space in my sewing room, I use an antique wardrobe and chest of drawers in the next room. The beauty of these storage pieces blends nicely with my family room décor. These happily hold my fabric, trims and notions, and other less often used items, such as my looms. Here are some DIY projects for creative storage solutions which will work inside the sewing room.
Keep like things together. Rather than storing tools all over the place, use a bin or other storage solution to keep these neatly together. The same goes for thread, notions, and etc.
Let the fabric live at the store. I am no longer tempted by fabric clearance sales and refuse to buy fabric to stash. I have learned that stashed fabric steals time, space, and money, so I do not buy any without a particular project in mind. Pretty quilter cottons are the only exception I make to this rule, as I know for sure that I will put these to use. Be a savvy shopper and take advantage of sales for stocking items you must have and will use. For example, I only buy white and neutral thread, and also cotton batting, when it is on sale.
Finish what you start. It is easy to get excited about new projects, but for keeping order, it is much more sensible to complete each project before starting another.
Do you have any other useful rules for keeping order in your sewing room? If you do, please add a comment and share it with us.
This is post one of a three part series on storing your fabric. Post two (how to store your works in progress) and post three (how to store your fabric scraps) are coming soon.
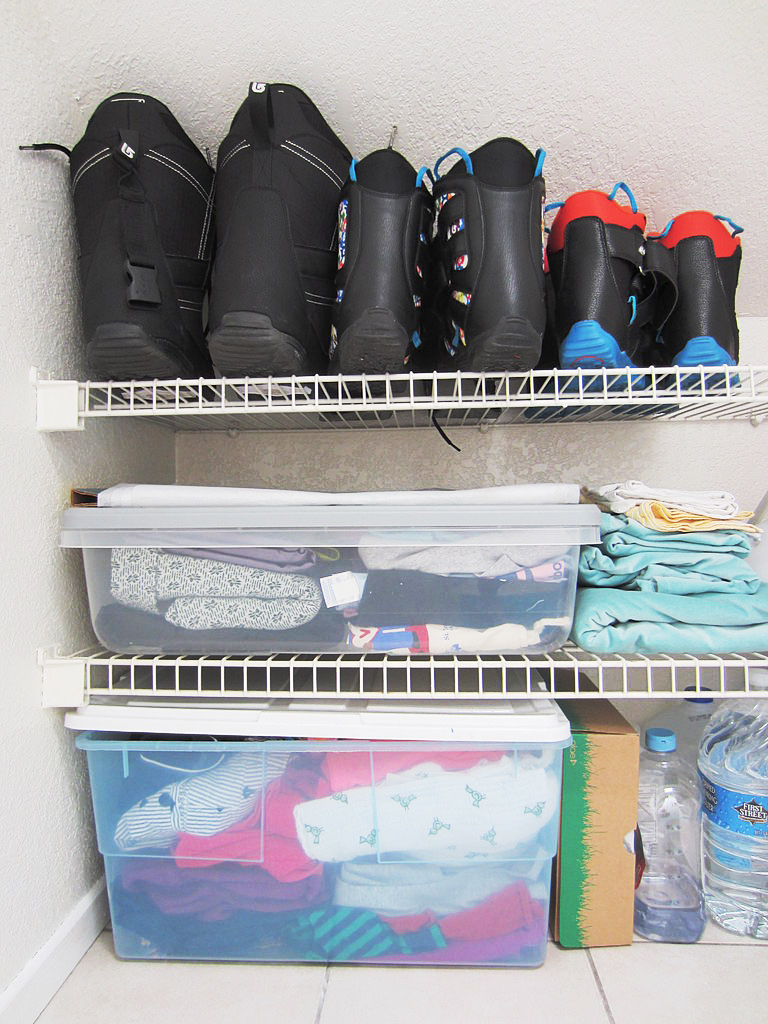
I keep my deep-storage and heirloom fabrics stored in a bin. Fabrics I’ll use soon are simply folded neatly awaiting their use.
How do you store your fabric stash? I have seen some of the most creative ways while perusing through Pinterest, everything from tucked in the drawers of a dresser, folded neatly on the top of a bunk bed, or deftly displayed in KITCHEN, yes kitchen, cabinets. Who needs to eat when you have beautiful fabric to sustain your soul anyway?
No matter which way you decide to organize your fabric, you will need to keep several things in mind.
My works in progress are kept in a tall bin and labeled so I know where to easily find them.
Store Covered
If you decide to store your fabric in bins, consider using plastic instead of paper, or file boxes, or baskets. Keeping your fabric covered will better protect it but consider using a plastic container with tiny holes (or creating tiny holes) to allow the fabric to breathe and to prevent synthetics from yellowing.
Tape a cedar block inside the container to help prevent moths and other insects from taking up residence.
Store away from sunlight to prevent fabric from fading.
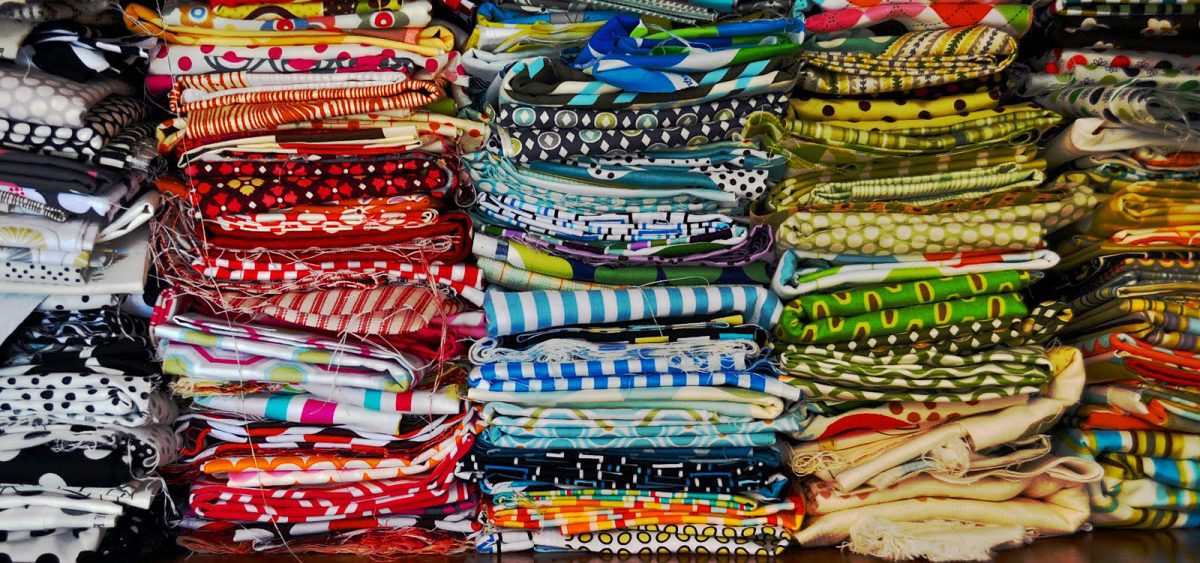
My lovely stash. I do take the time to dust off the fabric about twice a month.
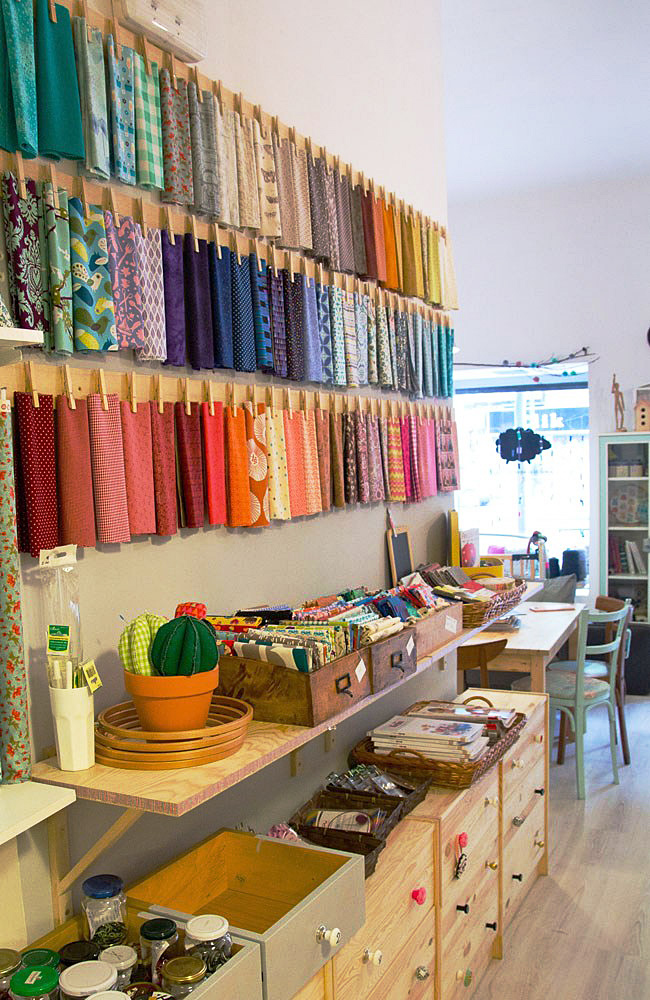
Display It
I love the quick access that openly displayed fabric offers. However make sure to keep fabric away from direct sunlight.
Dust! Your fabric will accumulate dust if displayed or left in the open. Keep it tidy with a frequent dusting or airing out.
Keep it clean – little children love to touch and play with fabric and even some adults can’t help but reach up and touch gorgeous fabric. Be aware of where you display your fabric and how frequently it may be handled by people whose fingers could leave it soiled.
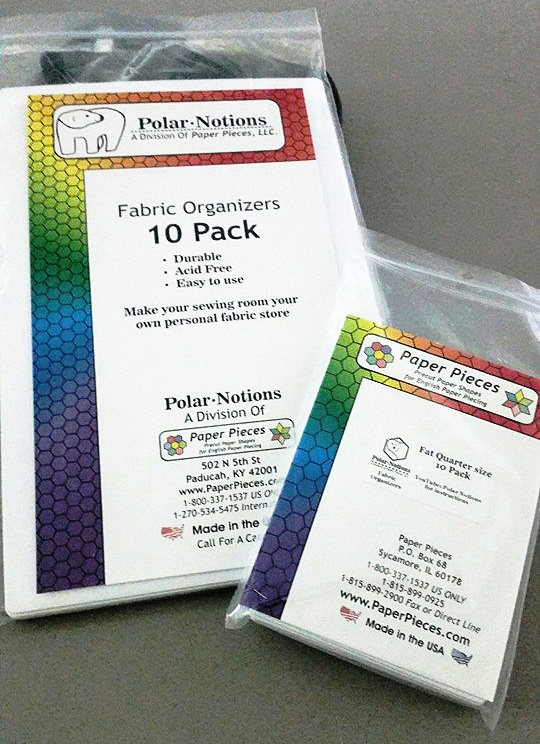
I just discovered these puppies and as soon as we move to our new home and I start working on my sewing room, I plan on ordering some to start wrapping and displaying my stash. Unlike fabric-store pieces of cardboard, these organizers are sturdy and acid-free. Storing fabric wrapped around cardboard will eventually discolor your fabric since cardboard is not acid-free.
The sad result of what happens when you use regular cardboard to organize your fabric.
I’ve found two brands that offer this acid-free option. Polar Notion’s boards are made from plastic and The Fabric Organizer’s boards are made from an acid-free corrugated cardboard. Both look fantastic.
Think about which product would suit your needs and your stash better.
The larger Polar Notion holds up to 15 yards of wrapped fabric and the smaller one is perfect for fat quarters and smaller pieces of fabric. The Fabric Organizer’s large size holds up to 10 yards. It is also cheaper than Polar Notions. Think about which product would suit your needs and your stash better.
Do you have a favorite method of storing your fabric? Let us know how you do it in the comments below.
Charlotte Kaufman is a writer and sewist in San Diego, California. She specializes in marine and home interiors and continues to fall more and more in love with quilting. You can follow her at charlottekaufman.com.