Basics of Quilt Maintenance

Maintenance. It can be a big deal in home, car and… quilt upkeep. That’s right. Just like letting your car go well beyond its oil change moment can snowball into a vehicle that isn’t budging without a major repair bill, not maintaining a quilt in the proper way could result in a sentimental treasure that’s good for little else than — maybe — scrap material. Sure, your quilt might not cost as much as, say, an engine to replace, but there’s more value in something handmade than a dollar sign. Maybe it was a wedding gift from a relative or a crib accessory that your mother started making before you slept your first night in said crib. Those types of belongings can have a lot of worth, so preserving them might be a big deal.

Wear, tear & time

Don’t break your own heart by letting this kind of damage happen to something close to it!

Don’t break your own heart by letting this kind of damage happen to something close to it!

One of the most important details about this preservation is to keep an eye on the products on a regular basis since smaller complications that come from wear, tear and time could be much easier to repair than those that have been expanding for some time. Other important details are to know how to fix the damage and determining if the damage is even fixable. As an example for these aspects, I’ll use a quilt that has some sentimental value to me, but a lack of maintenance has taken its toll. Don’t break your own heart by letting this kind of damage happen to something close to it!

Damage control

Let’s examine this first spot of damage, shall we?

Let’s examine this first spot of damage, shall we?

Let’s examine this first spot of damage, shall we? It looks fairly simple with just two simple holes in the top layer of fabric, so if I begin this examination with the basic question of whether or not it’s fixable, the answer would be yes! The smaller sizes here would allow a little bit of embellishment — maybe a patch — to be placed directly over the damaged area. Since this is a quilt that has a floral design, I could add something like a butterfly there so that it looks like it’s landing on the flower. Sure, it changes the design a bit, but it fits and is corrective. This issue, it seems, was detected in time!

Do away with the fray

The material is showing wear & tear around the seams and that’s not very surprising!

The material is showing wear & tear around the seams and that’s not very surprising!

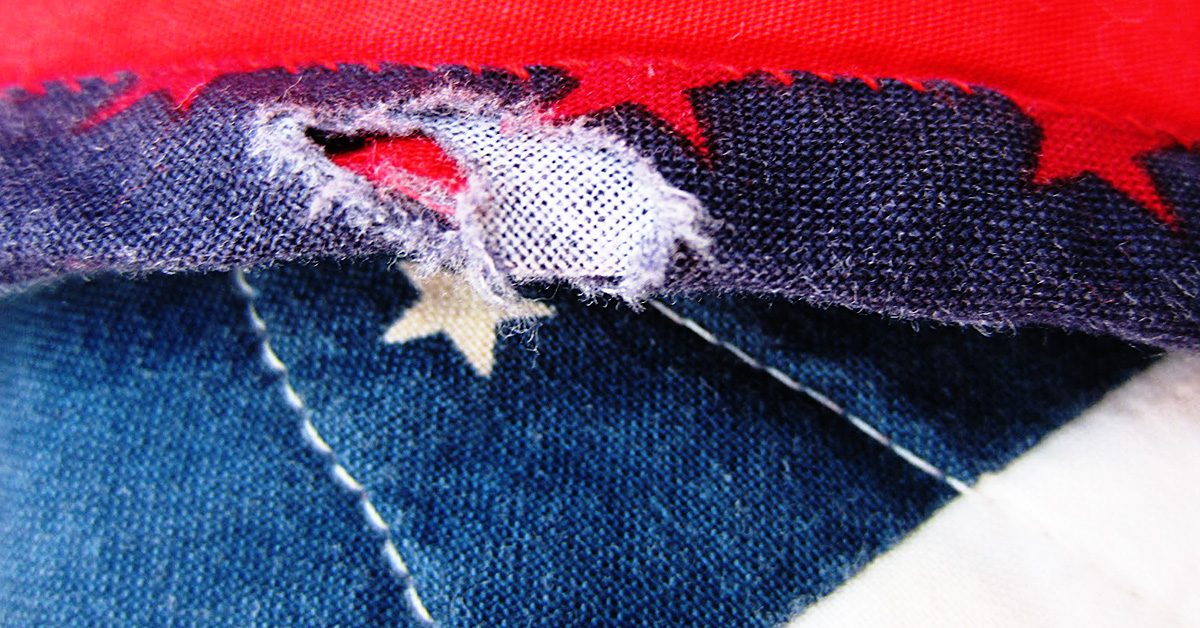
Now, let’s try this one. The material is showing wear and tear around the seams and that’s not very surprising! The damage does extend a bit beyond the immediate area surrounding the seam, but it still seems to stem from that one line where the thread is running through. So, is it fixable? Yes! All I would need to do is add a border around the block to cover the issue, and if I did that for every block, the strategy would be replicated throughout so that this block wouldn’t look out of place. Again, it would change the design of the quilt, but not in a way that would necessarily make it look odd. I could match the border to the colors already present, and the addition could actually create a popping look for each block.

To fix or not to fix
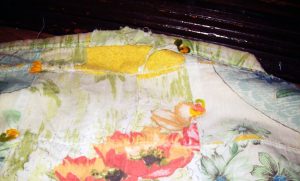
This one is shredded, & the top layer isn’t covering as much material as it did in the prior pictures. But is it fixable? Believe it or not, yes!

This one is shredded, & the top layer isn’t covering as much material as it did in the prior pictures. But is it fixable? Believe it or not, yes!

How about this one? Well, the damage here is much more drastic than a simple tearing from stitching or tiny holes in the fabric. Instead, this looks more shredded, and the top layer isn’t covering as much material as it did in the prior pictures. But is it fixable? Believe it or not, yes! Since this area is at the end of the quilt, changing the size of the quilt could work. I would need to cut off enough material on this side of the quilt so that the damaged territory is done away with and redo the border work. It’s not as easy of a fix as sewing on a butterfly embellishment, and the appearance of the quilt would definitely be altered by the smaller territory. But, if pressed, this would be a fix!

Too far gone?
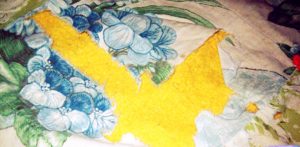
The fabric became too worn, whether from use, washing, time, or some other variable, & without the proper methods to fix the problem, it spread.

The fabric became too worn, whether from use, washing, time, or some other variable, & without the proper methods to fix the problem, it spread.

Now, we get to this one. Here, this looks as if the fabric became too worn, whether from use, washing, time, or some other variable, and without the proper methods to fix the problem, it spread. Of course, there could be another explanation for it. Perhaps someone ripped it, and the damage grew. Whatever the reason, the faulted block is in the midst of the quilt, and this fabric probably won’t go together at this point. This one, dear readers, doesn’t seem to be strategically fixable. In my defense, this damage could have happened before I got into sewing, but if I’d paid attention and caught a small hole in the fabric, I could have embellished it. If there was a tiny rip, I could’ve stitched it. As it stands though, the only ways I can see to fix this would be to add on an embellishment that would be too large to look natural or change the entire block — which would throw off the pattern of the quilt. This one, it seems, has gone too far.

And this is precisely why you should keep an eye out for damage! If you catch the smaller problems, you can fix them. If you let them escalate, you could be looking at a ruined quilt. So to preserve your works, keep tabs on them and — through borders, embellishments, and adjustments — tend to those issues as they show up!

Reuse and Recycle...Material!

Reuse and Recycle…Material!

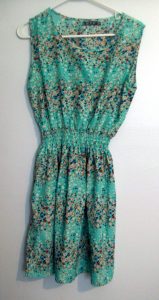
I had this piece of clothing that really wasn’t my style.

I had this piece of clothing that really wasn’t my style.

I’ve heard stories about my grandmother recycling material and such for the sake of future sewing projects. And, no, I’m not going give you a how-to of how to cut up your couch for the reusable material and filling! But the overall idea is a part of the general theme of today’s post: Reusing material for a new purpose.

I had this piece of clothing that really wasn’t my style. It’s the green, flowery one in the picture, and it wasn’t something I felt was *me* enough to wear in public. BUT, it did get the gears in my head turning with possibility. Even though I didn’t want to wear this as a top or a dress, I was convinced it could make a fairly good apron. I decided to keep the material for future cutting/sewing use.

I think it was last week that I got around to working on the project, and the process wasn’t all that difficult. In fact, there’s a tip for new sewers: Keep an eye open for projects that wouldn’t be overly difficult to build your sewing skills. What I had in the beginning with this piece of material just looked like it could be an apron, with the style and the fabric. And, when thinking through how I’d go about turning the clothing into an apron, I realized the steps wouldn’t be that numerous. If you can catch enough finds like this one—things you might have around your house that you’re maybe planning on throwing away—you can reuse material, make projects for little to no money, and improve your sewing with what could amount to baby steps! Sounds like a win to me!

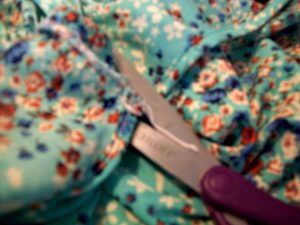
One side of the clothing had the seam along it, so I only had to follow the outline there.

One side of the clothing had the seam along it, so I only had to follow the outline there.

So what were the baby steps for this project? Well, they started with cutting, since I don’t know that I’ve ever seen an apron with a full back on it. One side of the clothing had the seam along it, so I only had to follow the outline there. The other side depended more on my judgment, but I do have a sewing mat and a rotary cutter now to hopefully help make more accurate cuts. Yay, sewing tools!

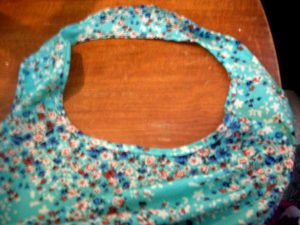
The material circling the neck could stay in place though, since aprons attach there anyway. That particular curve required a secondary round of cutting, which I’ll blame on my lack of experience with apron-making. I don’t usually have to make the right-place cuts for loops to go around my neck, so I won’t think too harshly about myself for going overboard on the first try. In the end, if you try for an apron, remember the loop should probably be no more than one inch thick once your sewing is finished, and make sure you’re keeping with the same general width range throughout your cutting. Otherwise, your backing might seem bulky overall, or just in parts. Neither is necessarily a good option!

Remember the loop should probably be no more than one inch thick once your sewing is finished.

Remember the loop should probably be no more than one inch thick once your sewing is finished.

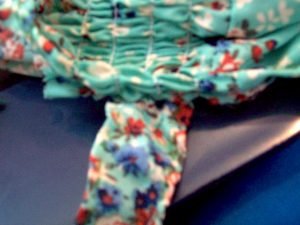
Once I was finished with the cutting, I sewed hems along the edges where I’d cut, and used some of the material I’d cut off for straps that I could use for the ties to attach to the waist. Honestly, that task was kind of frustrating since the straps were so small, and the thread kept bunching or wrapping around the fabric. Lesson I could potentially take from this experience: Tiny material should maybe be reserved for later use, like after I’ve gained more experience with sewing!

I sewed hems along the edges where I’d cut, and used some of the material I’d cut off for straps that I could use for the ties to attach to the waist.

I sewed hems along the edges where I’d cut, and used some of the material I’d cut off for straps that I could use for the ties to attach to the waist.

Possible lesson you could take from this experience, if you’re an early sewer: If you’re going to make an apron, start with thicker straps to go around the waist—maybe two inches or a bit more. As far as appearance goes, it might be better for those straps to be a little bulky than for them to have confusing thread patterns. As far as process goes, saving yourself the annoyance of fighting with your thread might be worth the extra material.

One more tip for the road: If you do a project like this one, make sure that when you can, you make use of the hem on the original clothing. It might seem like cheating, but saved effort and thread is saved effort and thread!

All in all, keep an eye out in your own house for things to recycle into sewing projects. You can learn to be a better sewer without breaking your bank account!