The Lace-Maker by Tropinin

The Lace-Maker by Tropinin

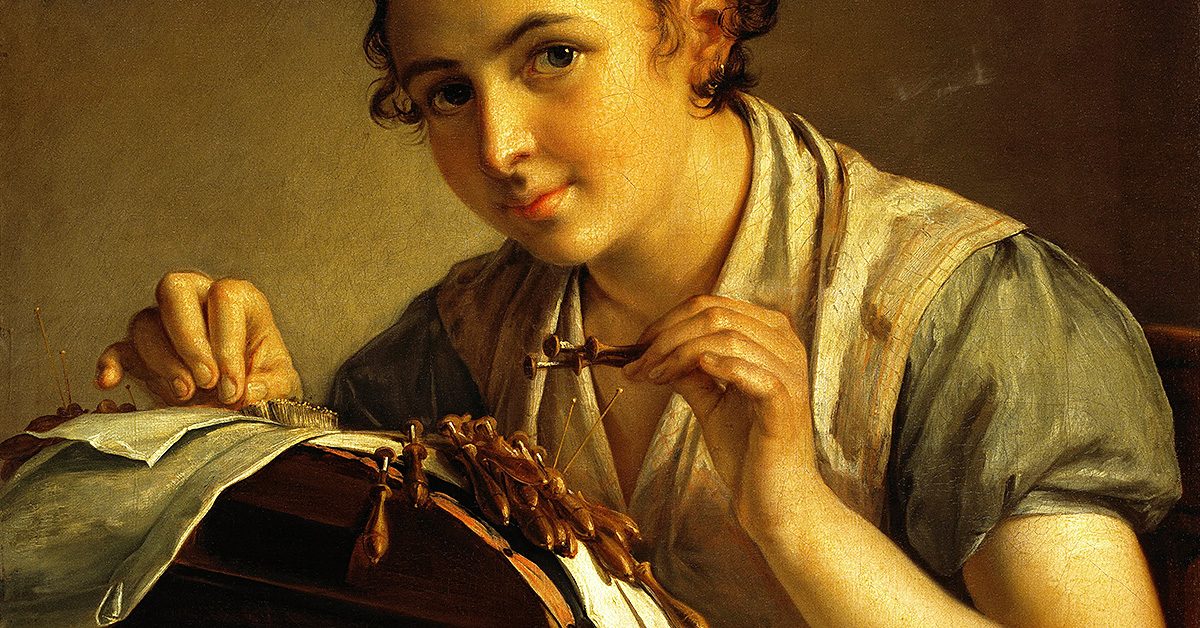
Once more, we’re turning to an artist’s rendering of a sewing topic for exploration and analysis, and this time, it’s coming with a couple of twists. Before we dive into those twists, let’s go ahead and introduce you to the painting that’s the focus of today’s post.

The Painting: The Lace-Maker

The Artist: Vasilii Andreevich Tropinin

The medium: Oil on canvas

The year: 1823

Picture 1

Masterpiece

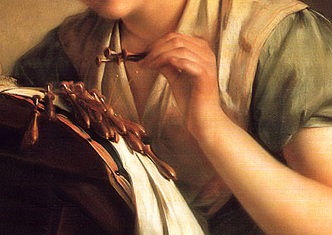
This is an eye-catching piece, and one of the most immediate concepts that separate it from works that have already been explored on the blog can be noted in its title. The topic isn’t just sewing stitches or making repairs, but rather the very specific task of making lace, which might require different tools than general sewing. The woman in the painting isn’t using a regular needle, clearly, which provides a unique view into the world of sewing.Picture 4

In fact, this entire painting is varied from some of the ones that historically came before it since it’s showing an average woman tending to the lace’s creation rather than someone from high class (“Vasilii Andreevich Tropinin: The Lace-Maker,” n.d.). This woman looks like someone you might see working on a sewing project in the comfort of home, and that quality creates a similarity between the average viewer and the painted woman. You can relate to her because it’s so akin to your approach—sewing in your own home.

Both of these aspects are showcased specifically in the painting—the tools and the woman—through the triangular configuration that’s been noted on other artistic works. Within the triangle of focus, you have the woman and the tools she’s using, allowing your eye to primarily be drawn right to them.

Picture 6

It’s about the passion, not the project

It’s also worth noting that we don’t see much of the actual lace being made. We see the woman. We see her working. But the project is mostly facing toward her, so our view of it is limited. It can be interpreted that the lace-maker herself and the process of making the lace are, to the artist, more significant than the actual project.

By extension, you could continue this logic to assume that the woman in the work is a beginner or early lace-maker, and that the process doesn’t need to be tarnished by seeing a newer lace-maker’s mistakes and missteps. This notion can be argued as mirrored in the idea that her hands look dainty as she tends to the process, which might lead the viewer to assume that she’s treading lightly into the field. She isn’t gripping the tool firmly, and the overall result can look like the carefulness and hesitance of a beginner.Picture 4
Personality and disposition

One could argue as well that the smile on her face is another detail that brings this new-lace-maker quality to life, as if the woman is happy to give this process a try and perhaps pleased with her progress. Unfortunately though, her face is the main spot where the argument could shift in favor of the woman being very secure in her craft, as if she’s done this again and again over the years. There’s no uncertain furrow in her brow or any lines of tension on her face like you might expect from someone struggling to get the hang of such an activity. Rather, she looks calm and relaxed, and that mind frame can be labeled as out of place for a new lace-maker being caught on canvas.

Picture 2

If you consider that detail—that her face is so free of lines of tension—the other elements can suddenly take a new turn as well. Maybe those hands aren’t dainty with hesitance. Maybe they’re loose from comfort with the process, like the casual grasp she has is enough to professionally finish the task. If you decide on this method of logic, the project being pointed toward the woman can mean that her comfort with the task is what’s supposed to be shown. You don’t need, from that point of view, to see the project. The woman is too at-ease with the process to be creating anything less than successful through her endeavors.

Light and shade

This notion of comfort can be seen in the lighting of the painting as well since, for the most part, everything is well-lit and in the spotlight. Other than the shady corners at the top, the space under the table, and the area underneath the platform the project is on, little is dark about this work. That sustained level of lighting speaks to an overall bright experience, and the similarity of color throughout adds to that calmness. No hue drastically sticks out, and other than the handful of dark places, nothing severely falls into the background in regard to those hues. Everything is neutral or placid enough in color to create an overall image of cohesion and balance.

With all of these elements combined, it’s sensible to interpret this as Tropinin’s attempt to showcase an average woman tending to a very specific task with so much expertise that she’s calm and tranquil throughout the experience. It’s a primarily bright experience that she feels comfort in, with little dynamism about the process due to her ease with the task while she works on a project that the viewer doesn’t need to see to know it will be a success.

References
“The Lace-Maker.” (n.d.). Russian Art Gallery. Retrieved from http://russianartgallery.org/famous/tropinin_lacemaker.htm
“Vasilii Andreevich Tropinin: The Lace Maker.” (n.d.). Rollins College. Retrieved from https://myweb.rollins.edu/aboguslawski/Ruspaint/troplace.html
No Bridezillas Here

No Bridezillas Here

I’ve gotten a few inquiries lately to do wedding dress alterations and creations. Some tailors don’t like working on wedding dresses. They say brides are the most difficult customers there are. I don’t mind so much and, honestly, don’t find brides any more demanding than actors and actresses, which makes sense as brides are (and should be if that’s what they want) the stars of their own little wedding day movies.

Here comes the bride…

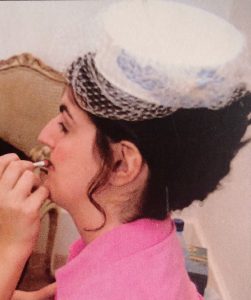
Classic pillbox.

Classic pillbox.

A lifetime ago, when I lived in Austin, TX, I did a lot of wedding dress alterations. I had a partnership with a bridal store there. The store referred all of its brides to me and I paid a small monthly fee to them for the referrals and use of their fitting rooms. On account of the University of Texas being in Austin, the city has a huge young adult population, many of whom get married there.

Most of the alterations were your straight forward hems, take in the side seams, add a bustle, kind of stuff. But a few them stick out in my mind, even all these years later, as being especially unique and fun to do.

One of my favorites was the girl who bought a dress with a tiered skirt. It was a relatively narrow skirt of about six 7” or so flat ruffled tiers that got slightly bigger as they got nearer to the hem. The dress was floor length but she wanted to be able to remove the bottom three tiers to make it knee length and easier to dance in once the reception rolled around. I bought a heavy duty separating zipper and hid it under the fabric tier that began just above her knee. It worked perfectly; you couldn’t tell it was there at all and she was able to easily zip off the bottom half of her dress skirt, like those hiking pants you can zip off the bottom of to make shorts. But a lot better.

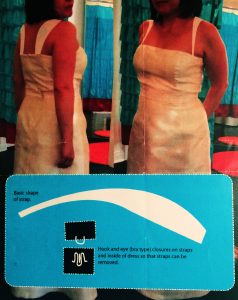
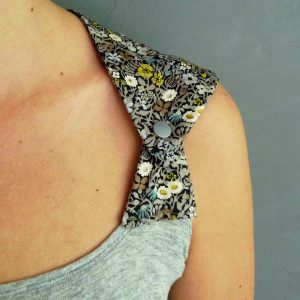
I also did a lot of adding straps to topless dresses. Topless dresses are always good in theory but not so much in many practical situations. One client, a computer graphics and design professional, even created her own unique strap shape she wanted me to build for her. I didn’t even have to make my own pattern!

Strap design.

Strap design.


Bridal hats

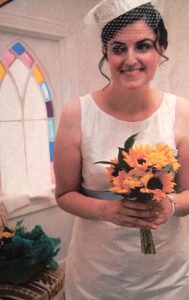
I made quite a few bridal hats too. Some of them were your classic covered pillbox shapes. A pillbox is really just an oval or circle with a 2 and a half to 3 inch band made from buckram and wire, then covered with fabric. A little trick to pillbox making I learned at the very beginning of my millinery career is to first cover the shape with a thin layer of baby flannel. Stitch it on as you would the fabric, then use Sobo glue to smooth and ‘mush’ the edges. This gives the hat a little bit of weight, softens the wire on the edges, and makes your outside layer (often a light weight silk if its bridal) look much smoother and nicer. Pull the baby flannel down and around the wire on the bottom edge and into the underside of the hat.

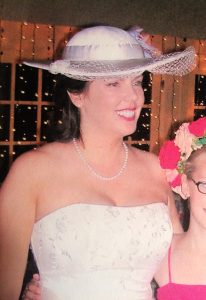
You can use this baby flannel technique to cover any buckram framed hat you make. I created this wide brimmed hat for another bride in Austin. You can see in the photo that the edge of the brim has some substance to it even though the silk covering it is fairly light weight. That’s because there’s baby flannel under there too. It just gives a hat a much more professional finish.

Wedding hat.

Wedding hat.


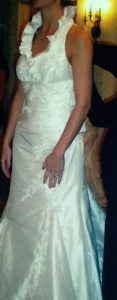
Another one of my favorite unique bridal embellishments was just the addition of a fun ruffle around the neckline. This is just your basic gathered ruffle collar but it made the dress one of a kind and added a lot of interest to the top of the dress.
Ruffle neckline.

Ruffle neckline.


And that’s the thing about brides from my experience; they just want their dress to be special and one of a kind. Many of them can’t afford to pay for a completely custom dress. But with some creativity, you can make most any wedding dress unique. And if you’re able to understand and do that, you’ll find that working with brides isn’t really all that difficult at all.
Tips for Dazzling up a Ring Bearer Pillow

Tips for Dazzling up a Ring Bearer Pillow

I can’t recall the first time I heard the phrase, “June bride,” but it’s something that’s stuck in my mind as the years have passed. While, to me, other months might present better options for a wedding (Sue me! I don’t like 90-degree weather!), June has somehow become what could arguably be the staple month for wedding ceremonies. Since we’ve entered that month, it seems fitting to target those ceremonies for a post or two. For this particular one, we’ll focus on a tiny wedding detail that can be handmade for that extra bit of sentimental value, and that’s the ring bearer pillow.

The ring bearer's pillow.

The ring bearer’s pillow.

For instructions on how to make a throw pillow in general, you can check out this link. But because pillows can be treated as such simple projects, I won’t discuss how to construct the actual pillow. Instead, I’ll concentrate on more decorative details in regard to the pillow’s appearance. These are aspects of the pillow that could come into play while you’re selecting fabrics and such—little concepts that you can do to construct something that stands out for your big day!

Choose your fabric wisely

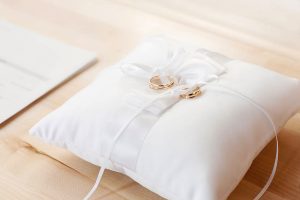
The most important thing to consider for your ring bearer pillow is your fabric choice, and the most obvious option would fabric that has a bright white look to it. This matches the bride’s ensemble and showcases the brightness of the day, but if you want to go with something less traditional for your wedding, you might think a little outside of the box in regard to color.

You might think a little outside of the box in regard to color.

You might think a little outside of the box in regard to color.

For instance, I adore fairies in fiction and movies. If I were to have some kind of fairy garden theme to a wedding, it might make sense to use fabric options that are more creatively colored than basic white. Maybe a pale blue or a light green would work, or perhaps even a combination. It’s worth considering, overall, how your theme and wedding colors could be represented in the pillow for a unique look.

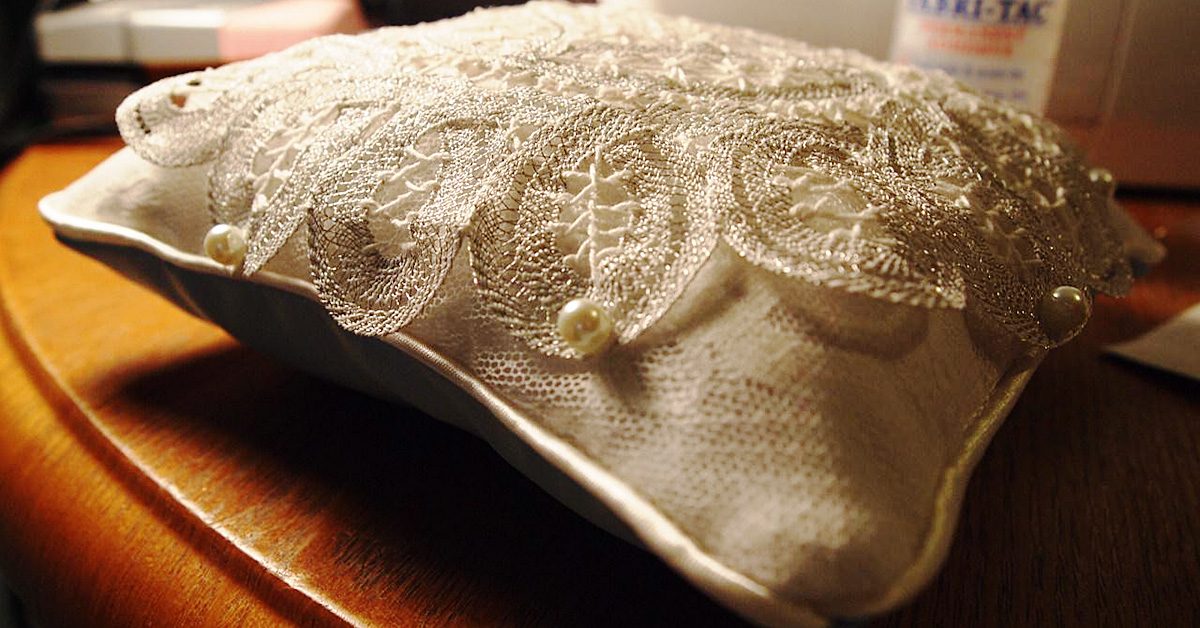
Fabric additions can be applied to the basic pillow structure to give it a more distinctive, lively look—things like lace, ribbon or tulle.

Fabric additions can be applied to the basic pillow structure to give it a more distinctive, lively look—things like lace, ribbon or tulle.

Time to accessorize!

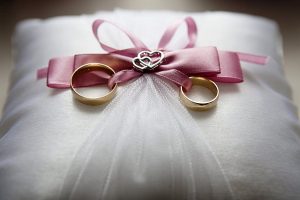
You might also want to consider accessories for the ring bearer pillow, and I don’t just mean the rings that will be carried on it! Fabric additions can be applied to the basic pillow structure to give it a more distinctive, lively look—things like lace, ribbon or tulle. Again, you can go with the basic white, or you can better pair the accessories’ hues with your theme or wedding colors if doing so feels like the right option.

Not only can these accessory decisions make your ring bearer pillow stand out that much more, but they can also be used as ways to fix technical errors. If you sew lace around the ends of the pillow, as an example, you might find that a spot where your stitches weren’t that fantastic on the actual pillow can be covered by the lace. If you accidentally punch a smaller hole on the top of the fabric, you can make sure that ribbon you have meeting in the middle to create a bow covers the error. Essentially, while prettying up your ring bearer pillow with visual elements, you could improve its appearance as well by making your mistakes less visually obvious!

And in regard to those accessories, don’t limit your options to fabrics either! Sometimes the smallest trinkets and gems can push a normal-level work into more amazing territory, and things like gems speckled around your ring bearer pillow or a pin that looks like a heart can create a simple elegance that adds a level of sophistication to the project. Another similar idea would be to use sequins that could catch the light of the event and shimmer to again mimic the brightness of the ceremony. Each of these embellishments are options that, if used in the right amounts and ways, could lead to a ring bearer pillow worth talking about at the reception!

Structure is key

Structural details that you could vary would be the shape of the pillow - maybe use a heart, oval, or star shape.

Structural details that you could vary would be the shape of the pillow –
maybe use a heart, oval, or star shape.

Keep in mind that even the construction of the pillow could highlight a particular quality that you want to embrace in your wedding if you’re going for something more modern and less traditional. Structural details that you could vary would be the shape of the pillow—maybe use a heart, oval, or star shape—as well as the face of the pillow itself. Instead of thinking, “How can I decorate this simple pillow,” you could make the top of the pillow its own design that doesn’t need any décor at all because the design is the décor—like a large flower, made of fabric, that covers the top. These decisions are structural elements that could create the unique, one-of-a-kind ring bearer pillow that you’re searching for to spice up your wedding!

So to give a sentimental touch to your wedding, turn this traditional addition to the ceremony into something homemade, unique, and fitting! It could add a splash of perfection to an already perfect day!

Fancy-Up a T-Shirt

Fancy-Up a T-Shirt

Fancy-Up a T-Shirt

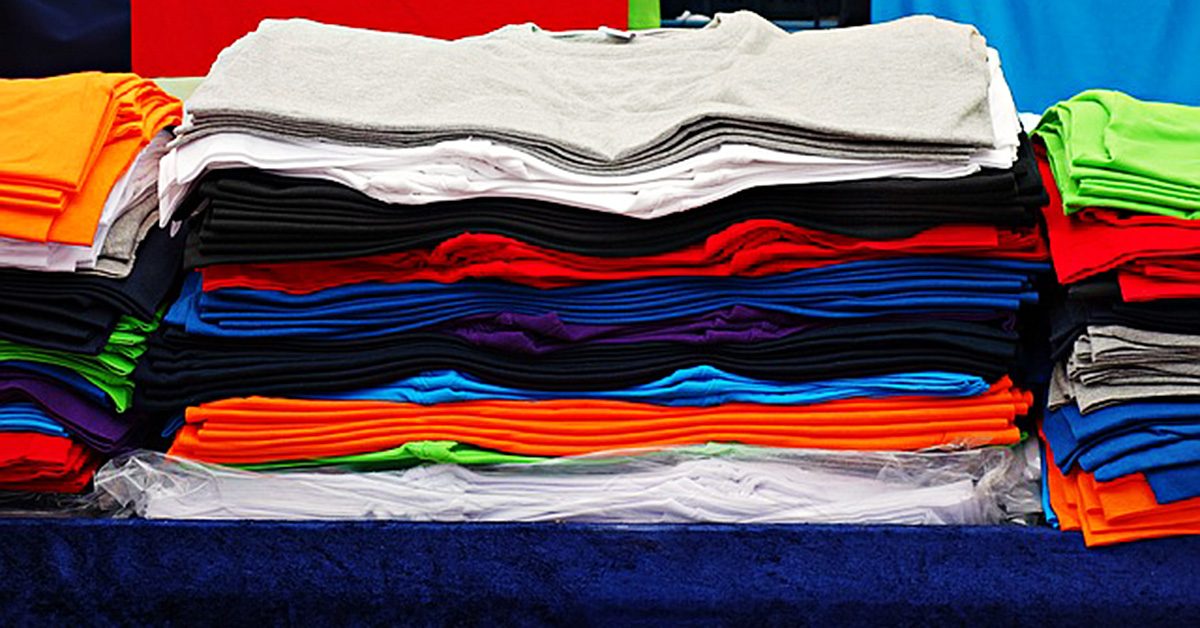
If you’re anything like me, when you find a t-shirt that fits well and is comfortable, you buy a bunch of them in a bunch of colors. Next time you do this, buy at least one more in a duplicate color. That t-shirt becomes the base for creating a fancy t-shirt that shows of your personal style. Build off it using items like lace, patches, fabric scraps, piping and beads. Or try your hand at embroidery.

Lace

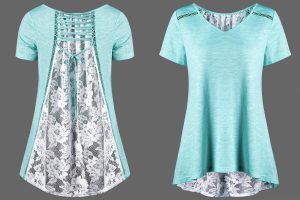
There are a couple of ways to use lace on a t-shirt. You can use full pieces of it to create a collar or edging on the sleeves or bottom. If that’s a little too vintage for you, try cutting apart lace and sewing parts of the design on the shoulder, sleeves, hem or around the neckline.

There are a couple of ways to use lace on a t-shirt.

There are a couple of ways to use lace on a t-shirt.

Patches

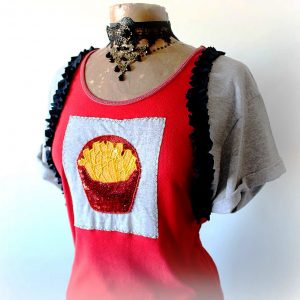
I’m a big fan of patches. Browse through your local craft store and find some that you really like. Place them on the sleeves, shoulders or bodice of your t-shirt to create the look you want. Even if they’re iron patches, I advise you to sew them on using either your machine or hand stitching.

I’m a big fan of patches.

I’m a big fan of patches.

Fabric scraps

Use these in a similar fashion as store bought patches. It’s a great way to use up some of your fabric stash while creating a funky, country t-shirt look. I recommend sewing the edges under to prevent fraying, unless you’re going for that look. Using a fabric marker in combination with fabric scraps can add to the country-chic look.

Use these in a similar fashion as store bought patches.

Use these in a similar fashion as store bought patches.

Piping

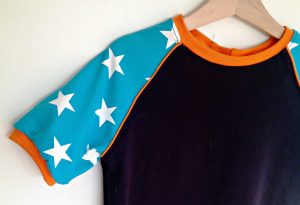
I love using piping around the bottom of the shirt and sleeves, but there are other options too. You can create a military look using piping on the shoulders or add some funk to the bodice. Get creative and use colors that contrast from the t-shirt color.

Get creative & use colors that contrast from the t-shirt color.

Get creative & use colors that contrast from the t-shirt color.

Beads

You can do a lot with beads on your t-shirt.

You can do a lot with beads on your t-shirt.

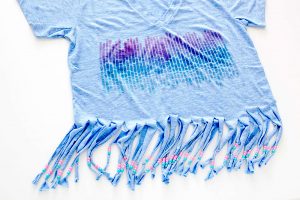
You can do a lot with beads on your t-shirt. They look great as a faux necklace around the neckline or along the edges of the sleeves or bottom of the shirt. Another option is to create a design on the front of back of your shirt using beads. I suggest using a washable marker or pencil to draw out the design before placing the beads.

Whether you use one or many of these techniques, you’ll wind up with a t-shirt that expresses your sense of style. They’re great in combination or alone. A t-shirt with even one of these creative additions would cost quite a bit in a store. Doing it yourself is both fun and cost effective. Give it a try and see what you come up with.

Pretty Little Things

Pretty Little Things

I was thinking about all the things you can make with fabric. Depending on your sewing skills and your motivation, you could make just about anything your heart desires.

Let’s see. My first sewn article was a red twill skirt in high school. My efforts had very good intentions, but I remember getting frustrated when I could never use the “best” sewing machine in the classroom. I had to rush to finish it so the teacher gave me a “C” grade on it. I couldn’t believe I put the zipper in the back just perfectly. (I’m still scared of zippers, by the way). But the hem of the skirt was about 3 inches in the back and maybe and 1 inch in the front, and very irregular. That was long before the days of the high-low hem which arrived on the scene by stylish fashion designers in the twenty-first century. Oh my, I’m dating myself now.

I learned it from watching you

I watched my Mom sew clothes for me as child, so when I got off on my own, I asked my Dad for a sewing machine. I picked one out from Sears, a basic machine with a couple of stitches. I made a knit T shirt out of multi-striped material and fell in love with stretch fabrics.

My dad called it my “$150.00 T-shirt.” I knew he was thinking I would be done with sewing after finishing that comfy, wearable T-shirt. I proved him wrong.

I went on to make dresses, suits with vests, skirts with zippers, a strapless bathing suit, and other clothes that were worn with pride when I thought, “I did this- I made this jacket”.

So fast forward today, after several years of non-sewing, I have found my passion again with other types of articles. The last couple years, I have made quilts, bed runners, napkins, baby articles and even Korean Quilting called “Pojagi”.

And now for something completely different

Today, I want to share with you my latest project. First off, I love the Victorian Era.

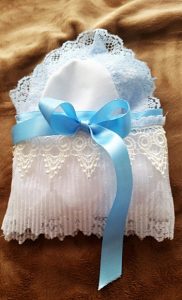
Laces, satins, silks and velvet. I have accumulated many boxes of vintage lace, ribbons, and trims and struggle to find ways to use them. So, I am trying to bring back something that were used by ladies of old. It is something that is considered vintage, or antique, but I still feel the idea is a good one. Many stores carry things similar like paper envelopes filled with lavender seeds, or other dried herbs, but I wanted to design something that was original to appeal to women who love frilly little things like me.

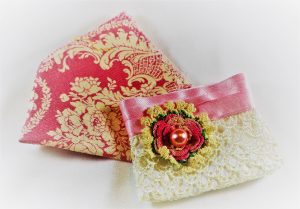
When I made these, I thought the Mother of the Bride & Groom may need the hankies to wipe away their tears during the wedding ceremony!

When I made these, I thought the Mother of the Bride & Groom may need the hankies to wipe away their tears during the wedding ceremony!

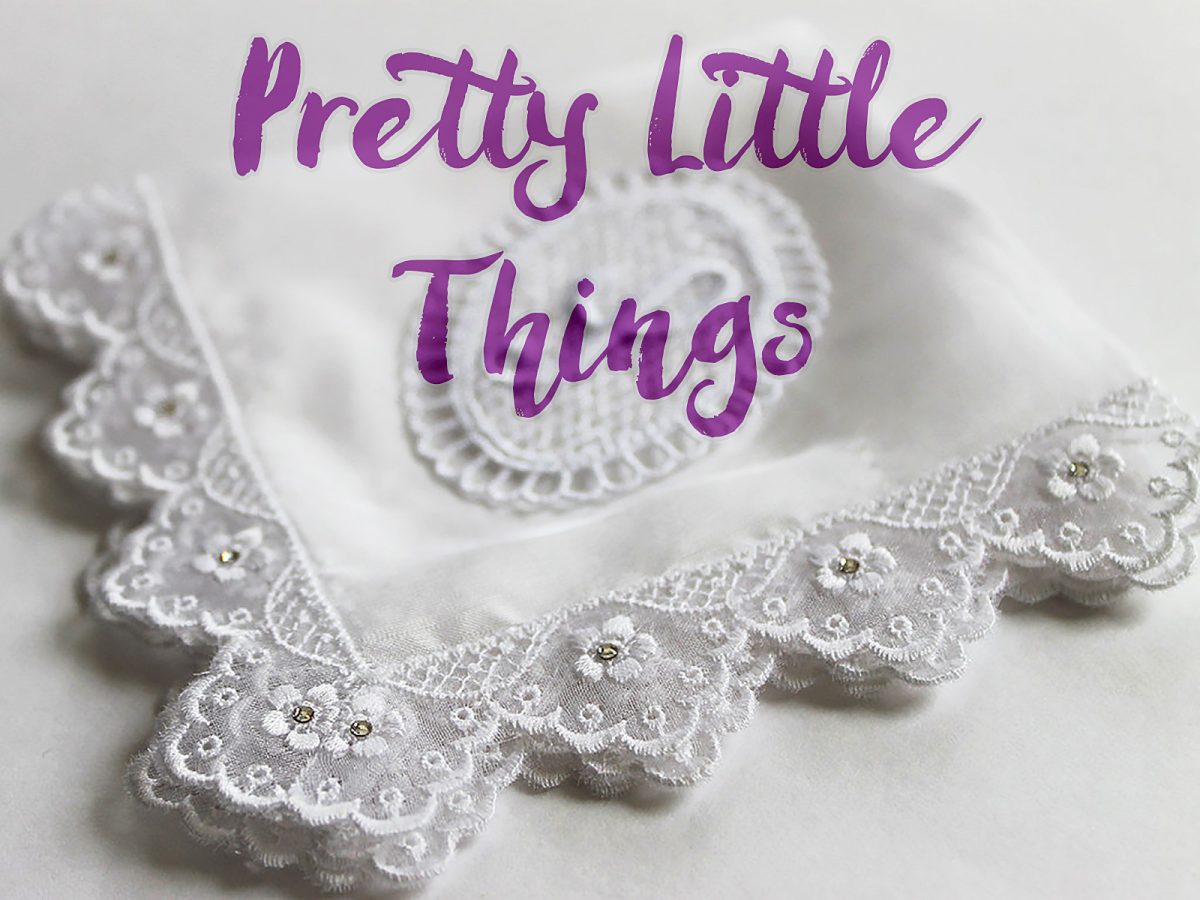
So, I designed a Handkerchief Sachet. The idea is to spray the handmade handkerchief with your favorite cologne or perfume, or fragrance oils. Place it in dresser drawers, on the bath counter top, or even your handbag, so you can enjoy your favorite scent as aromatherapy.

I thought these could be used as a keepsake bag for a special piece of jewelry, a lock of baby’s first haircut, or just a place for a tube of lipstick in your handbag. Just a little frill to enjoy & remember a special time or event.

I thought these could be used as a keepsake bag for a special piece of jewelry, a lock of baby’s first haircut, or just a place for a tube of lipstick in your handbag. Just a little frill to enjoy & remember a special time or event.

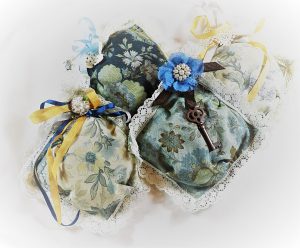
The last picture is the third set of sachets I made with 5” squares, lace, silk ribbon, and some metal vintage ornaments. These are stuffed with eco-friendly snow filling and will absorb your desired scent. Just respray when the scent fades and enjoy!

The last picture is the third set of sachets I made with 5” squares, lace, silk ribbon, & some metal vintage ornaments.

The last picture is the third set of sachets I made with 5” squares, lace, silk ribbon, & some metal vintage ornaments.

Whereas, the handkerchief can be washed if necessary if a change of scent is desired, these can also be utilized as a pin cushion in your sewing room. Who knows, you may fall in love with Victorian Vintage as I did.

All seams were sewn by machine except for adding flowers and ribbon, these items can be found at NaturaDomani on Etsy.
Shopping in the New York City Garment District

Fabric Shopping in the New York City Garment District

Shopping in the New York City Garment DistrictWhen I first moved to NYC a lifetime ago, I worked for very little money as an assistant to a crazy hat designer in the heart of the garment district. The only upside to the job was that I spent a good part of every day out on the streets gathering fabric swatches and button and trim samples. There was another assistant who had been there for almost a year already and she took me around with her and introduced me to all the people and stores. The two of us had a great time digging through bins of buttons, wandering deep into the back corner of NY Elegant Fabrics, and convincing the nice people at Mood to let us into their “secret” warehouse (it really does exist).

I only stayed at that job for about a month, though it felt like a year, and the other assistant (who has since moved back to Korea to head up a fashion company there) and I still keep in touch. I don’t go to the garment district as often as I once did but I do have a list of must visit favorite places.

Mood – 225 West 37th Street

I’ll get this one out of the way first since most people at this point have heard of Mood which lucked into some amazing advertising when it became the fabric store featured on Project Runway. One of the coolest things about Mood is the building its in and the old elevator, still manned by an actual man, that you have to take up to the 3rd floor. Once up there, the rows and rows of fabric reach from floor to ceiling. Things are pretty well organized, the selection is large, and most bolts have swatches already cut and attached to the ends that you can take.

One little note about swatching in most all the stores in New York City: If someone asks if you are a student, say no. They’re asking because most stores have specific hours for student swatching and won’t allow you to do so if its not during those hours.

Also of note: Mood has a public restroom in the back right corner. 😉

NY Elegant – 222 West 40th Street

I love NY Elegant for its selection of light weight cottons, organdies, and batistes. NY Elegant is a family run store and is the last standing fabric store on 40th St. They also get a lot novelty fabrics – fake furs and things with glitter and sparkly threads.

Paron Fabrics – 257 West 39th Street

This is one of my absolute favorite family run fabric stores in the city. Sadly, they closed their doors for good just last month. I’m only including it to remind everyone to try and support their local fabric stores and if, you have the chance, come to NYC and shop in the garment district. You really can find almost any kind of fabric there by visiting the larger stores and just wandering down 39th street and stopping in to the small stores that still remain.

B & J Fabrics – 525 7th Ave #2

B & J is your best bet for high end linens, lace, and silks. The store is extremely well organized and always seems extraordinarily well lit in comparison to other garment stores. They are a little pricier than some of the other stores but the quality of the fabrics they stock is superb.

Lou Lou Buttons – 69 West 38th St

Lou Lou Buttons sells only buttons. They have bins and drawers and barrels full of buttons. They have wood buttons, shell buttons, mother of pearl buttons, and every funky, unique kind of button you could imagine. The people who work there are helpful and friendly and don’t seem to mind if you spend hours looking.

M & J Trimming – 1008 6th Ave

There are a lot of small trim stores in the garment district with beautiful things but M & J has by far the largest selection of trims in the city. And, unlike a lot of the garment district stores, they’re open on Sunday (you know, for those weekend trim emergencies.)

Tinsel Trading – 828 Lexington Ave

Shopping in the New York City Garment DistrictTinsel Trading recently moved out of the garment district to this new location on Lexington. They stock the most amazing unique vintage and new trims you’ll find (unless you’re shopping in India or Southeast Asia). Their stuff is expensive but much of it really is one of a kind. If you like metallic thread, fabrics, and fringes, this is the place to go.

If you’ve never had the chance to shop for fabric in New York City, I encourage you to plan a trip if possible – you won’t regret it. And, if you come during the month of December, you can also go visit the holiday windows at the retail stores along 5th Avenue – Bergdorf’s (always my favorite), Saks, etc.

Picking the Perfect Sewing Notions

Picking the Perfect Sewing Notions

You’ve done it. You’ve got the pattern and the fabric to make a sewing project you’ll love. There’s just one more challenge remaining – picking the notions to compliment it. Whether it’s buttons, zippers, lacey bits or other accent pieces the right notions will give your finished project the final pop it needs to be truly special.

Zippers

It may seem like picking a zipper that matches your material, maybe even an invisible one is the best idea. And in many cases it may be. However, depending on the project and fabric, choosing a zipper that stands out can give your finished project some flair and style. If the fabric has a bright pattern, picking a zipper that matches one of the colors in the pattern can look really great when it’s done.

Buttons

ButtonsButtons can seem like just an easy way to close a shirt or jacket, but they also impact the look of your completed project. A fabric with a simple pattern can sometimes benefits from fancy or flashy buttons while a fabric with a busy pattern may look better with simpler buttons.

Button size also matters. Bigger buttons will draw more attention than smaller ones. If you’re trying to bring focus away from something, say a floppy collar, using big buttons can help. On the other hand, if you want people to see your great shirt or jacket, using smaller buttons will ensure their eyes take in the entire piece.

Lacey Bits or Ribbons

Even if the pattern doesn’t call for them, lacey bits or ribbon strips can add interest to your project. Sometimes cutting apart a larger lace work for specific shapes works really well. You can use these smaller pieces to accent the points of a collar, cuffs of sleeves or pants or the hem of a skirt.

Ribbons can be used in short or long strips to add some color and interest. A long ribbon can go around the edge of a collar or cuffs. Longer ribbon strips also look great as an accent belt around waist lines or as accents on short or pant leg cuffs.

Smaller ribbon bits can be tacked on to the body of the project to create a pattern or letter. You can also use ribbons to create cute bows and strategically place them to add charm to your project.

Other Notions Notions (Ideas)

See what I did there? Haha. But seriously, there’s other cool notions ideas too. Beads or sequins strategically placed can add a bit of sparkle and glitz. Embroidery whether hand- or machine-done adds personalization. And, if you happen to also be a yarn worker, combing your knitting or crocheting skills with your sewing skills creates a totally unique piece. Instead of the fabric collar, you could knit or crochet one. Same with cuffs, waists and hems.

What other notion and accent ideas do you love to use on your projects?

Luxury Textiles in Italy


Buongiorno from Italy! I am writing the second of my posts about my Fabric Frenzy this time in Italy!

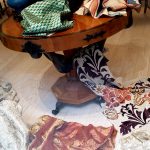
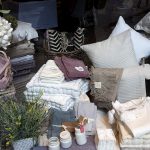
Walking along the shops of Roma and Florence, each window brought new and unusual surprises.

My focus was to look for Italian cloth and textiles to compare to those at home. The lace articles were lovely, but I found a few exquisite and expensive treasures as well.  As I admired them, I thought about how they belonged here in the midst of people of high culture and class.  So many curtains in the windows were lace in even smaller villages I saw, a common elegance for many.

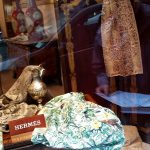
I wanted so much to buy yards and yards of the Hermes fabric and turn our home into one of Italian distinction.  I knew, however, it was only something I could dream about for that moment like the wonderful taste of the gelato I was eating as I strolled by the shops.

Only once did I come upon a shop that made curtains. It was a small establishment with racks of special order designs and a small loft above where the owner did the sewing. I was curious to ask what he charged to make drapes for the home, but my Italian was slight compared to his. So I just admired and appreciated his capability to create many yards of fabric into personal tastes for his clients.  Sewing is certainly not just a hobby here. It can be a “life line” for many.