Raggedy Coasters

Raggedy Coasters

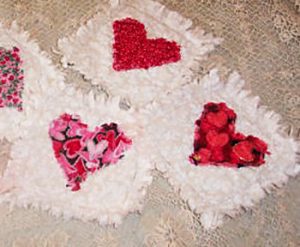
Valentine’s Day is around the corner, and as you might know from previous posts, I’m a holiday fan! In fact, I spent time researching Valentine’s Day projects for a post, and I chose one specific sewing craft that I thought was a cute idea. That concept is a raggedy coaster with a heart in the middle, which seemed simple and pretty. It was also useful since I have a Valentine’s Day party coming up with my nieces and nephew. I have plenty of leftover fabric from my latest quilt, so using it for homemade décor for the party sounded like a good notion!

That concept is a raggedy coaster with a heart in the middle, which seemed simple & pretty.

That concept is a raggedy coaster with a heart in the middle, which seemed simple & pretty.

Unfortunately though, one detail of the project did get derailed because I decided I didn’t like the Cupid cutout that I had planned to use in the center of my coaster. It looked amateur and out of place, so I made the executive decision not to use it. That meant that the coaster wasn’t very Valentine’s Day-ish since the top portion is a general floral pattern, but I was still interested to see how things would play out. And, as I’d been wanting to try a rag quilt for a while, this was a good time to test the waters. If I didn’t like the process of making one rag coaster, an entire rag quilt might not be something I wanted to dive into!

Stock up

The needed supplies are fairly minimal. All you really need are the bare essentials of a sewing project, like a needle, thread, fabric, pins, and scissors. Once you have those, you’re ready to start work on your coaster!

First, pick out the material you’ll use. Ideally, you would have batting in between the top and bottom layers because this raggedy craft can be, in truth, a miniature quilt sandwich. For me though, I didn’t have any batting available, so I decided to layer four pieces of fabric together. That way, there’s more thickness than what I would’ve gotten from just three pieces of thin fabric.

Let’s get started

Once you choose your material, make sure the pieces are cut into similar-sized bits that are more or less quadrilaterals. This is actually one benefit of a rag coaster or quilt. You’ll be shredding the ends anyway, so it doesn’t matter if they’re the exact same length at every point. Just make sure they’re close enough that, with the raggedy edges, they’ll look the same!

You’ll need to allow extra space beyond where you sew the pieces together for your ragged edges.

You’ll need to allow extra space beyond where you sew the pieces together for your ragged edges.

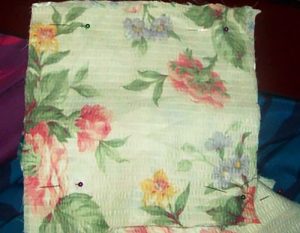
From there, you layer those fabric/batting pieces in the correct order and pin them together — but not necessarily right at the ends of the material. You’ll need to allow extra space beyond where you sew the pieces together for your ragged edges. Also, if you find after pinning that you have a bit of extra material that’s going to really stick out once your coaster has been shredded, feel free to trim off those ends.

Feel free to trim off those ends.

Feel free to trim off those ends.

Time to sew

Then you can start sewing! Remember to try for a box shape within your block of fabric, and to keep that space away from the edges. After you’ve sewn all the way around to finish that box shape, cut off the excess thread and get ready to do some shredding!
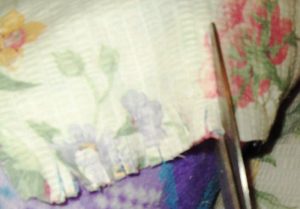
Be careful to give a decent number of cuts as you go around the fabric because the more you cut, the more thorough your raggedy quality could be!

Be careful to give a decent number of cuts as you go around the fabric because the more you cut, the more thorough your raggedy quality could be!

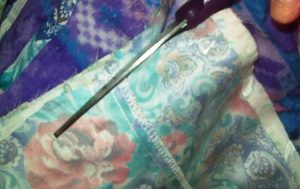
Now, shredding happens to be a bit more time consuming than I expected, but it’s a simple process! All you do is take your scissors and cut from the edges of the fabric inward, but never so far that you cut your stitches since that can seriously damage your final product! Also, be careful to give a decent number of cuts as you go around the fabric because the more you cut, the more thorough your raggedy quality could be!

Common mistake

Another tip on shredding is to make sure that you’re cutting through all layers of your coaster or quilt. I noticed a time or two that I’d left the bottom layer uncut for some of my shreds, so missing a space here or there is an easy thing to do! For a thorough job, check your results as you go along!

Once the shreds are finished, you’re ready to throw your product in the washing machine! Believe it or not, the washing and drying process makes those simple cuts attain that raggedy appearance!

What I learned from this experience is that making a rag quilt is going to be more complex than I expected. I’ll need to cut fabric, layer it, sew it, then shred it, and shredding is pretty tedious! I honestly wasn’t mentally prepared for what awaited me, and I think I have a better idea now. Although it’s different than the quilts/blankets I’ve made before, I’m still interested in making one. So, basically, the hunt for a Valentine’s Day project worked out differently than I thought — but still well!

The Scraps of Christmas

The Scraps of Christmas

It’s officially Christmas week, guys! The day is just around the corner, and soon we’ll be heading into a less twinkle-lit world. Until then though, there’s still time to revel in the holiday for one more blog post! For this particular one, how about we go with a nice wrap-up idea?

You see, I’ve covered a tree skirt, ornaments, and homemade gifts, but if you chose to go all of those routes, you potentially would have collected a series of Christmas fabrics. Each project could have its own material, so there might be quite the variety. Another decent assumption would be that you didn’t have just enough material for all projects, so you could easily have scraps of Christmas fabric left over from your handmade-Christmas-extravaganza.

The Scraps of Christmas

Sure, you could stash it away for future use, but if you keep every scrap of material you ever come across, you’re treading on fabric-hoarder territory! There’s nothing wrong with keeping the pieces that would reasonably be user-friendly in the future, but I’m talking about the small bits that won’t be much use without other smaller parts to make something happen, or for a small enough project.

So, maybe this post will help keep that fabric stash a little smaller and farther from hoarder territory by answering one simple question: What projects can you do with those small parts of leftover Christmas fabric?

Answer: Plenty, and I plan to take you through a number of those options!

Possibility #1: Make a banner

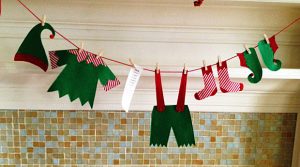
This is such a simple option, but it can add a classy touch to your Christmas decorations. All you need to do is pick a shape for your fabric, cut the scraps in that shape, make sure those hems are smooth, and link them together—maybe with some ribbon or yarn. If you’re feeling particular, you can make sure that each of those shapes is two-sided by sewing two pieces together—maybe spice things up by using more than one fabric for the cause. With that method, you could have (as an example) a bell-shaped addition to your banner that has Rudolph on one side and Frosty on the other! If you’re good at embroidery, use enough shapes to embroider a message across. You could even do this laundry-line idea if you had the right fabric! The options on this idea alone are numerous!

The options on this idea alone are numerous!

The options on this idea alone are numerous!

Possibility #2: Make fabric garland

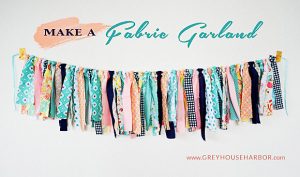
This is like the banner, but requires strips of fabric tied instead of differently shaped pieces embellished and sewn. I mean, sure, you could add gems and such, but the draping quality of the fabric is kind of its distinctive factor, which doesn’t leave a whole lot of room for the Merry Christmas message! Still, this is a simple, elegant idea that could add a touch of holiday cheer to your house by hanging from your mantel. And, as is the main idea of the post, it’s a great way to use that extra Christmas fabric you might have once you finish your holiday sewing projects!

This is like the banner, but requires strips of fabric tied instead of differently shaped pieces embellished and sewn.

This is like the banner, but requires strips of fabric tied instead of differently shaped pieces embellished and sewn.

Possibility #3: Make a Christmas tote

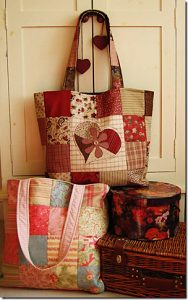
While you might not have enough material to make the entire tote in one style (then again, maybe you will!), you could create a patchwork look for a homemade Christmas tote! You can find patterns for totes here, and Sewing Machines Plus offers free patterns for bags as well. Can you imagine a patched-up Christmas tote in this design! I would definitely carry one of those!

I would definitely carry one of those!

I would definitely carry one of those!

Possibility #4: Make fabric bookmarks

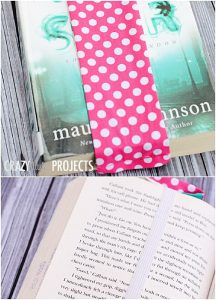
Call me a literature nerd, but how awesome would it be to give someone a copy of A Christmas Carol with a hand-sewn bookmark to go along with it? In fact, this could be a thing you do next year — give out holiday classics with hand-sewn bookmarks in Christmas fabrics! These projects are small, and who knows how many you could make in one day? And they require little fabric, which is the theme of this post! Whether it’s to hold your place for your own holiday reading or for small gift-gestures to let someone know you’re thinking of them, these creations could bring a festive touch to a book-and-hot-chocolate December time!

Call me a literature nerd, but how awesome would it be to give someone a copy of A Christmas Carol with a hand-sewn bookmark to go along with it?

Call me a literature nerd, but how awesome would it be to give someone a copy of A Christmas Carol with a hand-sewn bookmark to go along with it?

Possibility #5: Make a keychain

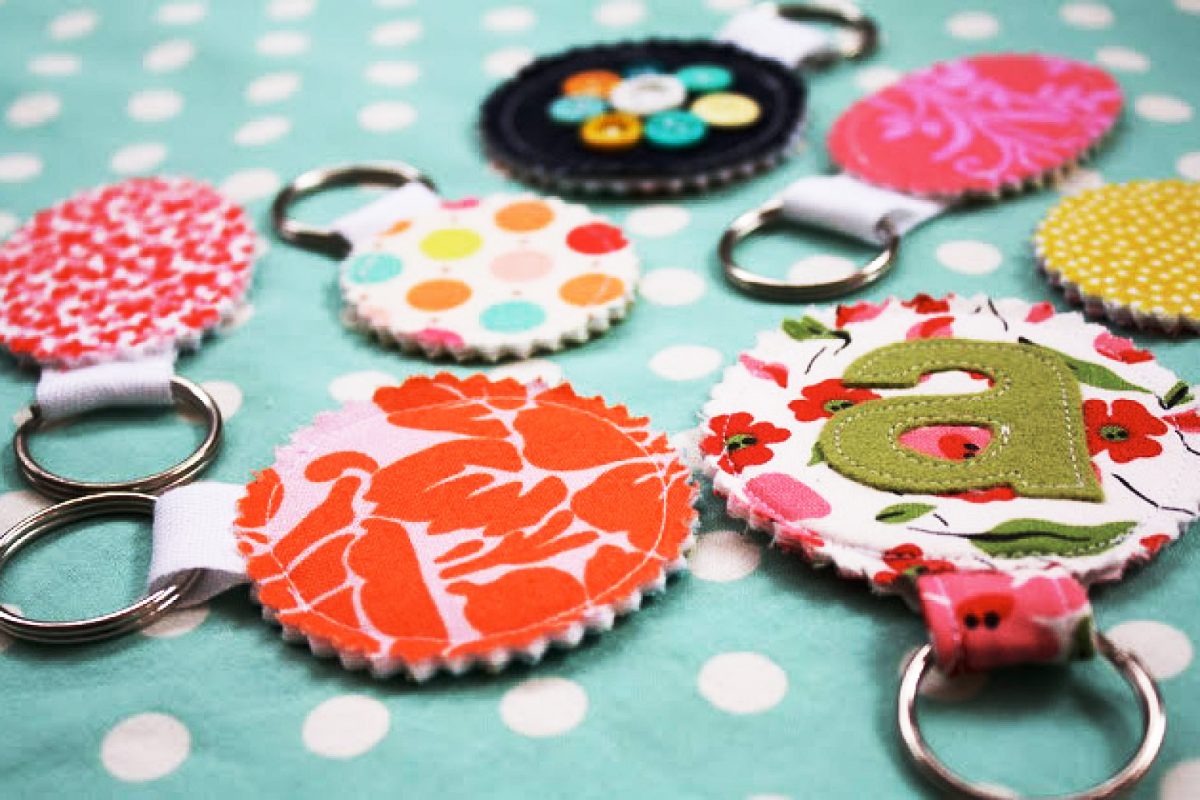
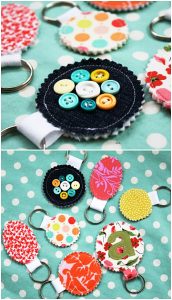
Since childhood, I’ve had an interest in keychains. I don’t know why, but it’s true just the same. So, why not take a bit of that excess material and make a one-of-a-kind keychain? Keyrings don’t have to be expensive, and it’s possible that everything else you’d need you could find around your house—maybe even down to buttons like what you see in the picture. Given the teeny-tiny-ness of keychains, this craft would be a good way to use some of that excess fabric! You can find this possibility (and #5) here!

Given the teeny-tiny-ness of keychains, this craft would be a good way to use some of that excess fabric!

Given the teeny-tiny-ness of keychains, this craft would be a good way to use some of that excess fabric!

So, the moral of the story is that you don’t have to be a Christmas-fabric hoarder after your holiday sewing! There are plenty of avenues to expend some of that scrap material!

Homemade Gift Tips

Homemade Gift Tips

It’s the month of Christmas, guys! Are you anywhere near ready? I have some presents still to buy, but to be honest, I might start planning one Christmas before the current one is over. Love of holidays? Crazy organization? Awareness of a budget? Maybe one, two, or all three things—maybe even a few more!—but the bottom line is that a good chunk of my Christmas shopping is finished. Yay, me!

I’m not so naïve as to think that’s the case across the board though! In fact, someone might be thinking, “Yeah, I need to work on that shopping list…” while reading this post. If that’s the case, stick around! I have some tips coming up that you might find useful!

Make it personal

I bought a used record online for about $10 & I don’t if I’d ever seen my mom so happy opening a present.

I bought a used record online for about $10 & I don’t if I’d ever seen my mom so happy opening a present.

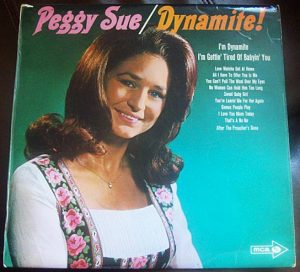
In my experience, gift-giving can go best when you really think about the person instead of how much you want to spend or how impressive other people might find the gift. Example: My mom had been saying for years that she wanted a certain record—yes, record!—and one year it occurred to me that buying her said record could be a good idea. Why hadn’t I thought of it before? Maybe I was caught up on the it-has-to-be-new concept for a Christmas present? I’m not sure. Long story short though, I bought a used record online for about $10, give or take, and I don’t know that I’d ever seen my mom so happy opening a present.

If you think outside of the box instead of putting a series of labels on what you’re supposed to buy, it opens a door to a category of gift that will be the focus of this post: homemade. Who says you can’t give someone something you made yourself? Sure, you might not have bought it in a store, but you took the time to craft it with your own hands! Not only can it be a beautiful gift, but there’s a sentimentality to it that might be harder to achieve from something store-bought.

Decisions, decisions…

Still, as with store-bought gifts, it pays to think about what you’ll craft instead of flippantly deciding on something. With that in mind, here are a few tips for any of you who want to change up some of your I-need-to-buy-a-present items to I-think-I’ll-make-something choices, specifically gifts that need a needle and thread to create:

  1. Know your recipient! This could be key no matter if it’s store-bought or homemade. If you have an idea of the recipient’s personality, you could find it easier to plan your gift. Your friend who loves rockabilly, for instance, might love a purse made from material with a 50’s theme! Is another friend’s kitchen decorated in sunflowers? Then maybe a table runner made with sunflower-based fabric could be an option! If you can tailor your gift for the person you plan to give it to, the level of appreciation that person has might seriously increase!
  2. Manage your time. This one might be something to keep in mind for next year since Christmas is so near! But if you decide that homemade gifts are the way to go, don’t underestimate the idea of pacing yourself! Working on a dozen gifts in three weeks might be hectic. Deciding in January that you want to do homemade gifts for that year’s Christmas though would let you space your work out over months—and trust me when I say that pacing yourself can be a WONDERFUL idea!
  3. Consider your budget. Just because it’s homemade doesn’t mean it won’t cost some money! Sure, there are cheaper homemade options than making curtains, quilts, or clothing, but I’m talking about sewing here! Once upon a time, I decided I was going to make my mom a homemade quilt, and I might have ended up spending more on the supplies than I would’ve spent on a store-bought item. But I had a certain fabric I wanted to use, and it required more panels than I thought it would… The bottom line is you shouldn’t assume homemade automatically equals cheap, so if you need to work within a budget, still consider that budget! Should you realize the supplies you need for your projects are going to run too high, tinker with your ideas. Is there a different fabric you can use that’s cheaper, but still a good option? Can you scale it back—maybe make a throw instead of a full-sized quilt? A beauty of crafting your own gifts is that you can make those kinds of calls because it’s your creation!
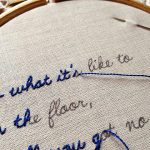
  4. Browse. You might not be window shopping, but that doesn’t mean you can’t look for ideas online! Pinterest is a clear example of a place to find those ideas. In fact, I was inspired while writing this post, and you can now find my “Homemade Gift Ideas” board here! Even running a Google search can help you get the creative ball rolling by giving concepts that you can alter and tailor to your gift-giving wants. Though the overall idea might have come from someone else, the details—what fabric, what color, what size—can still come from you! You can find a series of sewn gift ideas here ! FYI, I love the cross-stitching lyrics one!

How about you, readers? Are you pro-homemade gift?