Christmas Tree Turtlenecks

Christmas Tree Turtlenecks

Its finally autumn in New York City. The temperature dropped this past week and people broke out their jackets and sweaters and knit caps. The kids are back to school and if you’re out and about around three or four in the afternoon, you’ll likely encounter gaggles of uniform clad youngsters walking home from school and stopping into the corner bodegas for gum, nail polish, or comic books.

I was one of those super nerdy kids who always liked going back to school. I especially enjoyed getting new clothes for the occasion. When I was of elementary school age, my mom still made a lot of my clothing (and that of my three brothers). We were those kids who had matching plaid pants and skirts because Mom would buy a couple or three yards of a fabric and use it to make something for each of us. I didn’t mind so much. I thought my two little brothers were super annoying but, my big brother, who is 18 months older than me; well, I thought he was the best. I didn’t care that my red and white plaid skirt was made from the same fabric as his pants. It showed we were related and I was ok with that.

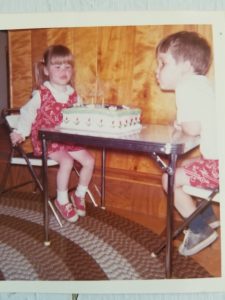
matching shorts and jumper for my birthday

matching shorts and jumper for my birthday

Mother knows best

Mom also went through this phase of embroidering designs on the fronts of plain cotton long sleeve turtlenecks for me. I have no idea where she found the time to do this. I remember having a red one with a Christmas tree on it and a brown one with flowers. I was a true child of the 70s and my Mom, always hip, dressed me like one, even when she couldn’t afford to buy me brand new clothes.

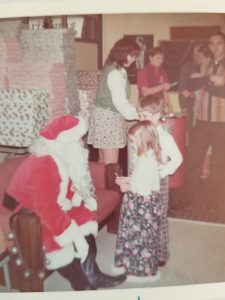
Mom made long skirt and plaid pants for Santa visit. My brother and I were very stylish.

Mom made long skirt and plaid pants for Santa visit. My brother and I were very stylish.

I also remember the huge JC Penny, Sears, and Montgomery Ward fall and Christmas catalogues. I would spend hours going through them, turning down the corners of the pages with items I hoped maybe Mom could buy for me. My parents were pretty good budget makers and keepers and somehow managed, even with four kids on a high school principal’s salary, to still be able to buy all of us some new clothes for the every year for back to school.

To Black Friday or to not Black Friday

We never actually ordered from the catalogues. I’d pick out what I wanted and then we’d all pile into Mom’s van and head to the mall where the JC Penny store was. Then, I’d spend hours searching the store for the pieces I’d ear marked in the catalogue. I thought that whole thing incredibly fun – which is rather ironic because nowadays I abhor shopping in actual stores for clothes and, on the rare occasions that I purchase new wardrobe items, buy most everything online.

Somehow, in my old(er) age, I’ve grown to dislike mass produced apparel of any kind, and shopping in general.

Unless, that is, I’m buying something cycling related. I go hang out in my preferred local bike shop even when I don’t necessarily need something. I’ve spent time thinking about the why of this and have come to the (fairly obvious) conclusion that the reason I’ll go to the bike shop in person and am completely fine with paying a bit more for things I could get at a slightly discounted rate at an online super store, is for the free, excellent cycling (and local food and bar) advice and recommendations from the bike shop owner and employees.

No flavor to savor

Everything in the stores these days looks the same to me and nothing looks like me anymore. Perhaps this is just a common occurrence, or realization, that manifests as you get older. I never wanted to look like everyone else, not even way back when I picked outfits from the JC Penny catalogue. Before everyone could buy anything they wanted from anywhere online, I used to beg Mom to take us to the mall the next county over because the stores carried different things than the stores in our local county mall. Then I was able to get things that no one else at school would have.

I think that’s probably why I loved those embroidered turtlenecks my Mom used to make me so much. Nobody else at school had a shirt just like mine. And I could even claim to have helped pick out the design. Guess I was indeed destined to end up sewing and creating for a living.
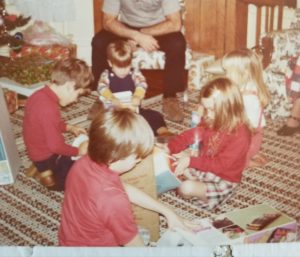
The Christmas Tree Turtleneck. Not a great photo of it but the only one I could find. Note that my brother (sitting across from me) is wearing a turtleneck in the same color.

The Christmas Tree Turtleneck. Not a great photo of it but the only one I could find. Note that my brother (sitting across from me) is wearing a turtleneck in the same color.

Be true to yourself

In this world of factory mass-produced disposable goods, individual style is truly a wondrous thing to have. So cultivate yours and that of others as much as you can. Make something for a child in your life, even if its as simple as embroidering a cheesy design on a cotton turtleneck.

You can find some great embroidery designs right here at Sewing Machines Plus to get you started:

It's National Sewing Month!

It’s National Sewing Month!

As a writer, I was well aware there’s a National Novel Writing Month (NaNoWriMo) that happens in November. As a person who sews though, I had no idea there was a month dedicated to sewing, until this week. Imagine my surprise to find that not only does National Sewing Month exist, but it’s this month — September! Essentially, I found this detail out with less than a month left to officially celebrate, but I suppose learning late in the month is better than having to wait until next year to utilize the concept.
I was surprised as well that this status isn’t something that a random sewing fan made up. Rather, this is something that Ronald Reagan declared back in the 1980s. That’s right. This is a former president’s declaration, and it pretty much boggles my mind that something like a sewing month would be noted by a President of the United States. It seems solid evidence that the world of sewing is more far-reaching and popular than what I might have thought when I first dove into it.

Now that I’m aware — and maybe you are too because of this post — that this month is dedicated to sewing, the question arises about how to celebrate it. There are plenty of options to do so, but seeing as how over half of the month is already gone, whatever celebrating you do would have to be fairly quick-paced! Regardless, there are still ways to fit your celebration into your end-of-the-month schedule, like with these possibilities!

Make a quick project

While some sewing projects can take a long time to make, other projects can be done in a day or less — and these are great prospects at this point for celebrating National Sewing Month before it ends. This concept can vary depending on how fast you are with sewing. For instance, something like a quilt might be a project that one person can finish in a week while another person requires longer. A guiding factor for this possibility then is your own ability and time frame. If you can manage a bigger project, go for it! But if you feel more comfortable with something smaller, like a fabric coaster or throw pillow, choose one of those options. As long as you have enough time to wrap up the loose ends before October 1st, you’re in good shape!

A great idea for this project would be to work on a homemade gift that you can give someone later in the year for a Christmas present. This can give you space to craft that gift and an excuse to revel in a month dedicated to sewing. Win/win, right? If you’re looking for sewing projects, Sewing Machines Plus has free project ideas available here that you can browse through to find a National Sewing Month project.leaf-flower-petal-celebration-heart-food-1250761-pxhere.com

Take a sewing class

Sure, a number of programs that you can take have specific start and end times, and you can’t just decide for those options that you’re going to start a class right now. For other possibilities though, there’s room to maneuver, particularly if you take a class you can finish in a virtual setting with timed videos. Craftsy, for instance, has classes with videos of certain lengths, and if you schedule your time effectively, you can finish one of them by the end of the month.hand-needle-girl-woman-vintage-tool-706616-pxhere.com

One other option would be to start a program this month even though you know it’ll extend farther than the beginning of October. Penn Foster programs, as an example, can allow you that kind of freedom to simply decide to register for a class today and work your way through at a personal pace. It’ll extend beyond September, but September can still be the month that led to you making the choice to enroll.

Buy a new piece of equipment

If you want to treat this month as something worth celebrating, why not go all out and buy yourself a gift for the prospect? You could even extend the prospect outward by buying small sewing supplies for friends and family who enjoy sewing as much as you do, like new thread or fun pattern kits. This way, you can spread the enjoyment of National Sewing Month beyond your own personal collection.hand-sewing-sewing-machine-art-design-handicraft-759263-pxhere.com

That doesn’t mean you should feel bad about adding to your own sewing stash though, and there are plenty of ways to build your supplies in honor of the month. If you need a new sewing machine and can splurge just a bit, celebrate Sewing Month by bringing your dream sewing machine home. Check out Sewing Machine Plus’s site for possibilities on the matter!

Smaller details, like a new sewing kit or interesting fabric, can also be ways to celebrate the month if your budget won’t allow for a new sewing machine, and a few extra dollars can lead to a tiny contribution to your sewing supplies in honor of the month. If you can work even a new pack of straight pins into your budget, it’s a method of celebration!

In any event…

I feel a bit of camaraderie with my fellow sewing fans this month, given our shared interest that was valid enough for a president to declare a month for it.

So to these fellow craftsmen, happy National Sewing Month!

Tutorial: More Kinchaku Japanese Drawstring Bags

Tutorial: More Kinchaku Japanese Drawstring Bags

We made lotus shaped kinchaku drawstring bags here on the blog a couple of weeks ago. I told you then that there are other ways to make kinchaku, too. So let’s look at these now.

Kinchaku are purse or lunch sized drawstring pouches. They were traditionally made with chirimen, which are kimono fabrics. They are most often made with a round or square bottom.And they are and were extremely popular with ladies in Japan, both now and in history.

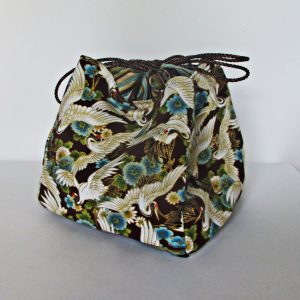
I didn’t have any chirimen fabric, but I did have a piece of Robert Kaufman Tranquility fabric with a crane motif and hints of gold shimmer.

kinchaku tutorial

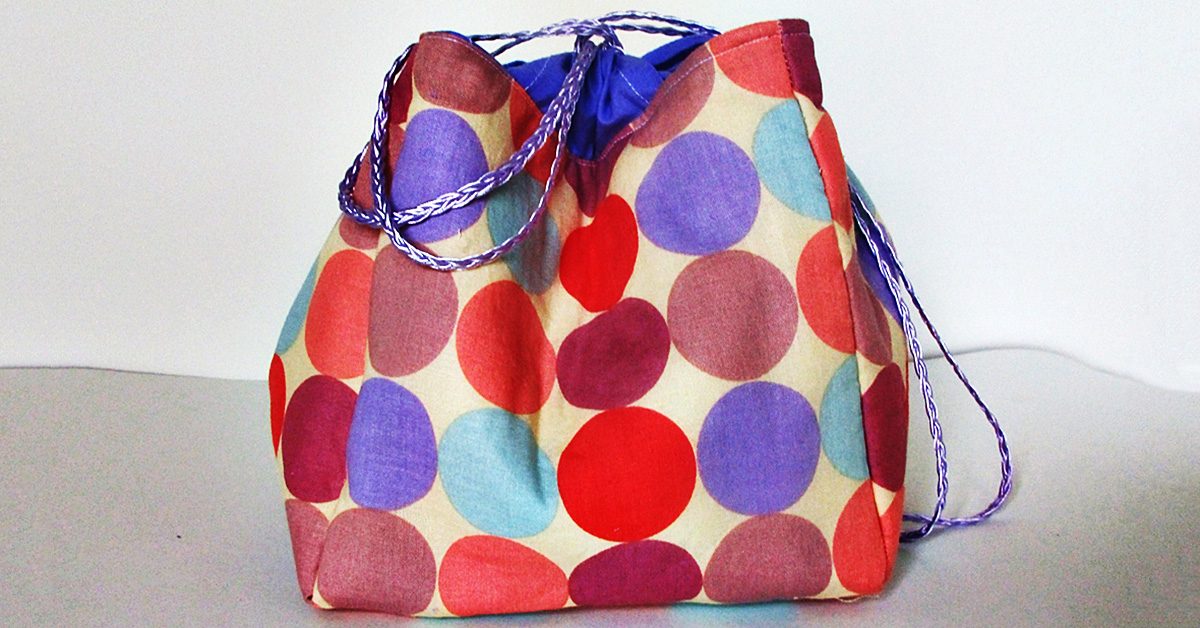
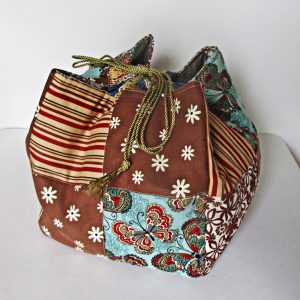
Square kinchaku, fabric by Robert Kaufman

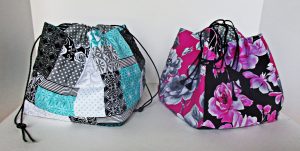
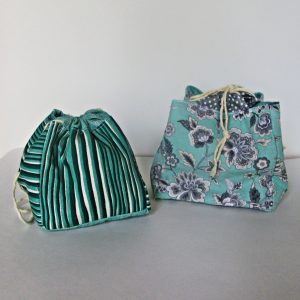
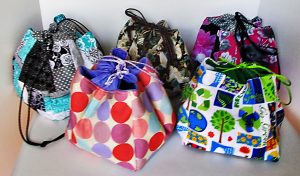
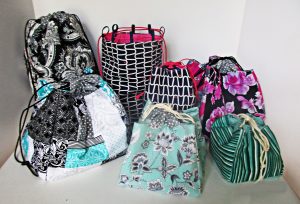
I started with this Japanese inspired print, and then I made these in all sorts of other prints, too.

kinchaku Japanese bag tutorial by Millie Green

These are reversible, by the way, when you make them the way I’m showing you.

How to sew kinchaku

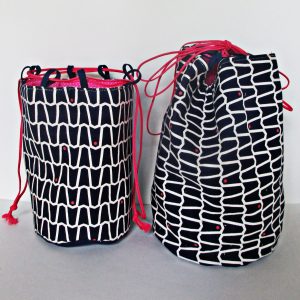
You can make your kinchaku with a square  or a round bottom.

Kinchaku tutorial by Millie Green

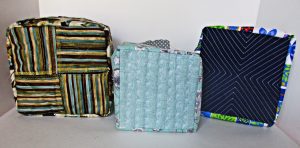
Small kinchaku made from five and six-inch squares

You can make them any size that you like.  Use three or four inch squares and add pockets inside to make a small pouch for carrying jewelry. Or use eight or nine inch squares to make a large purse. I think seven and a half inch squares are the perfect size for lunch bags.

I made one that’s ten inches all around, but once you make these that large or bigger, then they become komebukuro. We’ll save those for another post.

Make them sturdy

You will want to prepare your fabric squares before sewing these together in order to create a nice sturdy bag. You have choices here, and I recommend you make your choice based on the wise old principle of using what you have.

Prepare your squares using any combination of:

  • Batting and backing
  • Fusible fleece
  • Midweight interfacing
  • Heavyweight interfacing
  • Felt
  • Canvas
  • Duck
  • Denim

I like to use fusible fleece on five of the squares and midweight interfacing or sturdy duck or denim for the other five. Felt works nicely in place of fusible fleece.

For canvas, felt, or anything other than fusible type interfacing, you can baste the sturdier fabric to the back of a lighter weight cotton if you are using this for your outer fabric. To baste, just sew these together with a scant 1/8” inch allowance all around.

Or make a miniature “quilt sandwich” by layering your outer fabric over a layer of wadding (batting) and a backing square. Then quilt these together. You can have fun with this and do some fancy or decorative quilting. Or you can keep it simple.

Kinchaku tutorial by Millie Green

I had some fun quilting on the outer base square for these kinchaku.

You can add pockets to some or all of the lining squares, too. Do this now, after you interface the pieces and before you sew them together.

Of course you should feel free to construct your fabric pieces by patchwork. Simple four-patch works nicely here, or use your imagination and go wild.

large kinchaku

Ten inch square bags (made here from four- patched five-and-a-half inch squares) are a great size for a project bag for knitting or other take-along crafts.

To make square kinchaku

Kinchaku sewing tutorial

You will need five squares of outer fabric and five lining fabric squares, prepared (as discussed above).

For the exterior, I like to use a contrasting square, possibly of the lining fabric, for the bottom piece. In this case, I cut four of the outer fabric and six of the lining.

Take the bottom piece, and sew the other four pieces to the four sides of this bottom square,right sides together,  starting and stopping a seam allowance width from the edges.

Then, sew these four squares to each other, creating the side seams. Now use your fingers and eyes to check and make sure there are no openings in these seams. Fix this now if you missed any spaces.  You can turn it right sides out and look at it now if you want. Then repeat with the remaining five squares.

Skip to the next section to finish your square kinchaku.

To make round kinchaku

Round kinchaku tutorial

You need two circles for the outer and lining bottoms, and a piece of each fabric that is as tall as you’d like your round kinchaku to be by the circumference of your circle, plus seam allowance. You can use a compass or trace a dish or other round object to make your circles.

Prepare your fabrics as discussed above. Then, simply sew the other piece right sides together around the circle and then sew the side seam. It’s easy to sew the circle, just go slowly and carefully guide your fabric to keep your seam allowance uniform.

You can clip little slits in the seam allowance all around if you like, but if your seam allowance is narrow you won’t need to clip much if at all. Check the bottom and side seam with your eyes and fingers to make sure everything is connected and you didn’t accidentally miss a spot. It is easy to fix these mistakes now. Turn right sides out, if you like. Then repeat for the lining piece and base.

To make the drawstring casing

For either square or round kinchaku, you have options in constructing your drawstring casing.

You can make tabs from matching or contrasting fabric, grosgrain or other ribbon, or bias binding. You can make several evenly spaced  tabs or just choose one wide tab centered on each of the four sides.

I like to use contrasting fabric. To make the tabs like I have done for most of the kinchaku pictured here, cut four same sized rectangles. Cut them between three and four inches wide by a length that is anywhere between one-third and five-sixths of the width of your squares. Turn and press a narrow hem on all the short sides, then sew these down. Now fold along the long edge, and center it along the top edge of one of the squares with the raw edges of the folded rectangle aligned with the raw edges of the square. Baste down with a one-eighth inch seam allowance. Repeat for the other three tabs.

You could do the same thing with shorter squares rather than rectangles and space two or three tabs along each square. If you use narrow bias binding, cord, or ribbon, you will want to use more tabs.

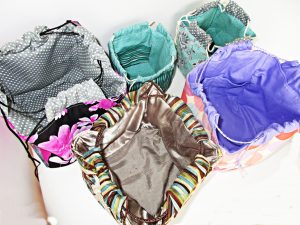
You can use contrasting fabric, even satin for the lining, and add pockets if you choose.

You can use contrasting fabric, even satin for the lining, and add pockets if you choose.

To finish your kinchaku

Place the inside and outside bag pieces right sides together, with the casing or tabs sandwiched between the two layers. Sew together, leaving an opening big enough to turn. Turn right sides out. Pull the tabs and push the lining down into the bag.

Sew the opening closed and continue top-stitching all the way around the top of the bag. Pull down on the lining and straighten the top seam as you sew.

Now thread a cord or ribbon through all tabs and tie the ends together. Then thread another cord of the same length starting and ending on the opposite side of where you started and ended the first cord. Tie the second drawstring and your bag is complete. You can tie the cords in a bow or use them as handles to carry your bag.

These are addictive

kinchaku tutorial

I can’t stop making these bags! They go together so quickly and are so cute and sturdy; sewing them is addictive. That’s good because these will make great gifts. Try this quick easy project and I bet you can’t make just one either.

Happy sewing!

Gifts to Sew for Dad

Gifts to Sew for Dad

Gifts to Sew for Dad

Sometimes it is hard to think of a great gift to sew for dad. It might seem like endless project options come to mind for most any other recipient, but gift ideas to sew for men don’t come quite as easy. Between the holidays, his birthday, and Father’s Day, you need a few good gift ideas each year—and that’s if you only have one dad to sew for!

Gifts to Sew for Dad

To help solve this perennial problem, here’s a long resource list of ideas to sew for men, including your dad, your children’s dad, or any other dad you might love.

Pillowcase

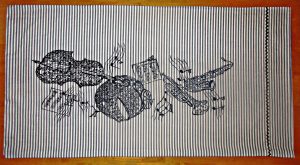
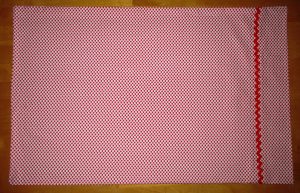
I seem to list pillowcases in every gift idea post I write! That’s because they are easy to make in a hurry, everyone uses them, and none are as nice as those that you make. So they make a nice gift to sew for dad, too. My dear always loves a gift of a new pillowcase, especially for his jumbo XL long pillow. Last year, I made him one with Star Trek fabric, it is covered with line drawings of the Enterprise.  I used a vintage yard I’ve been saving and some vintage trim, too, and made him a new one today.

I think he'll love this for his jumbo pillow. I love the extra bit the sparkly trim adds to this.

I think he’ll love this for his jumbo pillow. I love the extra bit the sparkly trim adds to this.

Pajamas

Simplicity and other pattern makers make super easy to follow patterns for pajama pants. Or you can trace a favorite pair to make a pattern, or you can follow an online tutorial.  Make them extra nice by adding pockets and drawstring waist. My dear prefers these cut quite loose and made from plaid flannel shirting; these look great on him, too.

Handkerchiefs

Make these from soft cotton; they are nice in flannel, or even knit.  Use a serger to finish all sides. For knit fabrics, you don’t even have to hem them at all. To save a step, buy these pre-made and make them more fun with tie-dye or personalize them with embroidery.

Handkerchief detail.

Handkerchief detail.

Quilt

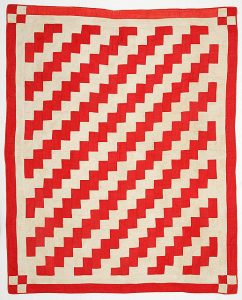
A quilt is a perfect gift to sew for dad. Make him a lap sized or larger quilt in his favorite colors if you know them. If not, you know he loves his college or pro team’s colors, or go with a muted and manly collection of scrap fabrics. My favorite quilt I made for a man was a corduroy scrap quilt, with brightly colored squares alternating with khaki squares in a Streak of Lightning pattern. Choose a high quality, super soft cotton flannel for the quilt backing, and use cotton batting for maximum comfort quilts.

Streak of Lightning quilt, Ashley Van Haeften, from Flickr.

Streak of Lightning quilt, Ashley Van Haeften, from Flickr.

Bedside or chair arm organizer

Sew an organizer pocket to go over the side of his chair and hold his remotes and things, or under his mattress to keep glasses and reading material safely at hand.

Comfy his couch

Besides making a quilt, you can make his couch even cozier with custom cushions, perhaps one which includes pockets for his remote. Or make him a cuddly plush sofa blanket.

Two layers of Cuddle Plush fabric make an ultra cozy sofa blanket.

Two layers of Cuddle Plush fabric make an ultra cozy sofa blanket.

BBQ Apron / tocque / oven mitts

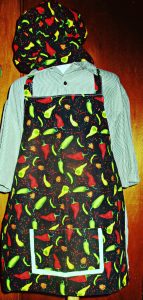
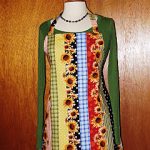
Use appliqué or a fun novelty fabric to make and personalize an apron just for him. I like this reversible pattern from Michael Miller fabrics best. Make the gift even nicer by pairing it with an easy-to-make, matching chef’s hat (tocque is the proper name for these) or an oven mitt.

Reversible, adjustable apron & chef hat.

Reversible, adjustable apron & chef hat.

Handyman apron

Help him around the house by sewing a full-coverage handyman apron or an easy pocketed waist apron for holding nails or a few tools.

First aid kit

Everyone needs one. You can make it roll-up style, or with a zipper.

Zip bag

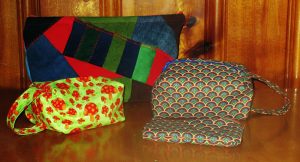
Zip bags I made for guys yesterday.

Zip bags I made for guys yesterday.

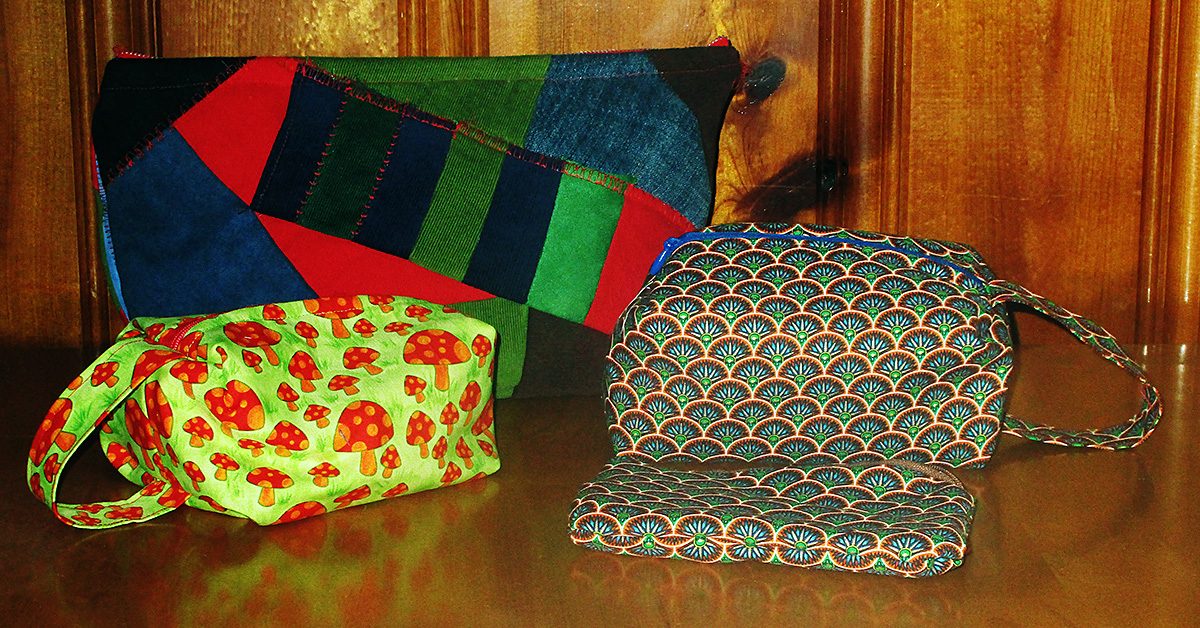
Make him a small and simple zippered pouch for holding his cufflinks and jewelry, sketching pencils, or other small items. For something a bit roomier, here is a tutorial for a boxy toiletries bag that will work well to sew for dad.

You can sew an easy zip bag in 15 minutes, or less.

You can sew an easy zip bag in 15 minutes, or less.

Phone or glasses case

These are simple and easy to make. If you prefer, make a hanging charging pouch.

Tablet tote

This one is really easy to make; scroll down to see a manly looking option. The iPlaid is a good choice for a guy, or you could make one from scrap jeans.

Laptop sleeve or bag

If you can get your hands on his laptop to take measurements, then you can make this easy laptop sleeve in an hour or less. For something with a strap, make him a messenger style bag to fit his laptop.

Lunch bag

He’d probably rather not carry a cutesy lunch sack, so here’s how to sew a reusable brown bag with waxed canvas.

Wallet

Make it bifold or trifold. Or make him a simple business card wallet.

Other kits or bags

Make a tool roll or tool bag, a cord roll, a battery bandolier organizer, a monogrammed suede bag for his liquor bottle if he carries one to go, a shoe bag for travel. I’m making a patchwork quilted ukulele bag and a drumstick bag for my hubby this year. A soft padded guitar bag is a great idea, too.

This fabric is perfect for lining his ukulele case.

This fabric is perfect for lining his ukulele case.

Cup, can, or bottle cozy

Here are free tutorials to sew these for a can, a bottle, or a coffee cup.

Keychain

Lanyard type key fobs make useful gifts. You can make them with webbing, leather, even recycled jean denim. Here is a neat tutorial that includes a way to make these with a zipper for a place to stash cash. Or make something else useful to hang hang on his keychain, like a chapstick cozy or earbud or iphone pouch.

CD visor or book

Plenty of dads still keep their music on CD. If yours does, you can sew him a place to hold them on his car visor. I made one with a patchwork dive flag and ocean blue fabrics for my diver dad. You can also use felt to make pocket pages and sew a folder or book for holding CDs.

Baby carrier

Dads love to wear babies, and babies love it when they do. For a new dad, make a sling type, mei-tai, or a toddler sized soft structured carrier in a manly color or fabric.

A mei-tai style baby carrier is super easy to sew and comfy for both dad & baby.

A mei-tai style baby carrier is super easy to sew and comfy for both dad & baby.

Sporting gifts

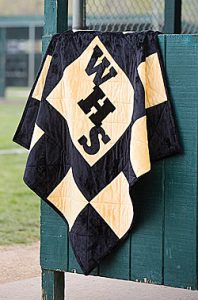
Stadium blanket, photo courtesy Fons & Porter.

Stadium blanket, photo courtesy Fons & Porter.

Hat

There are lots of ways to sew a hat. Here are tutorials and free patterns for a few different styles:

Shorts

Buy a simple pattern, or use my 10-minute way to make shorts. You can make the bandana style shorts in that link for men using four bandanas instead of two.  Just use two bandanas instead of one for each leg, and add side seams to sew these together. Add length at the rise with a matching or coordinating fabric, or cut a couple more bandanas in half and sew these at the top. Or choose a funky fabric and whip up some board shorts for him.

Tie / bowtie

Buy some silk and make him a stylish tie with a pocket square to match. Here are tutorials for a bow tie and how to add a secret wallet pocket to the back of any tie, too.

Scarf / cowl

Unless you live in the Southern Hemisphere, you probably won’t want to give dad a scarf for Father’s Day. But for winter holidays or birthdays, a scarf or cowl makes a great gift.

Do you have other ideas?

I am sewing all my Father’s Day gifts this year. What about you? Which of these ideas will you sew for dad? If you know any good gifts to sew for dad or men that aren’t on this list, please add them by commenting below.

Gifts for Grads Who Love to Sew

Getting through school requires determination, persistence and intelligence.

Getting through school requires determination, persistence and intelligence.

Getting through school requires determination, persistence and intelligence. Graduating seniors have earned the recognition and gifts their family bestows. We’d like to throw our hat in the ring and congratulate all graduates this year too! To help them celebrate, we have some great gift suggestions for grads who love to sew.

Sewing Totes

As your graduate heads out into the world for the next phase of their life, they’ll want to have their sewing machine and supplies with them. Sewing totes are the perfect way for them to pack up all their sewing gear safely and transport it to this next step on their life and for all the subsequent moves to come. The variety of colors, styles and sizes means you’ll find the perfect sewing tote for your graduate.

Embroidery Hoops

Not all of this year’s grads will embroider, but those who do will love getting a gift of embroidery hoops. Try getting them a variety of shapes and sizes so they’ll have plenty on hand for future projects. And know that any time they use one of the hoops you gave them, they’ll think of you while working on their embroidery project. Those warm memories will work their way into the project, making it that much more special.

Sewing Furniture

Many new graduates begin by moving into a place of their own – with or without roommates. Help them get set up and make their place comfortable with sewing furniture. Whether they’ll have a separate sewing room or a small space in the corner of a shared apartment, the right sewing furniture will help them feel more comfortable and settle into their new living arrangements.

Garment Care

With luck, the graduate in your life has a job lined up. Whether they do or not, they’ll need to look their professional best on the on the job hunt and in the workplace. Garment care items will help them do just that. They work well on both store-bought and handmade items, so your graduate who loves to sew may wind up sharing these gifts with their roommates and coworkers.

Graduates who love to sew may also appreciate gift certificates to fabric stores or to our website. What will you buy your grad this year?

Printed Fabric Project Panels and Ideas

Printed Fabric Project Panels and Ideas

Have you looked into the world of printed fabric panels yet? If you are someone who wants to sew, but doesn’t want to take the time to do detailed, intricate work, a printed fabric project might be more your speed. With pre-printed fabric you can easily sew up gifts for babies and new mothers, teacher and holiday gifts, and so much more.

Kids and New Moms

Making a gift for an expectant mother or little kid in your life? Now you can piece together quiet books, soft books, plushies, play cubes, and toys by buying fabric panels, cutting out the patterns, stuffing, and sewing. Here are a few darling examples.

Tara Lilly’s Whimsical Storybook, Sea Urchin Studio’s Forest Fellows 2, Ed Emberley’s Happy Drawing, and Dr. Seuss Enterprises’ What Pet Should I Get?

Tara Lilly’s Whimsical Storybook, Sea Urchin Studio’s Forest Fellows 2, Ed Emberley’s Happy Drawing, and Dr. Seuss Enterprises’ What Pet Should I Get?

Housewarming and Hostess Gifts

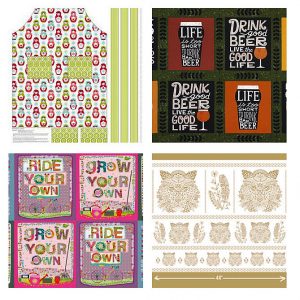
The next time I sew an apron, I’m going to buy a pre-printed fabric panel and just cut and sew. Likewise, there are fabric panels available out there for every type of friend and host or hostess gift you may need. I especially like the two highlighted below for beer lovers and DIYers.

Carly Griffith’s Merry Matryoshka, Robert Kaufman’s Cheers, Maia Ferrell’s Home Grown, Hawthorn Thread’s Bengal Panel.

Carly Griffith’s Merry Matryoshka, Robert Kaufman’s Cheers, Maia Ferrell’s Home Grown, Hawthorn Thread’s Bengal Panel.

Make Your Own Pillows

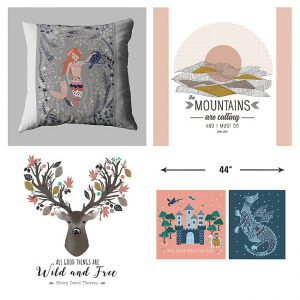
Never buy store bought decorative pillows again. Now you can cut out and sew any size panel with an endless array of patterns, designs, and quotes by inspirational people. I’ve got the John Muir quote one in my shopping cart.

Hawthorne Thread’s Calypso in Aegean, Redwood Panel with John Muir quote, Autumn Fawn with Henry David Thoreau quote, and their Brave Panel in Valor.

Hawthorne Thread’s Calypso in Aegean, Redwood Panel with John Muir quote, Autumn Fawn with Henry David Thoreau quote, and their Brave Panel in Valor.

Full-sized Quilt Panels

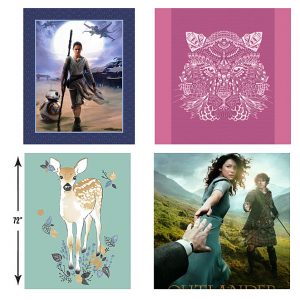
That’s right. Now you can buy an entire fabric panel ready to quilt. You don’t have to piece these beauties together. Just add batting and a backing and start quilting. For my Star Wars and Outlander fan friends, yes, you can now get your favorite heroines in full-sized quilts!

Camelot Cotton’s Rey and BB8, Hawthorne Thread’s Bengal Quilt Panel, and their Fawn Quilt Panel in Aspen, and Kathy Hall’s Outlander Panel.

Camelot Cotton’s Rey and BB8, Hawthorne Thread’s Bengal Quilt Panel, and their Fawn Quilt Panel in Aspen, and Kathy Hall’s Outlander Panel.

Season’s Greetings

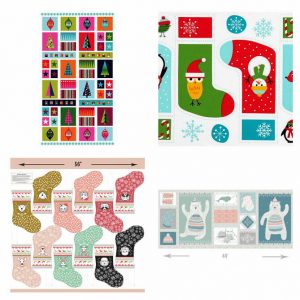
Holiday decorating and seasonal teacher and co-worker gifts are much easier now that fabric comes in these printed panel projects. Make a stocking for everyone in your kids’ class or just make them all for you and deck the walls at home.

Makower UK’s Wrap it Up Hanging Panel, Ann Kelle’s Jingle 4 Stockings, and Hawthorne Thread’s Oh What Fun Stockings cut outs, and Hawthorne Thread’s Fairisle Panel in Multi.

Makower UK’s Wrap it Up Hanging Panel, Ann Kelle’s Jingle 4 Stockings, and Hawthorne Thread’s Oh What Fun Stockings cut outs, and Hawthorne Thread’s Fairisle Panel in Multi.

This is Halloween

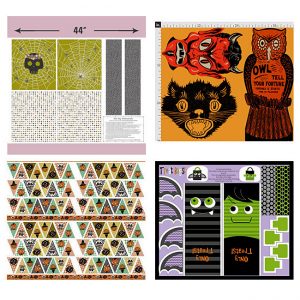
I had to spotlight Halloween printed fabric panels because I know a lot of my friends struggle to find Halloween crafts. No more! Make your own trick or treat or gift bags and spooky buntings and pillows.

Hawthorne Thread’s Nocturne Trick or Treat Bag panel, Halloween Pillows, Halloween Bunting, and Halloween Treat Bags by Heidi Kennedy on Spoonflower.

Hawthorne Thread’s Nocturne Trick or Treat Bag panel, Halloween Pillows, Halloween Bunting, and Halloween Treat Bags by Heidi Kennedy on Spoonflower.

What a Doll

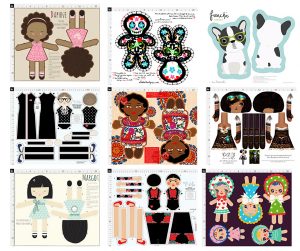
Full fabric quilt panels and doll patterns are where I think preprinted fabric panels really shine. Both categories are a lot of work when you make everything from scratch. These cut-out-and-sew doll patterns will have you finished in no time, and the gift recipients are guaranteed to love what you make.

Daphne by stacyiesthsu, Cute Dia de Los Muertos Doll by elladorine, Frenche by ewa_brzozowska, Ruth Bader Ginsburg by nicoleporter, Angelina Cut N Sew Doll by tiffanyhoward, Cut and Sew Doll Pattern Steampunk Princess by selinafenech, Margo by stacyiesthsu, Frida Kahlo by nicoleporter, and Cut N Sew Bunka Dolls by heidikennedy.

Daphne by stacyiesthsu, Cute Dia de Los Muertos Doll by elladorine, Frenche by ewa_brzozowska, Ruth Bader Ginsburg by nicoleporter, Angelina Cut N Sew Doll by tiffanyhoward, Cut and Sew Doll Pattern Steampunk Princess by selinafenech, Margo by stacyiesthsu, Frida Kahlo by nicoleporter, and Cut N Sew Bunka Dolls by heidikennedy.

Do you use preprinted fabric panels? What are your favorite projects to make from them?

———————————————————————————–
Charlotte Kaufman is a writer and sewist in Mammoth Lakes, California. She specializes in marine and home interiors and continues to fall more and more in love with quilting. You can follow her at charlottekaufman.com.
DIY: Reversible Tote Bag Tutorial

DIY: Reversible Tote Bag Tutorial

It is easy to sew a reversible tote bag; even beginners can make this project.

It is easy to sew a reversible tote bag; even beginners can make this project.

It is easy to sew a reversible tote bag; even beginners can make this project.

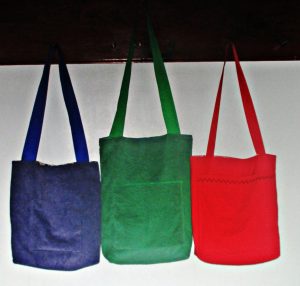
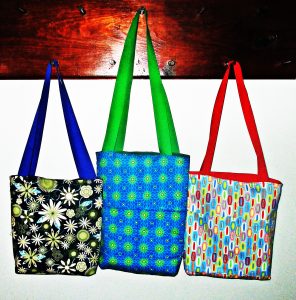
You can make these in any size. My three examples are each sized slightly differently.

To make one reversible tote bag, you need 2 different bag fabrics. Depending on the sturdiness of your fabrics, you may also need medium weight interfacing or fusible fleece. You can make your bag handles from long rectangles of one or both of these fabrics, or you can use grosgrain ribbon, as I have here.

Reversible tote bag step one: cut bag pieces

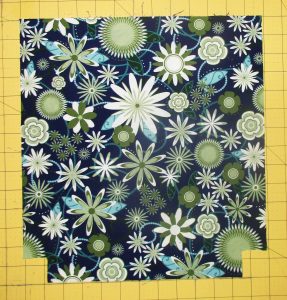
Measure & mark 1.5” from both sides of the bottom corners & cut these little squares out.

Measure & mark 1.5” from both sides of the bottom corners & cut these little squares out.

Cut two squares or rectangles of each fabric to your preferred dimensions. I made these using 13” x 14”, 14” x 15” and 13” x 17” rectangles, and I have made them both much smaller and much larger.  The 13” x 17” is big enough for my laptop. But ribbon handles aren’t a good idea for a laptop bag; follow the directions for making stronger fabric handles if you plan to carry your computer.

Then measure and mark 1.5” from both sides of the bottom corners and cut these little squares out. Do this for all four pieces of your bag fabric.

Step two, optional: interfacing

If you choose to make your reversible tote bag from home decor fabric and/or canvas, you won’t need to use interfacing.

If you are using quilter’s cottons or similar lightweight fabrics, cut fusible fleece or interfacing to fit two of the bag pieces. Follow package directions to fuse fleece or interfacing to the wrong side of both pieces of one bag fabric.

Step three, optional: pockets

You can make pockets on one or both sides of your reversible tote. The easiest way to make pockets is to start with a rectangle, fold it right sides together, and sew all around, leaving an opening for turning. First topstitch the opening closed, then pin and sew the bottom and sides of the pocket to the bag.

You can make a long rectangular pocket that stretches the full width of your bag, or make square patch pockets and sew them in the middle of one or more of the bag pieces.

Step four: sew two bag bodies

Take both pieces of one of the bag fabrics and sew along the bottom and side seams with right sides together. Press seams open. Now, miter the corners by lining up the side and bottom seams you just sewed at the middle of the new seam you will form from the square cut out. Sew these seams.

Repeat with the pieces of the second bag fabric.

Step five: handles

Use a soft measuring tape or even a string hung over your shoulder to determine how long you want your straps to be. I like long shoulder straps, so I usually cut mine about 30 inches long. If you prefer to carry your tote on your arm, cut yours shorter. You need two.

I saved time making these bags by using grosgrain ribbons to make easy straps. To do this, just cut two pieces of ribbon to your desired length.

To make fabric handles, cut two long rectangles to your desired length measurement by twice your desired strap width. Apply interfacing to the wrong side of your fabric if you like.  Fold lengthwise right sides together and press. Sew along the long open edge, then turn. Press again.  Now top-stitch along both long sides.

There is no need to finish the short ends as these will be concealed between the two sections of the bag.

Step six: assembly

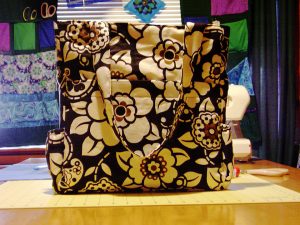
They are handy for carrying books, notebooks, your computer, clothes for overnight or the gym.

They are handy for carrying books, notebooks, your computer, clothes for overnight or the gym.

Insert one bag into the other, with right sides together. If your placed pockets on one side of each bag body, insert them together so that the pockets are on opposite sides. Push down the corners to make sure both bag pieces are lined up well at the bottom. Then line up the side seams from both pieces and pin these together.

Take one strap and hold one end in each hand so that the loop hangs down. Be sure it isn’t twisted and insert it between the two bag parts on one side. Measure in from the pinned side seams on each side to be sure the straps are centered. About three inches in is a good guideline, but eyeball your bag to decide on exact strap placement. Just measure the distance between strap and side seam on both sides to be sure they are even. Pin, then repeat on the other side with the other strap.

Now sew together along the top edge.  You will have to leave an opening big enough for turning; I sew across all the straps and leave the opening on one side.  Turn everything right sides out. Both sides of the reversible tote will be pointing out.

Stick your hand into the opening and poke all the corners out from the inside. Then push one bag body into the other so that it becomes a bag with handles at the top. Return to your ironing board and press. Pay attention to the edges still open from turning; you want to press the raw edges inward and neatly align for top-stitching this opening closed.

Now stitch all the way around the top of the bag and you’re done.

Make more!

Reversible tote bags are easy to sew in a hurry & the possible variations are endless.

Reversible tote bags are easy to sew in a hurry & the possible variations are endless.

Reversible tote bags are easy to sew in a hurry and the possible variations are endless. Make them in different sizes and try different fabrics and trims. Use tie-dye, quilting, appliqué, fabric paints, or any other embellishment you like.

They are handy for carrying books, notebooks, your computer, clothes for overnight or the gym. You can use them as a shopping bag, your purse, or for handmade gift giving. Pick out some pretty fabrics and make a bunch. Happy sewing!

Summer Trends: Embroidery

Summer Trends: Embroidery

Summer Vacation 2017 is upon us!

Summer Vacation 2017 is upon us!

Summer Vacation 2017 is upon us, and as could be the case for any season and time frame, it’s showing up with its own trends. There are a number of these that you can apply to your sewing, but the one that I primarily want to focus on is embroidery. According to one source, “[t]he biggest trend that is coming in 2017 is definitely embroidery,” which makes it a popular topic to explore and try your hand at. For me personally though, it isn’t my main focus in sewing, so there’s plenty of room for me to learn and grow within that category. What better way could I have to do those things than to explore and research for the sake of a new blog post?

Start at the beginning

Let’s start with the very basics, like what exactly embroidery is. In regard to the world of sewing, that definition has been given as the following: “Embroidery is ‘thread art’ used to embellish a garment, hat or some other product by adding a sewn pattern. Generally, this sewn pattern includes a design and can also include lettering and/or monograms.” If you find that a bit too far-fetched of a definition though, think of it like drawing artwork on a product or fabric. Just as you would take a marker, colored pencil, or crayon to create an image on paper, “thread or yarn” can be used in embroidery to build the picture you mean to make.

Clearly, embroidery has changed over the years, but the long-reach of this style of artwork speaks volumes to its appeal & application.

Clearly, embroidery has changed over the years, but the long-reach of this style of artwork speaks volumes to its appeal & application.

Embroidery, as it happens, is not a new concept either. It dates back to prehistoric times — “to Cro-Magnon days or 30,000 BC” — so prominently that “fossilized remains of heavily hand-stitched and decorated clothing, boots and a hat [have been] found.” Clearly, embroidery has changed over the years, but the long-reach of this style of artwork speaks volumes to its appeal and application. If it has remained for so many millennia and through the technological changes within the later centuries, it’s safe to say that it’s a topic and technique that has captured interest through the passage of time!

Your only limitation is your own imagination

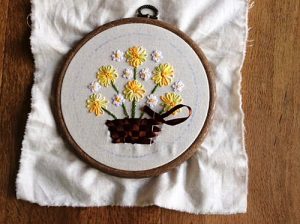
One reason for that appeal is clear since, because of the many forms embroidery can take, the possibilities for design are almost limitless. If you want a picture of a flower, a bird, a house, a doughnut, or a dragon on your work, you can add any of the above — or whatever else you have in mind — so long as you don’t over-exceed your own abilities. If you can physically create it, you can do it! It’s important to note though that this is one area that merits consideration since if you try for something too large-scale on your first embroidery project, you could fall short and become discouraged with the whole process. When you start off with such a bad experience, it can be a psychological obstacle to overcome if you want to better yourself in the field. Keep in mind then where you are with embroidery, and choose projects that are fitting for your level.

If you can physically create it, you can do it!

If you can physically create it, you can do it!

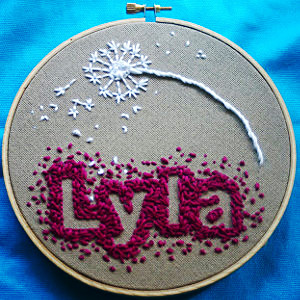
In essence though, embroidery can be incredibly personal and project-specific. You don’t just have to rely on the fabric at your disposal to create a work that’s perfect for you and your purpose. If you want to sew a blanket for a friend’s baby shower, for instance, you could add to whatever adorable fabric you use for that work by personalizing it with the baby’s name. If you’re making some kind of wedding gift, you could add the wedding date right onto the material. That truly is a beauty of embroidery. Whatever you want, if you physically can do it, it’s an option — even if you have to use an embroidery pattern to make it happen!

Unlock your creativity & see where it takes you

Add to whatever adorable fabric you use by personalizing it with a name.

Add to whatever adorable fabric you use by personalizing it with a name.

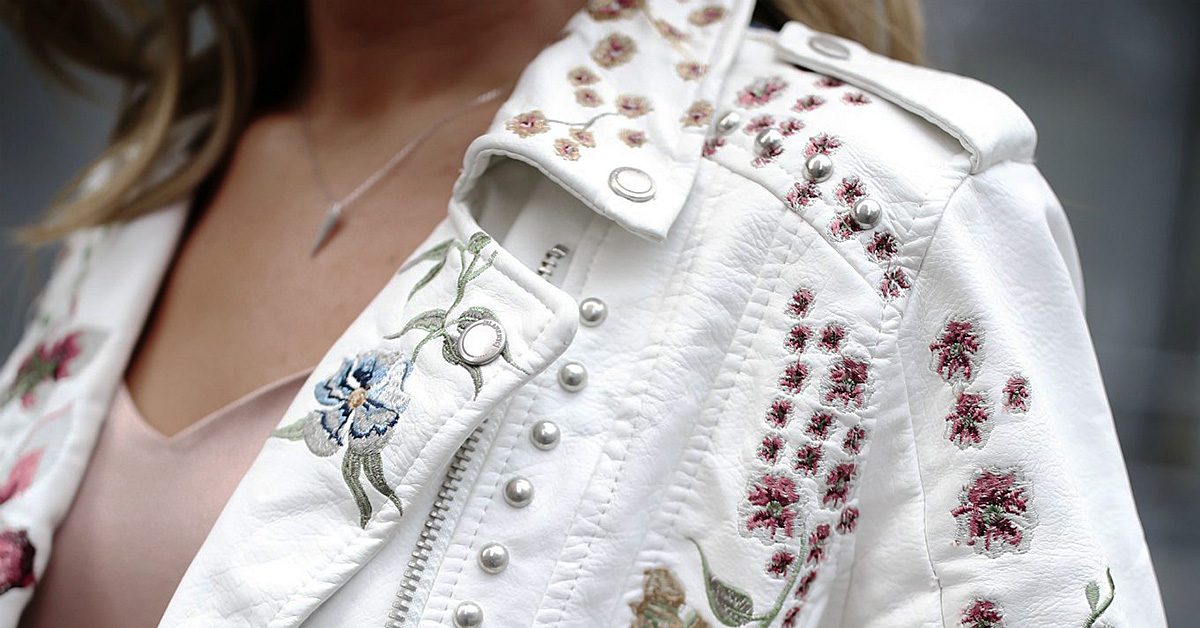
Of course, this can be applied to your clothing, as is evidenced by the notion that “Gucci, Dolce & Gabbana and McQueen” have all been credited with embracing this trend. The level of creativity involved with this clothing idea, again, can’t be overstated because you can tailor your designs to what you have in mind. If you want a blue top with a colorful butterfly on the left shoulder, you could make that happen even if you can’t find it in stores.

Overall, I honestly don’t know if there’s a more creative way to make your own items unique, so if you want to create a piece that’s as yours as you can manage, you might want to step into the world of embroidery! It’s trendy this summer, and a number of the popular embroidery concepts are very spring/summer-inspired — like flowers and birds. All in all, if ever there was a perfect time to step into this creative category, it’s now!

Gifts to Sew for Mom

Gifts to Sew for Mom

Are you looking for ideas to sew for Mom?

Moms come in all types. But most appreciate handmade gifts, especially the ones you make. Whether your mom is glitzy or sporty, a homebody or a world traveler, we’ve got you covered.

For Mother’s Day, her birthday, holiday gifts, or just because you love her, here are lots of fun project ideas you can sew for mom.

Zip bags

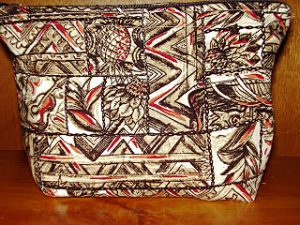
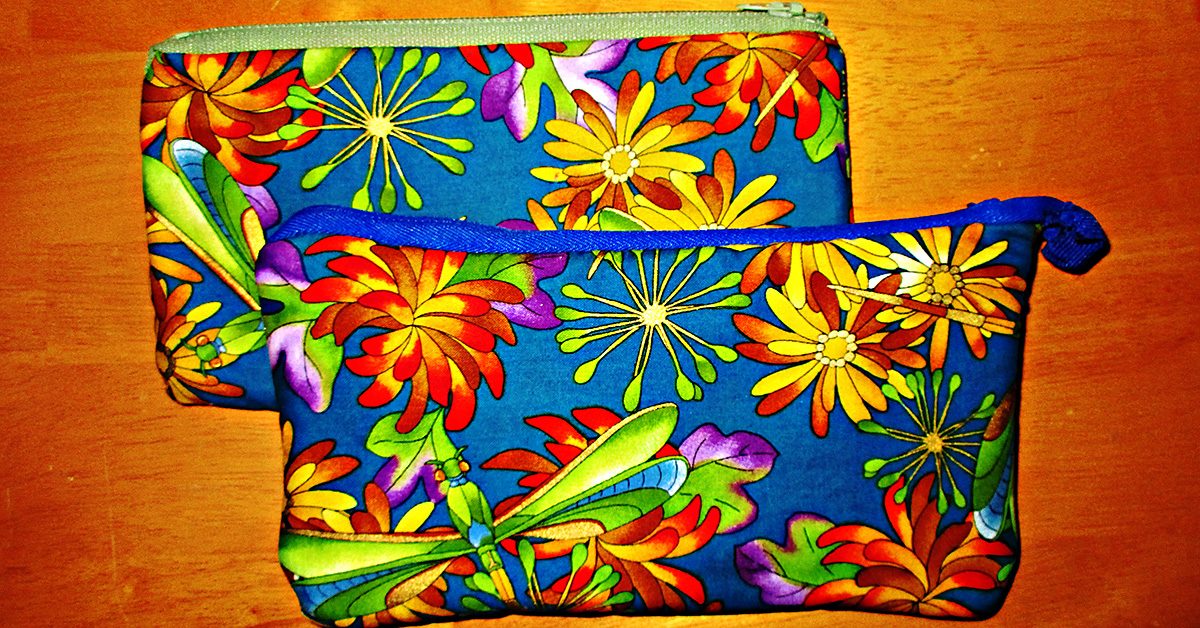
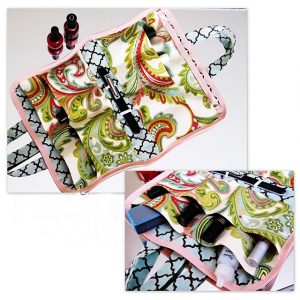
There are so many uses for these that zippered cases are always a good gift idea. She can use one for a cosmetics bag for her purse or travel, to hold pencils or art supplies, or anything else. I once made a matching set of these in several sizes for a gift for my mom.

She can use these to hold anything.

She can use these to hold anything.

Quilt

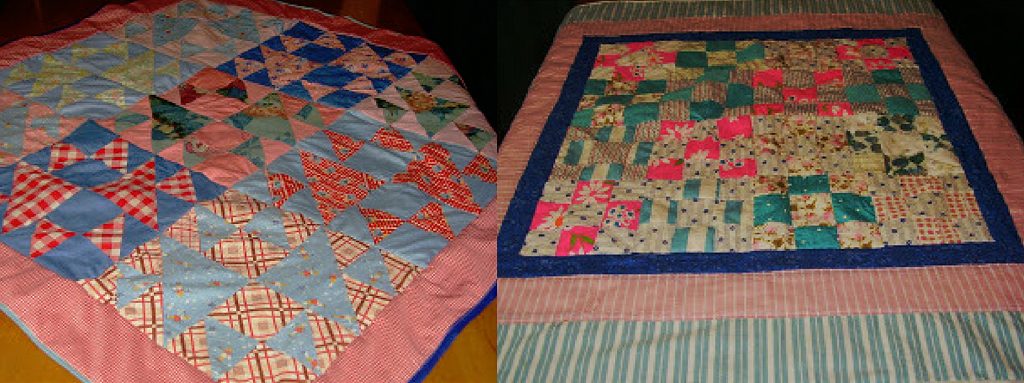
Whether she likes to get comfy in her favorite chair or she babysits grand-babies, a lap quilt is a perfect choice to sew for mom. Make one in her favorite colors, to match her décor, or choose a special pattern.

The blocks in these quilts were pieced by my mother's and my husband's grandmothers. I found them in their sewing boxes & put them together with borders to make these lap quilts for our moms to share with their grand babies.

The blocks in these quilts were pieced by my mother’s and my husband’s grandmothers. I found them in their sewing boxes & put them together with borders to make these lap quilts for our moms to share with their grand babies.

And speaking of grand kids and special quilt patterns, you could get the kids involved and make a handprint quilt for their grandmother.  You can make a handprint quilt using washable fabric paint and the kids’ hands as stamps. Or you can have them trace and then cut out their hands and use these as appliqué patterns.

Handbag

Most ladies will appreciate a beautiful new handbag. Depending on your mom’s style, you could make her a clutch, a wristlet, a structured bag, or a casual cross-body purse or messenger bag.

The possibilities are endless here. Choose suede, an elegant stamped faux leather or other fancy fabric, a distinctive or wildly patterned print, or build her a bag based on a small piece of patchwork created just for her.

Totes

She can’t have too many tote bags since these are endlessly useful.

She can’t have too many tote bags since these are endlessly useful.

She can’t have too many tote bags since these are endlessly useful. Make her a stylish and sturdy tote bag for her library books, groceries, or other shopping and she will appreciate it endlessly.

Make a gorgeous XL tote in a special fabric and she will be thrilled to use it as a stylish everyday bag. Especially if you add in ample pockets and/or smaller zip bags for organizing contents.

You can make a reversible tote bag in any size and give her two bags in one.  Make a canvas tote with ample pockets inside and out to create a custom beach bag she will love. Or make her a few of these cute shopping bags that collapse into their own pocket.

And consider smaller totes, too. Here is one as pretty as a purse meant for toting her tablet.

Pillowcases

You can’t buy pillowcases as pretty as the ones you can sew. Make her a luxe pair trimmed in vintage lace. Choose a colorful patterned fabric to dress up her bed or a special motif she adores. Whether she loves owls,  Star Trek, or her favorite sports team, you can make her a pillowcase from a yard of any novelty print.

You could make a pillowcase covered in hearts to remind her how much she is loved.

You could make a pillowcase covered in hearts to remind her how much she is loved.

Sew a bouquet

A bouquet of flowers is a standard Mother’s day gift. You can sew her a bouquet of flowers that will never wilt and fade away.

Here are a lot of different ways to make fabric flowers.

Rice Pack

Whether she suffers from pains in the neck, back, tummy, or general monthly pains, an oversized microwavable rice pack heating pad will be a welcomed gift of comfort.

Slippers

There are lots of ways to sew slippers, here are some slipper sewing tutorials to choose from.

Pajamas

You can sew cozy pajamas from silk, cotton, flannel, or fleece. Make them ultra feminine with batiste and lace, or pure fun in a funky print. Start with an easy pattern from Simplicity, McCall’s, or Butterick, or use one of these tutorials.

Easy robe

Like pajamas, you can sew a robe from a lightweight or dressy fabric or from something heavier and more cozy. Robes are easy to sew. You can buy an easy robe sewing pattern or here’s a great tutorial showing how to make your own pattern using rectangles.

Apron

There are so many ways to sew aprons.  You can make her a pretty half apron from just a fat quarter of fabric plus trim, a full coverage bbq style apron from a yard, a reversible apron, or a garden or craft apron.

  • Oven mitts/ pot holders
  • Table runner
  • Placemats
  • Napkins

Travel bags

If your mom travels a lot, there are a lot of great gifts you could sew to help her

Project link at Positively Splendid.

Project link at Positively Splendid.

Pareu

I got this idea from the book Travel Gear and Gifts to Make, by Mary Mulari. She says that a pareu (pa-ray’-oo) is actually a colorful Polynesian wrap skirt. But it can also be used as a shawl, head cover, scarf, swimsuit cover up, light blanket, picnic blanket, or even a knapsack for carrying stuff.

This is probably the most used and loved gift I have ever made for my mom, and it is also the simplest. She travels a lot as a car passenger, and she likes to nap with a light blanket while riding.

A pretty pareau works perfectly for that plus more.

To make one, you just hem a square or rectangle. You can make one from a 44″ or a 60″ square. Since I knew she would use it as a blanket, I made my mom’s in the larger size. And I sewed a small matching tote with a strap, for storing the pareau rolled up while not in use. I bet it has been over ten years since I made it for her, and she still raves about and uses this gift all the time.

Needlebook

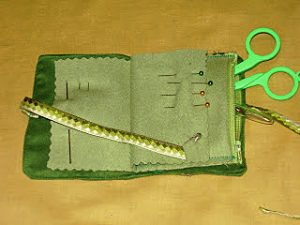
If your mom sews a lot or even just a little, she will certainly treasure a needle book you make with love just for her. You can make a simple one from felt or create a patchwork cover and include a zippered “page” for holding small scissors and other supplies.

I like to make needle books with a zippered page inside.

I like to make needle books with a zippered page inside.

Fabric necklace or bracelets

Jewelry is another go-to gift for moms, but have you ever sewn jewelry? Here are some ideas you could try:

I hope this list gave you some good ideas. What will you sew for mom?

How to Sew Valentines: 33 Project Ideas to Show Your Loved Ones How Much You Care

How to Sew Valentines: 33 Project Ideas to Show Your Loved Ones How Much You Care

Sew valentines this year

I challenge you to sew valentines this year to show your love.

I challenge you to sew valentines this year to show your love.

I challenge you to sew valentines this year to show your love. Anyone can buy trinkets, but making something with love infuses more meaning into even simple gifts. Heartfelt gifts don’t need to be elaborate to mean a great deal.

From simple sewn hearts to labor of love quilts, the web is full of fun ideas that you could use to sew valentines this year. You can make a little something for every person you love. And there is nothing wrong with sharing a little love with people you just like, too. From your sweetheart to your grandma to your neighbor or teacher, everyone who you bless with a handmade gift will appreciate that you spent time making something just for them.

Sew valentines: my simple ideas

I’ll start by sharing three simple ideas of my own that I’m using this year to sew valentines for my family and friends, including an easy way to add a homemade touch to candy I’ll pick up at the store.

Felt or fleece hearts

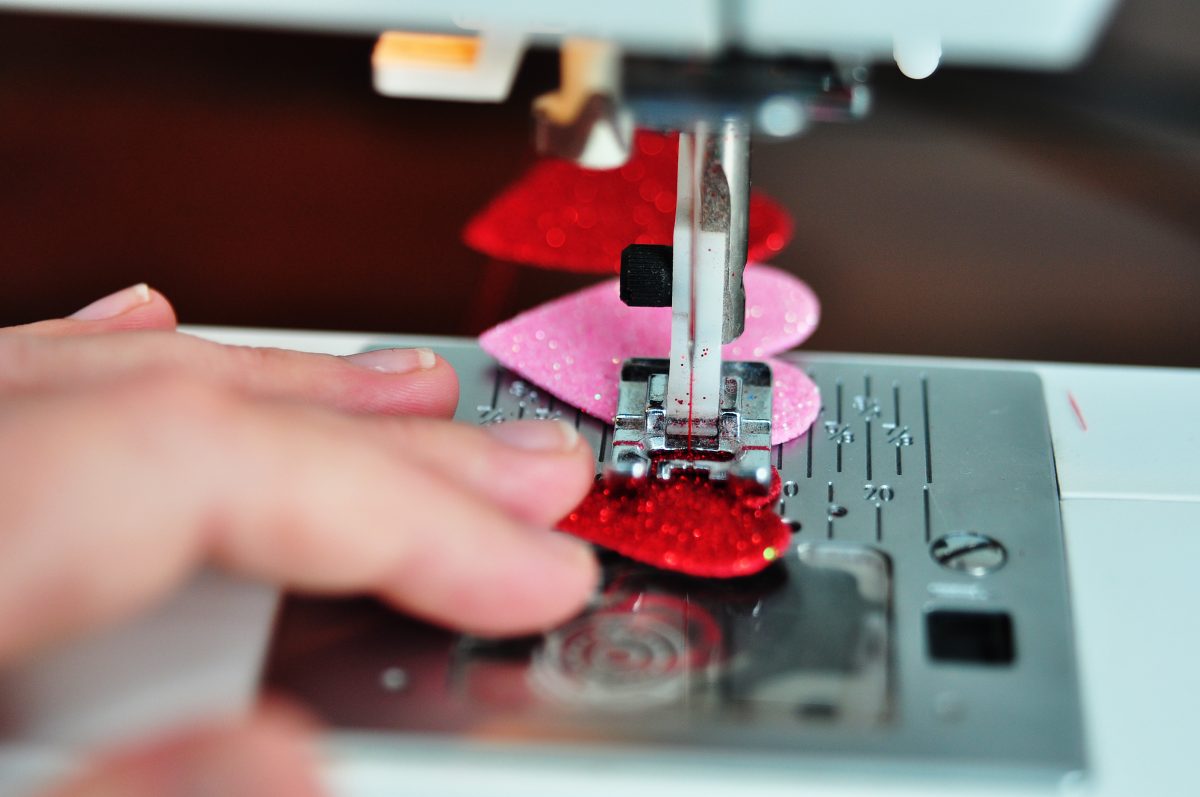
These couldn’t be simpler to make. Just draw a heart pattern on paper, cut out, and pin to two layers of fleece or felt. Cut these out, then sew them with right sides together, leaving an opening for turning. Stuff, and then sew the opening closed. I’m stuffing them with dried lavender flowers to make simple sachets for my friends. I once made a pair of these and filled them with baking soda to stuff in my gym shoes, and this worked well to eliminate odor. You could also use lentils and make a set of heart bean bags for a game for your kids.

You could also use lentils & make a set of heart bean bags for a game for your kids.

You could also use lentils & make a set of heart bean bags for a game for your kids.

Valentine novelty fabric pillowcases

There is nothing easier to make from a yard of cute fabric than a pillowcase. To make one, hem across one long side. Then fold the fabric widthwise, with right sides together, and sew or serge the other two sides. Turn right side out. That’s it! Of course, you can dress these up with decorative trim. But choose a cute enough fabric and there’s no need to dress it up further.

Attach trim after hemming, before sewing together.

Attach trim after hemming, before sewing together.

Simple gift bags

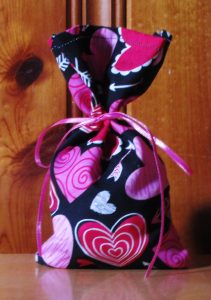
Use the pillowcase instructions above in miniature form to create simple gift bags to fill with chocolates or other candy from the store. Or for children, include dollar store trinkets such as small toys. Tie with a ribbon. You could amend the directions slightly to make drawstring bags instead.

Use the pillowcase instructions above in miniature form to create simple gift bags.

Use the pillowcase instructions above in miniature form to create simple gift bags.

I’ll also be making some projects that I have collected from all over the web. Follow these links to find the perfect projects to sew valentines for everyone that you love:

Sew valentines: more easy ideas

I might make one for myself!

I might make one for myself!

  • Fabric Heart Bookmarks: Here is another project so easy that you can whip up several in mere minutes. This is the kind of sweet gift that most anyone could use. I might make one for myself!
  • Felt Heart Ornament and Garland: I plan to make a couple of these ornaments to share as gifts, and the garland for my house.
  • Warm Heart Coffee Cozy: Here is another simple idea that makes a nice gift for most anyone.
Warm heart coffee cozy.

Warm heart coffee cozy.

Sew valentines: cards

Here’s how to incorporate your love for sewing by hand while making paper cards.

Here’s how to incorporate your love for sewing by hand while making paper cards.

Sew valentines: a game and a toy

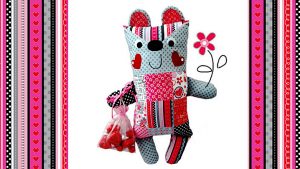
There are lots of ideas for softies to sew, but none are as cute as this sweetie.

There are lots of ideas for softies to sew, but none are as cute as this sweetie.

Sew valentines: bags and purses

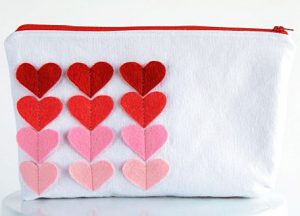
This change purse includes a key ring.

This change purse includes a key ring.

Sew valentines: pillows

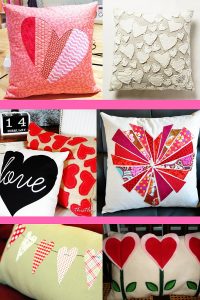
This pattern features reverse appliqué.

This pattern features reverse appliqué.

Sew valentines: quilts

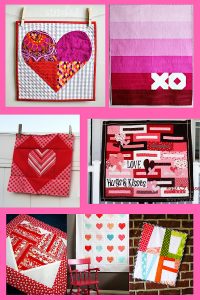
Valentine quilt roundup.

Valentine quilt roundup.

Whichever projects you choose, I hope you have a happy Valentine’s Day!