French Alterations and a Wee Rant

French Alterations and a Wee Rant

French Alteration: Pinning a garment with a note about something you never intend to actually do – and no one ever knows or realizes!

At this point in my tailoring and patternmaking career, I tend to work with the same five or six designers. Mainly, because I enjoy working with them and our fitting styles and fitting room etiquette mesh.

“Fitting styles and fitting room etiquette?” you might ask, “I didn’t know that was a thing.”

Well, when it comes to TV and film fitting rooms, it is definitely a thing. I prefer to work with designers I know and respect because they, in turn, know and respect me. And, most importantly, they let me do my job. Which is to fit a garment on a specific person’s body.

Take it in

My fitting style is to survey the situation for a few minutes, to let the clothing settle on a person so I can see what it’s doing or what it wants to do. Then I go in and start pinning if I need to. Sometimes, I don’t need to, sometimes I can tell what needs to happen just by looking at it.

On the rare occasions these days when I work with someone who doesn’t know me very well, they often want me to rush right in and start pinning away before I’ve had a chance to actually look at things. Or, one of my big annoyances, they yank in the center back waist of a thing so the side seams are pulled all wonky and tell me I need to “take it in”.

Well, yes, it does need to be taken in, but not like that.

Fit preference

Sometimes they’ll even do this to a jacket without buttoning the front buttons, which means if I did take it in the amount they’ve grabbed, the jacket would never, ever, in a million years, be able to close.

I try to be as nice as possible and say, yes, I see that. Now, can you please let go so I can see what’s going on?

Costume Designers definitely have their own preferences when it comes to fit and hem lengths and stuff. I’m completely ok with that and will fit things how they like them fit but I’m not going to do something that will end up looking bad in the end (and for which, I’ll be the one who is blamed because, as in most things, people tend to blame the last person who touched a thing if something is wrong with said thing).

We tailors have this little term we use called a French Alteration. It’s when you pin something or write a note about something as if you’re going to do it but never actually do and no one ever knows or realizes.

Anyway, so back to fitting room etiquette. If there’s a designer in the room, I let them do all the talking and or schmoozing about how good something looks on someone. I just like to concentrate and do my job. Some tailors like to chat (which is perfectly cool if that’s your thing) but I like to listen to what the clothes are trying to tell me.

Brand fitting

One thing I’ve noticed about some designers is that they don’t always seem to understand that brands are cut differently and certain labels look better on certain people. Sometimes, you need to go through a whole slew of suit jackets to find the one that fits a specific body type the best. I can do pretty much any alteration but after a point its sort of foolish to spend a crazy amount of time altering a thing when you could possibly find a cut of jacket that works with minimal alterations. Like, if you need to shorten the body of a suit jacket, maybe you should buy a short (as in a 40short or something). Men’s suit jackets come in longs, regulars, and shorts for a reason. Use them.

I know I’ve mentioned this before but, one of my favorite designers to work for is Frank Fleming who, among all sorts of other things, is the Costume Designer for the show Power. Frank is the master at finding which suit brand and cut fits best on which actor. He can even usually tell which one is going to be best by just looking at an actor. I love that, ‘cause as much as I enjoy taking a suit jacket sleeve out, re-cutting the back and or shoulders and resetting the sleeve (not really), why not just start with a suit jacket that works on a specific body type and not do that?

I never went to school for costume design so I don’t know if they teach this little idea but, they should. It’s a huge time saver. And it really just makes sense.

The Problem with Over Fitting

The Problem with Over Fitting

In my almost 30 years in the film and television business, I’ve worked with a lot of different designers. Every designer has a specific way they like things to fit, at least in the film and television world. Tailors at men’s suit stores like Brooks Brothers, or department stores like Nordstroms, have standard fit and length parameters they follow.

They’ll tell you that a suit jacket hem must end at a certain point on the wrist and the proper length of the jacket is determined by whether or not you can curl your hand around the hem in a certain way. They’ll also tell you that a pant hem needs to have a specific amount of break over the front of the shoe (the amount the hem buckles in when you’re standing straight up).

In television and film, these things can vary depending on what designer you’re working with. I have five or six different designers I work with fairly regularly and they all have specific ways they want things to fit. I’ve worked with them enough to know what each of them like. One of them likes suit pant hems on the short side but lots and lots of ‘stack’ when it comes to jean hems. Another always wants a rake in the hem because they hate to see an actor’s socks showing in the back when he walks. One likes the shirt sleeves to show a ¼” below the suit jacket. Another tends to want things very slim fitted.

One size fits all

As a tailor, one of the most annoying fit attributes is when a designer wants you to, essentially, over fit something (none of the designers I work with regularly do this). By over fitting I mean, they want me to fit something so tightly that there are absolutely no wrinkles present anywhere at anytime. The main problem with this is that it’s only achievable if the actor or actress happens to be a non-moving, stationary dress form or mannequin. And, as I’m sure you know, most are not.

Actors move, clothing wrinkles. If you fit a dress too tightly, it’s going to ride up at the slightest provocation. If you fit a man’s suit jacket within an inch of its life, the actor won’t be able to lift his arms.

There are a lot of wrinkles I can fix, but I can’t get rid of them all. An over fitted garment looks just as bad on camera as one that isn’t fitted enough. Unless you start putting all kinds of extra seams into a thing, you’ll never be able to get something that isn’t spandex, completely wrinkle free all the time. Wrinkle free-ness is only completely achievable when the actor stands in one specific way and doesn’t move at all, ever.

Oxygen is overrated

I can’t tell you how many times a designer has insisted I take something in so tightly that after it’s done, the actor complains about not being able to breathe. I usually don’t take anything in as much as I pinned in a fitting if I’m working with a designer like this. I honestly find it ridiculous that there are costume designers who don’t understand that when humans move, the clothes they are wearing also move. Sometimes there are wrinkles, and this does not mean that the garment is not fitted correctly.

Stylists who dress people for print or short shoots like commercials tend to fit things more tightly because they’re not used to dressing people for realistic scenarios and situations that involve actual movement.

Stylists who dress people for print or short shoots like commercials tend to fit things more tightly because they’re not used to dressing people for realistic scenarios and situations that involve actual movement.

Stylists who dress people for print or short shoots like commercials tend to fit things more tightly because they’re not used to dressing people for realistic scenarios and situations that involve actual movement. In a photo shoot for print, there is no movement so you can over fit to your heart’s content. That’s why clothing never fits you like it does the model in the catalogue or on the website. And this is not a bad thing.

I’ve also worked with designers who do this thing where they grab a whole wad of fabric center back to demonstrate how something should be taken in. Well, first, when you do that, you’re pulling the side seams into a weird place that they shouldn’t be. Unless its men’s pants, I rarely take something in just from the center back, especially if it’s a wad-full of fabric. One reason is that I like to avoid having to reset the zipper if possible and secondly, it probably needs to come in from the side seams and the side back seams anyway. Or, if it’s four to six inches, it might make sense to purchase the garment in a smaller size. If I were building the garment from scratch, I’d want to recut it if possible.

Stress fractures & signs you are doing it wrong

I don’t know if other people notice this but when I see a dress with side seams that swing backward instead of hanging straight, I think that someone who didn’t really know what they were doing did that alteration. Costume Designers don’t necessarily need to know all the nuances of fit and balance but they should know enough to trust a good tailor when they have one.

Sadly, it normally doesn’t do any good to try and explain yourself to a designer who tends toward over fitting. They’ll just assume you don’t know what you’re talking about.

When I find myself in a situation with a center-back-wad-pulling designer, I just nod and pin it, then alter it in the way I think is best.

Because, as any tailor who’s been in the television and film business for awhile knows, “alter as pinned” is simply a suggestion (and a way to appease an over zealous fitting designer).

Funky Design Details in Men's Shirts

Funky Design Details in Men’s Shirts

I alter a lot of men’s long sleeve button front shirts at work. We use a variety of brands, each of which usually has its own little signature detail or cut. I can often tell what designer brand a shirt is without having to look at the tag.

I suppose, though, that as a designer at Rag & Bone or Varvatos, or Paul Smith, or the like, you can find yourself hard pressed to come up with some new, unique detail that makes your shirt special. Contrasting fabric on collars and cuffs has been done, funky buttons have been done.

Sleeve and center front plackets in a different fabric: done. Welt breast pockets. Done. Stand collars, unfinished seams, all of it, has been done. At times, I think there isn’t anything new left to do. I was pretty sure I’d seen it all when it came to cool, weird, and even sometimes bizarre design details on mens shirts.

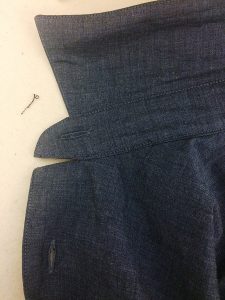
Varvatos shirt showing collar stand unattached from shirt body.

Varvatos shirt showing collar stand unattached from shirt body.

But, John Varvatos proved me wrong. The newest feature on their long sleeve button front shirts is to leave the part of the collar stand that contains the button – you know, the portion that extends past the collar and is, essentially the center front overlap – unattached from the shirt body. Odd, because, if the shirt is buttoned, it really doesn’t look any different. And if the shirt isn’t buttoned, it kind of looks like a rip or tear.

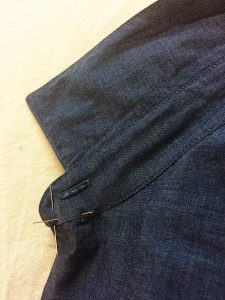
Varvatos shirt with collar stand pinned and ready to sew.

Varvatos shirt with collar stand pinned and ready to sew.

I spent some time last week sewing collar stands to shirt fronts. I do, though, have to give the designers at Varvatos kudos for coming up with something I hadn’t seen before. It also ensures that, in the future when I see that particular detail, I will automatically know it’s a Varvatos shirt. So, good job on the branding. 🙂

To do list

While I’m on the subject, here’s a short list of design (or construction) element quirks that tend to be slightly annoying to film and television customers.

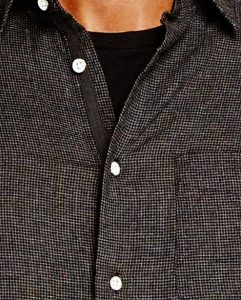
Rag & Bone with their painted white buttons.

Rag & Bone with their painted white buttons.

Rag & Bone and their painted white buttons.

They put the same painted white buttons on most every shirt. The buttons are kind of cool in a shabby chic-look-at-me kind of way but, the last thing you want when filming are shirt buttons that upstage the person wearing the shirt.

I’ve wasted many an afternoon, replacing those buttons with normal, non-descript ones.

Brooks Brothers and the glue they insist on using in their seams.

Taking apart a Brooks Brothers shirt is no quick and easy task – the stitches are miniscule and, as if that’s no enough, they use some sort of glue in their flat felled seams.

Ralph Lauren Polo.

Ralph Lauren Polo.

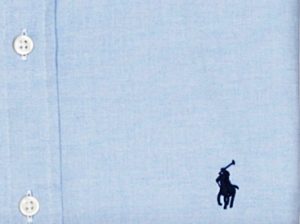
Ralph Lauren and the polo horse logo.

We’re rarely able to use any piece of clothing on a film or television show with an obvious logo for legal reasons. Most shows need clearance to use anything that clearly advertises a particular brand.

I can tell you that removing those cute little polo horses takes a really long time.

Any shirt that says it’s a ‘slim fit’ yet still has a back pleat.

I think I’ve written before about removing the back pleat (or pleats) in button front shirts. These are the pleats in the shirt body where it joins the yoke. They exist to add a good amount of ease to the shirt through the body. The only thing is, in the world of film and television they just end up looking bulky, a bit messy, and definitely not slimming. So I take them out. If I have the time, I usually take the entire back off and recut it, moving the armseye and side seams in the appropriate amount. If it’s a quick and dirty thing, I just throw some side back darts in and hope there isn’t a close up of the actor’s back.

That’s all I’ve got today though I’m sure there are more. I’ve got to get some sewing done now.

There’s a pile of Varvatos shirts on my table that need the collar stand stitched to the shirt body.

The Safety Pin

The Safety Pin

I try to collect them all in one drawer, but they escaping & disburse themselves all about the apartment.

I try to collect them all in one drawer, but they escaping & disburse themselves all about the apartment.

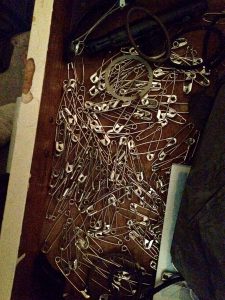
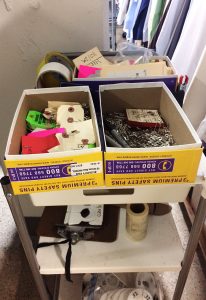
Almost every pocket in every article of clothing I own, there are a couple of safety pins. I can also usually find at least three of four of the little buggers on the bedroom floor. Sometimes they end up outside my apartment door because I reached for my keys and pulled out a fistful of safety pins instead. I try to collect them all together in one drawer but seem intent on escaping and disbursing themselves all about the apartment.

I use safety pins for fitting clothing, for hanging patterns, to attaching notes to things. Of course, there are different sizes and flavors of safety pins.

Size matters

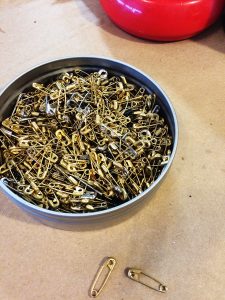
I use the tiny gold ones when I’m fitting something very delicate like silk or gauze so that they don’t make an unsightly pin hole.

I use the tiny gold ones when I’m fitting something very delicate like silk or gauze so that they don’t make an unsightly pin hole.

I use the tiny gold ones when I’m fitting something very delicate like silk or gauze so that they don’t make an unsightly pin hole. For some reason, someone thought that gold pins without the end spiral were good idea. I suspect because sometimes things snag on the little coil but, without that coil, the pin is free to slide about so it’s hard to know exactly where/what the mark is.

I use the big number 3s for the majority of my fitting needs. And the number 2s if I need a thinner pin.

History Hunt

Walter Hunt invented the safety pin in 1849. He was the first one to create a pin with the coiled spring on one end and the clasp or catch on the other end to keep the pointy bit safe from tender fingers. Hunt sold his idea outright for $400.00 so never collected any royalties or anything from it. Legend has it that he needed to pay off a debt and thus invented the safety pin and sold the rights within a few hours.

I use safety pins for fitting clothing, for hanging patterns, to attaching notes to things.

I use safety pins for fitting clothing, for hanging patterns, to attaching notes to things.

Selling his safety pin idea wasn’t Hunt’s only unfortunate business decision though. He was also the first one to invent many of the significant parts of the sewing machine, including a curved needle and a shuttle. Hunt created the first sewing machine prototype in wood, which didn’t work all that well so he ended up selling his idea to Elias Howe and Isaac Singer.

Hunt invented a plethora of other things including a streetcar bell, a knife sharpener, paper collars, and an antipodean walking device – or suction cup shoes!

Alas, Hunt didn’t seem to have much business savvy or any true idea of what his inventions could be worth, and just how wide spread and common place they would become.

A modern twist

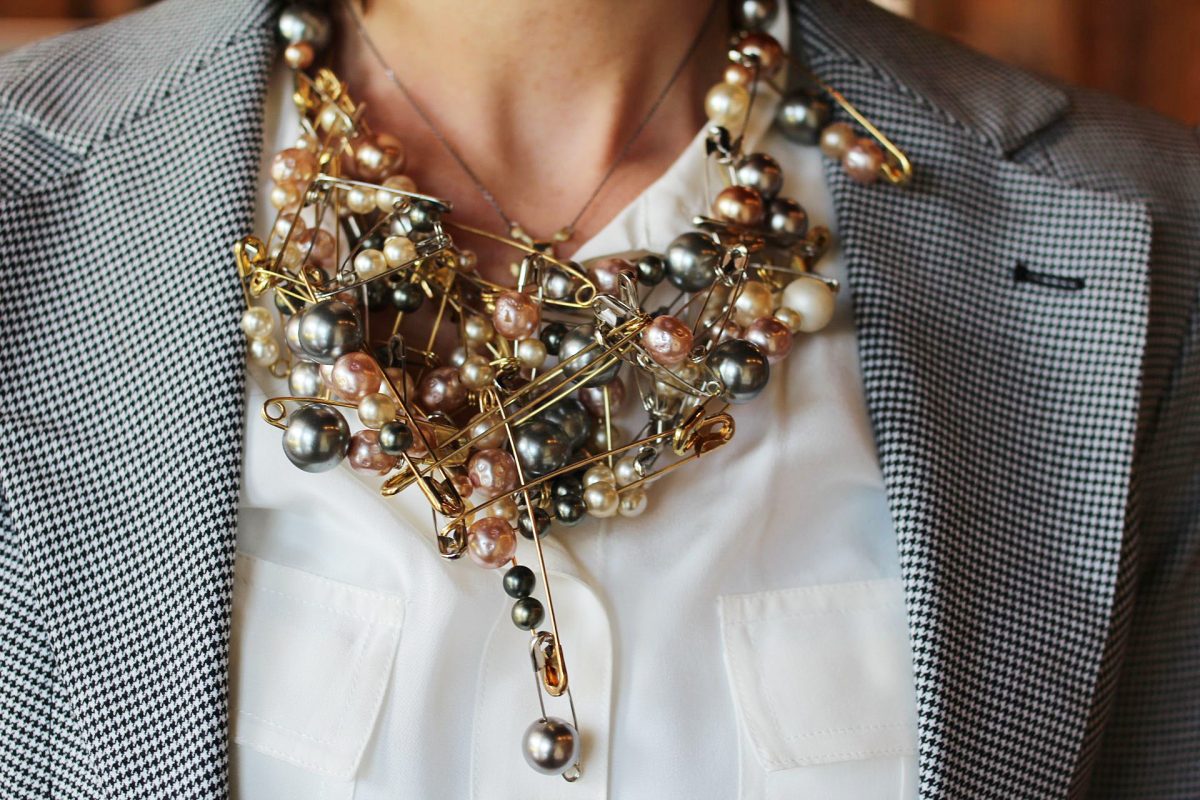
The safety pin has found its way onto the catwalk and into high fashion with decorated, embellished safety pin broaches and large dangling safety pin earrings.

The safety pin returns as punk becomes more relevant than ever – via Independent.

The humble safety pin also has a rich symbolic history and significance. Punk culture has long used the safety pin as an expression of individual freedom and DIY culture. In the wake of the UK’s Brexit and the US presidential election it has come to symbolize tolerance and unity with all people.

Wonder what Walter Hunt would have sold his idea for back in 1849 if he had been able to foresee even a small fraction of what his pin would become.

Boost Your Sewing Skills To Professional Quality In One Quick Step

How To Boost Your Sewing Skills To Professional Quality In One Quick Step

After learning to use a sewing machine, the best thing you can do to produce more perfect and professional projects is to use a serger. The serger is the sewing machine’s best friend and it will be yours too.

Sergers are fast! Save time in production & cut down your fitting time. Not only that! A serger will create professional finishes & immaculate seams.

Sergers are fast! Save time in production & cut down your fitting time. Not only that! A serger will create professional finishes & immaculate seams.

What is a Serger?

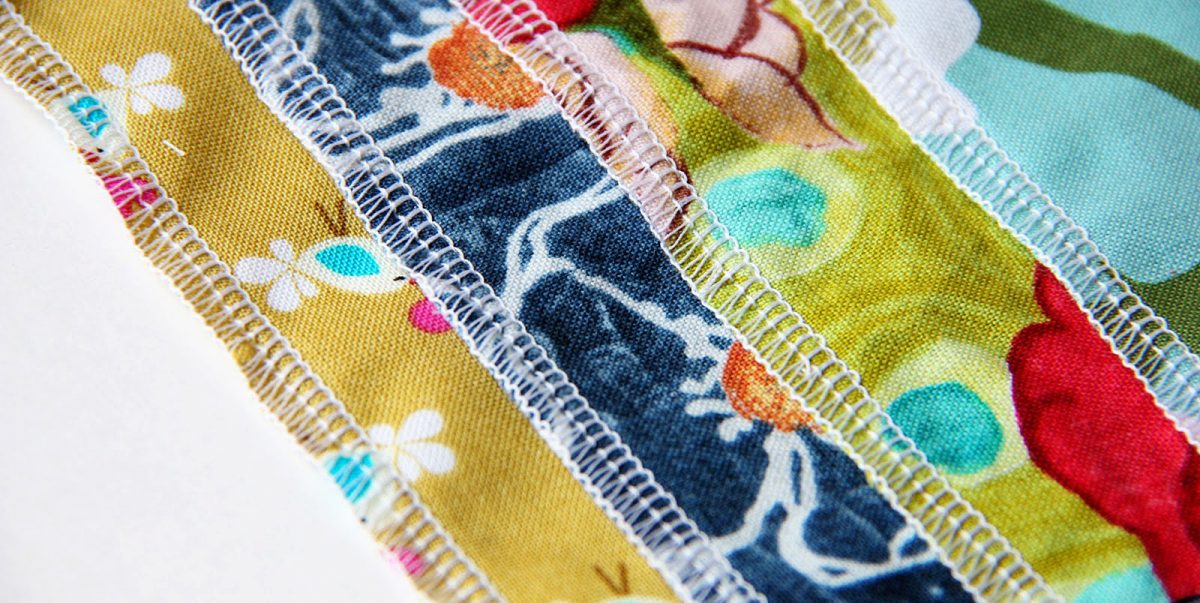
A serger, which is also known as an overlock machine, produces professional finishes on garments and other projects. It does this by a process of knitting, rather than sewing.

A Serger is Fast!

The serger accomplishes all its tasks quickly and easily. It is the real workhorse of the sewing room and will speed a great many tasks immensely.

While most regular sewing machines can stitch between 700-1100 stitches per minute, a serger beats this by a lot, and can make up to 1700 stitches per minute.

What Can a Serger Do?

Serge your way to becoming a sewing pro with a serger in your sewing room.

Serge your way to becoming a sewing pro with a serger in your sewing room.

In a nutshell, a serger can:

  • Neatly bind and finish seams, and cut excess fabric from seams at the same time
  • Professionally finish unlined garments
  • Perform rolled edge finished hems
  • Make beautiful, delicate narrow, pucker-free seams
  • Make decorative edgings such as ruffled edges and scalloped trims
  • Flawlessly hem ruffles with rolled edging
  • Neatly and easily attach lace and other trims
  • Automatically gather
  • Sew stretchy knit fabrics with ease, including finishing sweater knits
  • Add strength with stretch seams
  • Decoratively and functionally seam fabrics by flatlocking
  • Create reversible items
  • Finish garments without facings
  • Feed 2 layers of fabric perfectly (the serger’s secret to handling knits)

The serger, with its rolled hem option, hems skirts beautifully in just a couple minutes!

With an overlock machine, you will have no more unraveling messy edges, either when you pre-wash your fabric or inside your finished garments or projects.

You can sew knits with ease with a serger.  If this were the only thing that a serger could do it would be well worth it to get one right now! But lucky for us the serger can do lots more!

Serging is Easy!

There is a myth that the serger is complicated or hard to learn to use. This may have been true long ago. But today many well-designed, user-friendly, high-quality sergers are available. There are features that make some sergers literally a breeze to use.

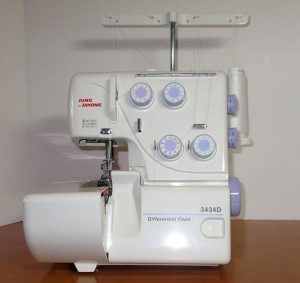
The Janome 634d, with its Jet Threading, is truly a breeze to use!

You Can Do It!

I was scared myself and hesitated to buy my first serger. I was reluctant to take on the task of learning something new which I feared as difficult.

As is often the case, all this procrastination and worry was silly; I was serging projects the very first day I got my serger! It was not complicated to learn: it was easy and straightforward. There was no learning curve to get started and I only regretted not buying one sooner.

I had never sewn on knit fabric successfully before– I tried but made a mess using my sewing machine! But I followed a pattern and made my first t-shirt pretty much immediately after I got my serger.

I learned more and more as I serged on, and I was continually amazed by how many new things my overlocker enabled me to do.

Having a Serger Offers and Opens Options Galore!

  • thick thread coverage for decorative edgings
  • sparsely covered seams for less bulk in seaming
  • narrow width and
  • wide width seam choices
  • flat or
  • rolled hems

Your skills and finished products will increase in quality and you will be able to make these nicer, better professional quality projects more quickly than you’ve made things before.

If you don’t have your serger yet there is no better or more important investment to make. No sewing room is complete without a serger, and having one more than doubles your production capability.

Janome’s 7034d Magnolia model is an easy-to-use entry level serger at a very affordable price!

Buy Yours Now!

If you want to create more professional quality projects in less time, you need a serger. And if you want to, you can do it, I promise!

Get your serger now and your skills will soar.

We have the best sergers on the market here at Sewing Machines Plus, from easy-to-use, quality entry level models to the jet threaded deluxe models that literally thread themselves.

Don’t put it off anymore, buy yours today. You’ll be so glad you did!