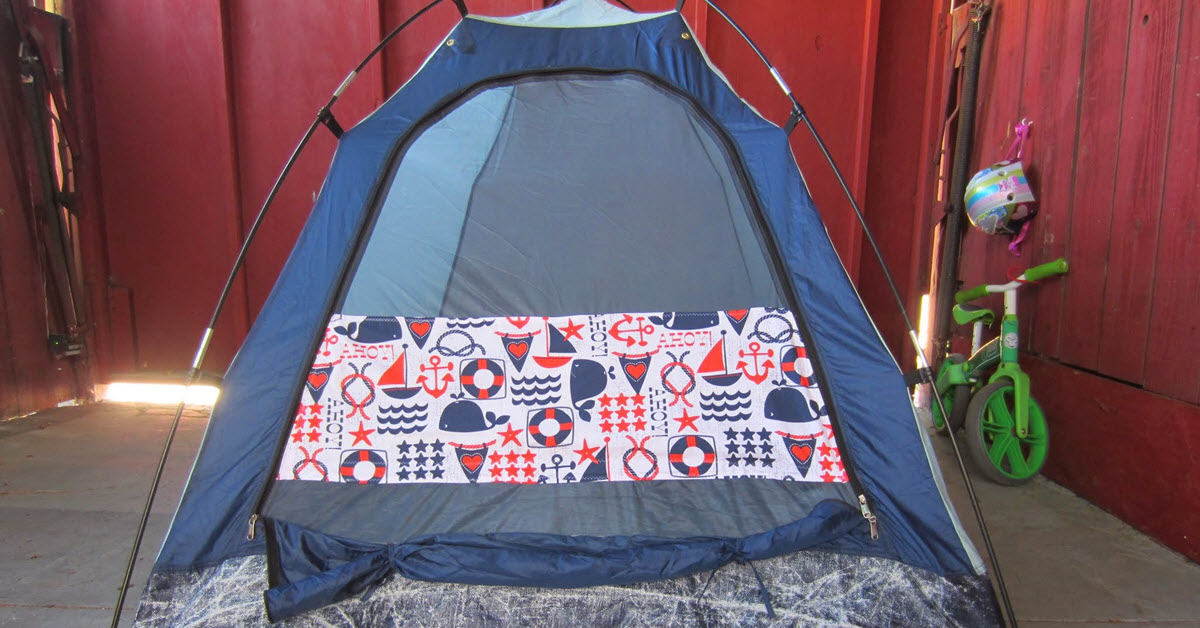
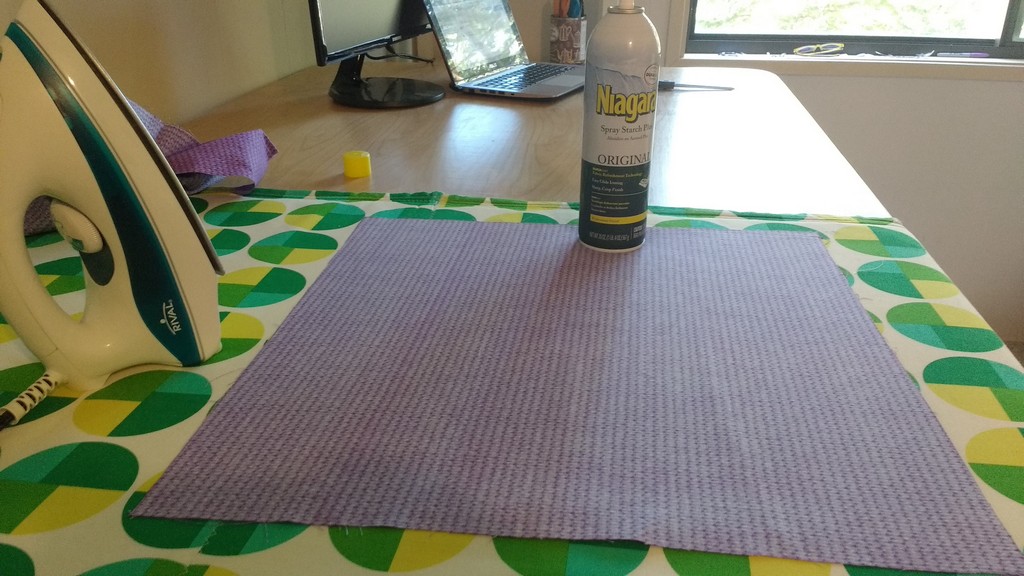
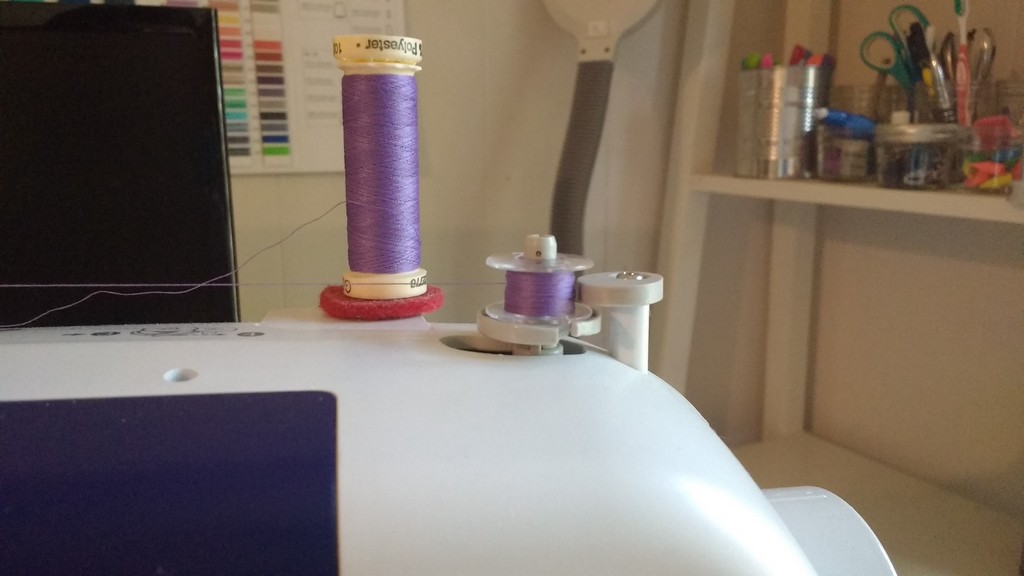
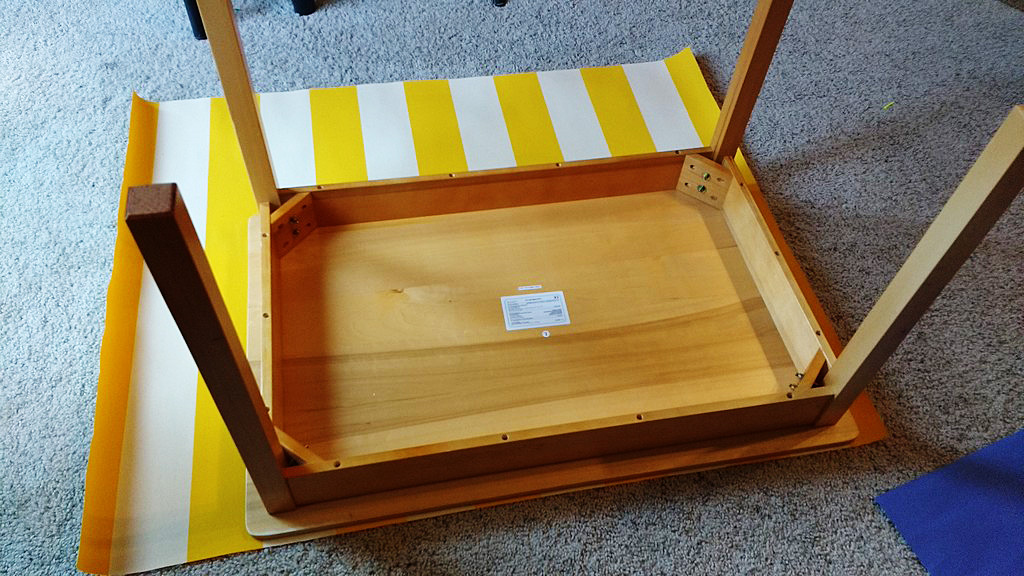
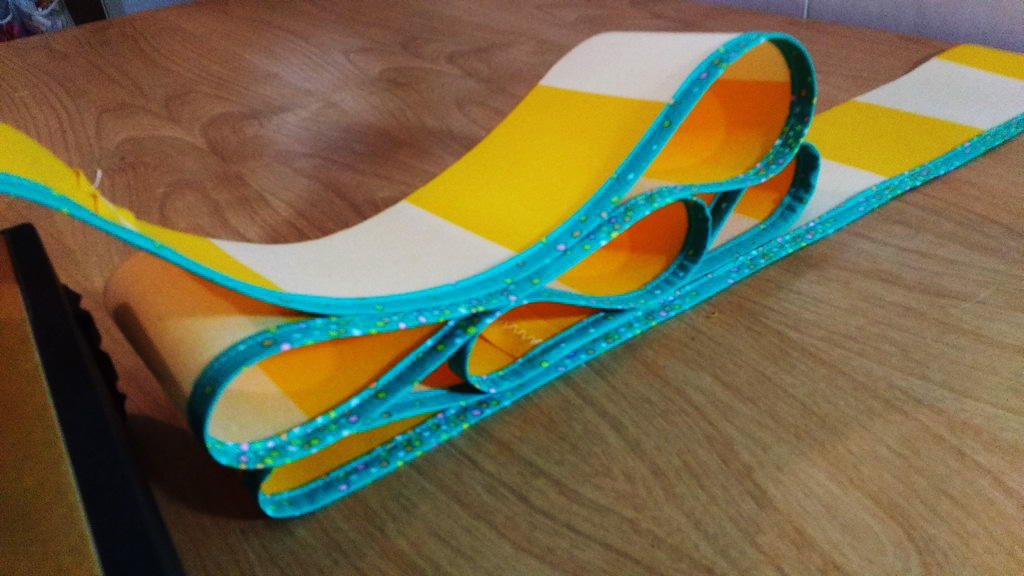
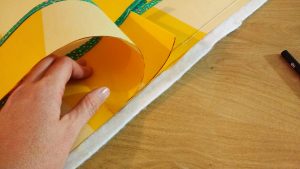
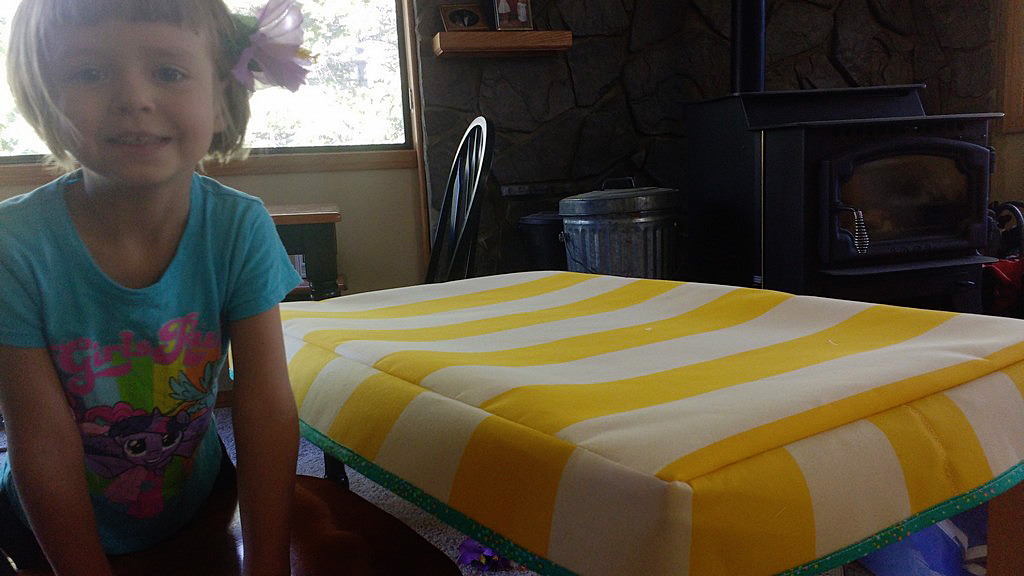
My brother recently picked up this tent at an estate sale and gave it to us for camping with kids. It could easily sleep our family of four but the front screen was ripped.
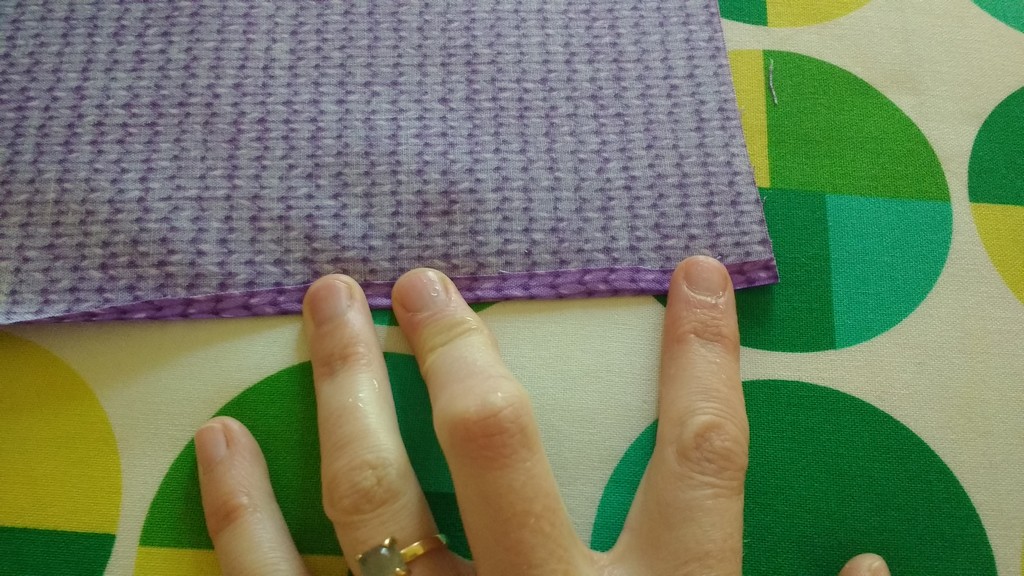
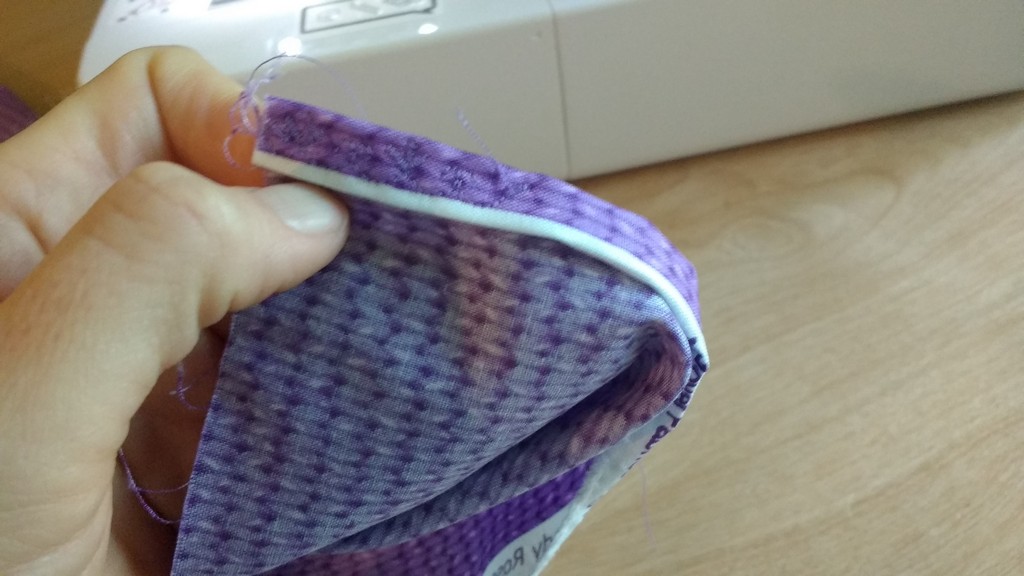
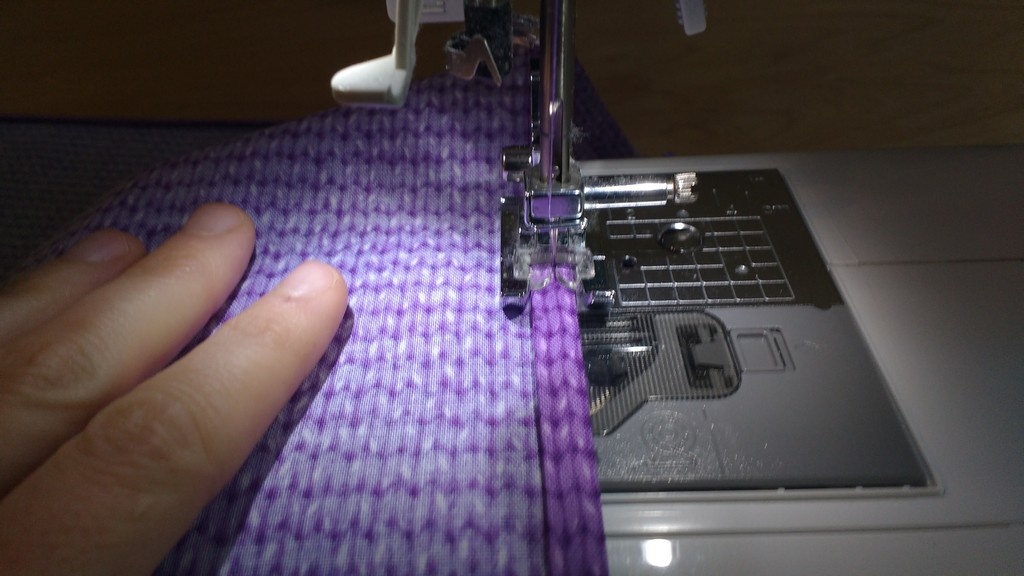
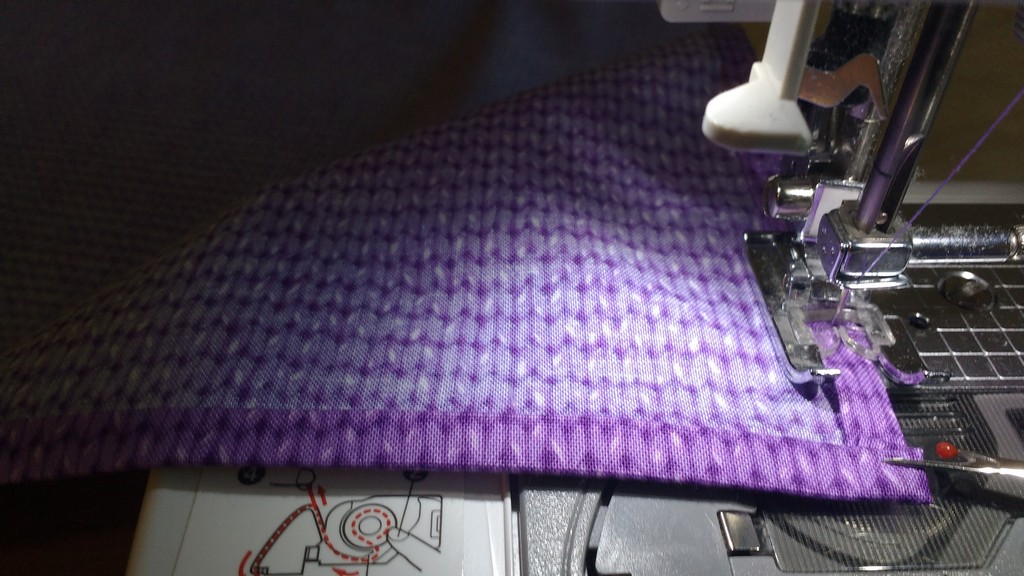
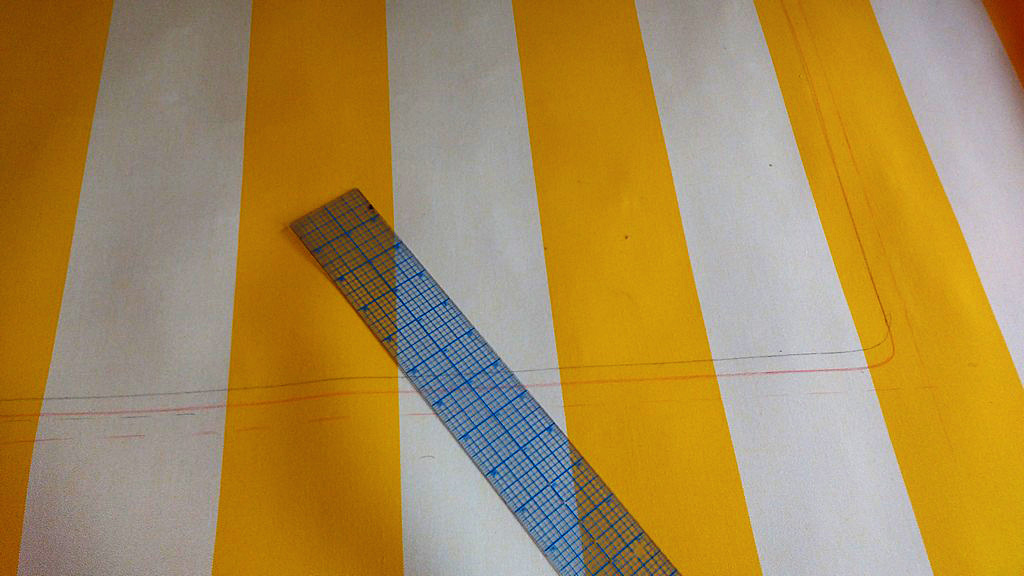
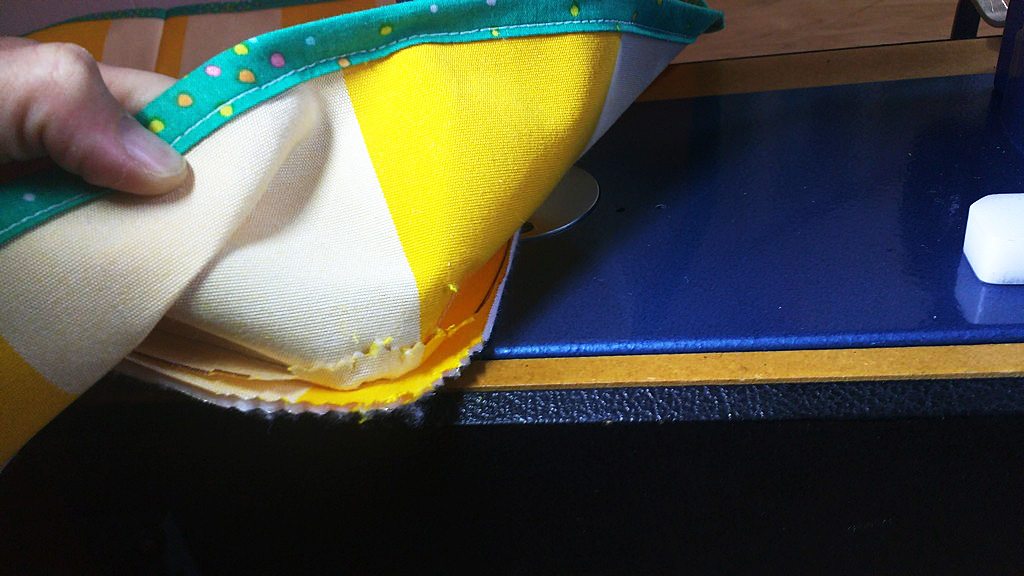
To fix this, I cut two matching fabric panels in the shape of a rectangle, and planned to fold under the edges and pinned them in place on the front of the tent and one on the inside. This would sandwich the rip in between the fabric.
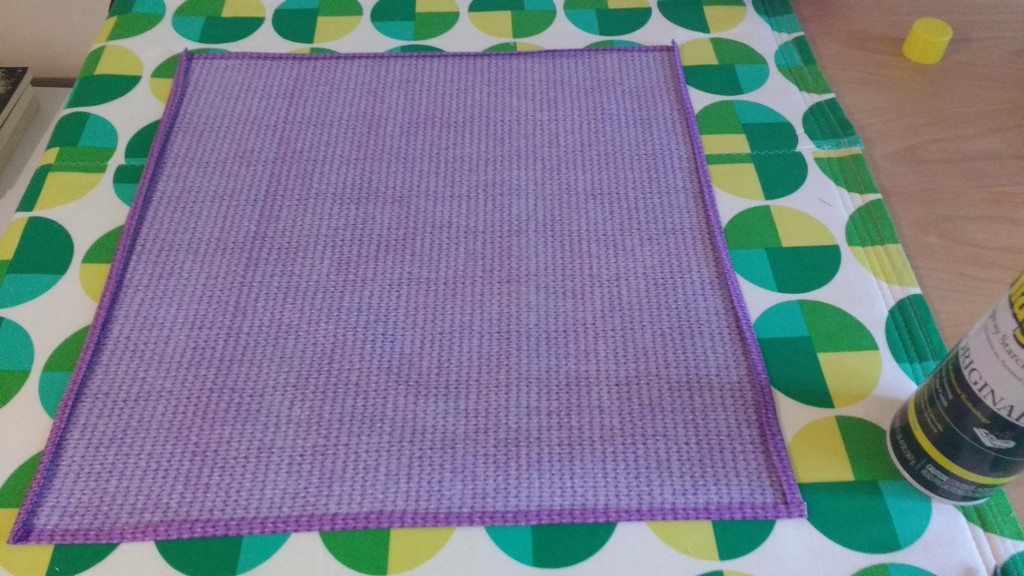
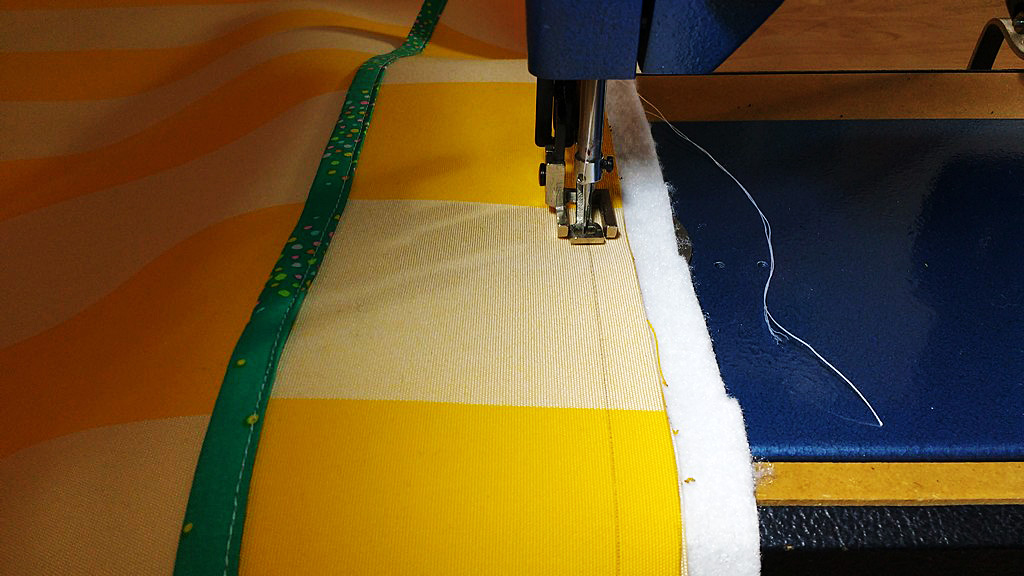
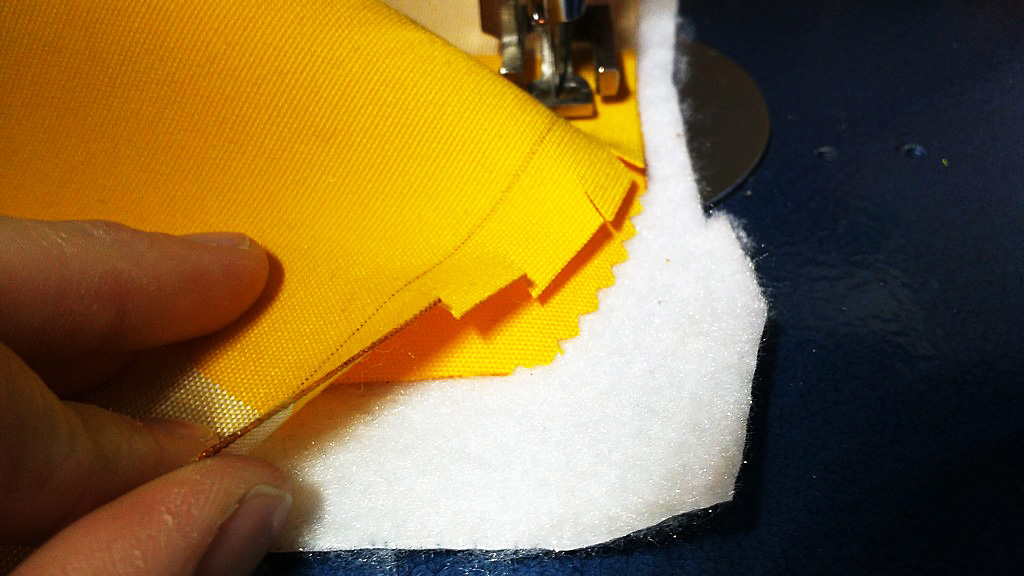
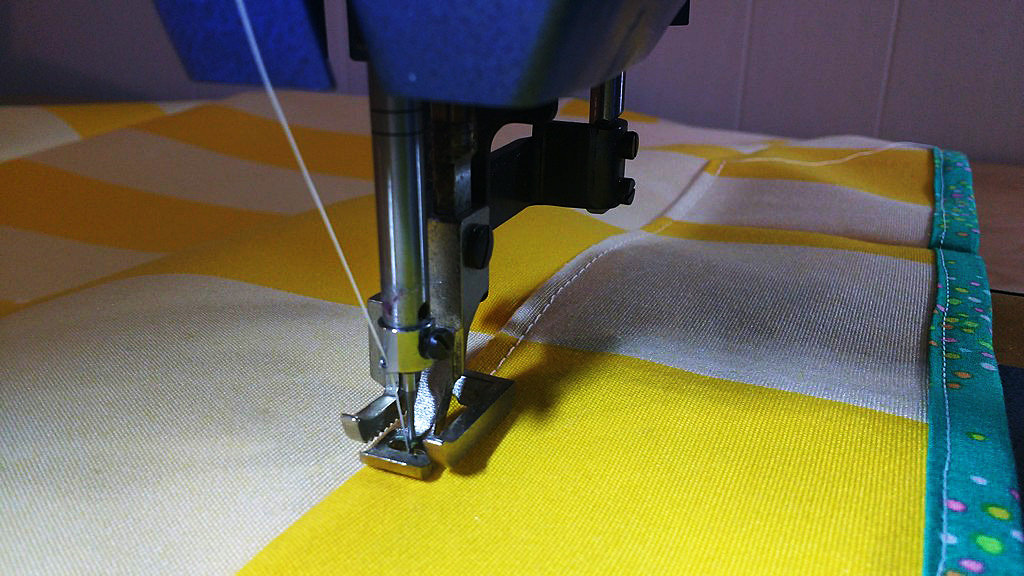
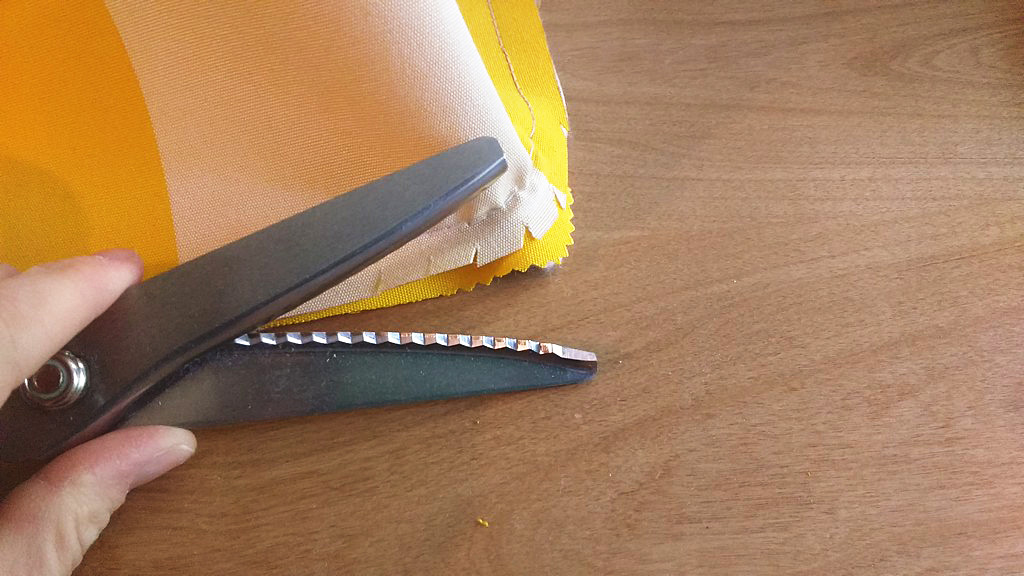
I sewed on the front fabric piece first, sewing right across the netting and then cut away the ripped netting up to the seams. Then I placed the back fabric panel to the front one, wrong sides together and followed the seams of the first piece.
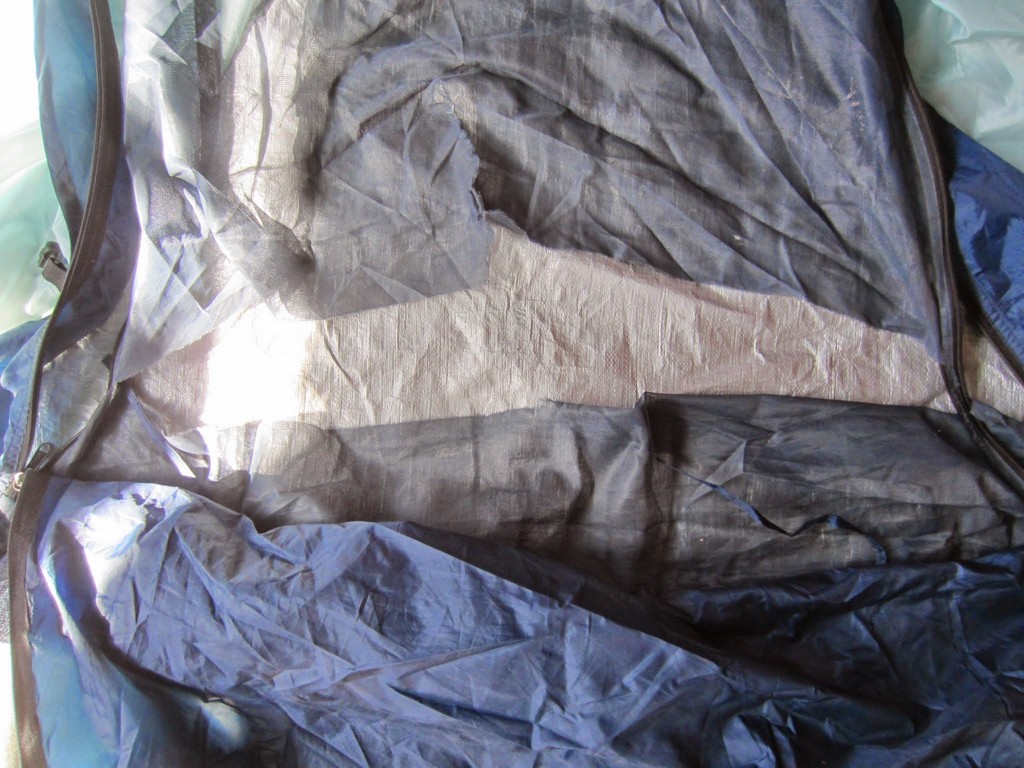
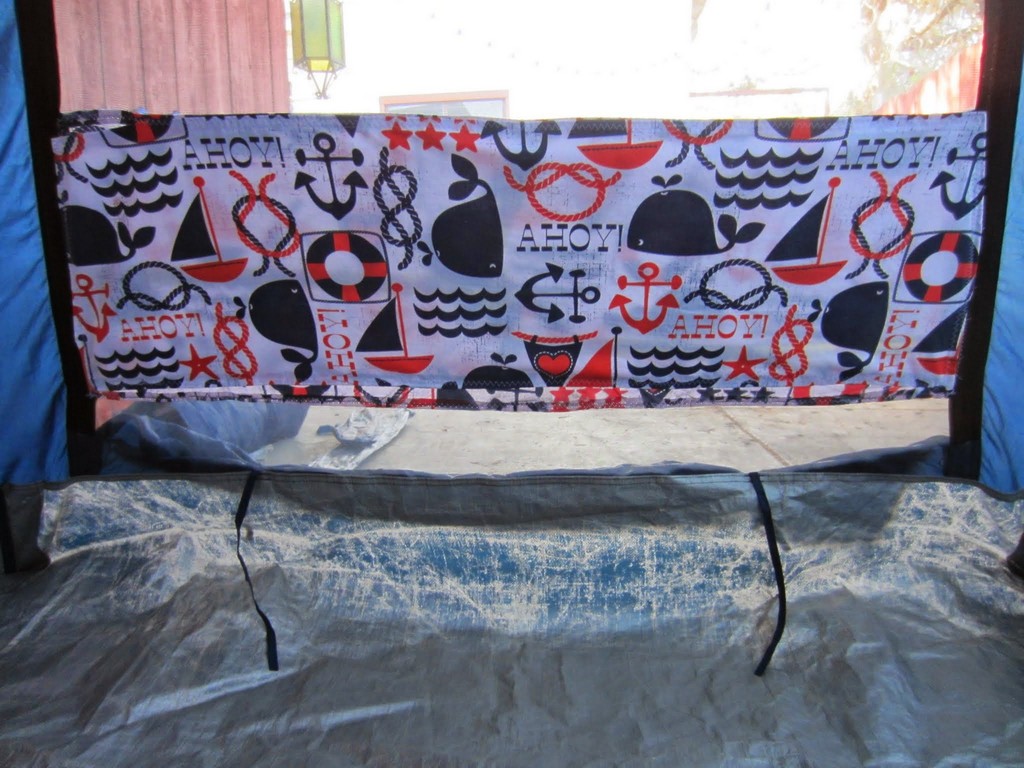
Here’s a view from the inside looking out.
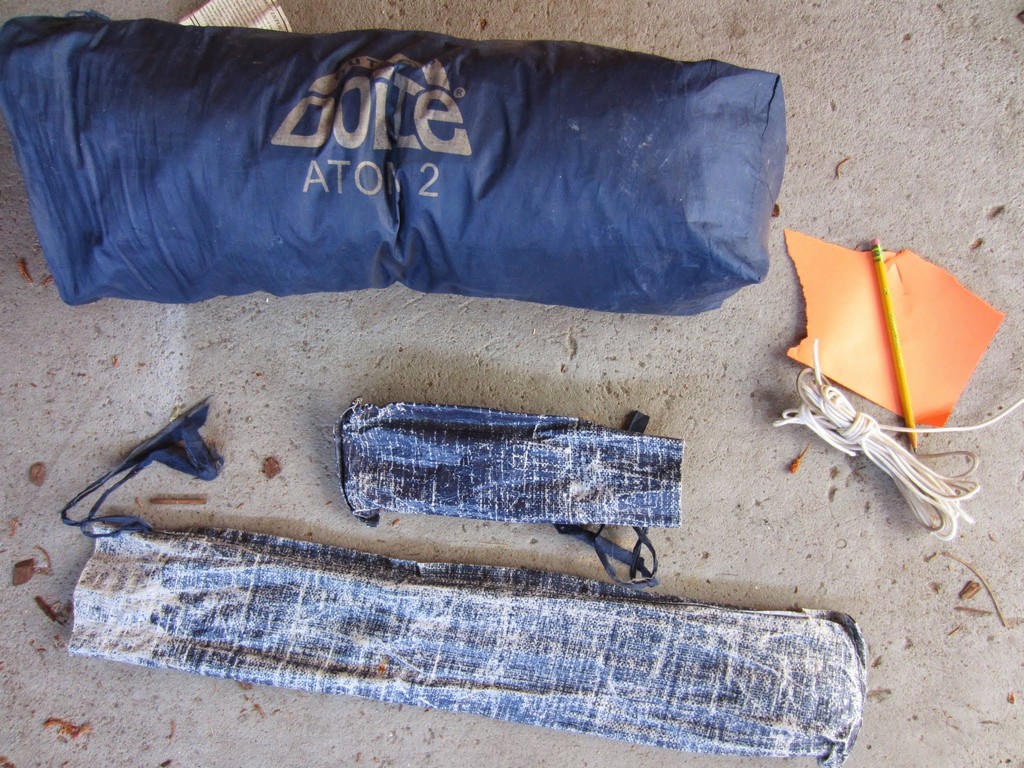
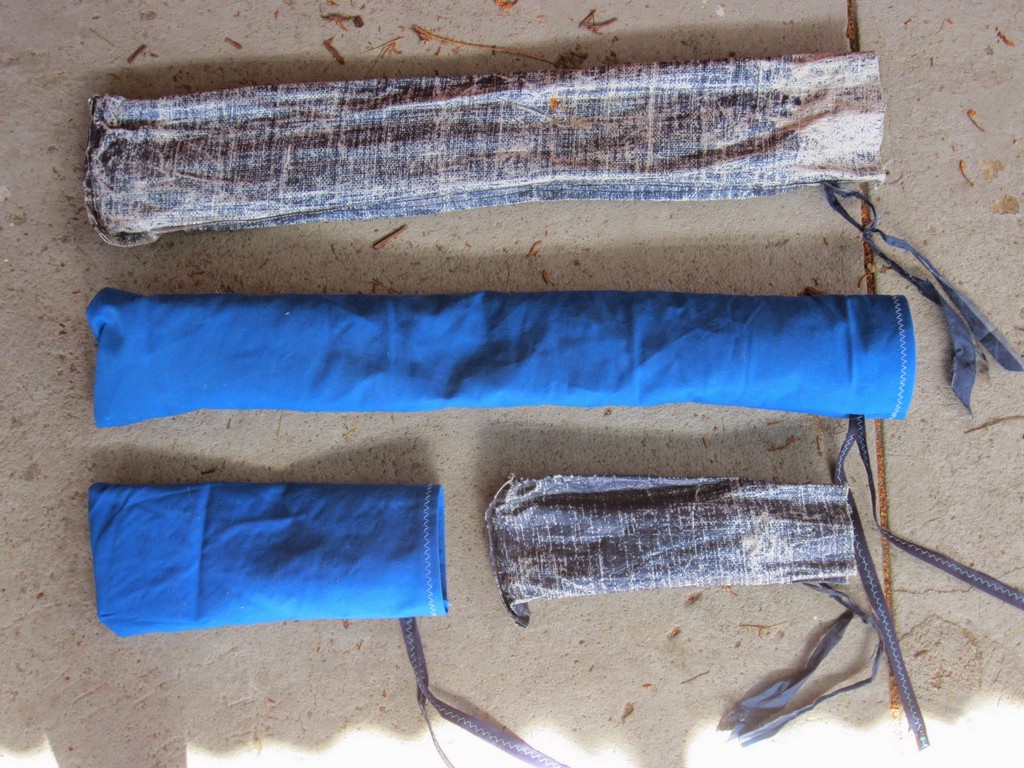
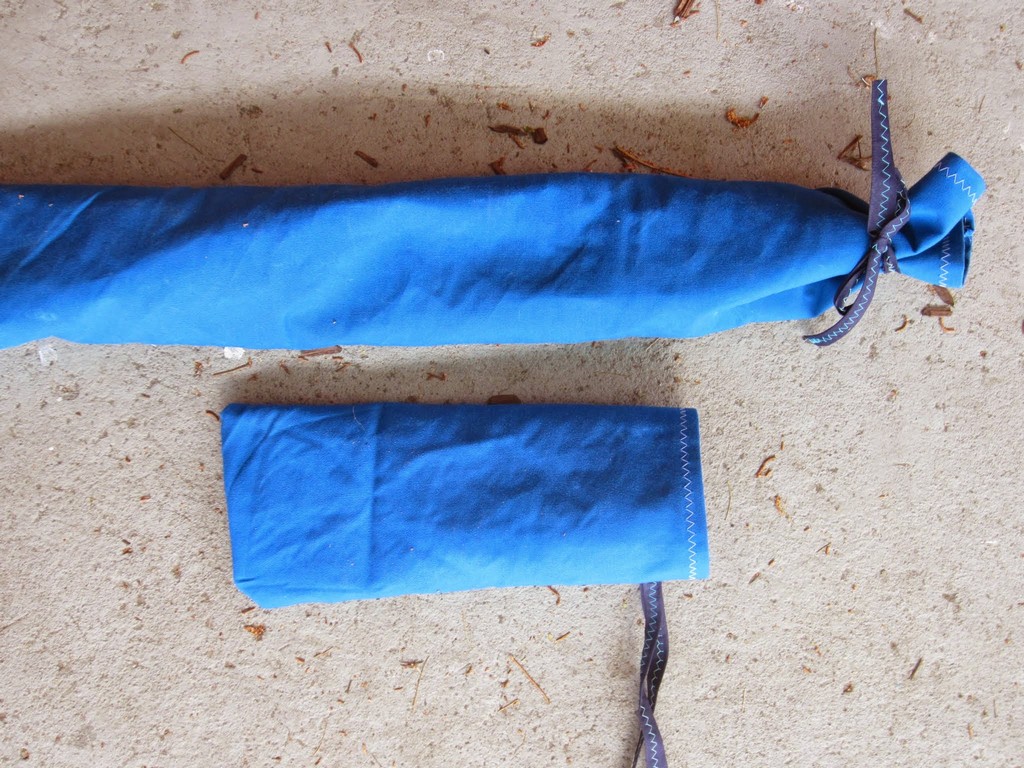
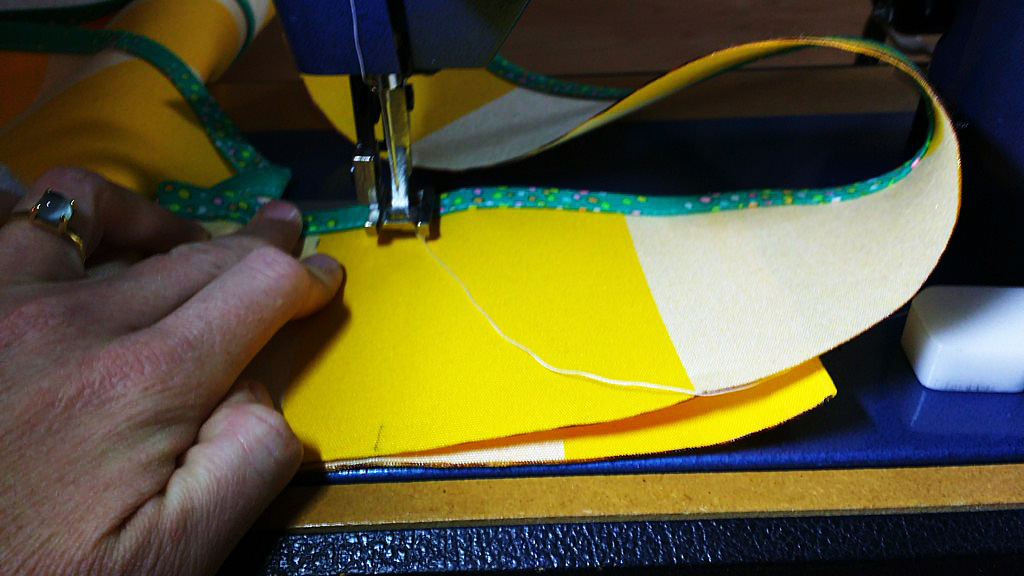
Next up was the bag to hold the rain fly and the smaller bags for the tent poles and stakes. They were falling apart.
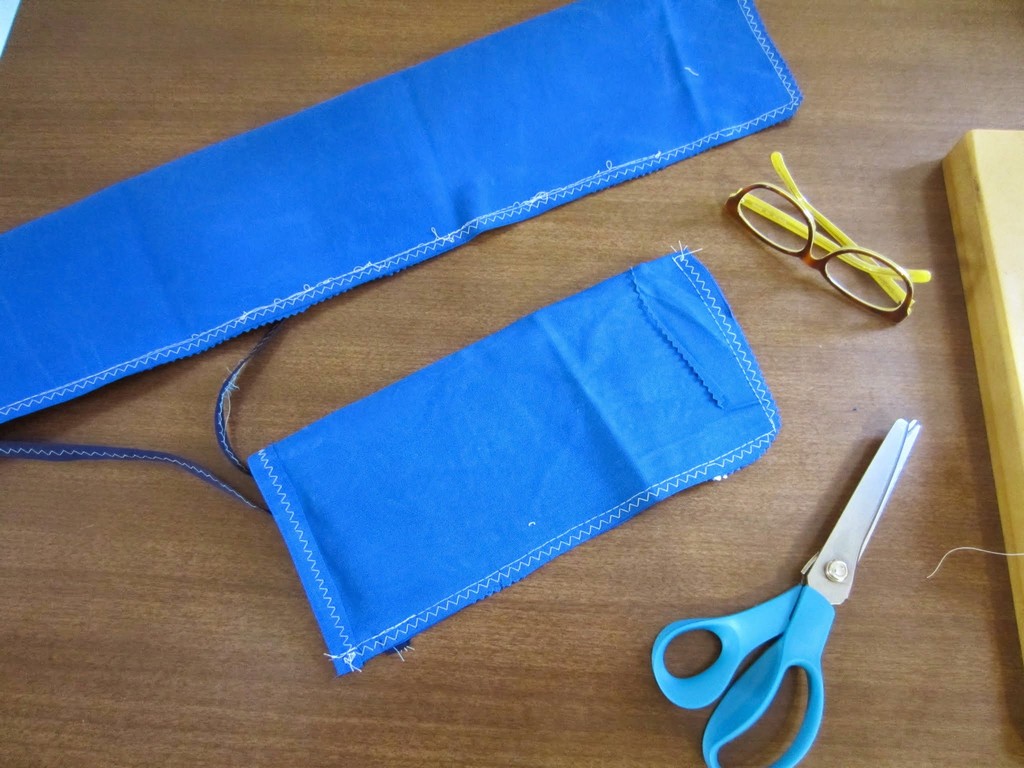
I used scraps of canvas to make new rectangular bags for both the tent poles and the stakes.
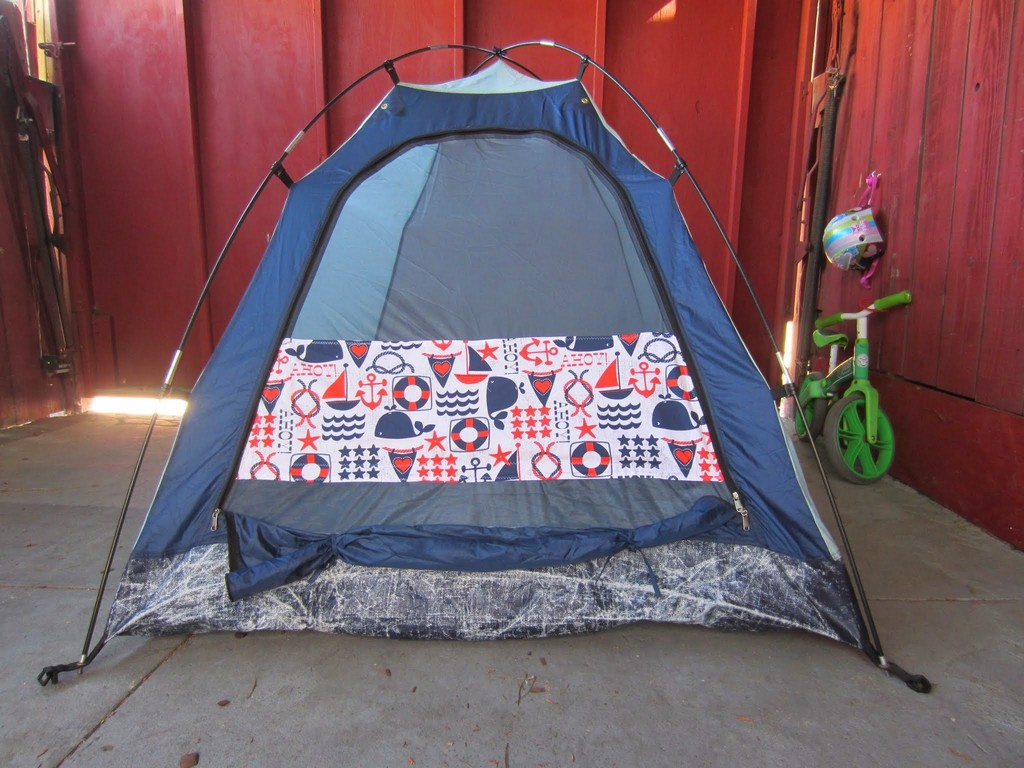
Huge improvement, no?
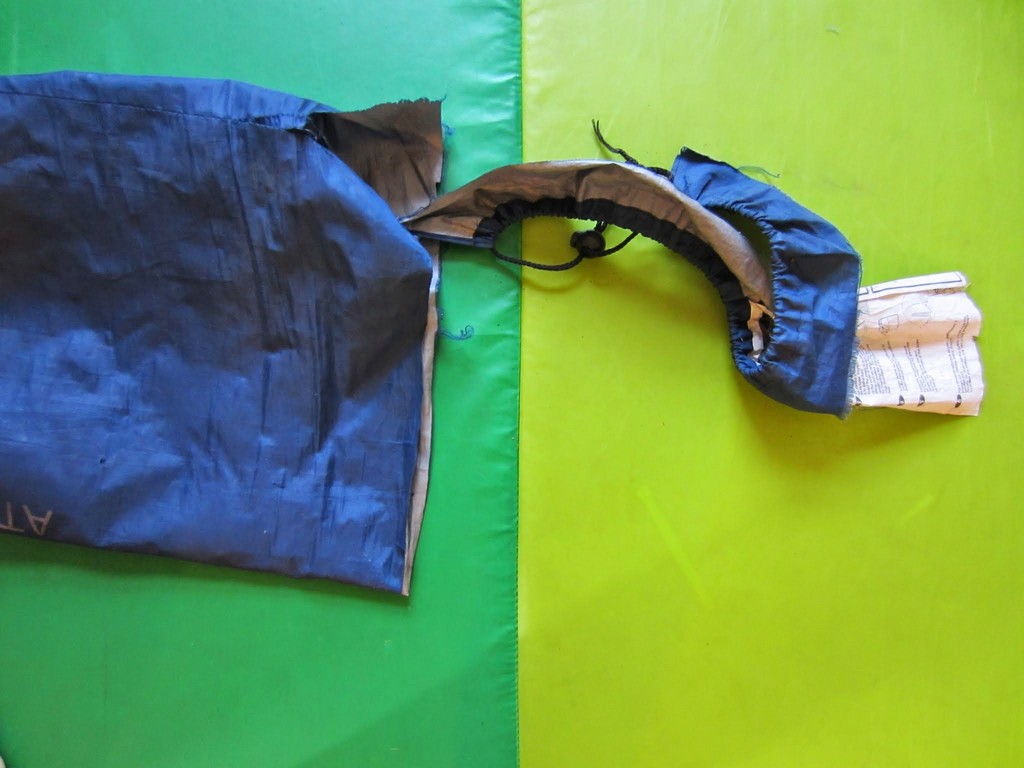
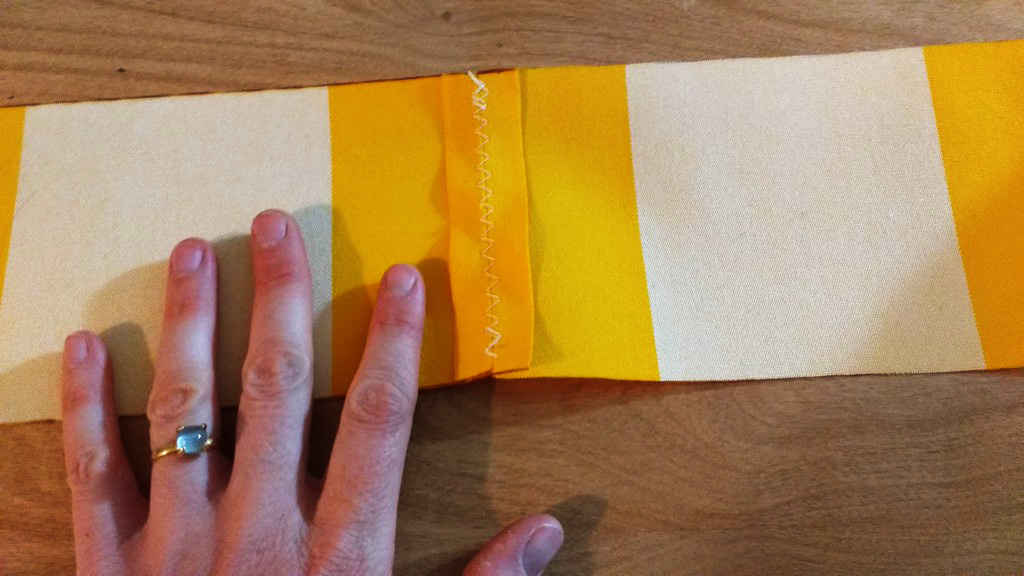
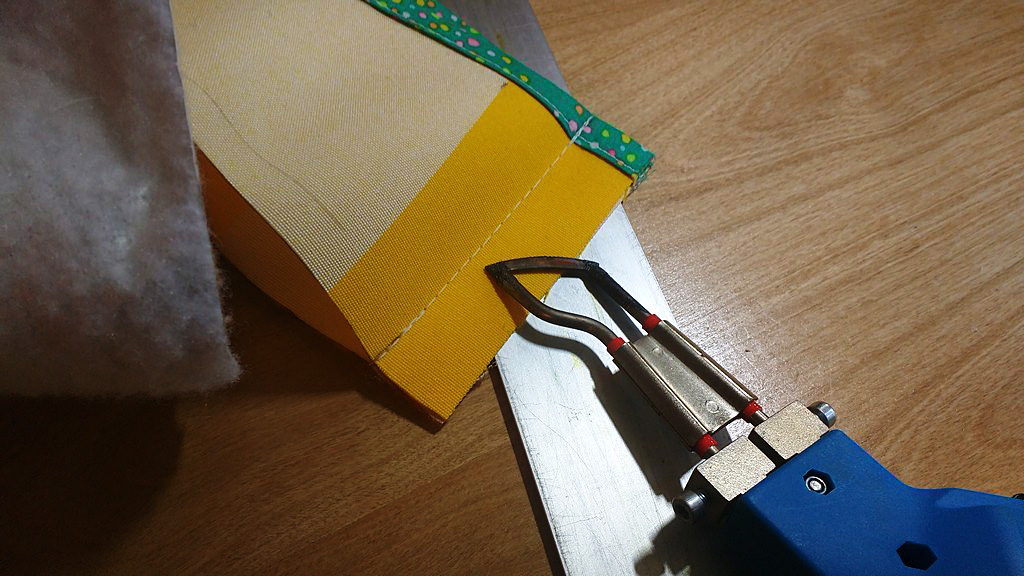
The bag for the rain fly was split almost perfectly around the top.
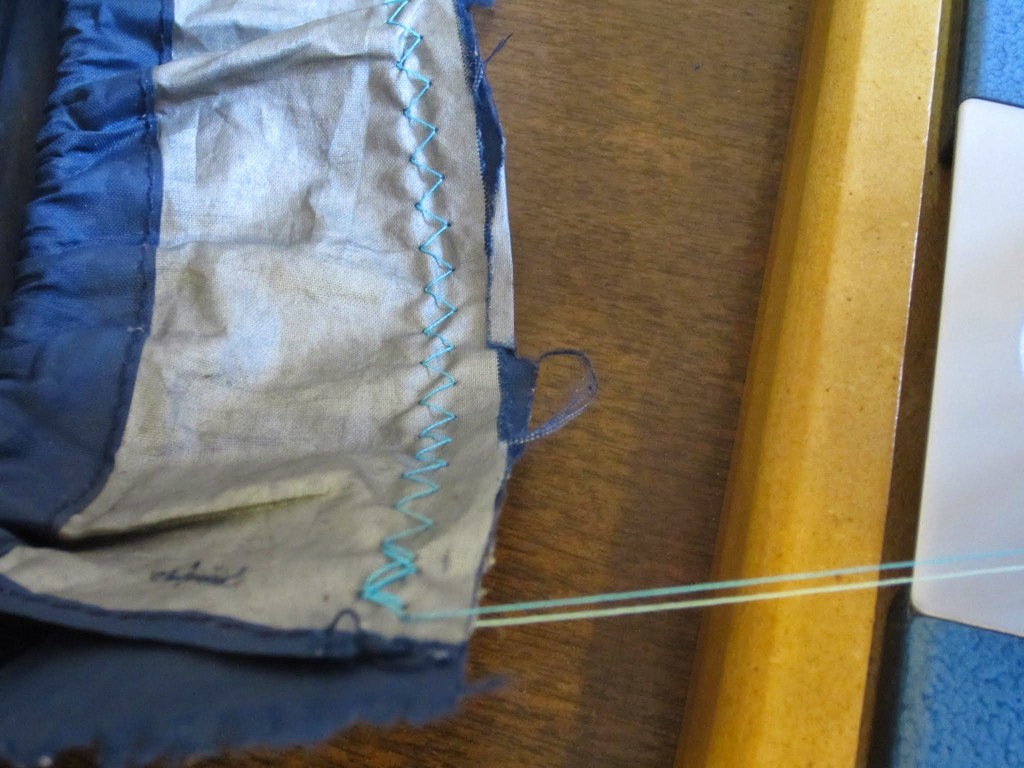
To fix this rip I used a zig zag stitch and followed it around the tear.
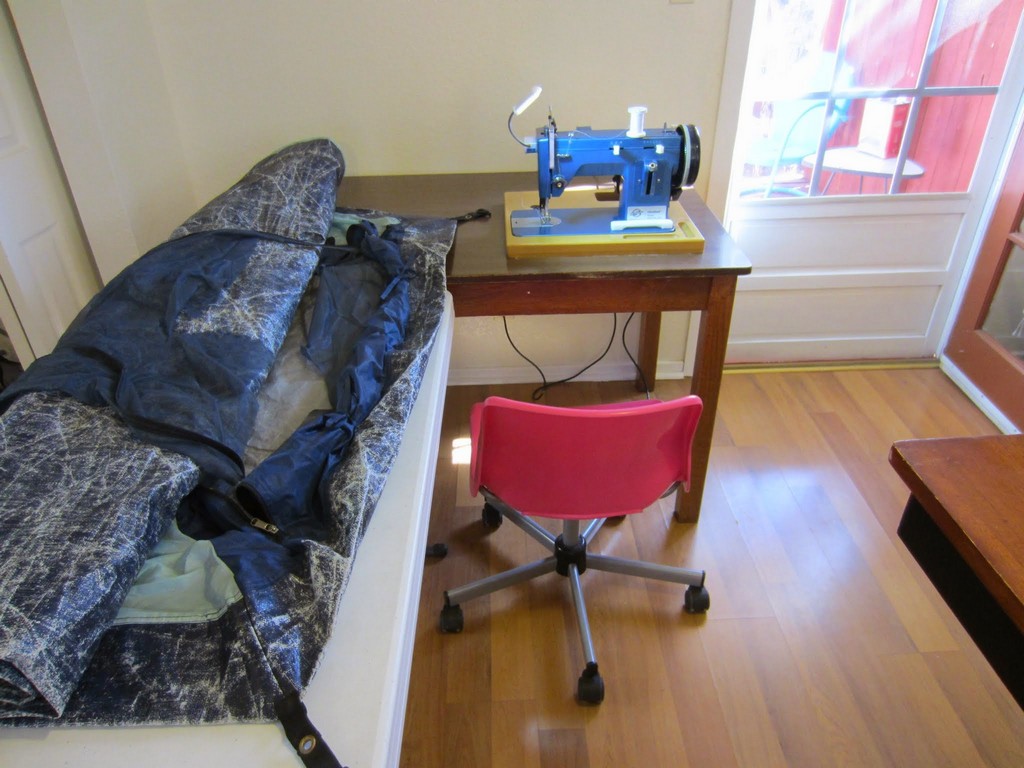
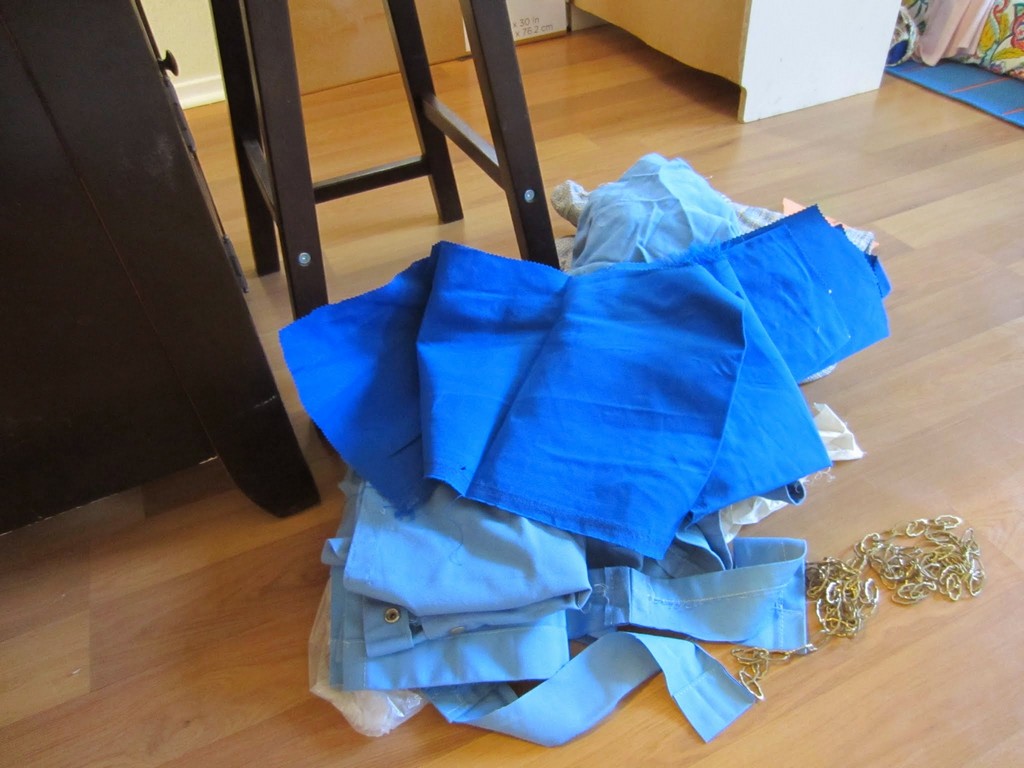
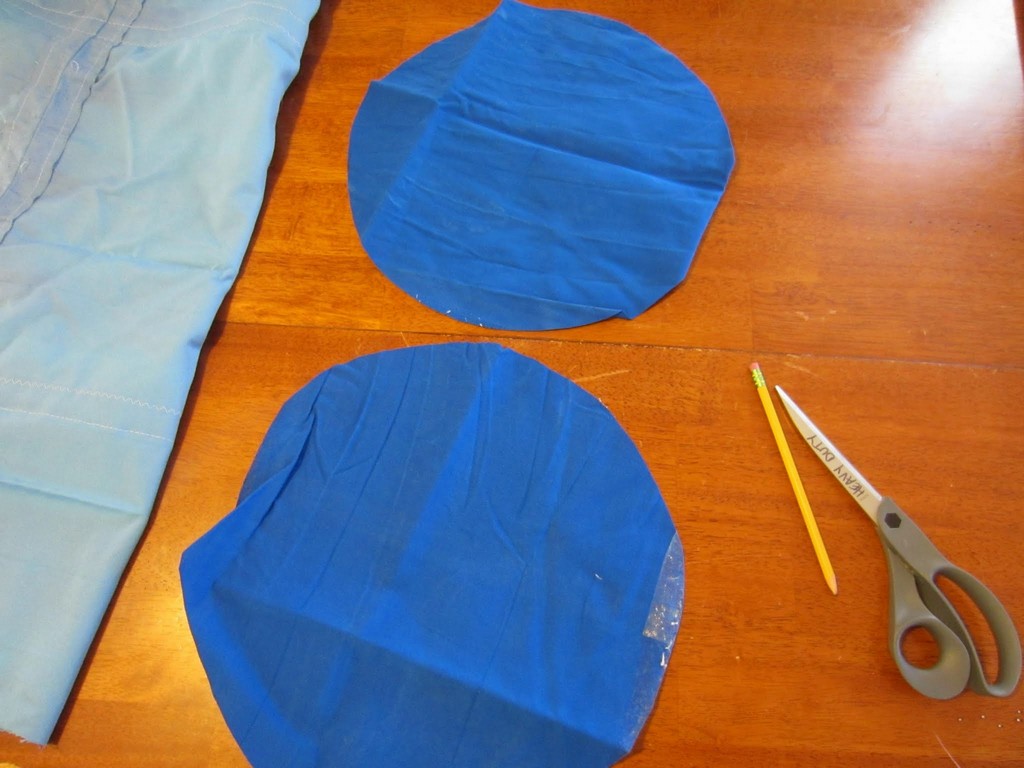
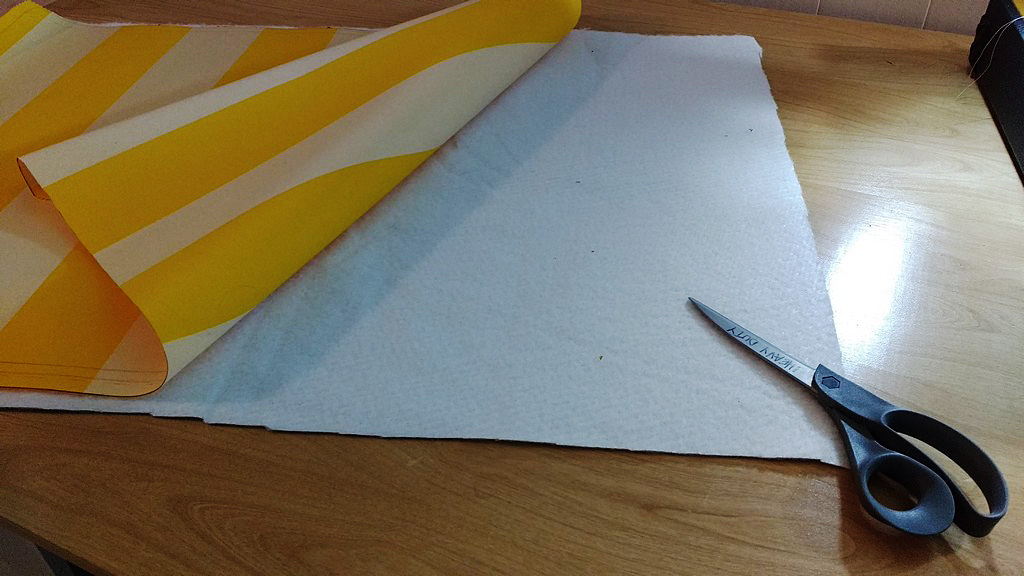
The last part of this DIY project was creating a duffel bag to hold the tent, the rain fly and the tent and stake poles. For this I dug into my pile of scrap canvas.
I drew two circles for the ends of the bag and then a large rectangle for the body piece.
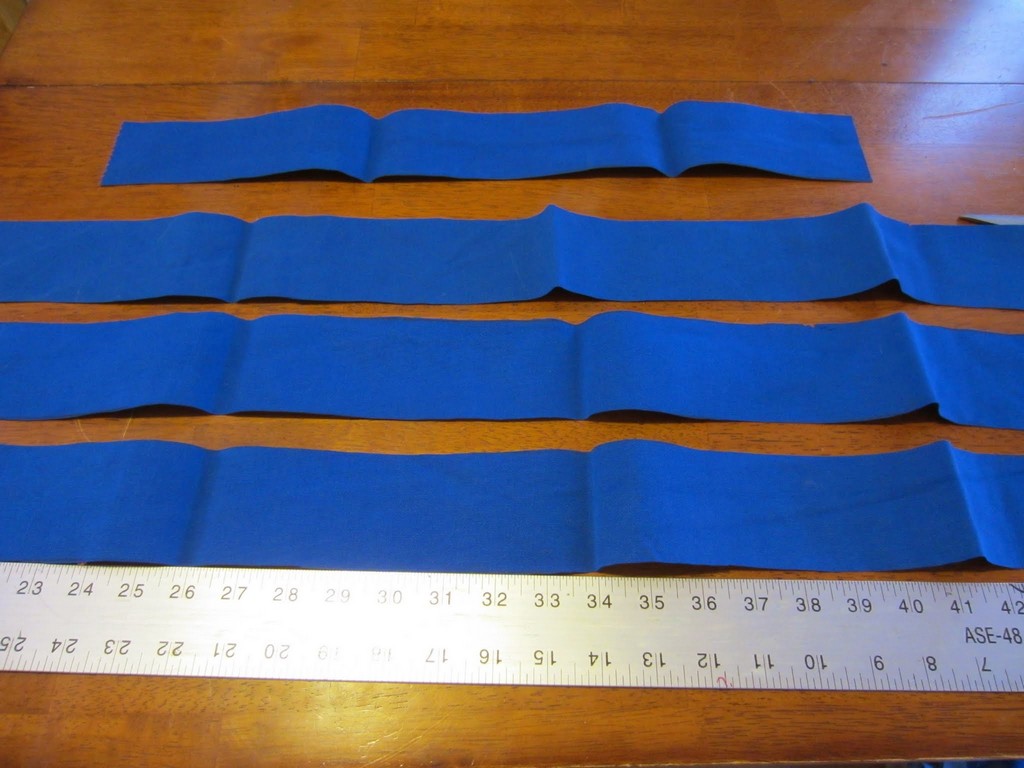
Before I sewed the circle pieces to the body I measured out straps for the handles and attached the handles from one side of the rectangle to the other.
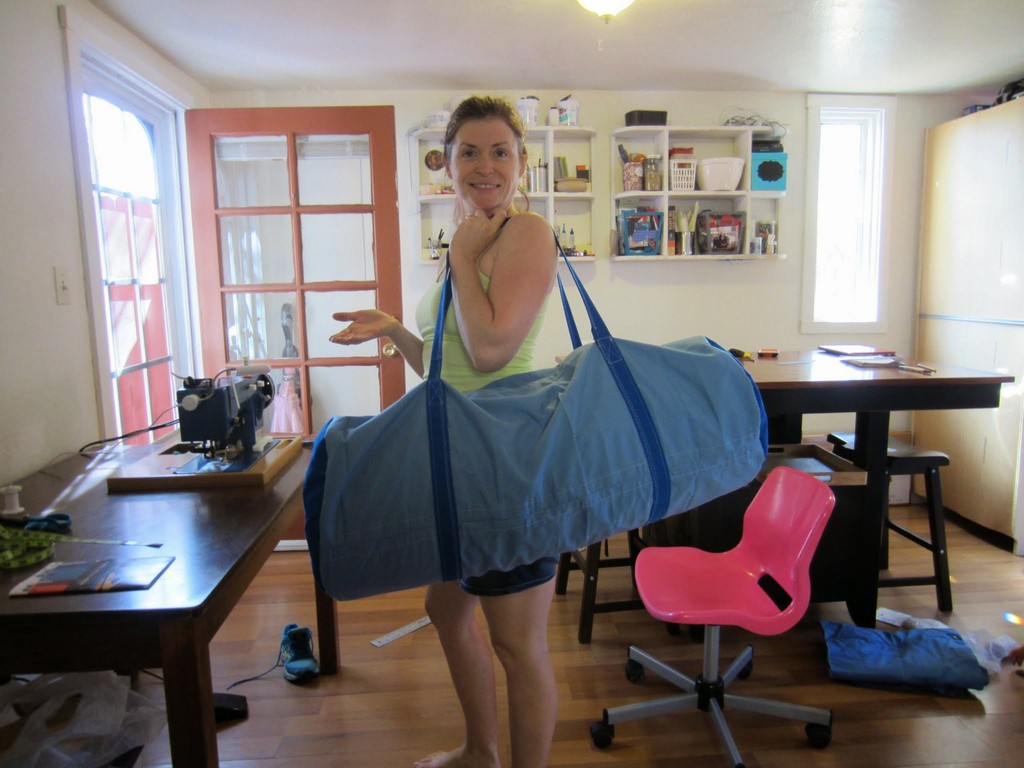
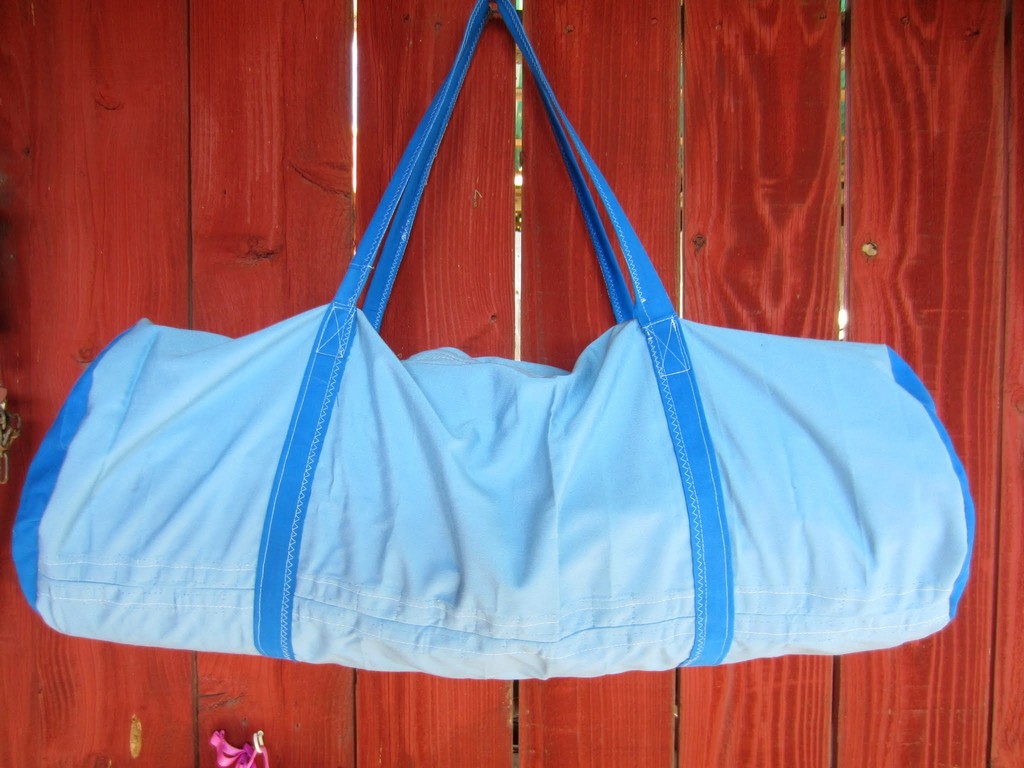
I used Velcro to close the seam and then I was ready to go.
A perfect storage solution and a quick way to grab a family-sized tent and head out camping.
———————————————————————————– Charlotte Kaufman is a writer and sewist in Mammoth Lakes, California. She specializes in marine and home interiors and continues to fall more and more in love with quilting. You can follow her at charlottekaufman.com.
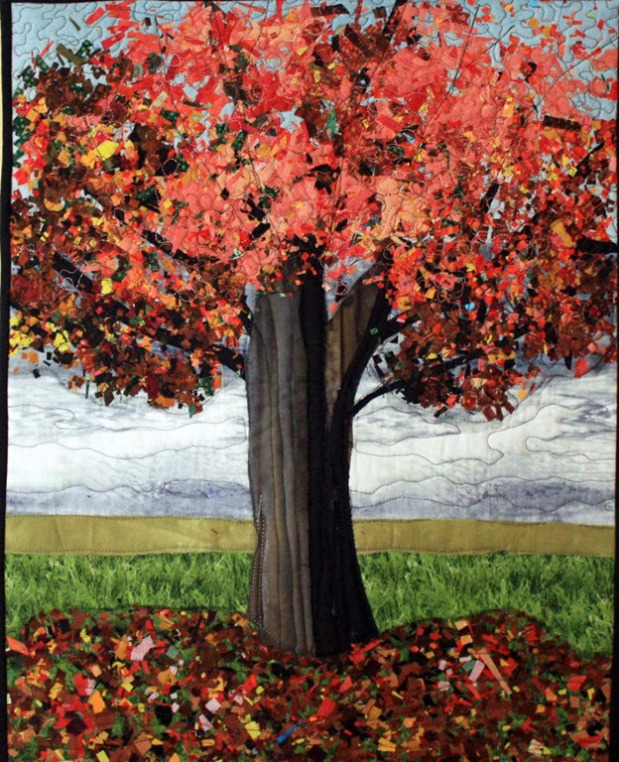
Speaking of fall projects, I’ve recently come across a quilting technique that would be fantastic for creating a beautiful piece of autumn to use for wall décor. The problem, though, is that the technique used to build this work is a bit advanced, so it’s something I’m going to have to put on the back-burner for a bit until I potentially get the hang of more intricate workings of specific sewing processes.
The overall idea is out of my comfort zone right now, but it’s still something that seems like a great enough idea to share with those reading this blog post. Maybe you’re more advanced than I am in the sewing world, and this would be a simple project to you to bring fall coloring to your home’s interior. If so, gather your fabric and tulle, and get to working!
Sewing machine, scissors or rotary cutter, fabric (some for shredding purposes), tulle, and straight pins
The Idea:
Creating a work of art from bits of fabric
See all of these leaves? Those are tiny bits of fabric placed on the piece, or confetti fabric!
It would be easy to label this a mosaic-type project, and in a way it is because it’s a bigger picture that’s being constructed by smaller pieces. But the incredibly small sizes of these pieces are tiny enough to compare to confetti being tossed in the air, so the confetti name is actually more fitting than the mosaic title—especially since the confetti can bunch up and overlap on your design in contrast to the side-by-side nature of a mosaic piece.
This is an idea that can be put in practice to make a full quilt, but the number of times you’d have to go through the process to create enough blocks for a quilt sincerely escalates the amount of time you spend on a project. Considering fall is so close, using the one-block notion for a wall hanging is more reasonable—and it’ll create a one-of-a kind piece to show off to your home’s guests.
The advantage of confetti
The beauties here are that you can pick the size of the confetti art work, you can choose the image you want to depict, and you can even use scrap material from other projects that have little to no value for other concepts. These confetti dots are tiny, so it doesn’t take extended amounts of fabric to create them. You might want to keep that in mind as you trim up your fabric for other projects and stash away the scraps and remainders in some kind of a confetti-quilt container. That way, you can build your supply for a confetti project that pops in your head, giving you the ability to start constructing immediately rather than having to search for fabric bits.
For a fall project, this is a good option because autumn comes with a great deal of outdoor imagery, like trees filled with colorful leaves or pumpkins placed in front of haystacks. Through the outdoor elements comes the prospect of movement and wind, so having the confetti scraps present to drizzle across your project can give the viewer that sense of movement in a display that’s random enough to highlight the notion.
Working with layers
You can layer the colors and fabrics to boost that realism until you have a strong tree covered in a series of leaves that are dropping to the ground and flying away, a pumpkin patch with dust and leaves blowing past it, a scarecrow that’s caught up in seeds that are breaking away from crops and sailing by… Lots of ways exist to put this idea into practice, and each has a look of intricate realism that’s sparked from the confetti approach.
The process to perform this task seems basic, if intricate, and so long as you keep the confetti pieces in their places with straight pins, tulle, and early sewing, you can make sure everything stays close enough to the arranged order to highlight the scene as you intended it above your mantle or over your couch—or wherever you choose to place the finished work!
Inspiration is key
If you want to find inspiration for what to depict in your confetti project, try going for a nature walk to look for signs of autumn’s approach, and when something particularly seasonal catches your eye, freeze that memory in your mind (or snap a photo) to remember it. As the month rolls on, nature itself can give you plenty of sights to choose from to be the main scene of your confetti project!
So, if your skills allow you to handle this intricate of a project, start looking for that autumn image to commit to a wall hanging!
This weekend my family is going backpacking. It’s the first time all four of us, my husband, myself, and our two daughters, ages 7 and 4, will go on an overnight backpacking trip together. My husband, Eric, compiled a detailed list of the things I’d need to bring (he is taking care of the girls’ packs. Rad guy, right?).
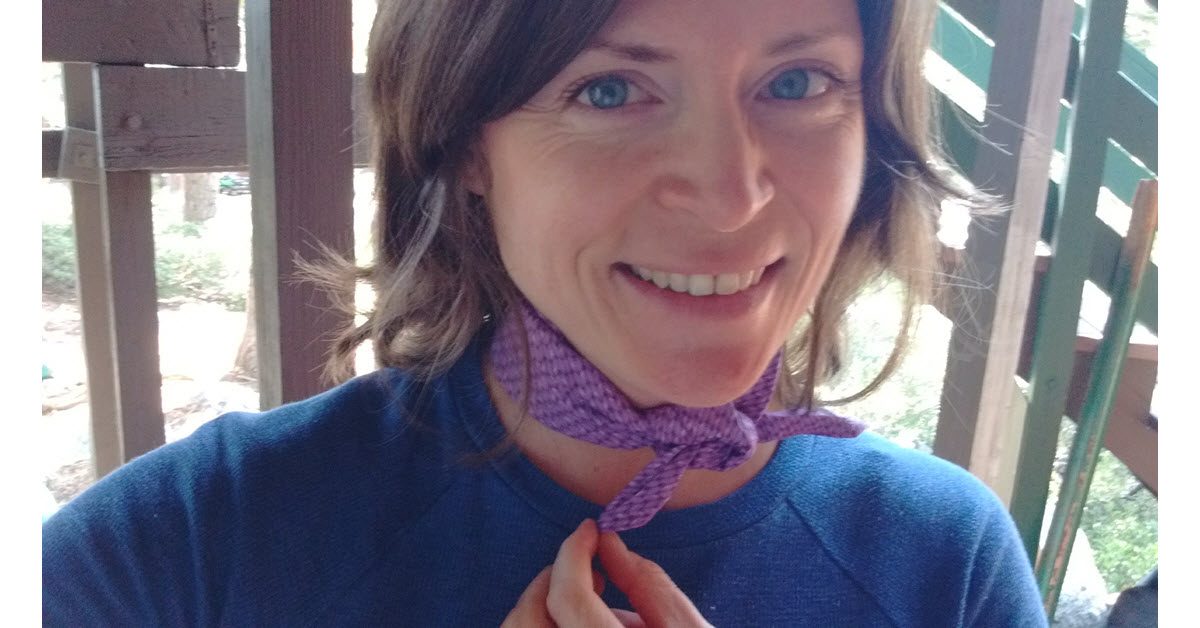
On that list was a bandana. It’s been awhile since I had a bandana but I remember how useful they were when I used to go backpacking. They can be used as sweat catchers, scarves, headbands, face masks, pot holders, to keep the sun off your face or neck, and even to tie a tourniquet. Honestly, their uses are endless. I just didn’t have one and darned if I was going to buy a bandana off of Amazon when I have a wall full of fabric bins and a sewing machine.
Getting started…
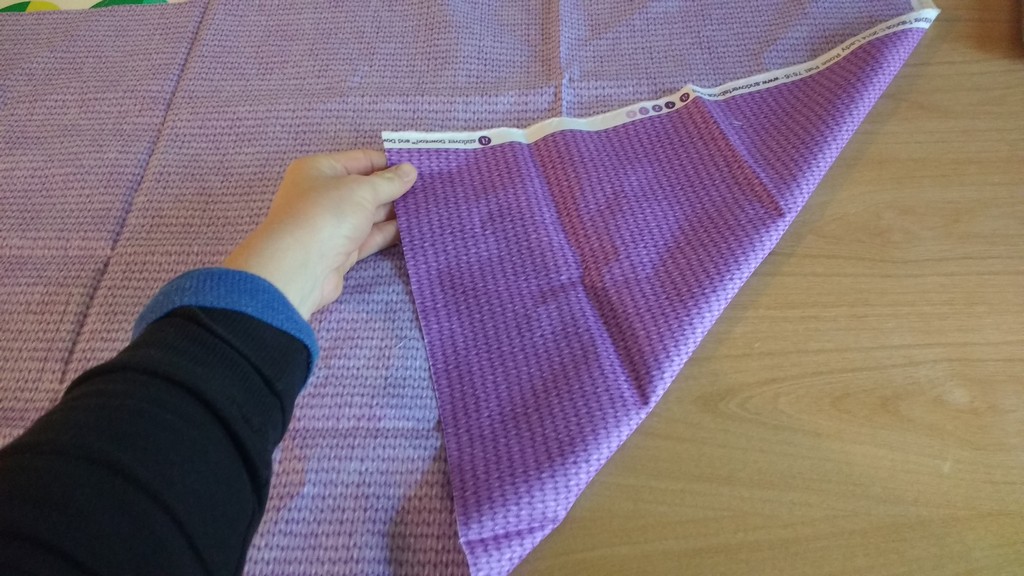
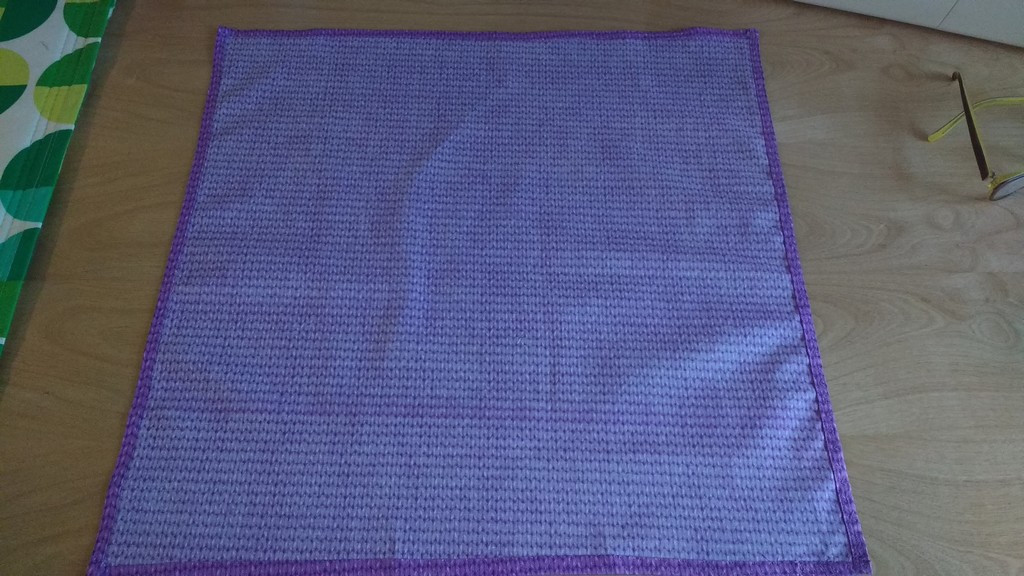
I grabbed a ½ yard of fabric which was a little over 18″ tall. If you have a bigger neck than me (that’s me in the photos) or want a larger bandana, grab 3/4 of a yard of fabric.
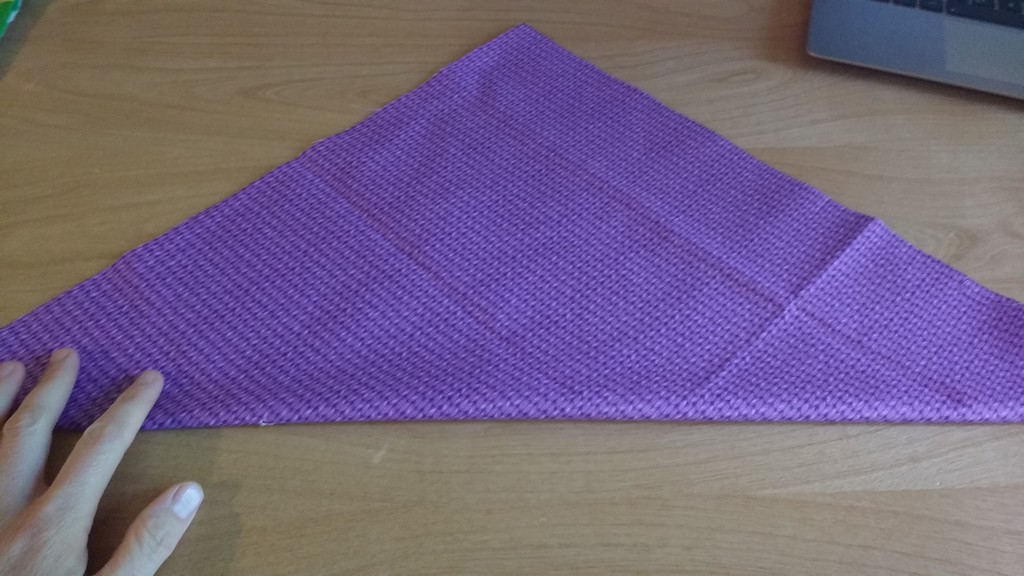
I cut out an 18″ x 18″ square. Again, size up if you want a larger finished piece. Once you’ve cut the square, roll it up and test it out unhemmed. Does it fit around your neck? Around your head? If you want it big enough to create a possible tourniquet, around your thigh?
Key step
Now is the most important part. Press and starch that sucker, especially around the unfinished edges.
You can make your hems as large or as small as you like. I like bandanas with TINY hems, so I rolled mine over even smaller than ¼”, pressing and starching all the way around. Then I doubled that over again, pressing and starching.
Start pinning
Done! At this point, you could pin the pressed and started hems but I have a feeling that if you used enough starch they are going to stay put while you sew.
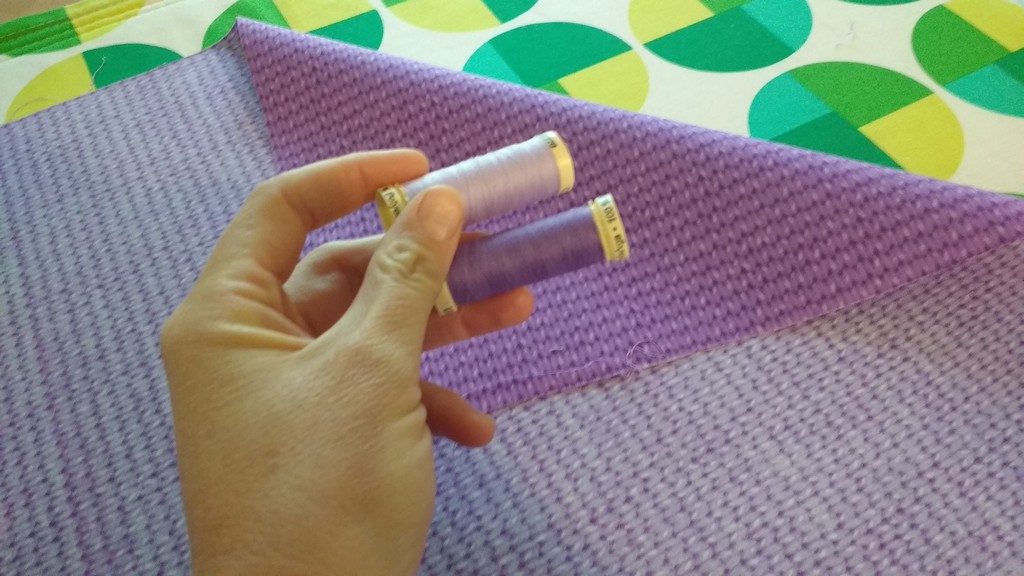
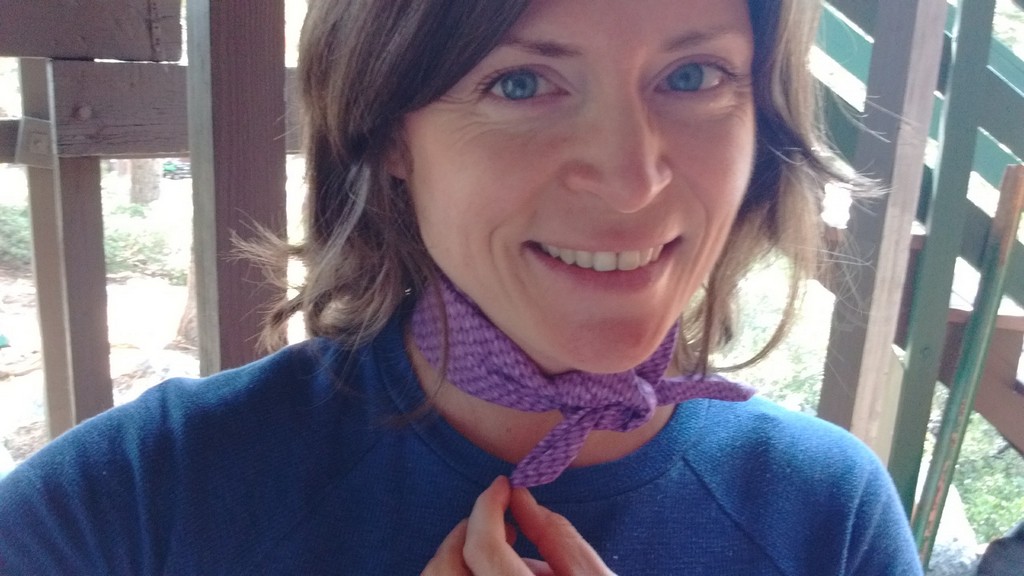
Pick your thread. For this project I went with a purple that matched but once it was finished I wished I had gone with the lighter purple just for a fun contrast. You live and you learn.
If you are going to use a decorative stitch, make sure you have enough thread in your bobbin.
I tested out this decorative stitch on a separate piece of fabric first. I wanted a stitch that would look good and keep my hem nice and flat.
Easy-peasy
Start sewing a square. This is the easiest part after your prep work to get there.
If you have a shallow hem, use a seam ripper to hold down the corners as you go.
Admire your creation
Look that beauty! And you didn’t spend $12 on Amazon for it.
Try it on and enjoy. Happy camping!
———————————————————————————– Charlotte Kaufman is a writer and sewist in Mammoth Lakes, California. She specializes in marine and home interiors and continues to fall more and more in love with quilting. You can follow her at charlottekaufman.com.
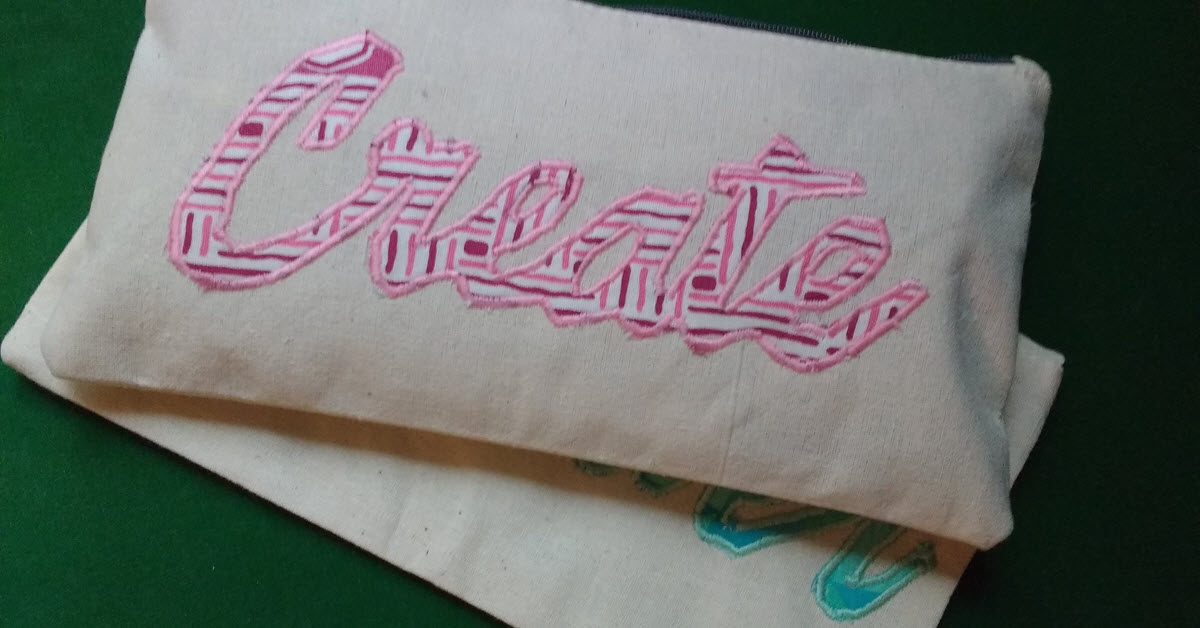
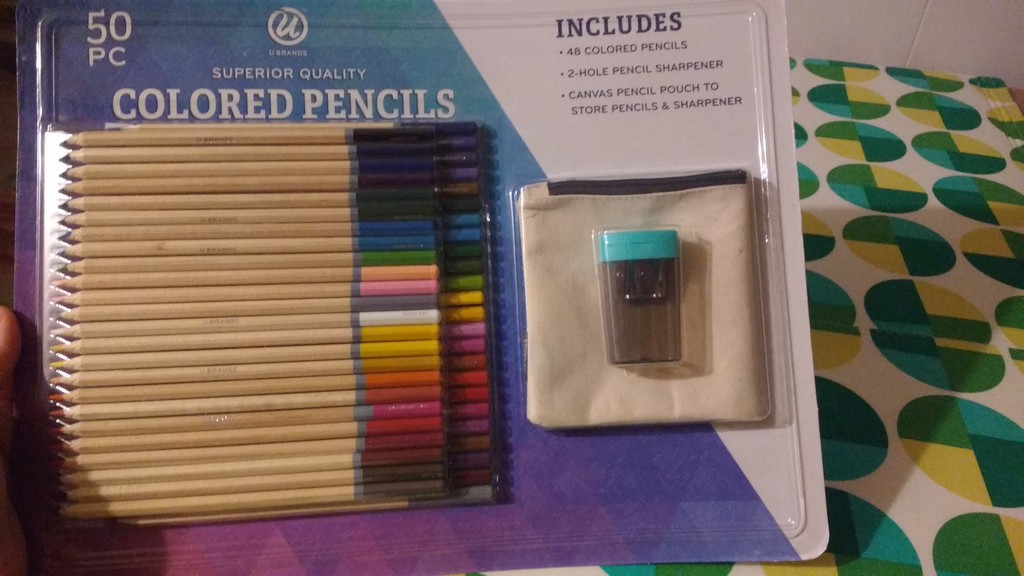
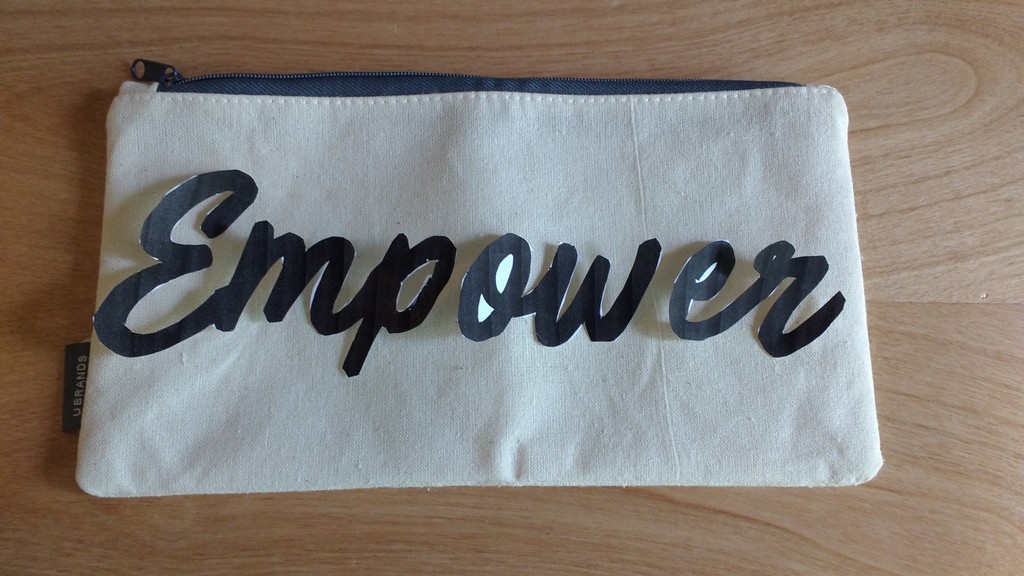
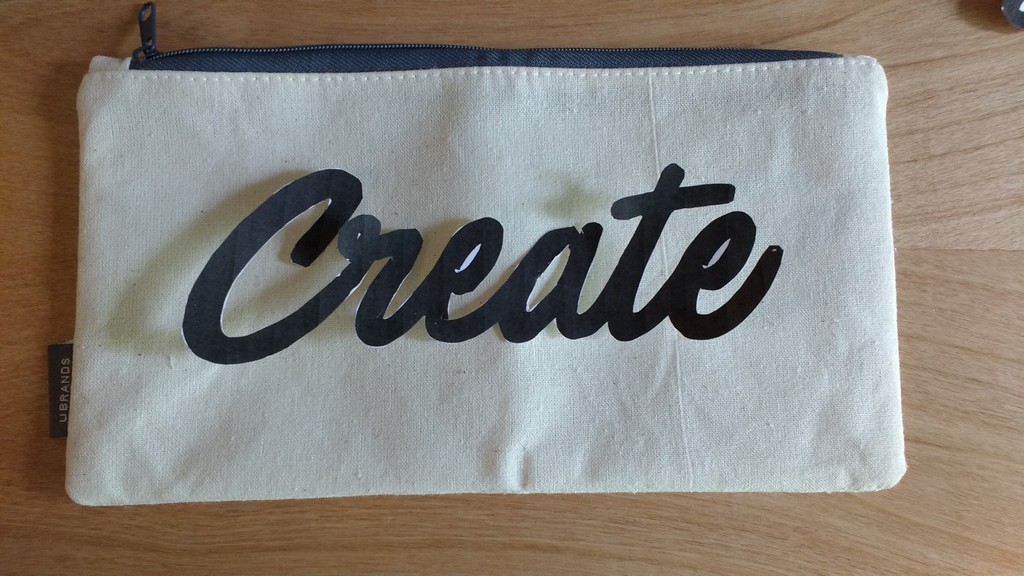
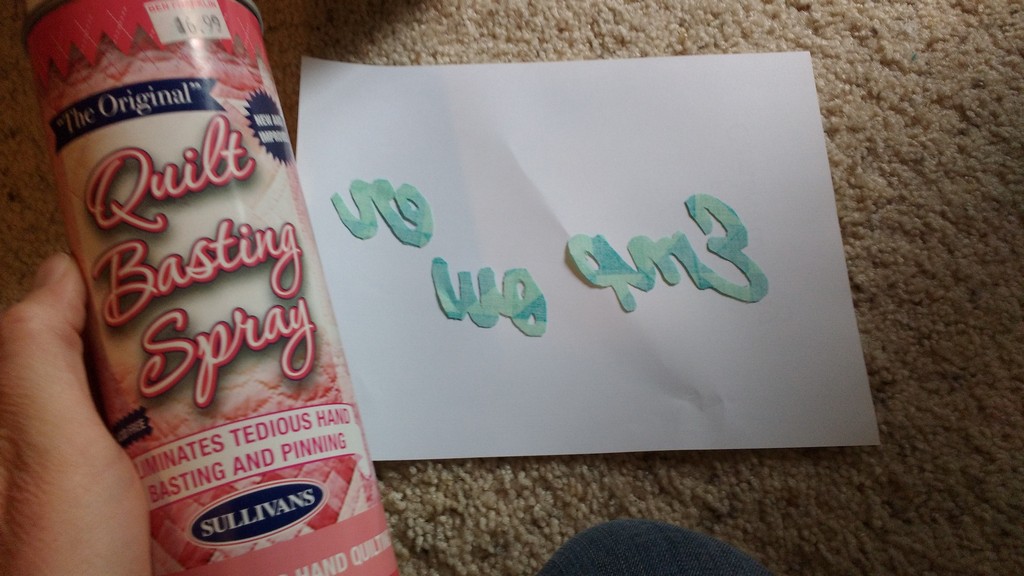
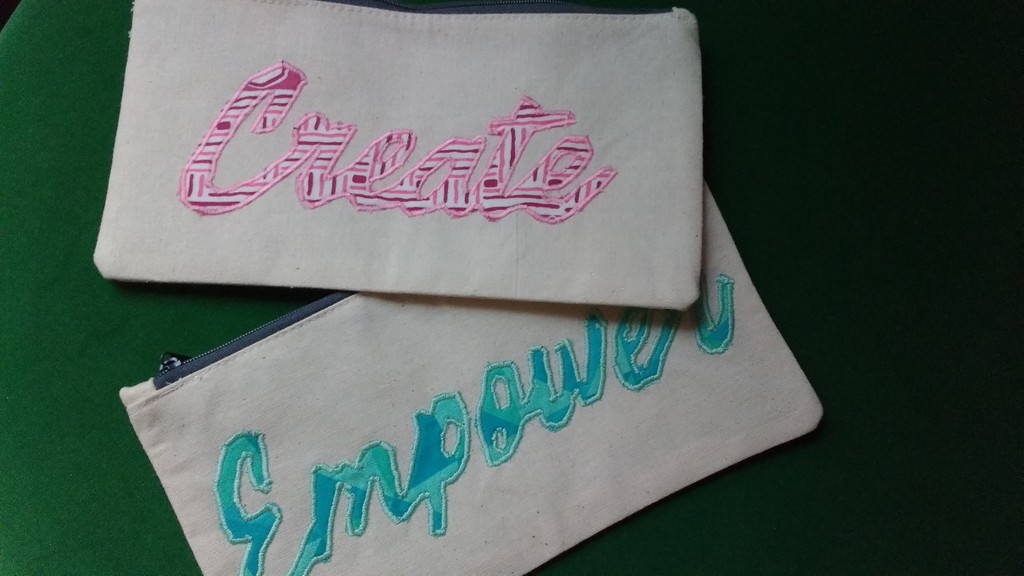
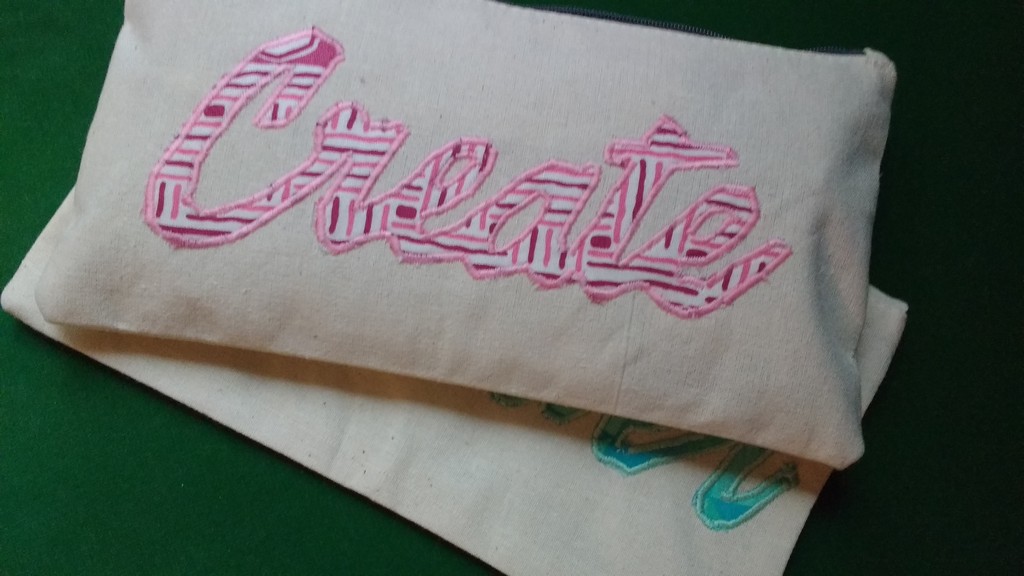
Recently I saw this set at Costco that includes 50 colored pencils, a pencil sharpener and a plain zippered pouch. I nabbed two but I think I’ll go back and grab some more because I turned them into something cool and I want to do it again.
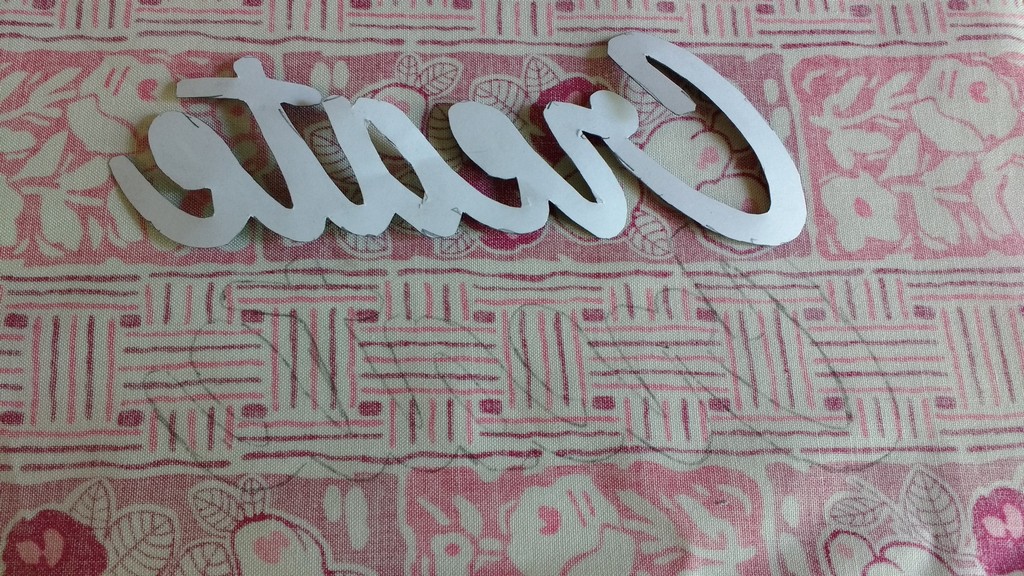
Here’s what I did. I printed out two words, one for each case, and then used them as patterns to draw the words onto fabric. The font is a free font I downloaded from dafont.com called Painted Paradise.
Empower printed out in three sections and I was able to place them on a charm square from my fabric stash. Create printed out as one word so I used a layer cake precut for it.
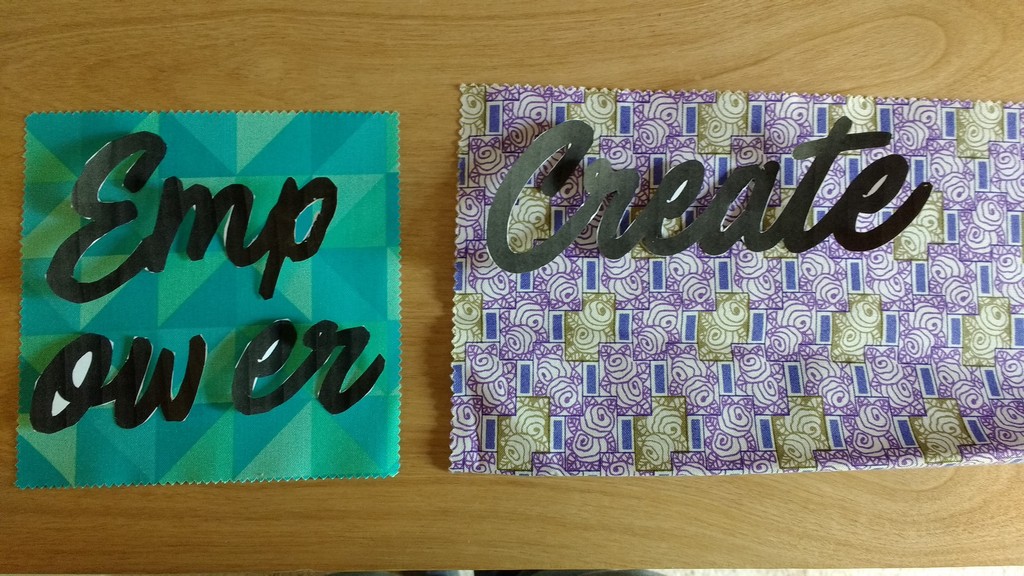
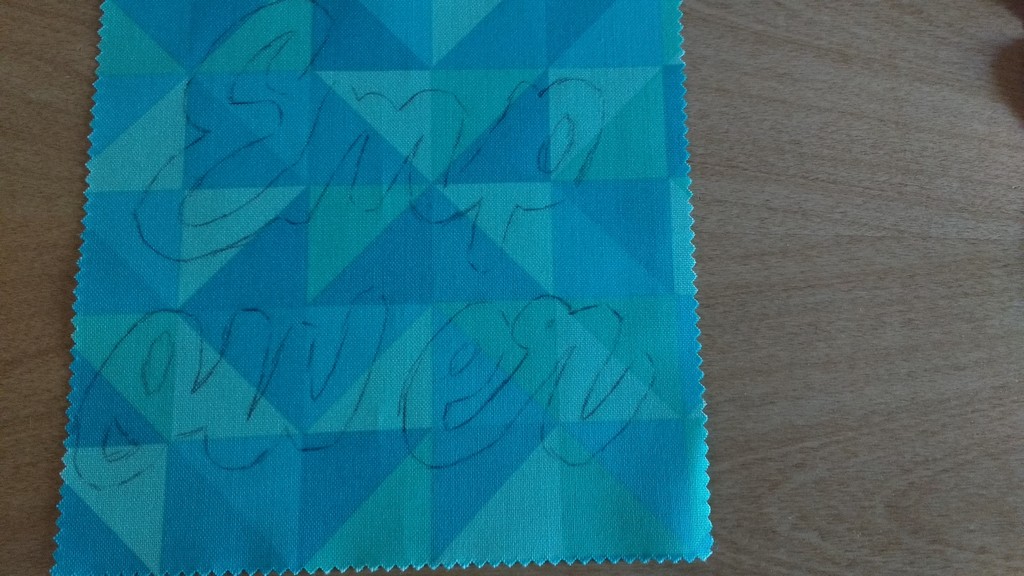
I used a freshly sharpened pencil and held the paper down as I traced.
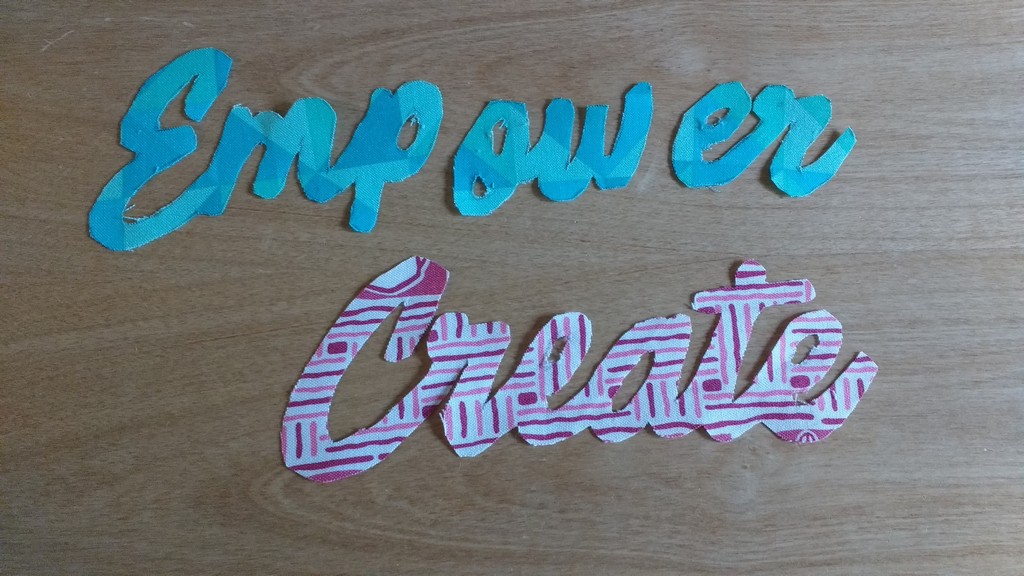
For this fabric, it was easier to flip the words upside down and draw on the backside of the fabric (I eventually chose a pink fabric instead of the purple you see above).
Use some sharp scissors, and patience, and cut out the words.
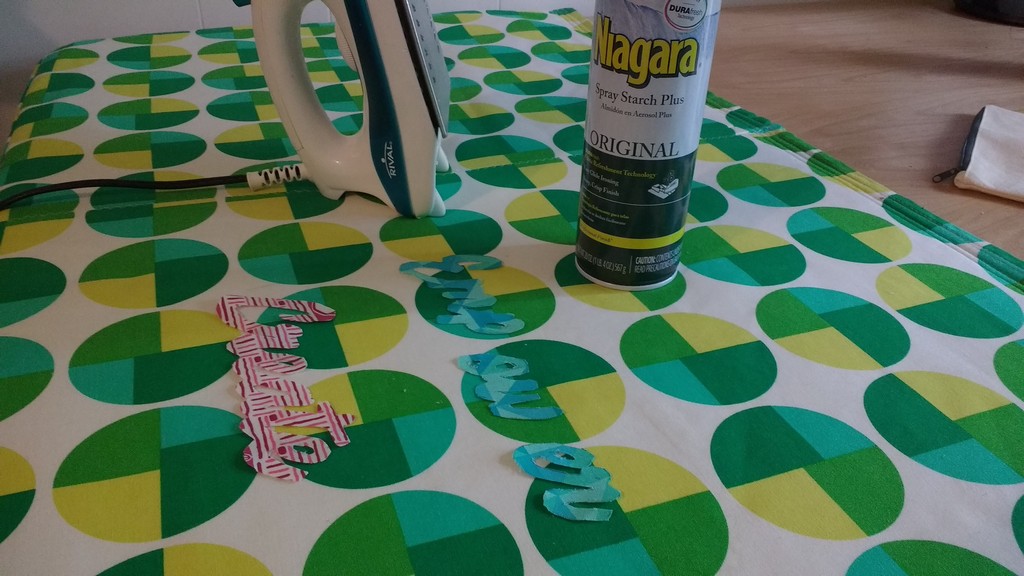
I ironed and starched the words to get them very crisp.
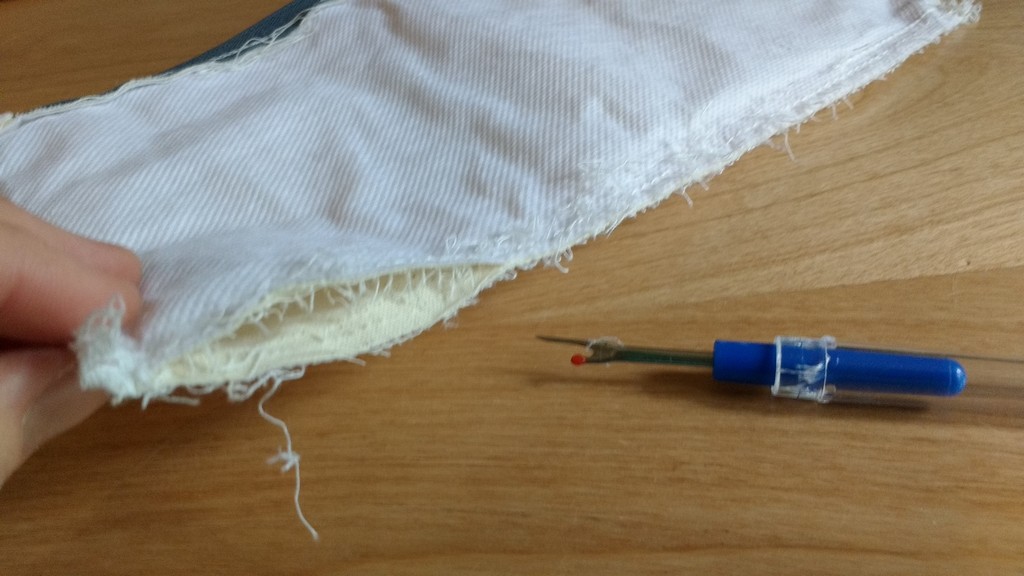
Next up: taking out the seams of the pencil case. This actually went pretty fast as I ran my seam ripper along the serged seams and then opened the fabric and pulled out the inner seams.
I did this to both cases and then took a moment to pull out as many of the remaining threads as possible to create a clean working space on the fabric (and my table).
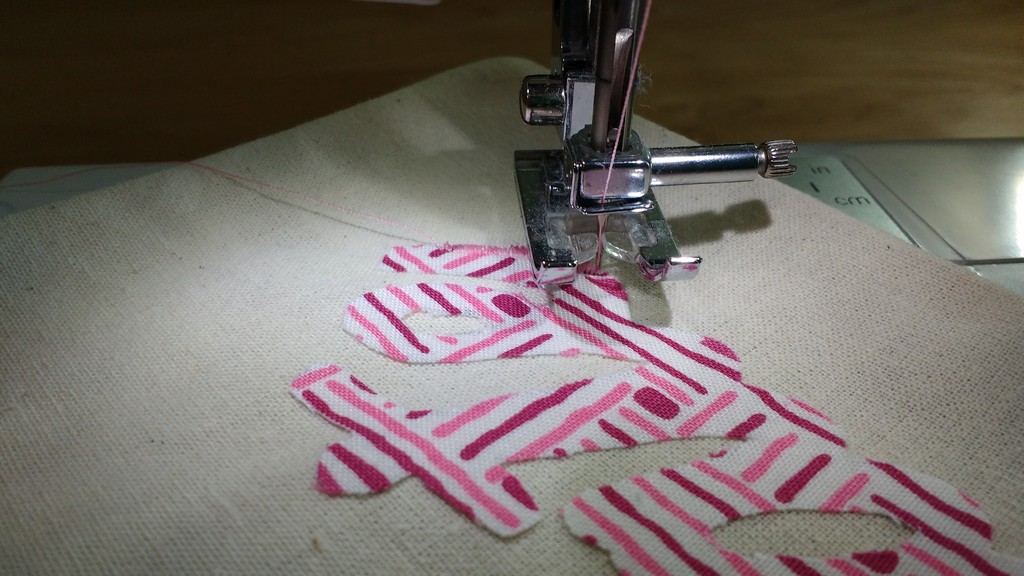
This is my handy quilt basting spray. I placed the words wrong sides up on a piece of paper and then sprayed fabric glue on them. Then I positioned the words on each pencil case where I wanted them.
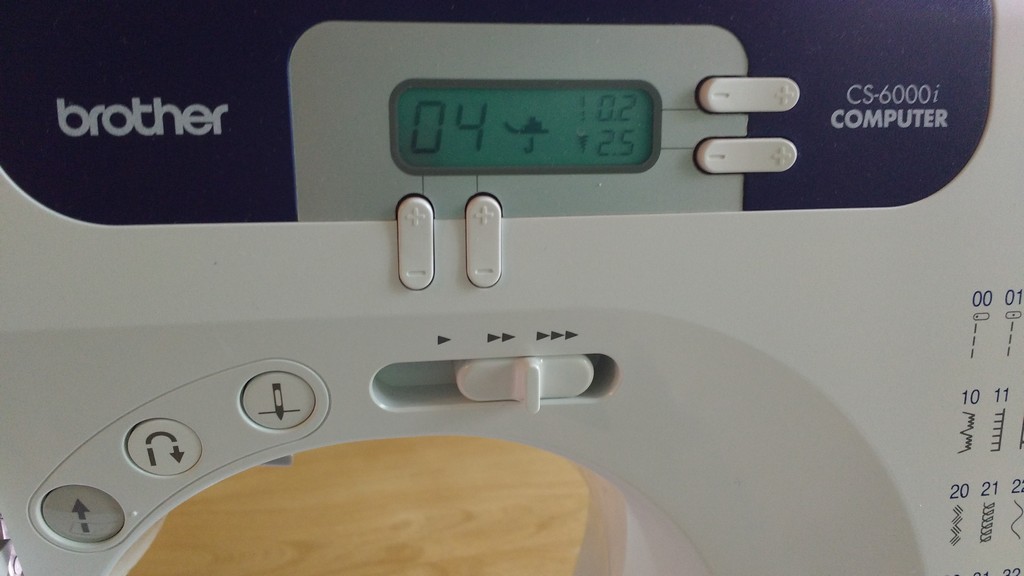
My plan was to basically embroider the words onto one side of the pencil cases. I learned a great embroidery stitch, called a satin stitch, on my machine. You create this look by selecting a zig zag stitch and then reducing the stitch length to almost zero. You can play with the numbers/look to find what you like.
I practiced on some scrap fabric and then got to work.
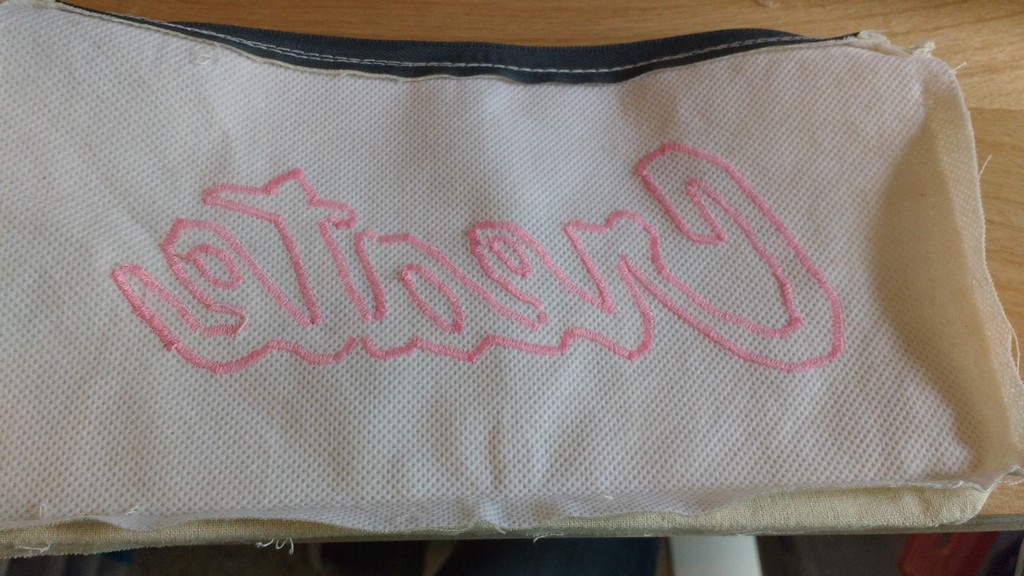
Here’s what it looked like from the back when I was done. It even looks cool inside out!
After I finished embroidering each case, I pinned each one closed and resewed the cases back up. Then I turned the cases right side out, pressed them, and look at these beauties!
The Create case is for me. It’s rare I make something for myself and I’ve been in a really creative mood lately so I thought it appropriate. The Empower case is for my friend, Kate, who empowers other women. I definitely think I’ll be making more of these personalized cases in the future.
———————————————————————————– Charlotte Kaufman is a writer and sewist in Mammoth Lakes, California. She specializes in marine and home interiors and continues to fall more and more in love with quilting. You can follow her at charlottekaufman.com.
Have you joined the adult coloring mania that is sweeping the nation (possibly the whole world?) You know what I mean right, the movement of grownups using coloring books to Zen out, get calm, and relax? I for one am fully into doing more coloring and less stressing in life.
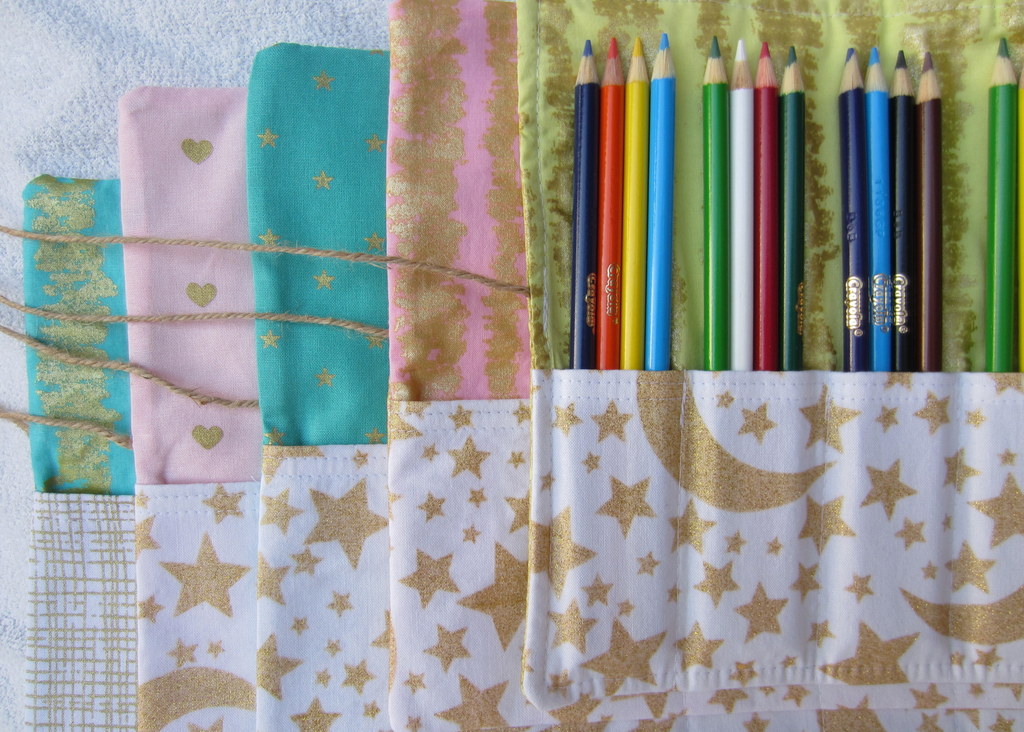
If you want to join the movement, but need a place to store your coloring utensils, then here is a quick DIY for a colored pencil or marker or pen roll.
Supplies
1. Fabric for back of pencil roll
2. Fabric for front of pencil roll
3. Thin batting (for in between the front and back fabric)
4. Fabric for front panel
5. Interfacing (for front panel)
6. Twine
7. A pretty bead
Pick your fabric
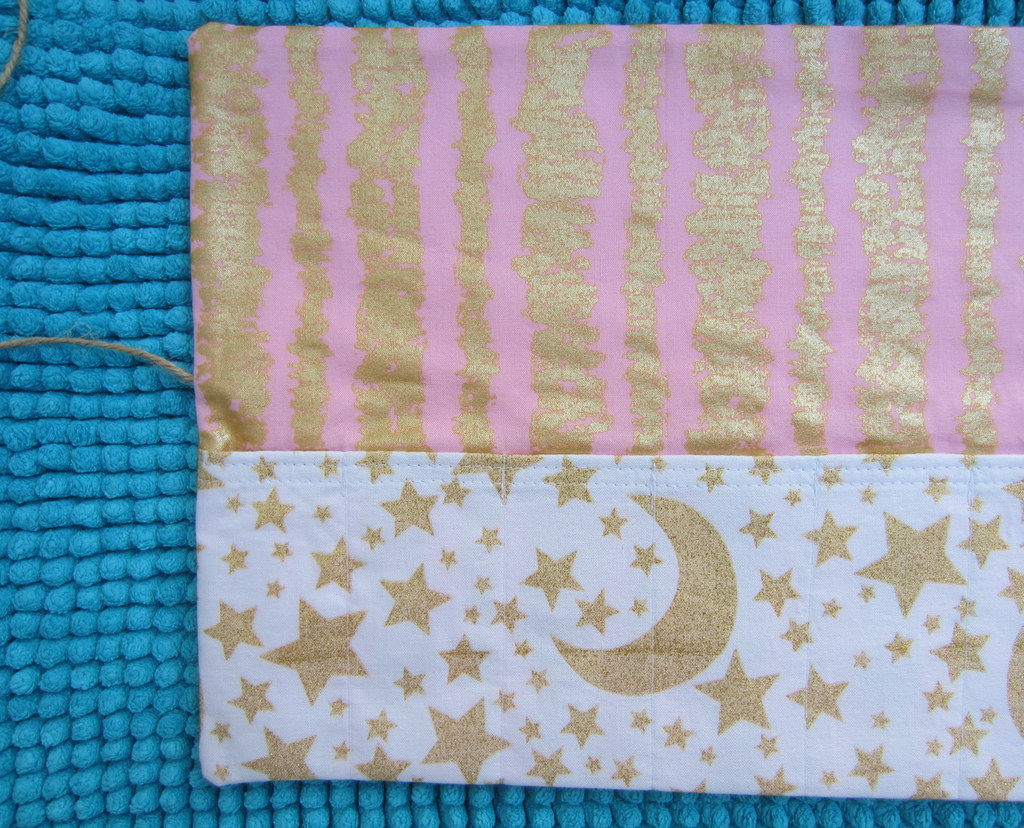
The amount fabric you’ll need for supplies 1-4 depends on how big you are making your roll. I wanted to include a good assortment of colored pencils (or markers, pens, etc) in mine. Here are the measurements I used (seams are ¼”).
1. Fabric for back of pencil roll: 15.5″ x 9″
2. Fabric for front of pencil roll: 15.5″ x 9″
3. Thin batting piece: cut slightly larger than front/back pieces
4. Fabric for front panel: 15.5″ x 4.75″
5. Interfacing (for front panel): 15.5″ x 4.75″
Iron out the details
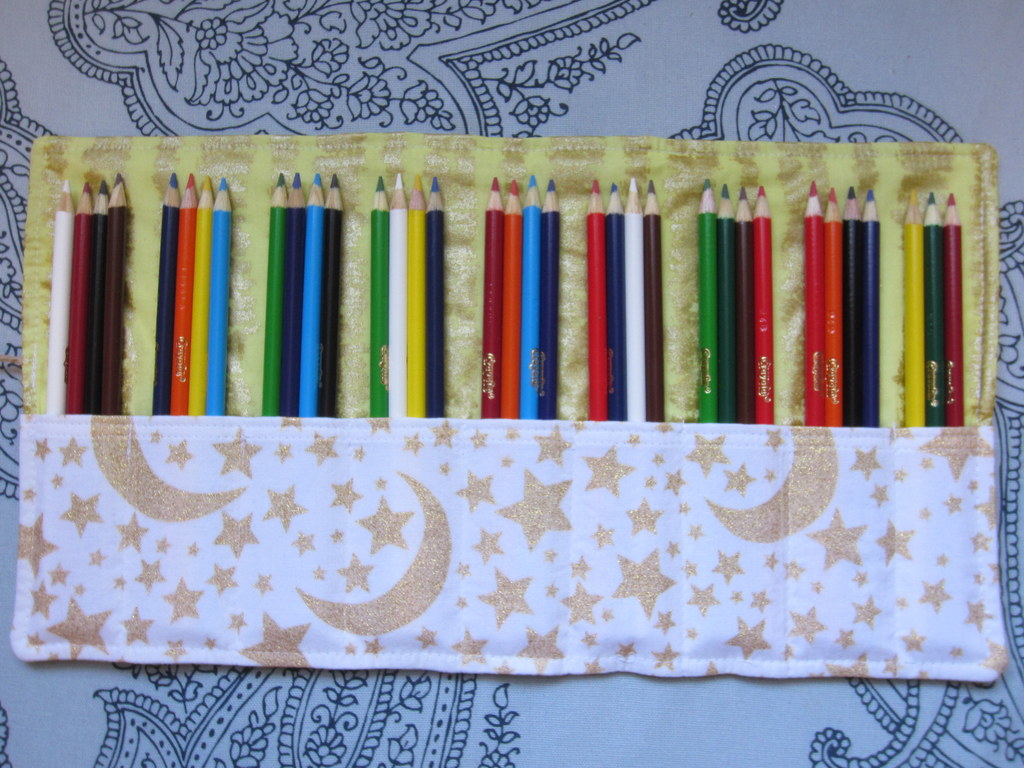
I ironed the interfacing to the back of the smaller front panel of fabric and then folded the top of the fabric over ¼” and then again ¼”, pressed, and then finished the seam. This is the top of the fabric where the pencils will slip in and out of the roll.
Pins and sandwiches
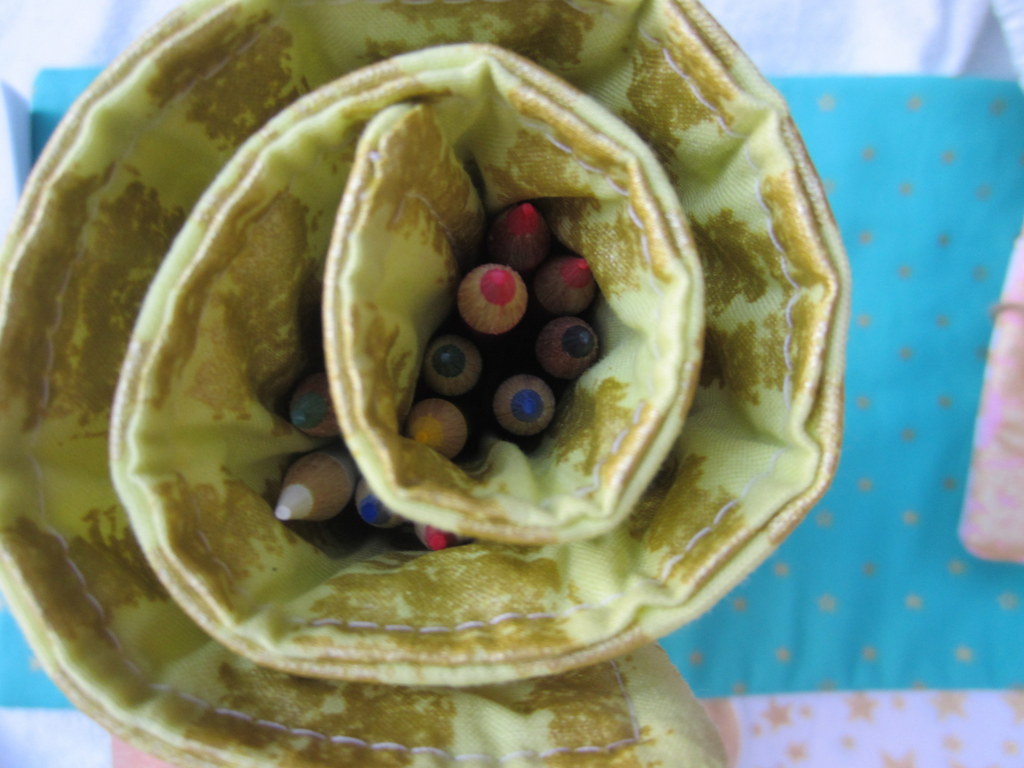
Then I pinned the smaller front piece to the larger front fabric piece, marked out 1 ¾” spaces and sewed up the front of the smaller panel, back tacking at the top of each line, until I had nine sections.
Next I sandwiched all the parts in this order:
1. Batting
2. Top, front fabric piece (right side up)
3. Back panel piece (wrong side up)
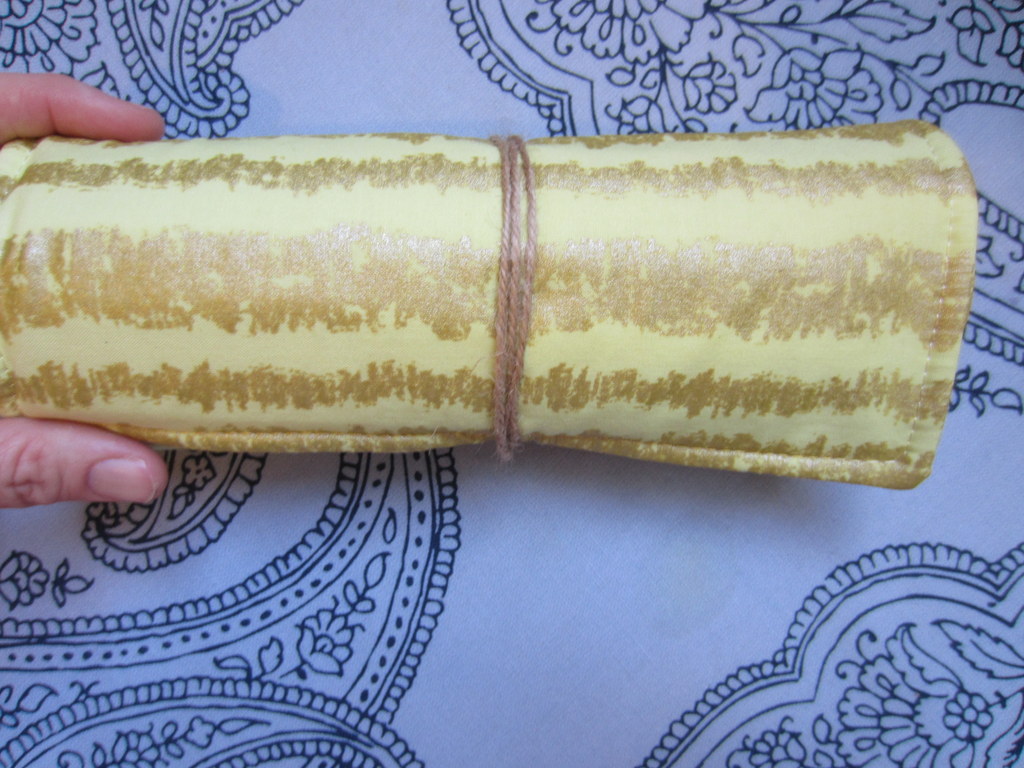
I pinned the layers together and then inserted the twine into the bundle, placing it so it would extend out on the side where the front panel fabric joined the main front panel. I sewed around leaving a section at the top for turning.
Pro Tip: heavily stitch back and forth over the twine so it is not easily pulled out.
The final stretch
Trim your corners and trim off excess fabric, then turn your piece and use your finger or a seam ripper (with the lid on) to massage out the corners so they pop nicely. Then topstitch. Don’t forget to topstitch!
Plan ahead and cut out a lot of a fabric because when your friends see these, they are going to want some.
Lastly, slip a bead on the long end of the twine and tie a knot on the end so the bead can’t slip off.
Enjoy and happy coloring!
———————————————————————————– Charlotte Kaufman is a writer and sewist in Mammoth Lakes, California. She specializes in marine and home interiors and continues to fall more and more in love with quilting. You can follow her at charlottekaufman.com.
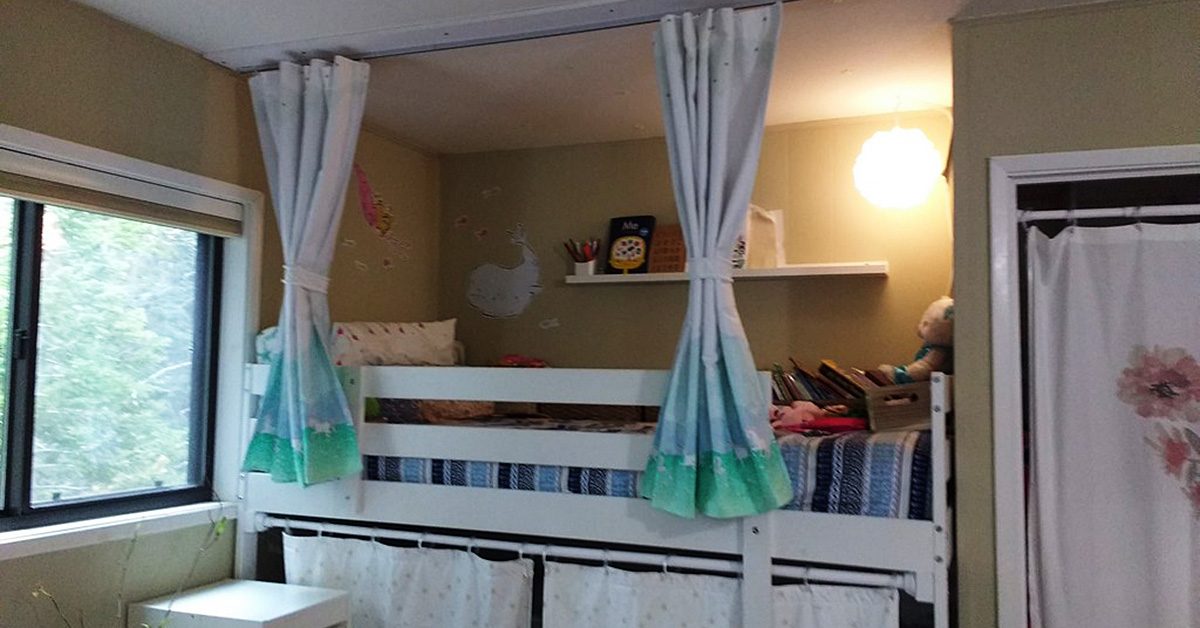
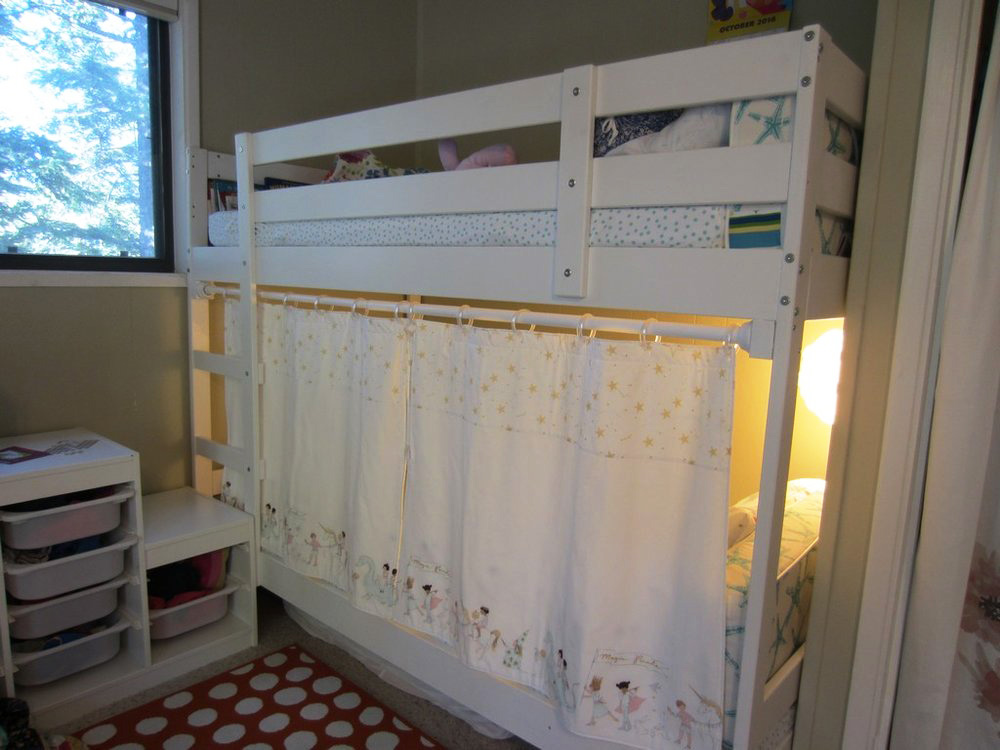
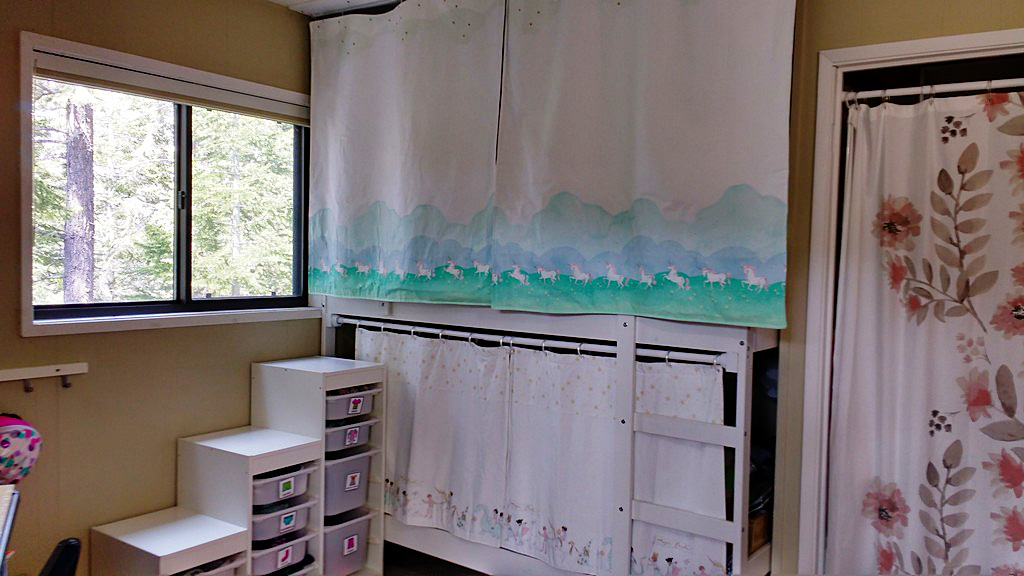
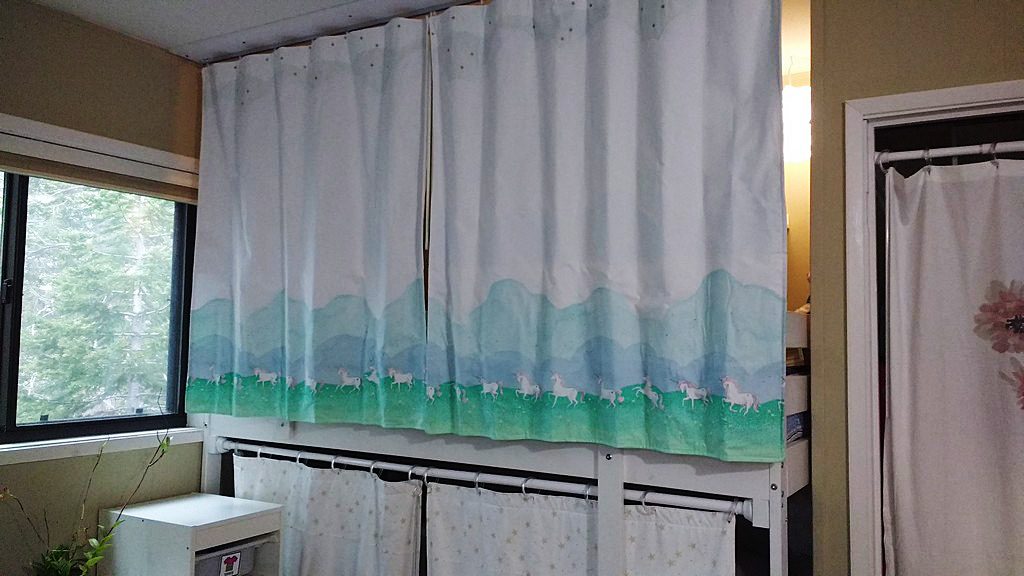
Last fall I wrote a post about the bunk bed privacy curtains I created for my youngest daughter for her bottom bunk. You can read that post here.
They turned out amazingly well; here’s a picture.
They turned out amazingly well; here’s a picture.
It’s only fair…
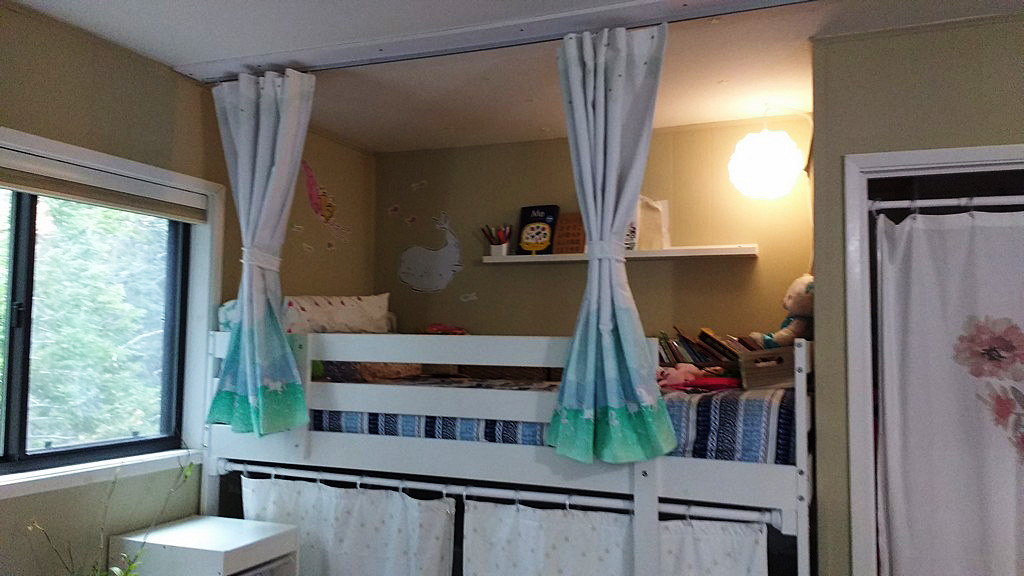
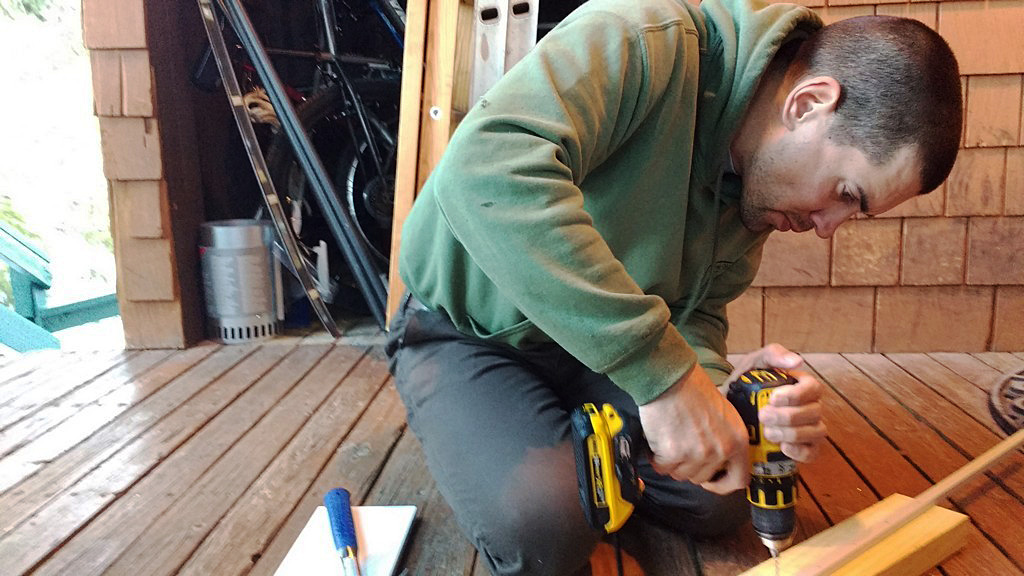
I also promised my older daughter, who sleeps on the top bunk, that I’d make her a pair too. Her curtains, I knew, would take a lot more work. First I bought ceiling curtain track and used a hacksaw to cut it to size. Then I asked my husband to drill in the holes for the screws.
While he worked on the track, I painted a thin board white to match their ceiling. We attached the track to one side of the board and then attached the board to the ceiling, drilling holes in the side of the board that didn’t have the track, right into a stud in the ceiling.
Drilling holes in the side of the board that didn’t have the track, right into a stud in the ceiling.
Unicorns and stars
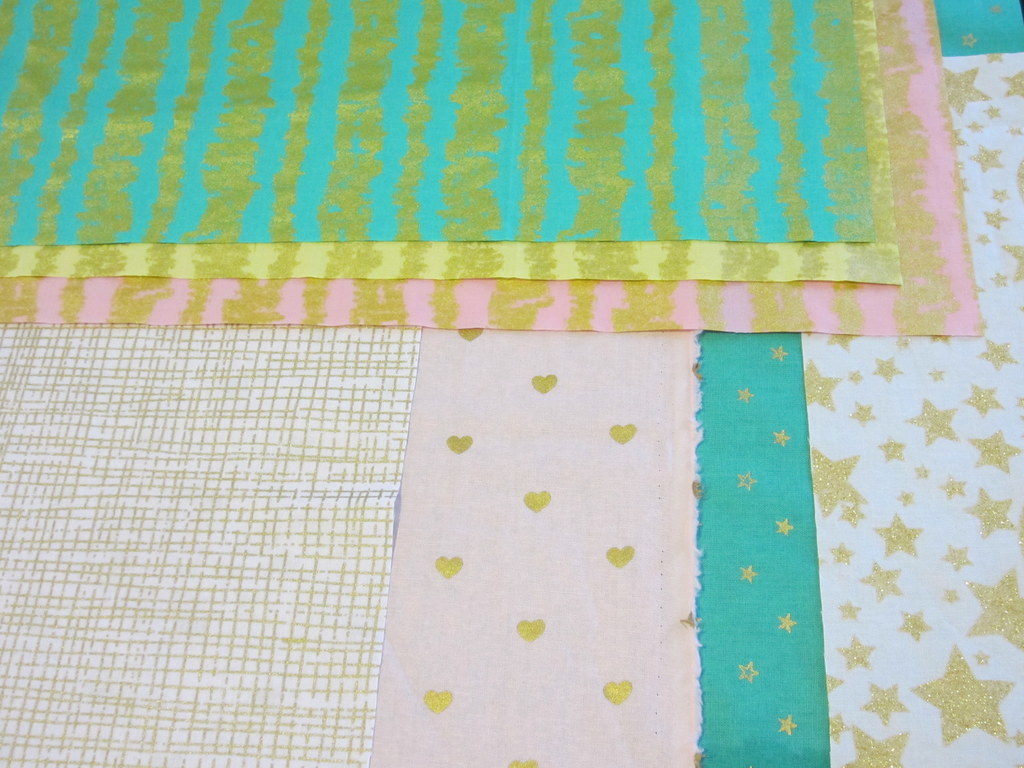
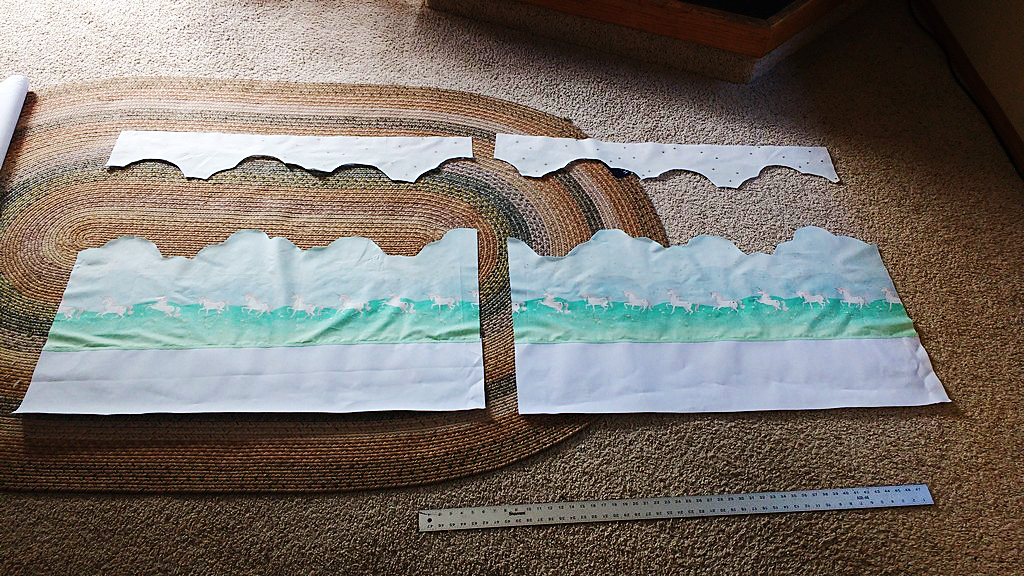
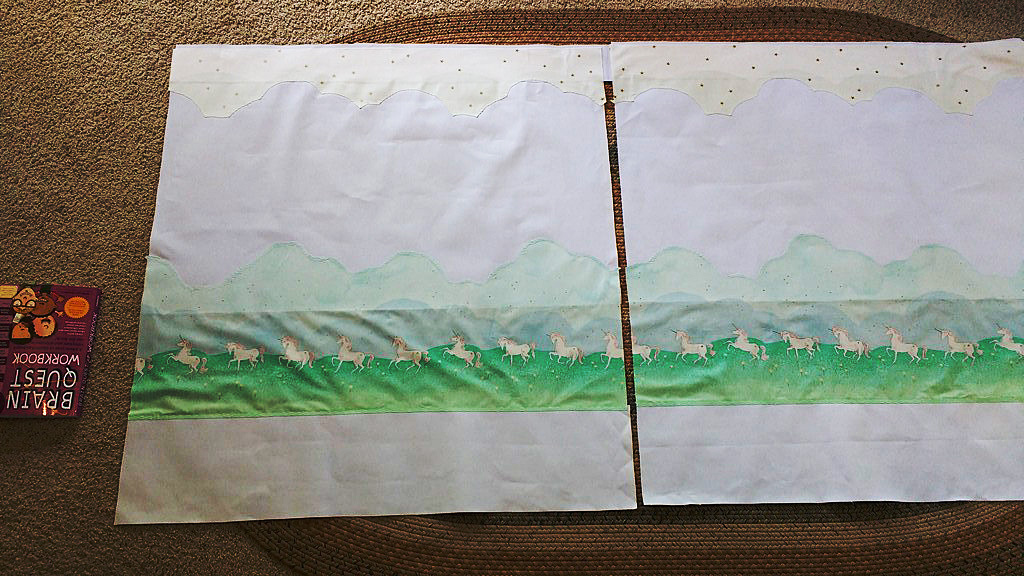
Next up was the curtains themselves. She said she wanted ‘unicorns and stars,’ and for a theme like that you can always count on Sarah Jane Fabrics for something good. The only problem was the space the curtains took up was much larger than the width of a yard of fabric.
Undeterred, I cut the clouds and the stars from the grass and the unicorns and did the math on how to baste the fabric onto white canvas fabric to elongate the scene.
Undeterred, I cut the clouds and the stars from the grass and the unicorns & did the math on how to baste the fabric onto white canvas fabric to elongate the scene.
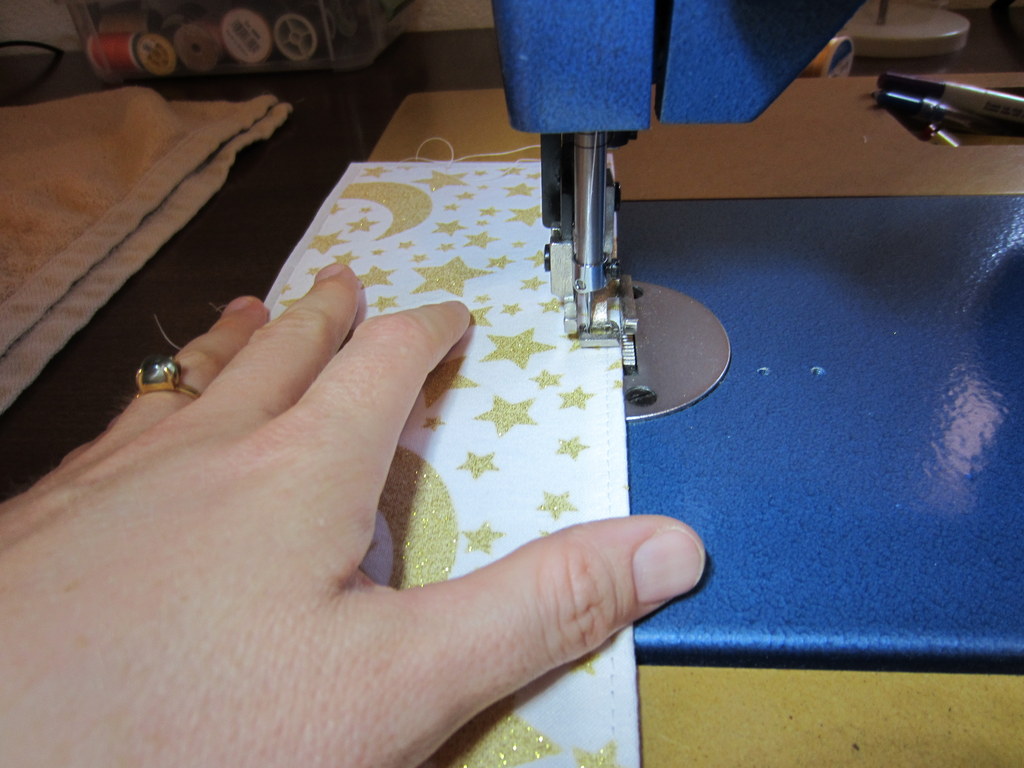
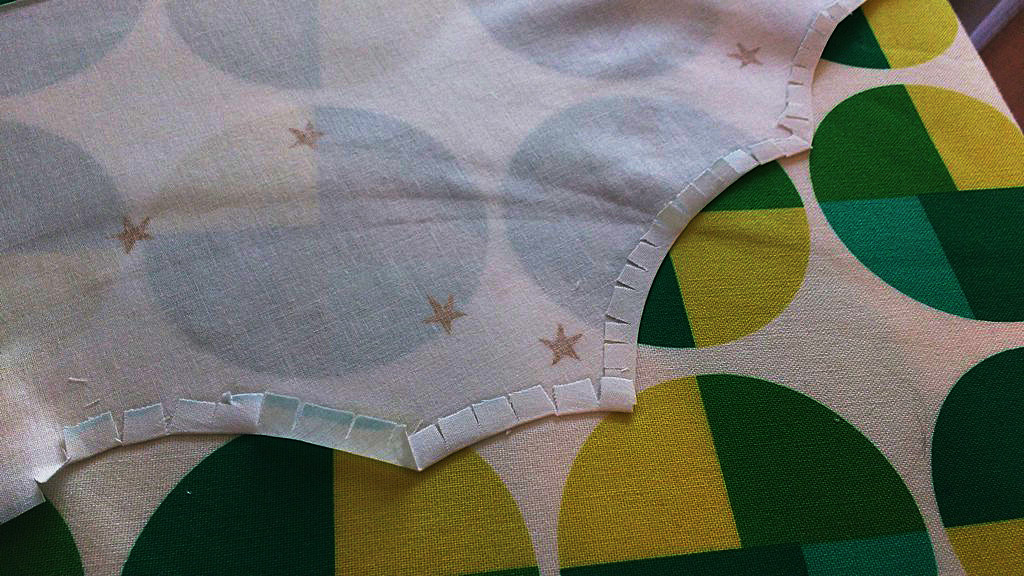
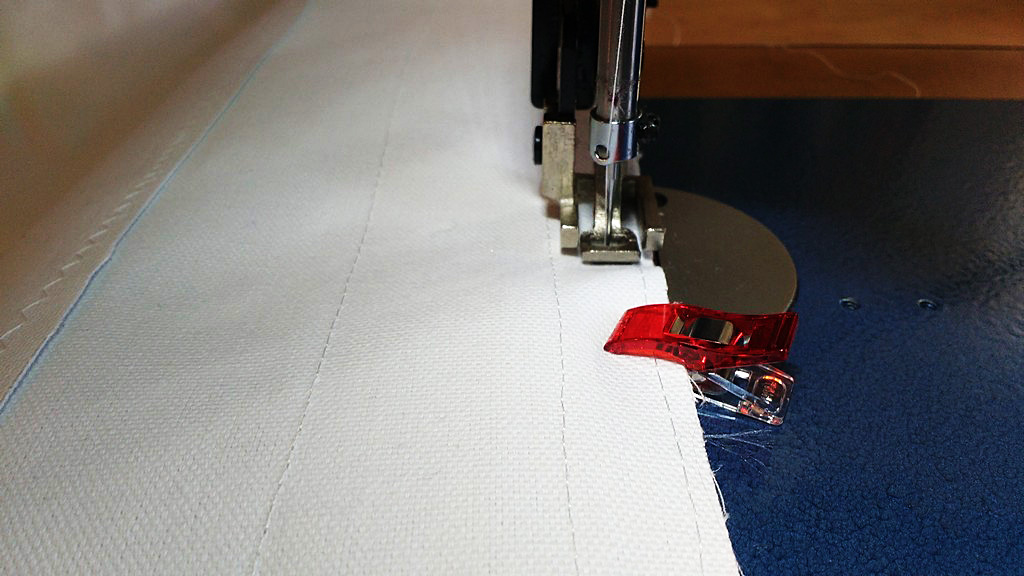
I painstakingly snipped around the curves of the clouds and the grass on the bottom and top pieces and then finger folded them over and ironed. I used starch to help the little pieces stay down. This was time consuming because I had to do it for four panels (two front, two back) and the top and bottom pieces of all four.
I love it when a plan comes together
My trouble paid off however.
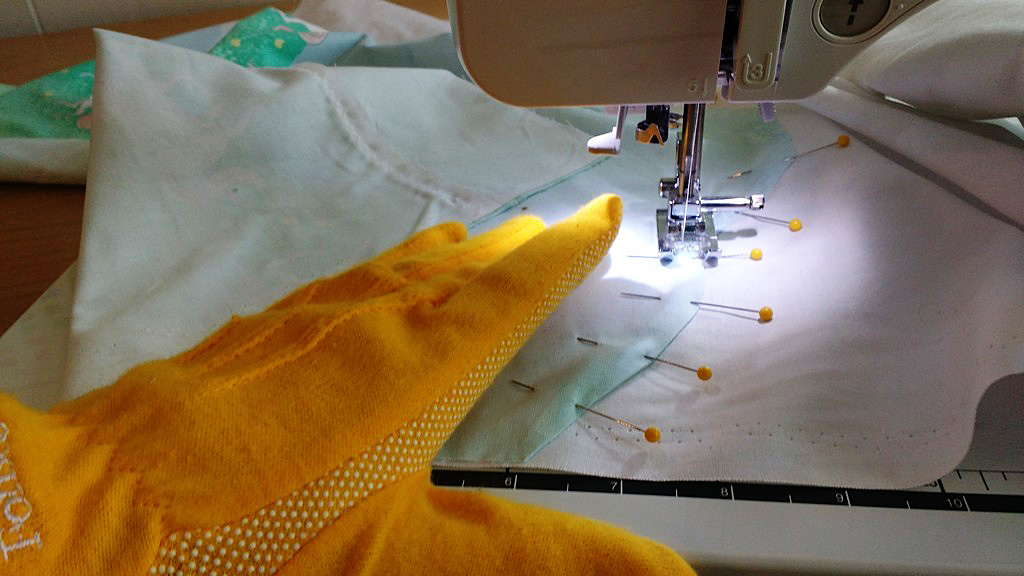
My trouble paid off however. I diligently pinned the pieces to the main panel fabric of the top and bottom curtains and then sewed them in place with a decorative stitch.
I diligently pinned the pieces to the main panel fabric of the top & bottom curtains & then sewed them in place with a decorative stitch.
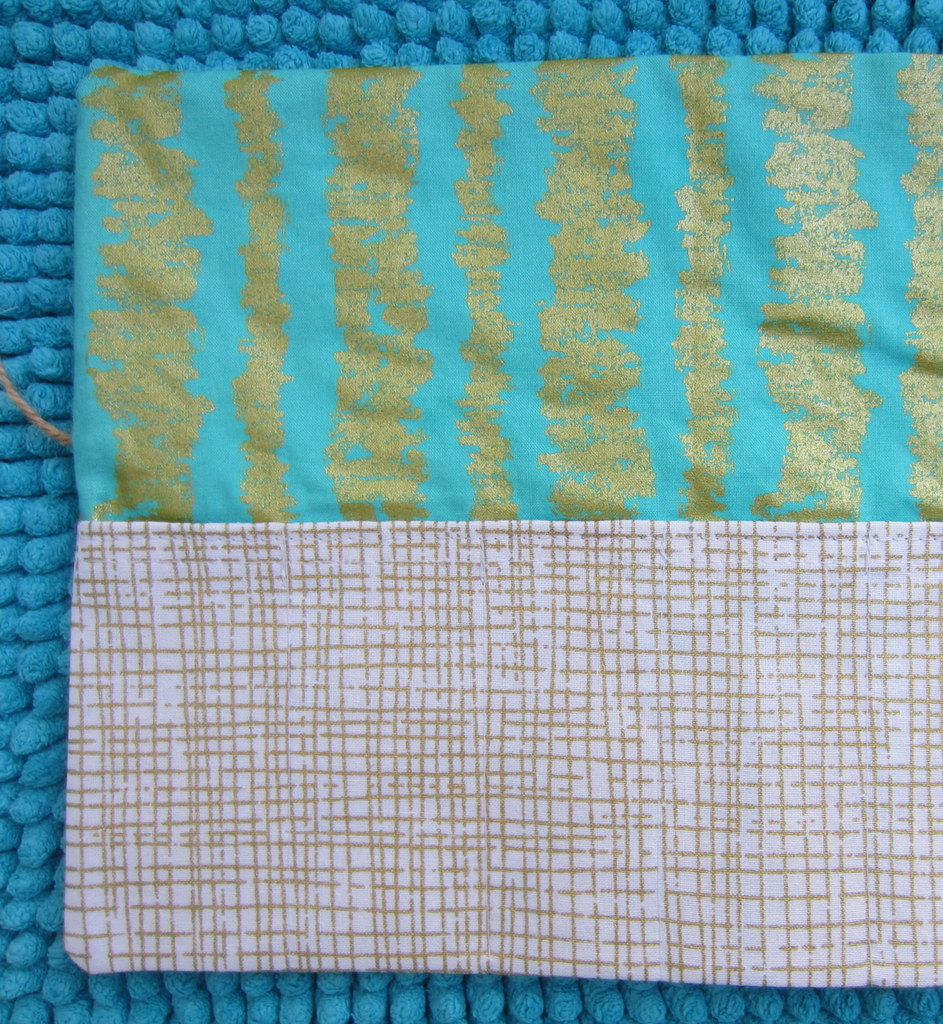
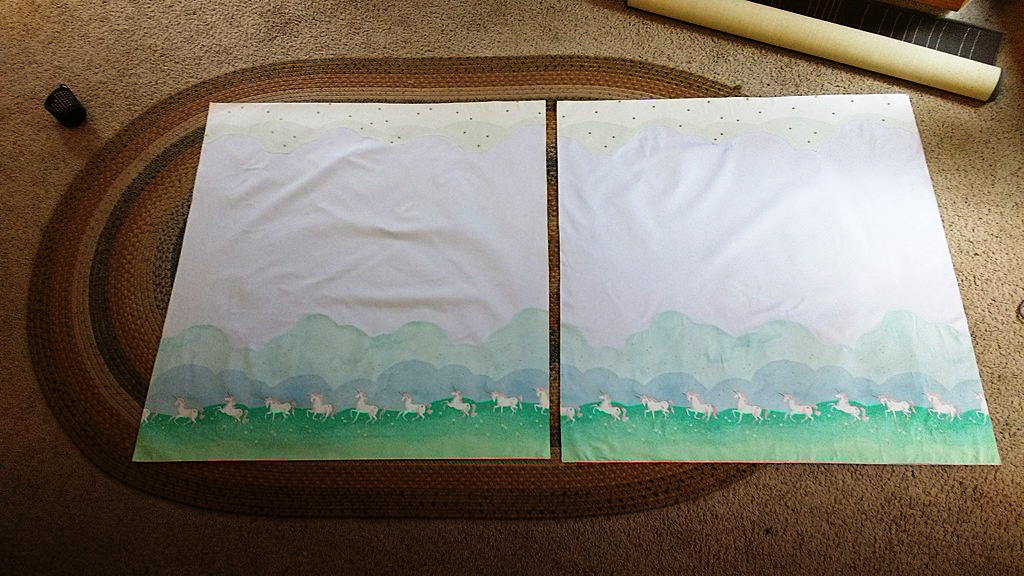
Here are the two front panels. Gorgeous, no?
Here are the two front panels. Gorgeous, no?
For the back panels, I raised the grass & unicorns up higher and added a strip of white on the bottom so the unicorns wouldn’t be hidden from my daughter’s view by the bunkbed railing.
For the back panels, I raised the grass & unicorns up higher and added a strip of white on the bottom so the unicorns wouldn’t be hidden from my daughter’s view by the bunkbed railing.
Putting it all together
On the back panel, I then sewed drapery tape to the top of each panel. Then I sandwiched the top and bottom panels, right-sides facing, and sewed them together. Next I turned the panels and pressed everything neat and flat. I finished by top stitching the panels, and the opening where I’d turned them, closed.
On the back panel, I then sewed drapery tape to the top of each panel.
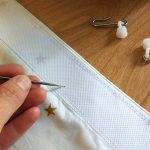
Now it was time to puncture some holes in the drapery tape so I could add the hooks that feed into the curtain tracks. For this, I used my handheld sailmaker needles to pierce a hole in the tape but not through to the front of the fabric.
For this, I used my handheld sailmaker needles to pierce a hole in the tape but not through to the front of the fabric.
Now it was time to puncture some holes in the drapery tape so I could add the hooks that feed into the curtain tracks.
And voila! The curtains fed onto the track perfectly. But I wasn’t done yet.
For this, I used my handheld sailmaker needles to pierce a hole in the tape but not through to the front of the fabric.
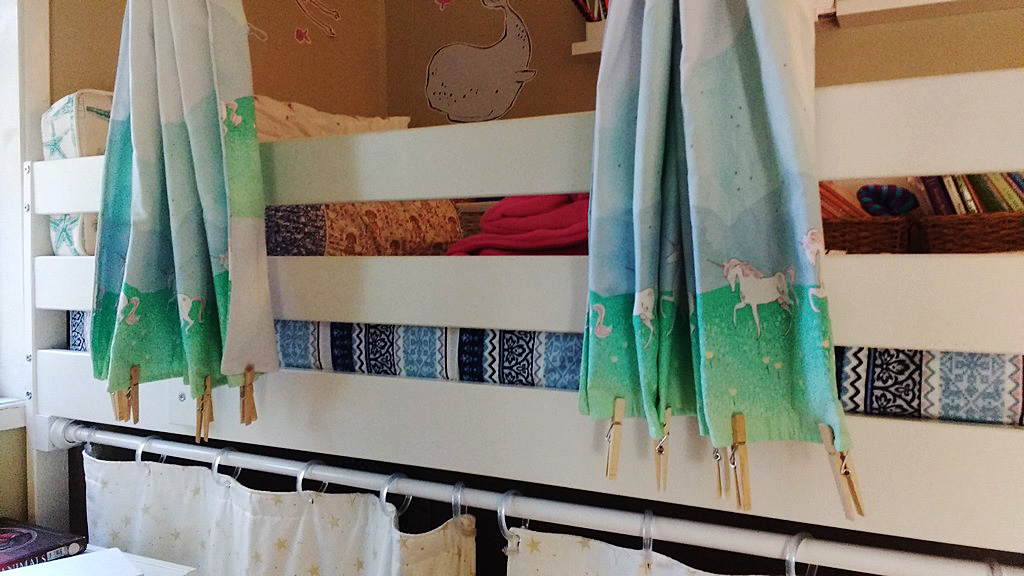
Train your curtains
My daughter wanted to be able to block out the light of the night lights we use in the room, but also wanted to easily be able to open and shut the curtains too. I took the time to carefully fold the curtains into the bunched position, using ribbon and clothespins to maintain them in that shape while I sewed curtain tie backs. I call this ‘training’ my curtains.
I took the time to carefully fold the curtains into the bunched position, using ribbon & clothespins to maintain them in that shape while I sewed curtain tie backs.
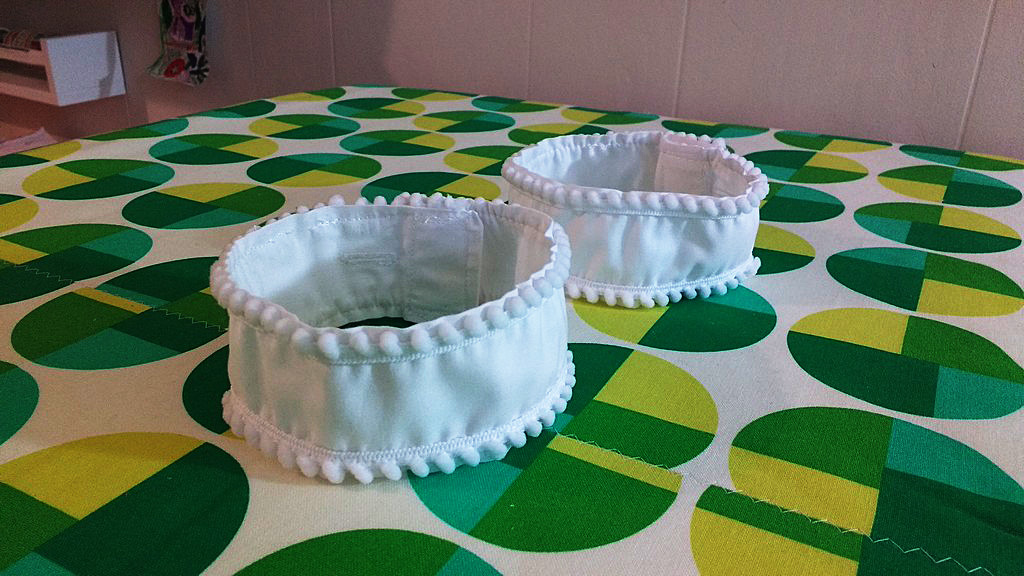
Then I sewed two curtain tie backs and added some mini pompoms for a bit of whimsy.
Then I sewed two curtain tie backs & added some mini pompoms for a bit of whimsy.
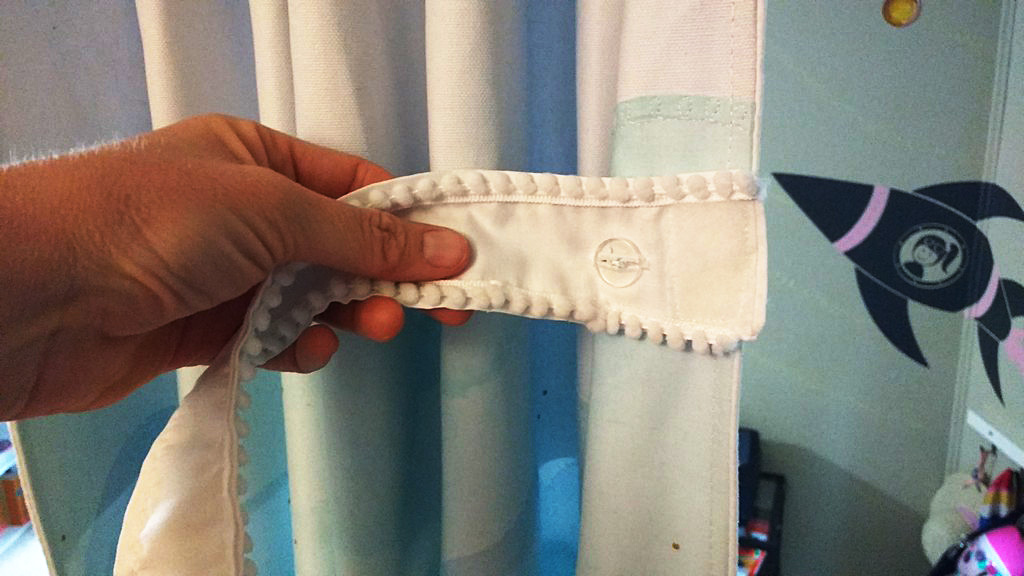
I knew that my daughter would lose them if I didn’t think of a way to keep the tie backs attached to the curtains so I sewed a buttonhole onto each tie back (you can read my post about how to sew buttonholes here). Next I climbed up into her bed and hand sewed a button onto the back panel of each curtain.
I knew that my daughter would lose them if I didn’t think of a way to keep the tie backs attached to the curtains so I sewed a buttonhole onto each tie back.
Next I climbed up into her bed and hand sewed a button onto the back panel of each curtain.
Then I connected the tie backs to the curtains via the button hole. Now she can bunch the curtains to open them, wrapping the tie back around them and securing them with the Velcro I sewed on the tie backs. And when she wants to close them for privacy or to shut out the light, she just releases the Velcro and the tie backs remain attached to the curtains.
When she wants to close them for privacy or to shut out the light, she just releases the Velcro & the tie backs remain attached to the curtains.
And I have a very happy six year old! Have you made your own bunk bed curtains? Tell us about it in comments!
Now I have a very happy six year old!
Have you made your own bunk bed curtains? Tell us about it in comments!
———————————————————————————– Charlotte Kaufman is a writer and sewist in Mammoth Lakes, California. She specializes in marine and home interiors and continues to fall more and more in love with quilting. You can follow her at charlottekaufman.com.
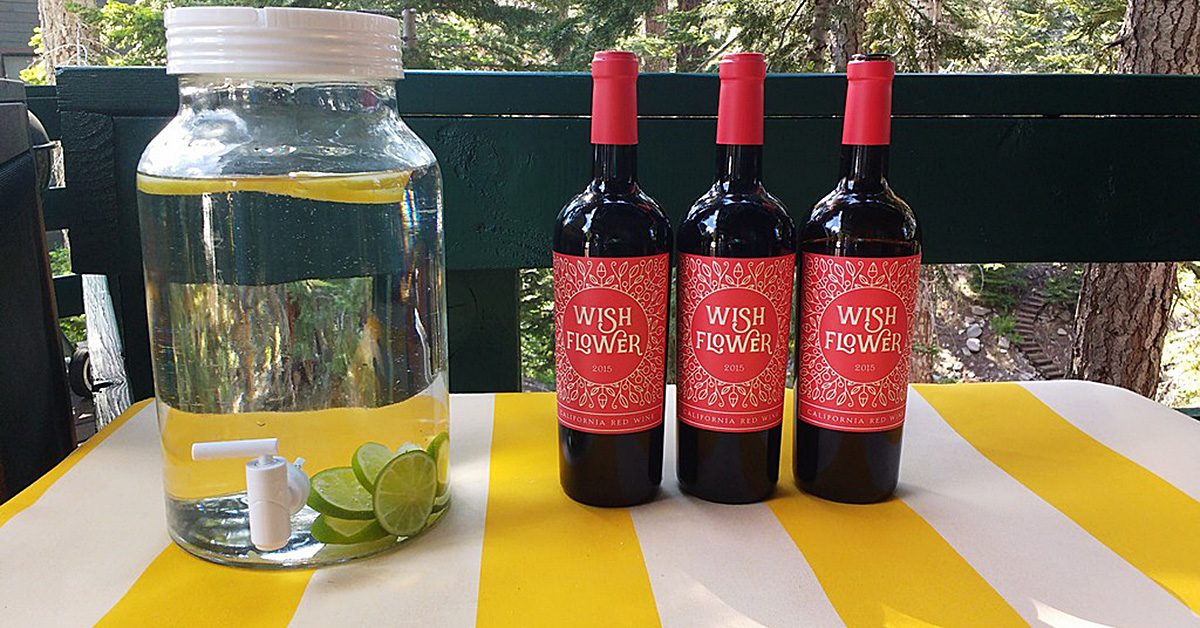
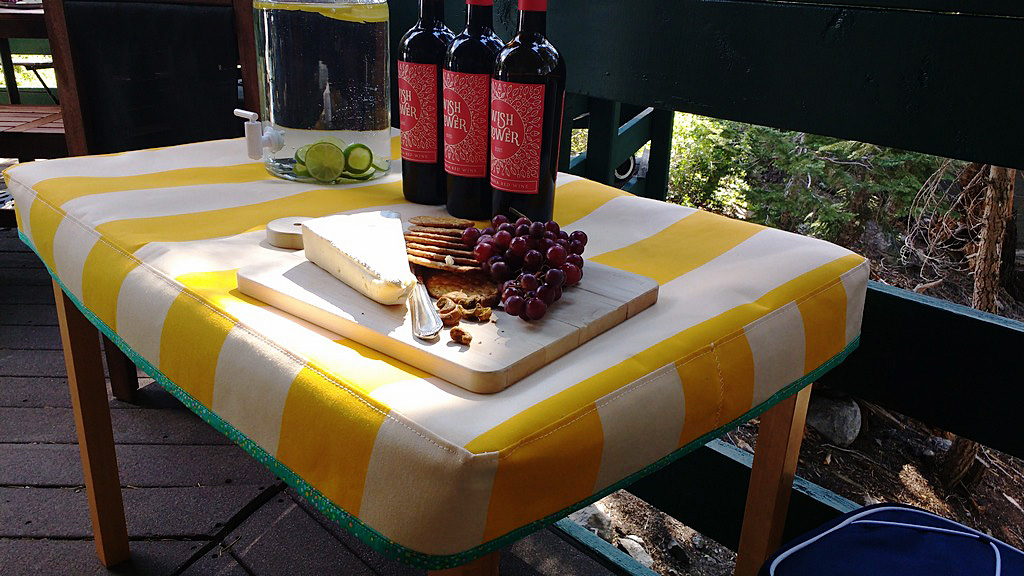
I would need a place to serve the hot lasagnas we had ordered.
This weekend I hosted 17 women at my home for a women’s writing workshop with bestselling author, Amy Ferris. We had lunch each day and we ate outside on my lower deck. Lunch was catered and I knew I would need a place to serve the hot lasagnas we had ordered.
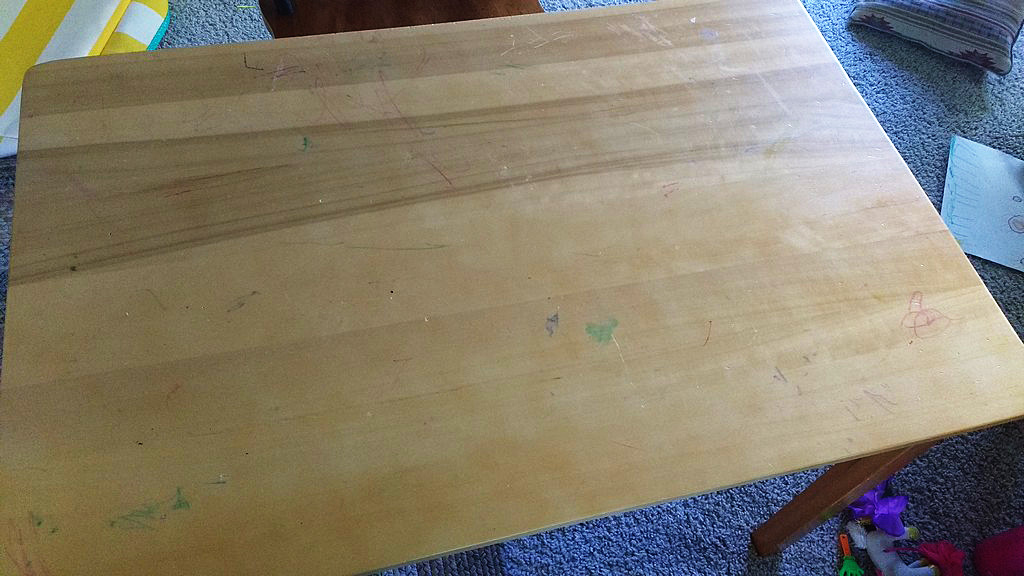
Enter my daughter’s art table: I thought it would be perfect for staging food on the deck but it’s covered in marks and squiggles and I didn’t want hot food to hurt its surface. I’ve been on a role using up my Sunbrella stash (you can read about the outdoor Sunbrella pillows I recently made here and here.) So I dug into my Sunbrella stash again.
Enter my daughter’s art table.
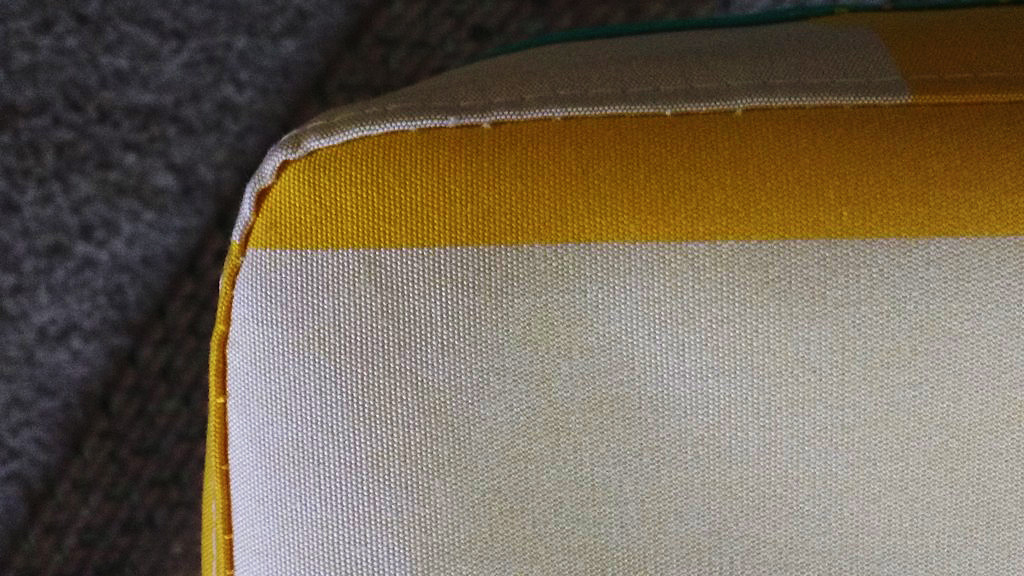
This wide striped yellow Sunbrella fabric was a perfect choice. Sunbrella is water resistant and stain resistant. I also had some Insul-Brite batting in my stash too. Insul-Brite is amazing and is what home sewers use to make DIY pot holders and ironing boards.
To get started, I turned the table over and used it to make a pattern on the fabric.
This wide striped yellow Sunbrella fabric was a perfect choice.
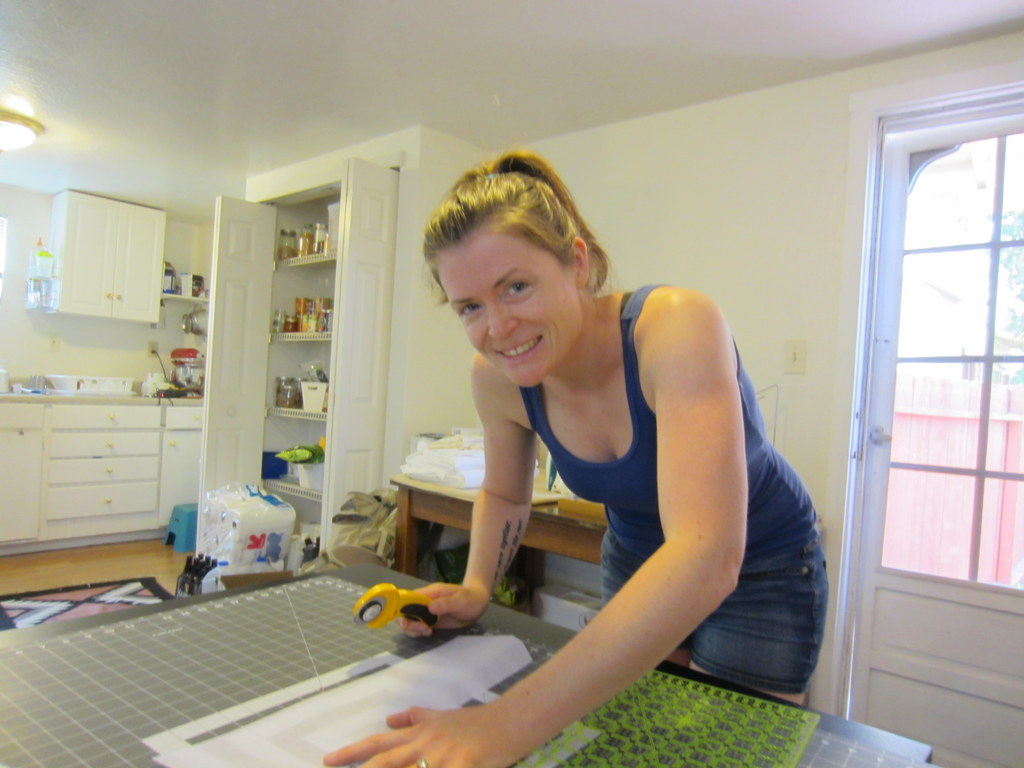
I used a ½” seam around the pattern. I also only had one yard of the fabric so on the remaining portion I had to do some math to make sure I had enough left to make strips for the sides of the table cloth. I figured out that I could do three strips at 4.25” each. I cut out the tablecloth top and the strips with a hot knife.
I used a ½” seam around the pattern.
Next I joined the three strips together, opening the seams and finishing them with a zig zag stitch to help keep the joins as flat as possible.
Next I joined the three strips together.
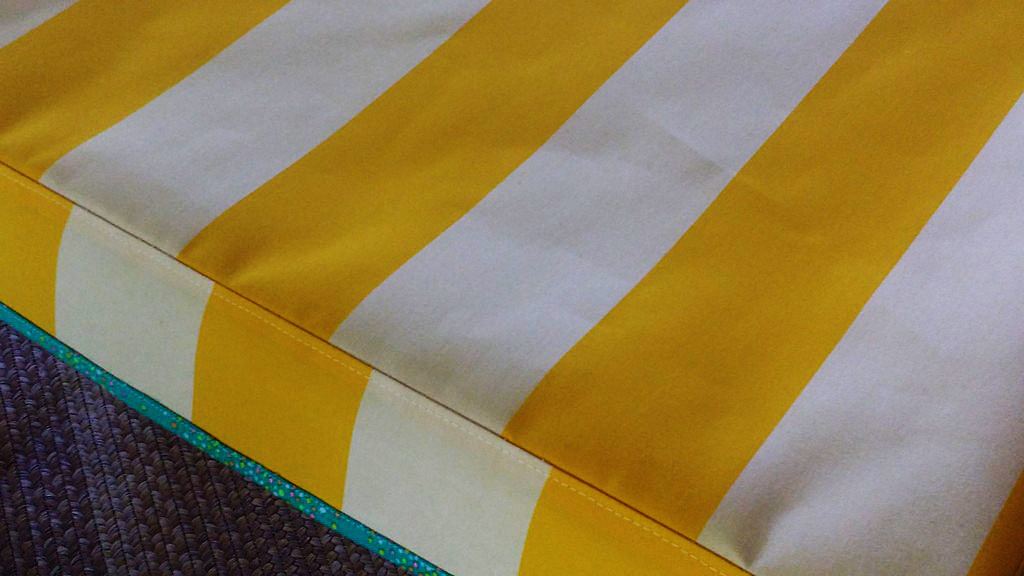
I really wanted to add pom pom trim but I didn’t have enough to go around the table cloth so I used some of this handmade trim I had from a quilt I made earlier.
I used some of this handmade trim I had from a quilt I made earlier.
How beautiful is that?
How beautiful is that?
Now that the side fabric had the trim attached, I busted out the Insul-Brite. You want to put the shinier side of the fabric toward the heat source. I cut out a piece that was slightly larger on all sides of the top of the tablecloth.
I cut out a piece that was slightly larger on all sides of the top of the tablecloth.
To attach the side piece to the top I made a sandwich of first the Insul-Brite, and then the Sunbrella top. The side piece went on top of the table cloth top, right sides together. Before I started I drew a ½” seam on the side piece so I knew I was sewing correctly to the pattern I’d created for the tablecloth top.
Before I started I drew a ½” seam on the side piece so I knew I was sewing correctly to the pattern I’d created for the tablecloth top.
Cut snips into the fabric as you go around the corners.
Cut snips into the fabric as you go around the corners.
When you get close to the other end of the trim, pull it off of the machine, join the two pieces and fold them back and forth, marking where they should be sewn together.
When you get close to the other end of the trim, pull it off of the machine.
Join the two pieces and fold them back & forth, marking where they should be sewn together.
When you have those marks, bring the top over to your machine and sew the join on the side piece.
When you have those marks, bring the top over to your machine & sew the join on the side piece.
Use your hot knife to trim the join. Then sew the rest of the side piece down to the tablecloth.
Use your hot knife to trim the join.
Next I tried it on the table to make sure I had it correctly sized. I had not yet trimmed any excess Insul-Brite. Here you can see both my darling daughter and that the tablecloth fits. What it is missing is topstitching. Topstitching is magical, not just for the finishing touch it gives but because it helps give support and structure.
Here you can see both my darling daughter & that the tablecloth fits.
I chose to topstitch on the side piece versus the top and fold the Insul-Brite down toward the sides.
I chose to topstitch on the side piece versus the top & fold the Insul-Brite down toward the sides.
That nice, clean line is exactly what will take this project to the next level.
That nice, clean line is exactly what will take this project to the next level.
Finally, I trimmed the Insul-Brite to match up with the seams and then used pinking shears on the corners where I had made snips to help prevent fraying.
I trimmed the Insul-Brite to match up with the seams & then used pinking shears on the corners where I had made snips to help prevent fraying.
Here’s what the finished piece looks like on the underneath.
Here’s what the finished piece looks like on the underneath.
Flipped over and on the table, you can see how much more snugly the tablecloth fits because of the topstitching.
Flipped over & on the table, you can see how much more snugly the tablecloth fits because of the topstitching.
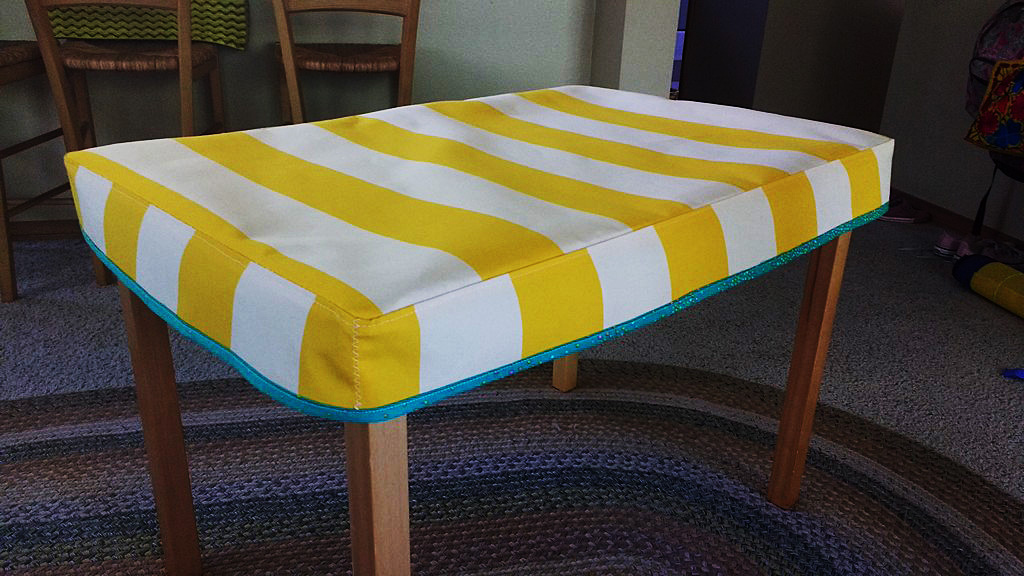
How darling is this?
How darling is this?
This is a quick pic of it inside.
This is a quick pic of it inside.
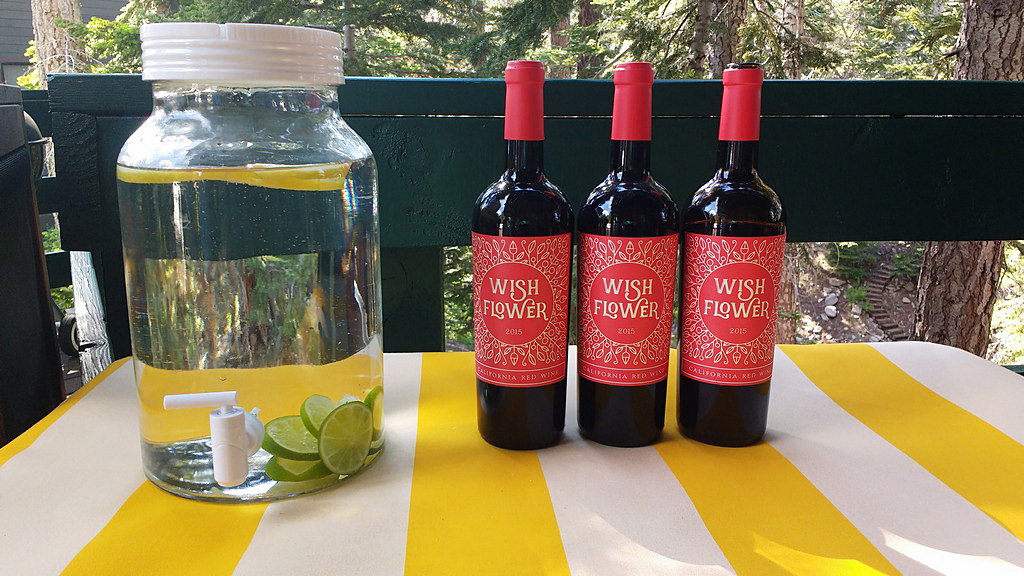
And at last, my idea worked out great on the deck where I served lasagna for my guests and later, cheese and wine. I love it when a project works out!
I love it when a project works out!
———————————————————————————– Charlotte Kaufman is a writer and sewist in Mammoth Lakes, California. She specializes in marine and home interiors and continues to fall more and more in love with quilting. You can follow her at charlottekaufman.com.
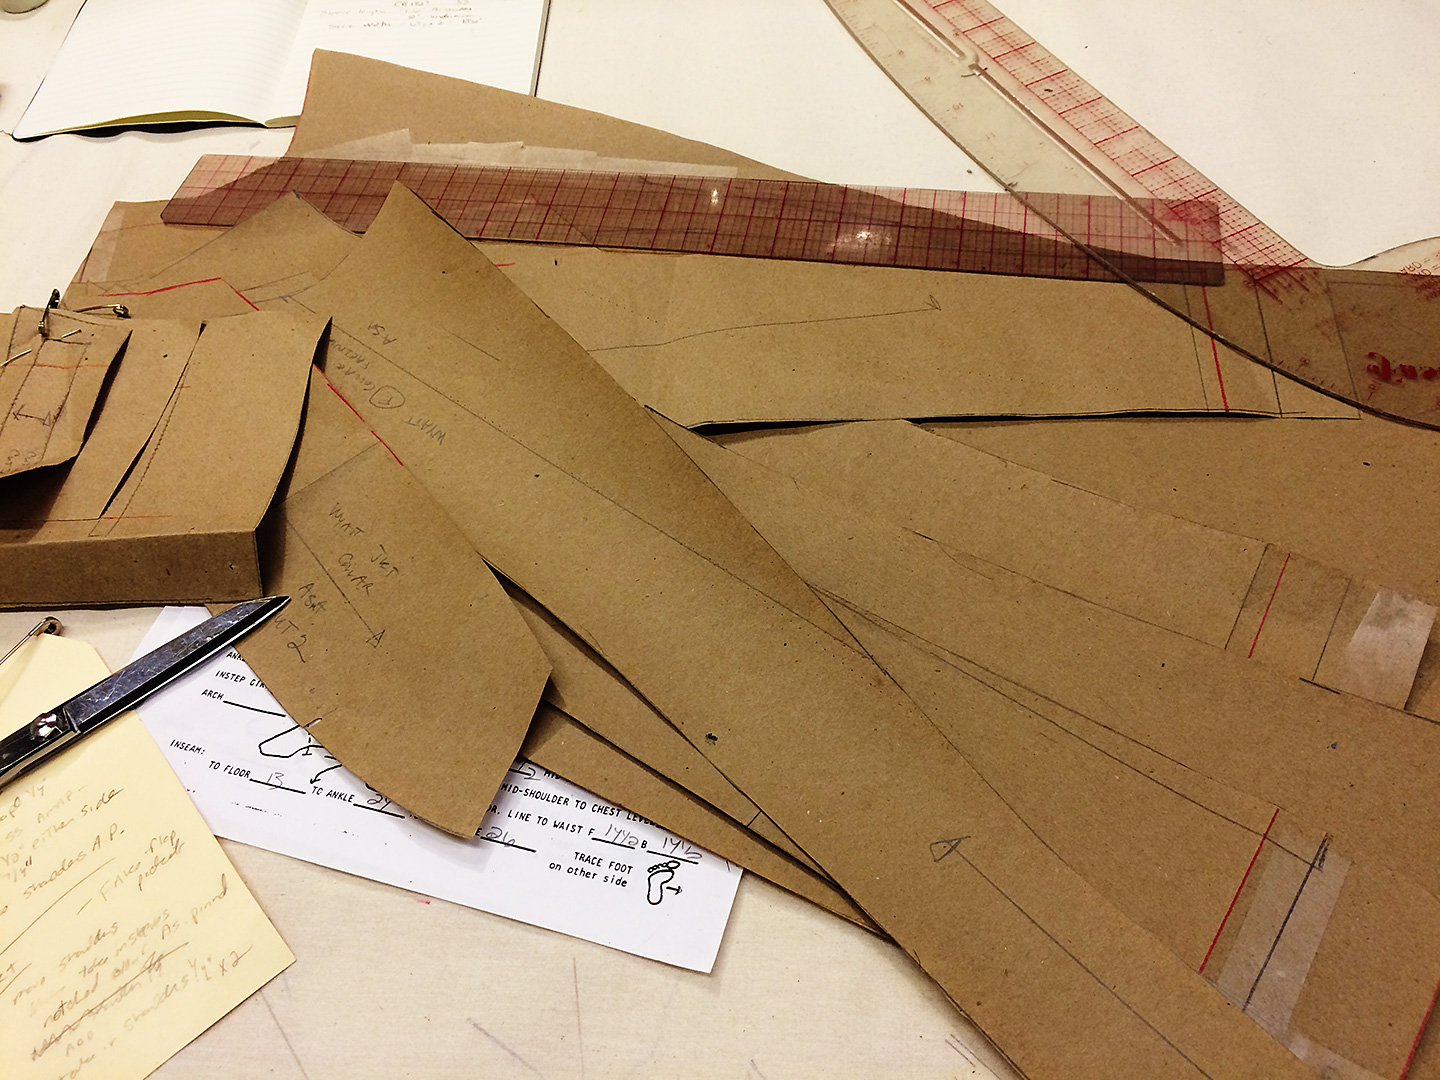
I spent part of last week flat patterning a period vest and coat for a ten year old actor for a new Amazon series based on the book Dangerous Book For Boys by Conn and Hal Iggulden.
Let’s get technical
Flat patterning is one of my most favorite things to do. It’s very mathematical & systematic.
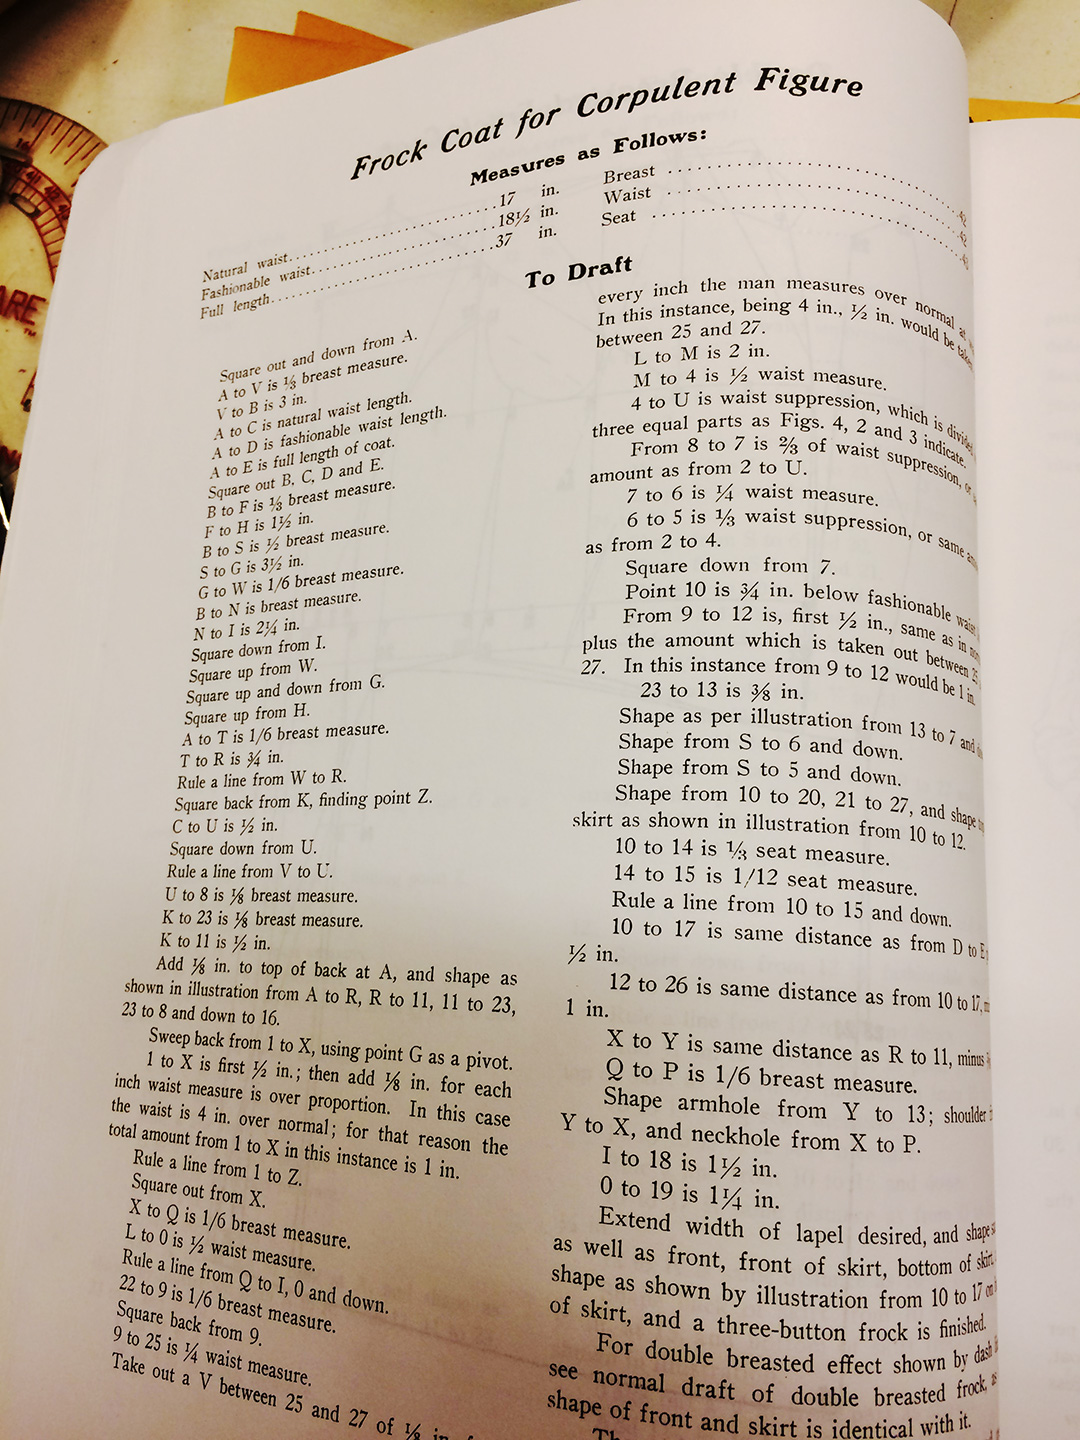
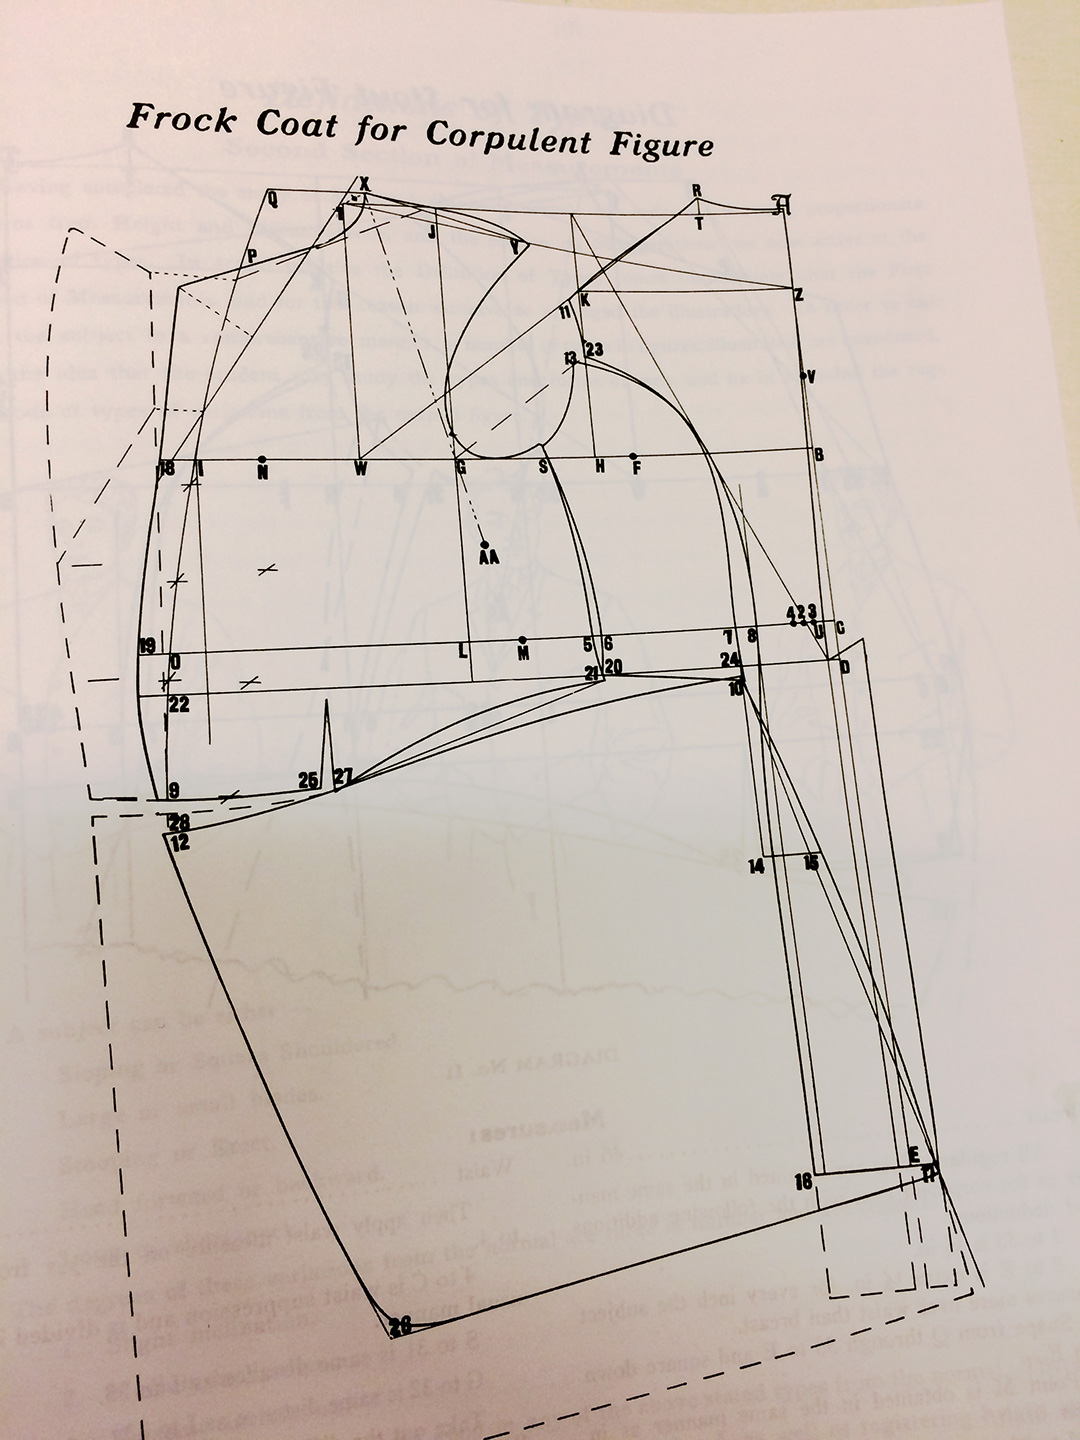
Flat patterning is one of my most favorite things to do. It’s very mathematical and systematic. I find it strangely soothing. Many people are intimidated by flat patterning and don’t think it’s something they would ever be able to do themselves. But, the thing about flat patterning is, if you’re good at following directions, anyone can do it.
Have you ever seen the opening sequence for the movie Tailor of Panama? In it, you see a hand drawing in chalk on a piece of fabric. The hand presumably belongs to the tailor who appears to be free handing the outline of a suit jacket front. Now, that’s something you probably won’t be able to do until you’ve drafted some thousands of suit jacket fronts but, flat patterning onto a piece of brown paper by following the instructions in a flat patterning system book is something you can do.
Take a look – it’s in a book
Every person who starts out flat patterning is following someone else’s directions on how to do so.
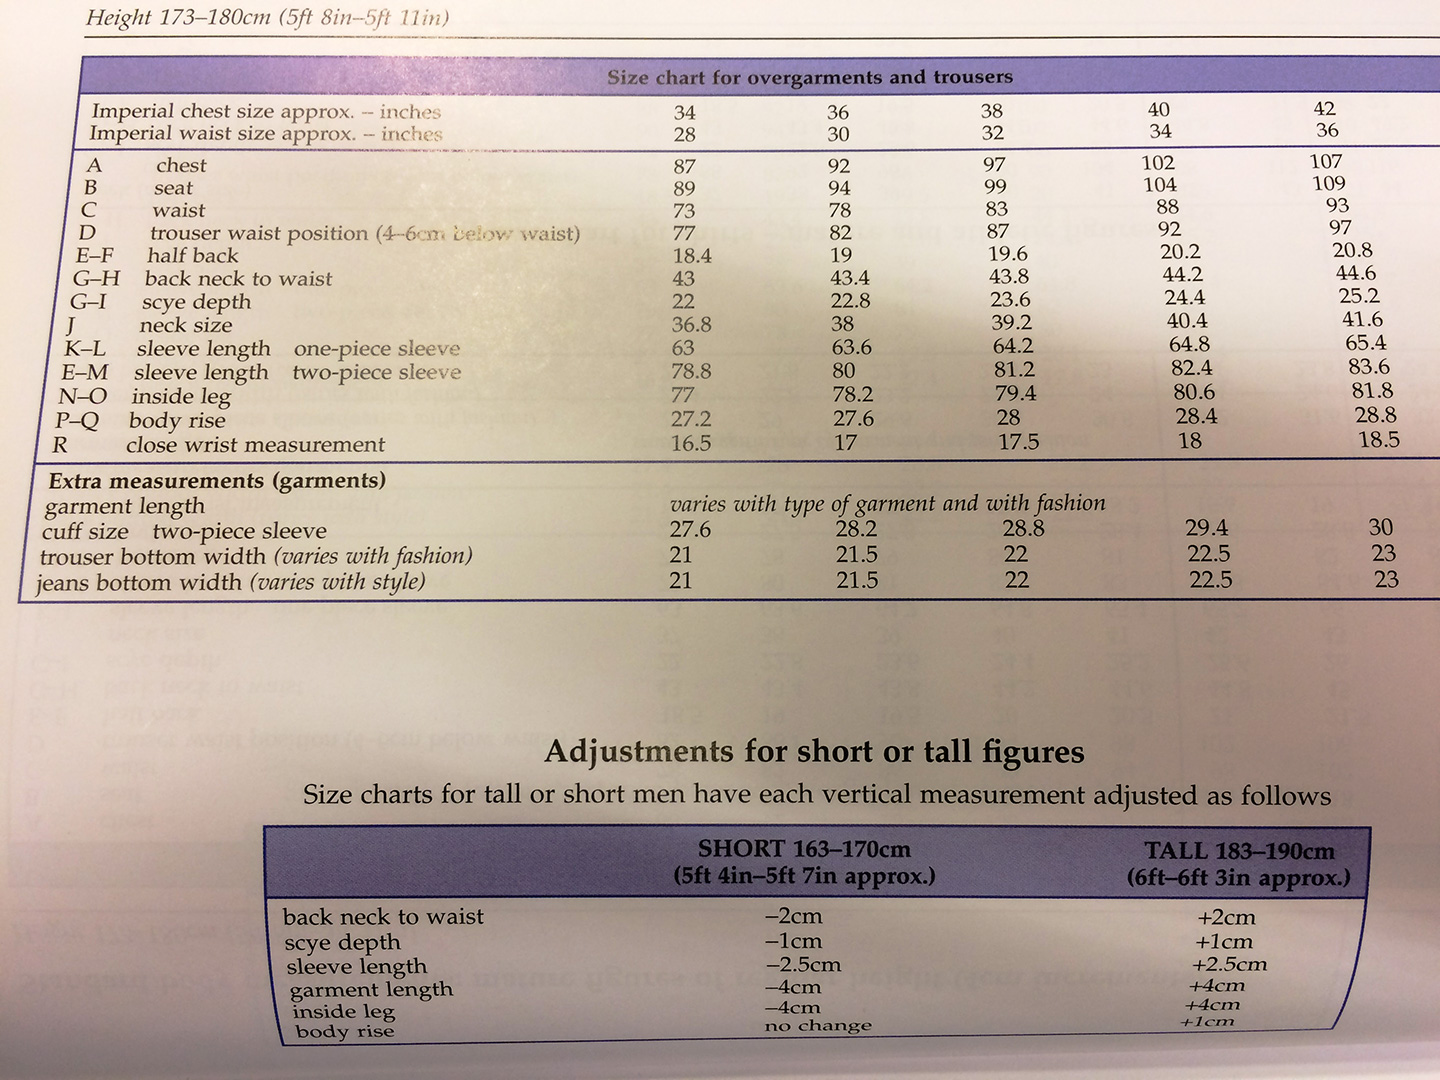
Every person who starts out flat patterning is following someone else’s directions on how to do so. If you take a flat patterning class you’ll work from whatever book the instructor likes. A flat patterning book provides step by step instructions for drawing specific pieces of clothing – things like draw a line equal to back neck to waist and square off from both ends (a and b).
What this means is you need to know the measurement from the neck to the waist of the person you’re drafting for. You can also use standardized measurement charts (which is how commercial patterns are made). Most flat patterning books include such charts, or you can do a search online for them. The instructions for drawing the pattern will continue with the labeling of points by letters using measurements. Directions will say things like: connect e and f with a curved line or mark a point 3/8″ from g and square out.
The right pattern book for the right job
Each flat patterning will produce slightly different results as they are each based on a system developed by the author. Some systems factor in more ease than others, depending on what period the clothing is. For instance, a book on flat patterning a man’s suit jacket from the 1880s will produce a garment different than one written for patterning contemporary men’s suit jackets.
You can also use standardized measurement charts (which is how commercial patterns are made).
So, how do you know which book to work from? It honestly doesn’t matter all that much when you’re first starting out. But as you get more comfortable with it, you can try different books to see what end results you like better.
One of my most favorite patterning books is Dress Design: Draping and Flat Patterning Method by Hillhouse and Mansfield. The book, written in 1948, gives instructions for a variety of really cool 1940s dresses and suits. It’s not always useful if I’m making something that isn’t a 1940s garment but it’s a wonderful book to study and try out different techniques.
Some other excellent patterning books that are used often in colleges are Norma R. Hollin’sPattern Making by the Flat Pattern Method and Designing Apparel through the Flat Pattern by Rolfo, Kopp, Gross, and Zelin.
I also like Metric Pattern Cutting books by Winifred Aldrich, though these do require being able to convert your measurements into the metric system. Some pattern makers believe that the metric system allows for increased accuracy when patterning.
Pattern Making by Tomoko Nakamichi is a creative non-traditional approach to patterning and gives instructions for unique geometric Japanese garments.
Tools
A few other tools that are handy to have when you’re flat patterning are a clear see-through ruler, a curved ruler, & an L-shaped ruler.
A few other tools that are handy to have when you’re flat patterning are a clear see-through ruler, a curved ruler, and an L-shaped ruler.
Most pattern makers use a regular old pencil to draft the initial pattern. If they need to go back and make corrections, they’ll often use a red or blue pencil so they’ll know which line is the new line. I, personally, am a fan of the red pencil for corrections as it’s easier to see than a blue one.
If you’ve been wanting to try your hand at flat patterning but didn’t know where to start now’s the time to get yourself a book and start learning! If you don’t want to purchase a book (some of them can be quite expensive), check out your local library. You can, also, of course find used pattern books on Ebay – just don’t get too caught up in auction frenzy and pay too much.
The hot weather means flowing, loose clothes that keep you cool while flattering your body. For me, it also means it’s time to sew! Sundresses are some of my favorite things to make. I’ve lost count of how many I’ve made over the years – most of them I still wear! The key to success with making a sundress is choosing the right pattern. The right sundress pattern will flatter your body.
Think About What You Want to Accentuate
We all have things about our bodies we like…and things we don’t. Start by thinking about the things you like about your body. Great legs? Go with a shorter length dress. Love your flat stomach? Make sure the dress is fitted at the waist. Adore your curves? Don’t be afraid to show them off with some well-placed darts. Keep all of these things in mind as you search for your sundress pattern. It’s easy to get pulled into a pattern that looks great on the package or model, but by keeping in mind what flatters YOUR body, you’ll be able to set aside any that won’t work.
Figure Out What You Want to Cover Up
Now, think about those parts of your body you want to cover up. Tummy not as flat as it used to be? Try an empire waist to accentuate other curves and avoid the cling around your stomach. Wish you were a little less curvy? Try something loose and flowy with material to match. Wish your legs were longer or skinnier? Go with a long sundress.
Pro tip: If you don’t like your arms, add a sheer shawl to the ensemble. Some patterns even come with the shawl included.
Match Your Skill Level
When you’ve determined the style of sundress you want to make based on your body and what you like and dislike about it, look at patterns that match your sewing skill level. You’ll find that using these three factors it’s easy to narrow down your sundress pattern options to a manageable number. Then, pick the one you like best and hit the fabric aisles!
Every sundress I’ve made from a pattern chosen this way is one I still wear. Sundresses where I picked the pattern simply because I liked it and didn’t think about my body or my abilities were worn once, at best, and discarded. No one wants to see that happen after the effort of making a sundress. Instead, make a sundress you’ll love to wear using these simple steps to pick your pattern.
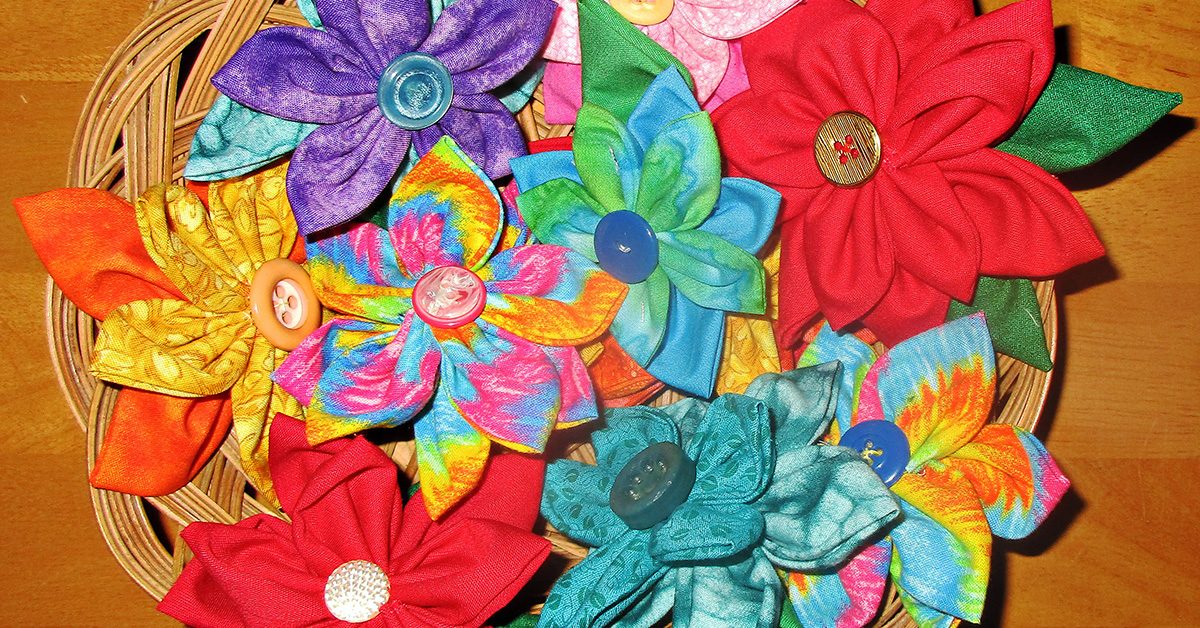
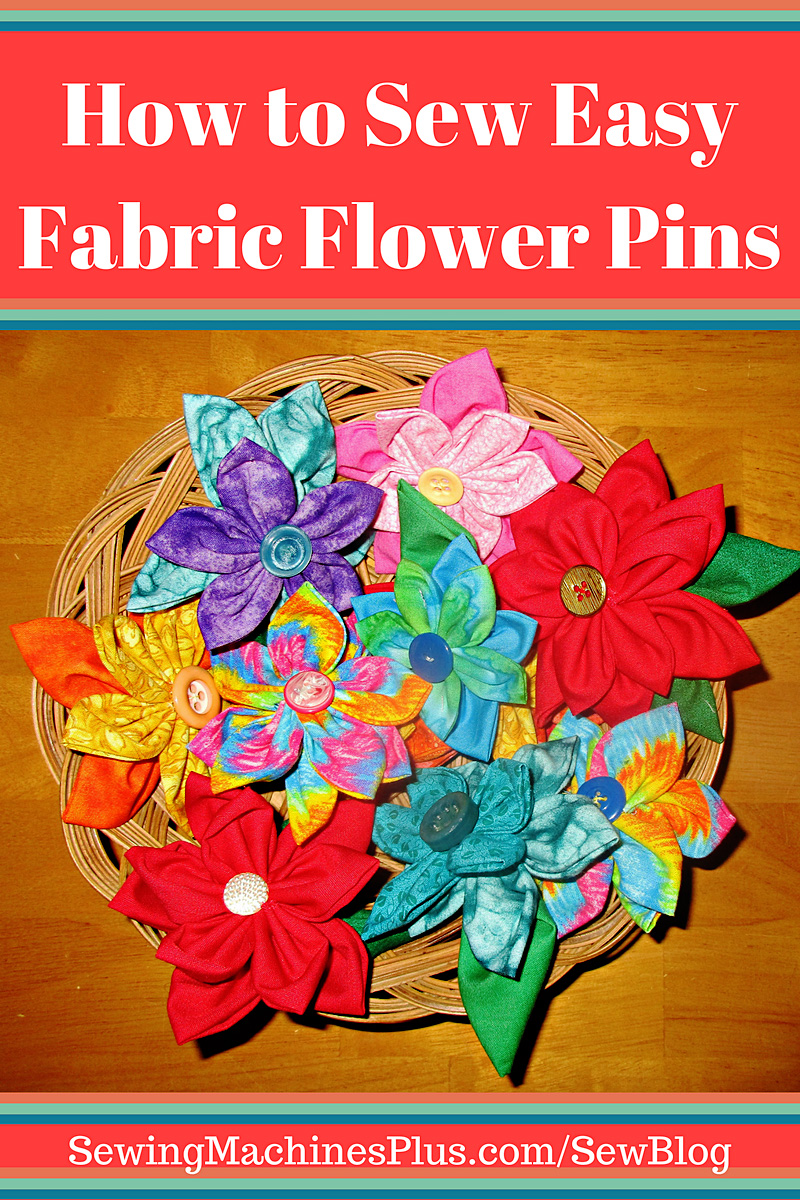
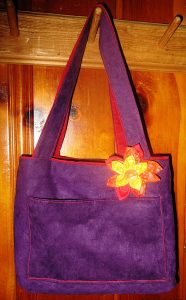
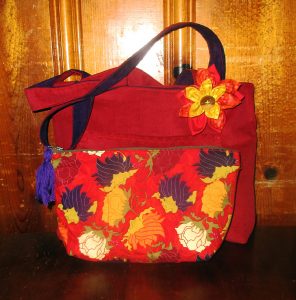
I wanted to make a fabric flower pin to dress up and bring together the complementary colors on a reversible tote bag I made for my mother-in-law’s Christmas gift.
These fall colors are her favorites.
I think they look great together.
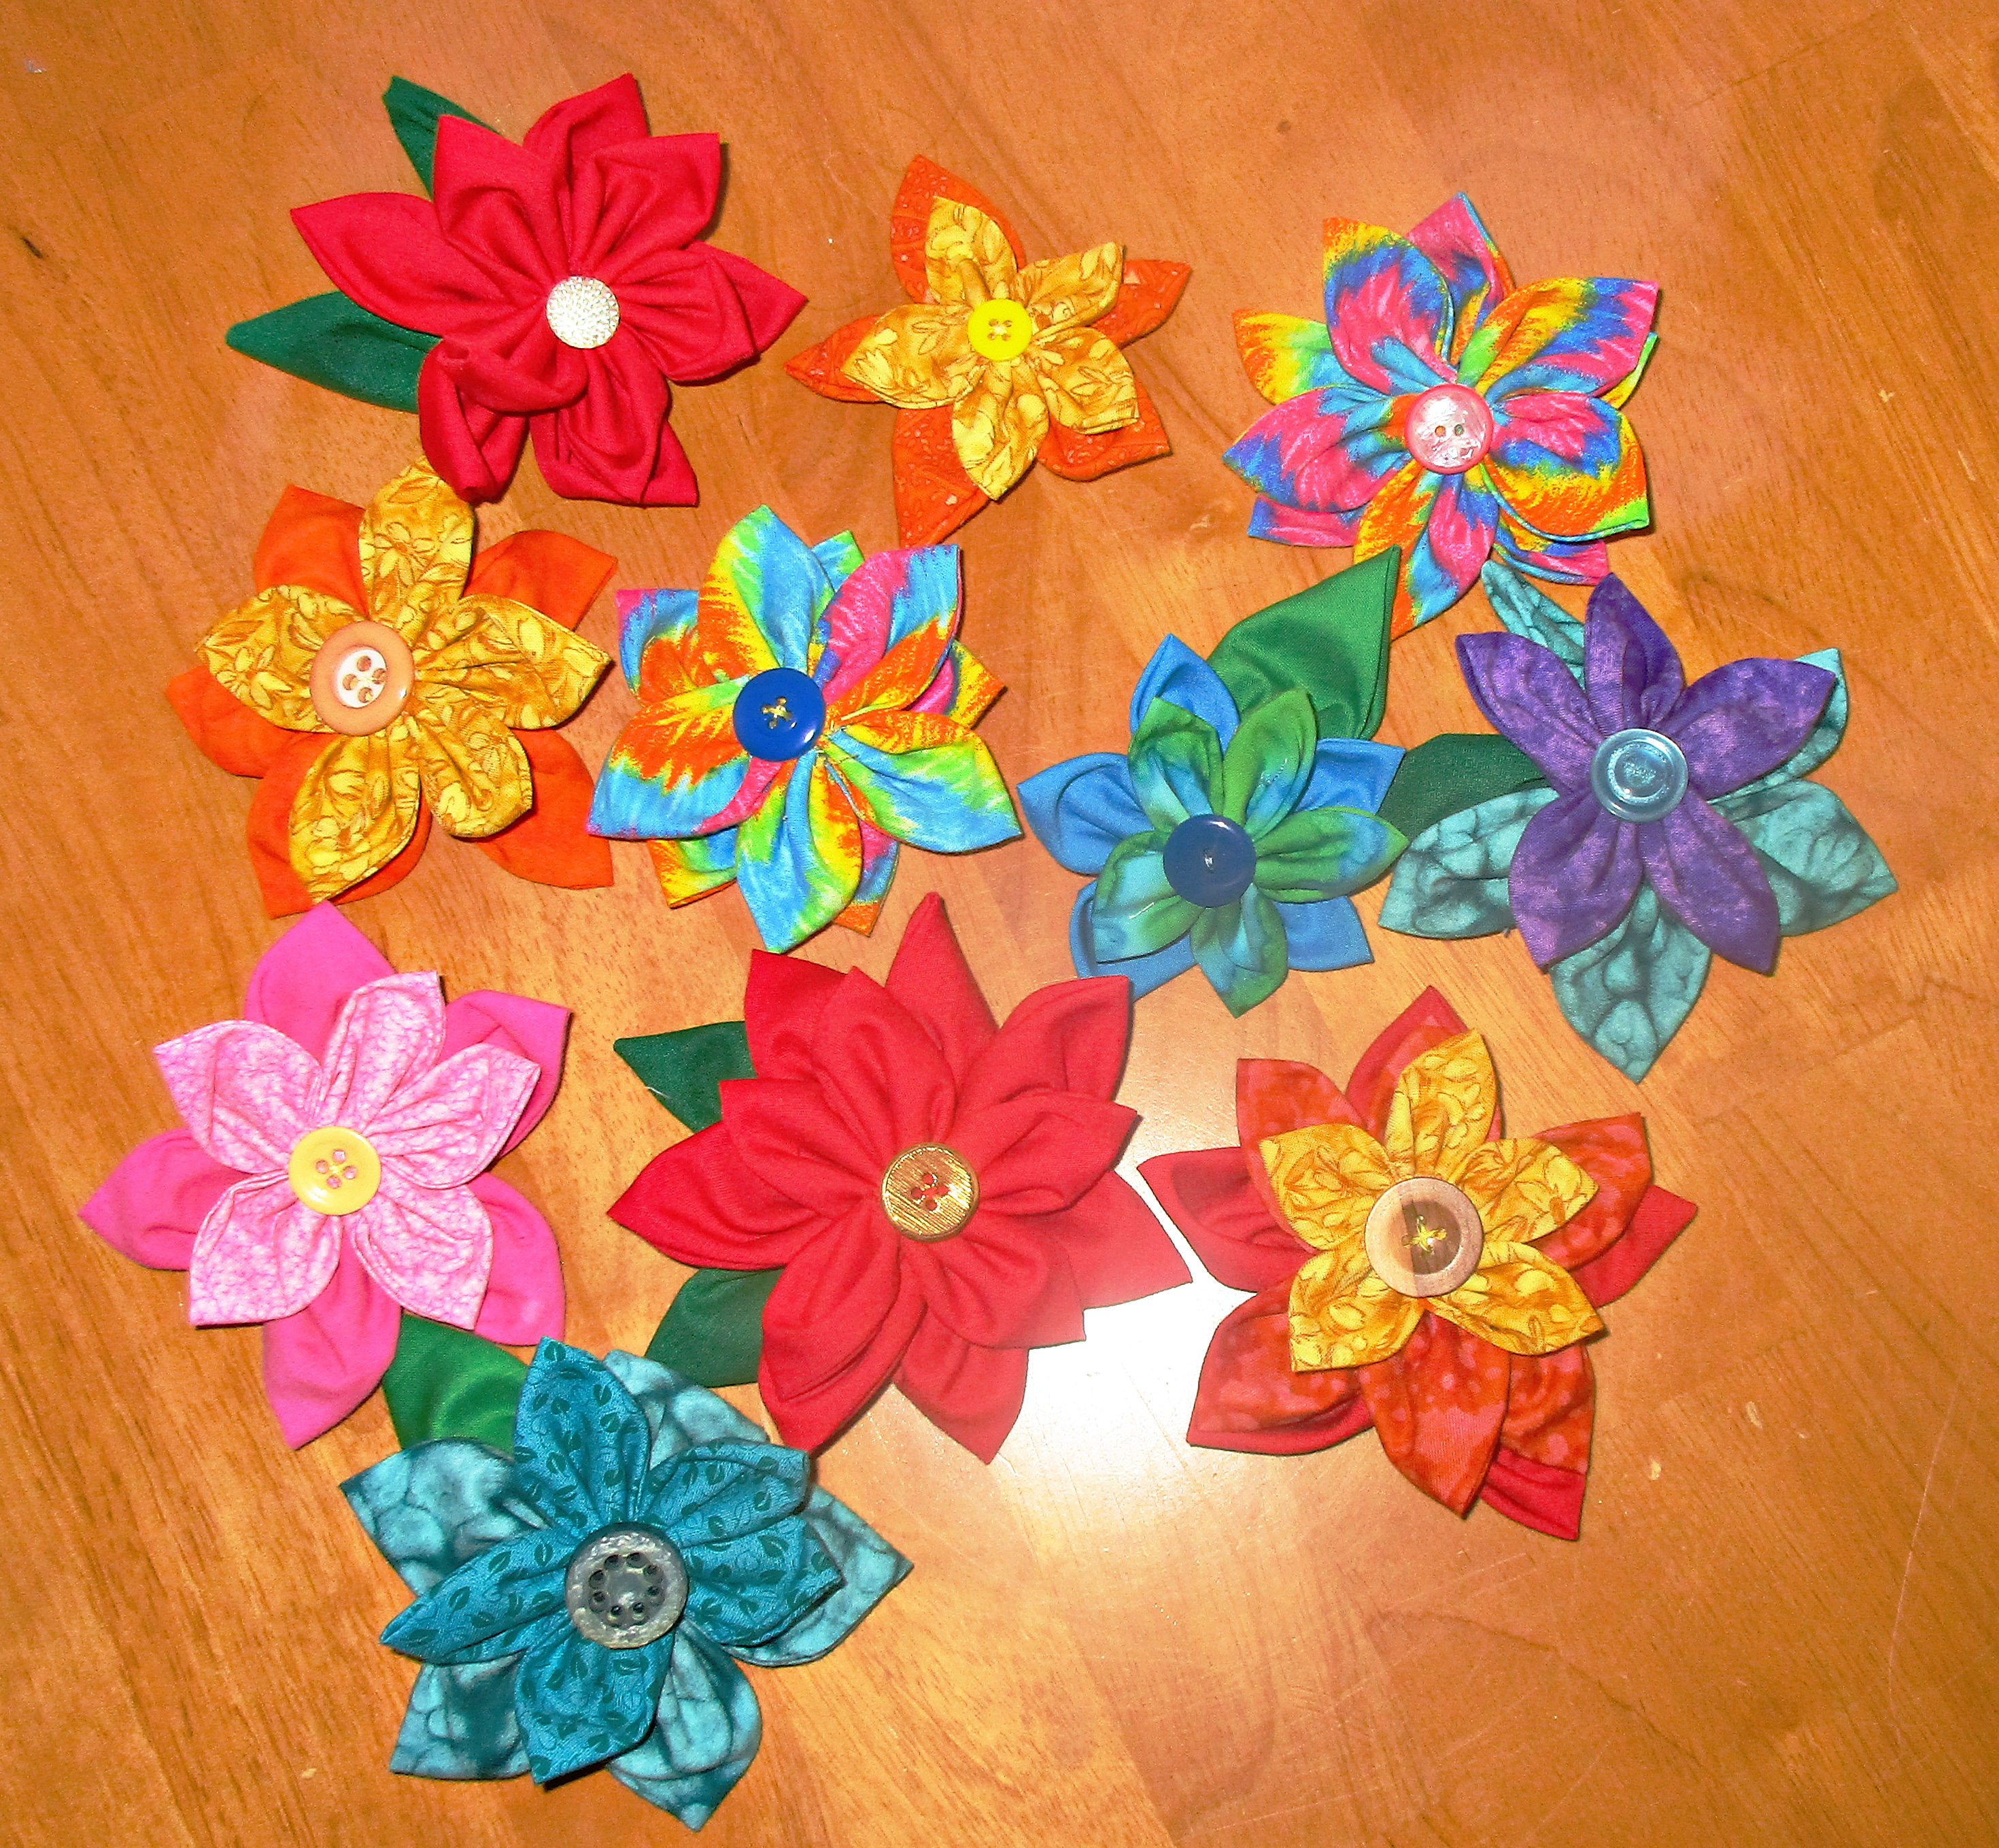
Yes, I’m getting a head start on my Christmas making now. And that’s why, when I loved the flower I made for her bag, I kept going and made a bunch of these pretty flowers. I kept my favorite of the bunch for my hair, and the rest are for gifts.
You could sew these directly onto a ponytail elastic, barrette, headband, clip, clothing, or bag, but I opted to make them more versatile by sewing them onto small brooch pins, which I can then pin on my hair elastic, hat, or bag.
Who can make a flower?
While making these, I had a sweet memory of my great grandmother, Lucy, who was a Sunday school teacher and loved nothing more than hearing children sing. Of all the songs she taught us, my favorite was always this one:
“Oh, who can make a flower?
I’m sure I can’t, can you?
Oh, who can make a flower?
Only God, it’s true.”
While these aren’t the real thing, I sure felt happy while creating these fabric flowers and thinking of this old song and Grandmother Lucy. I hope you enjoy making them, too.
How to sew fabric flower pins
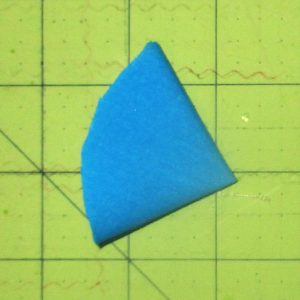
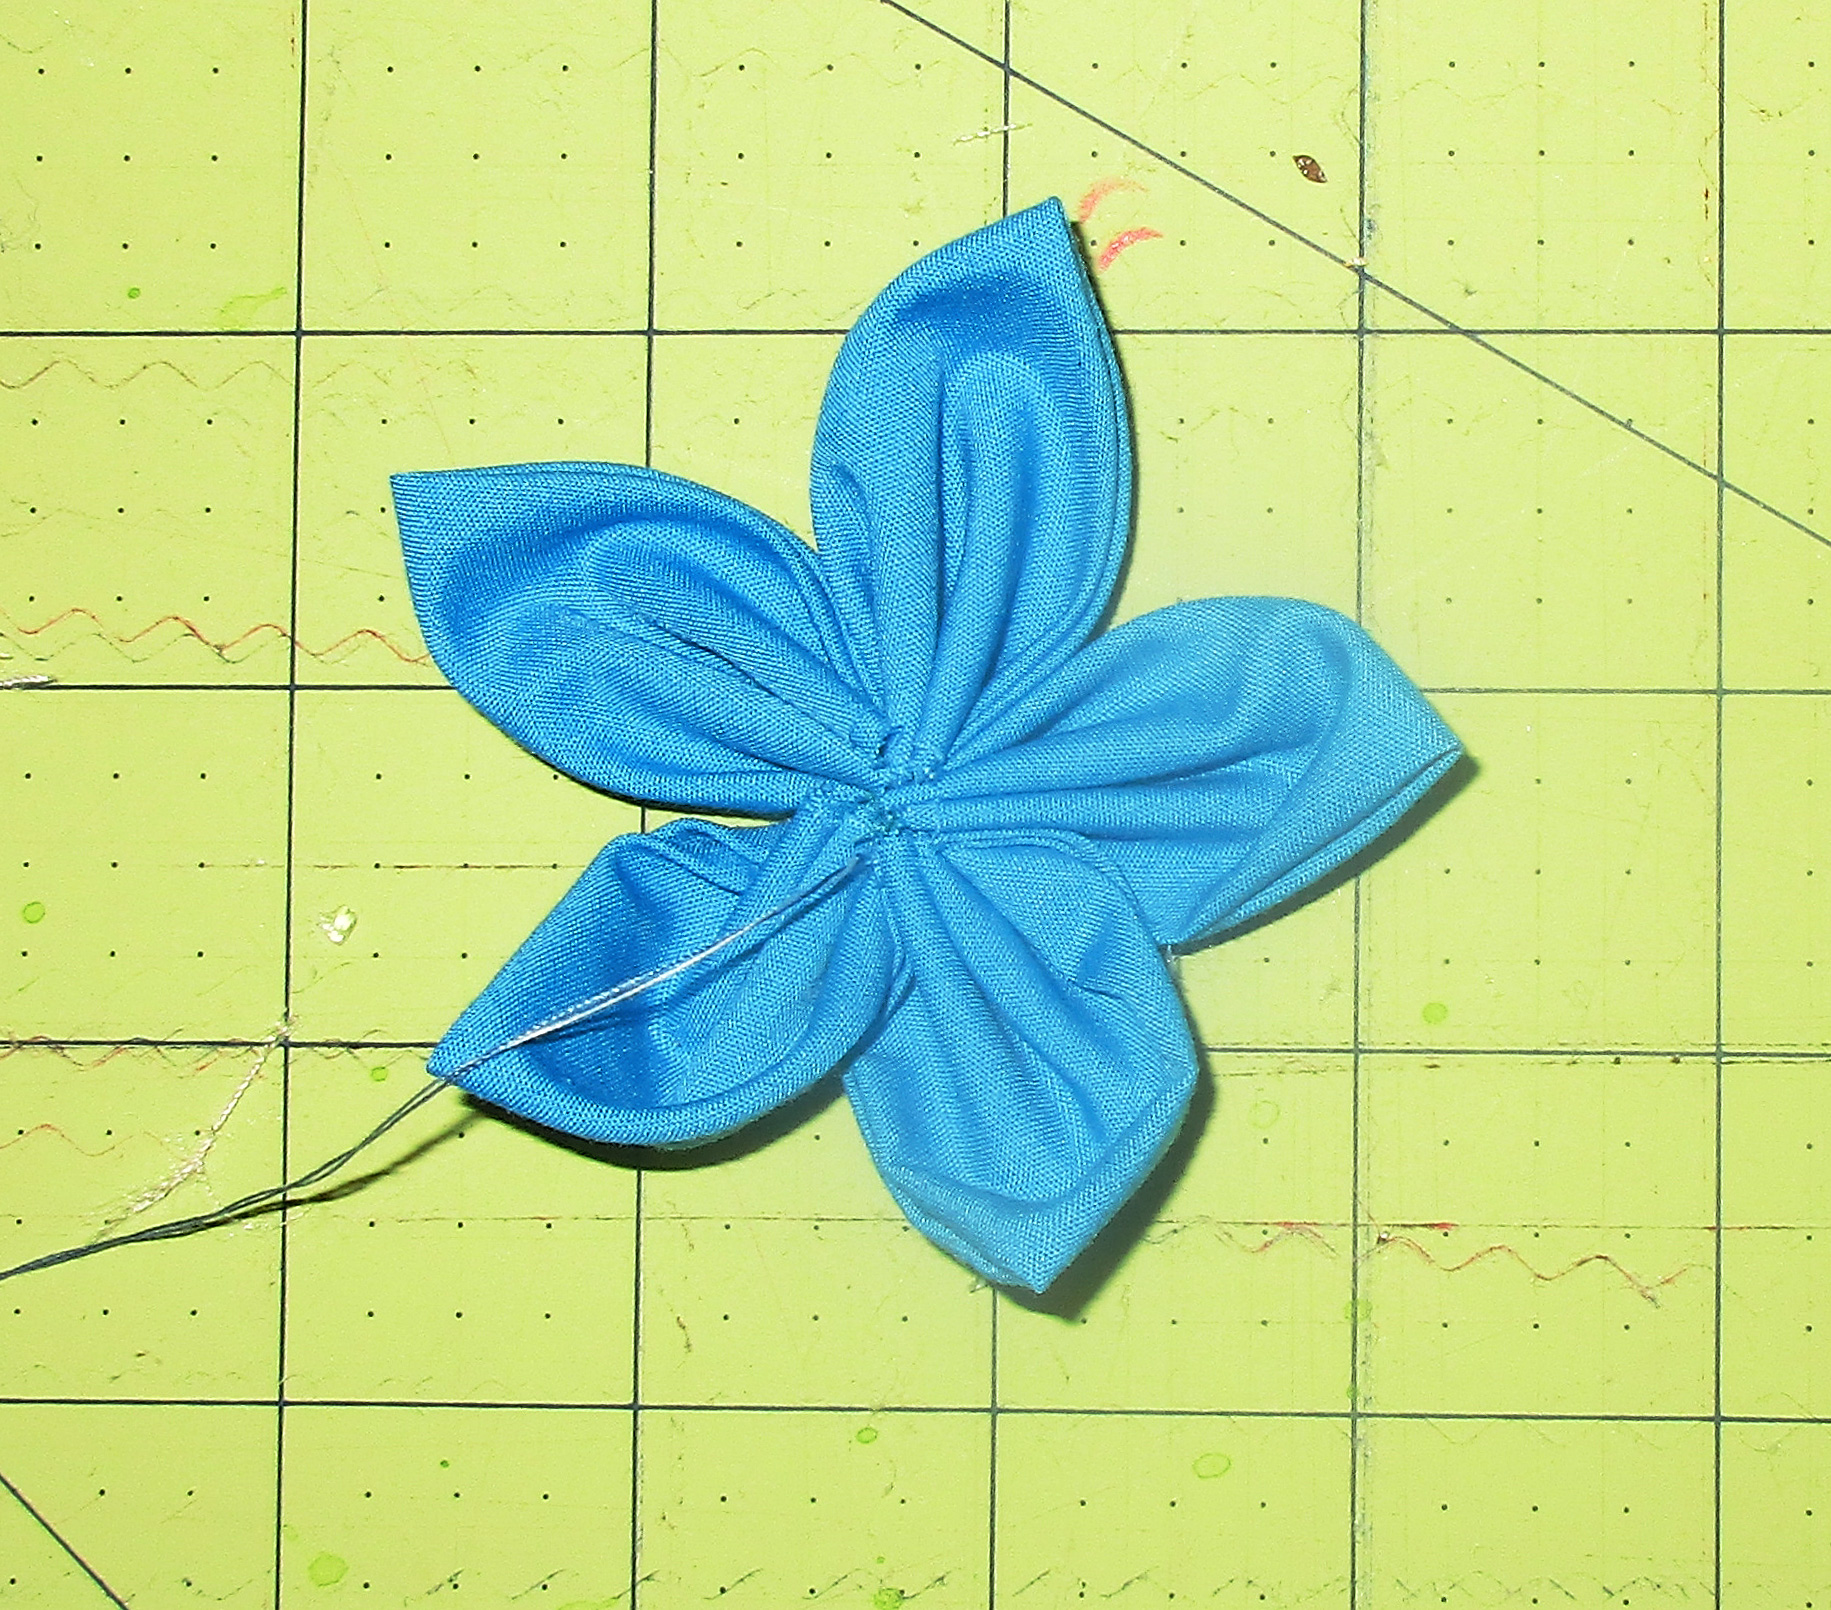
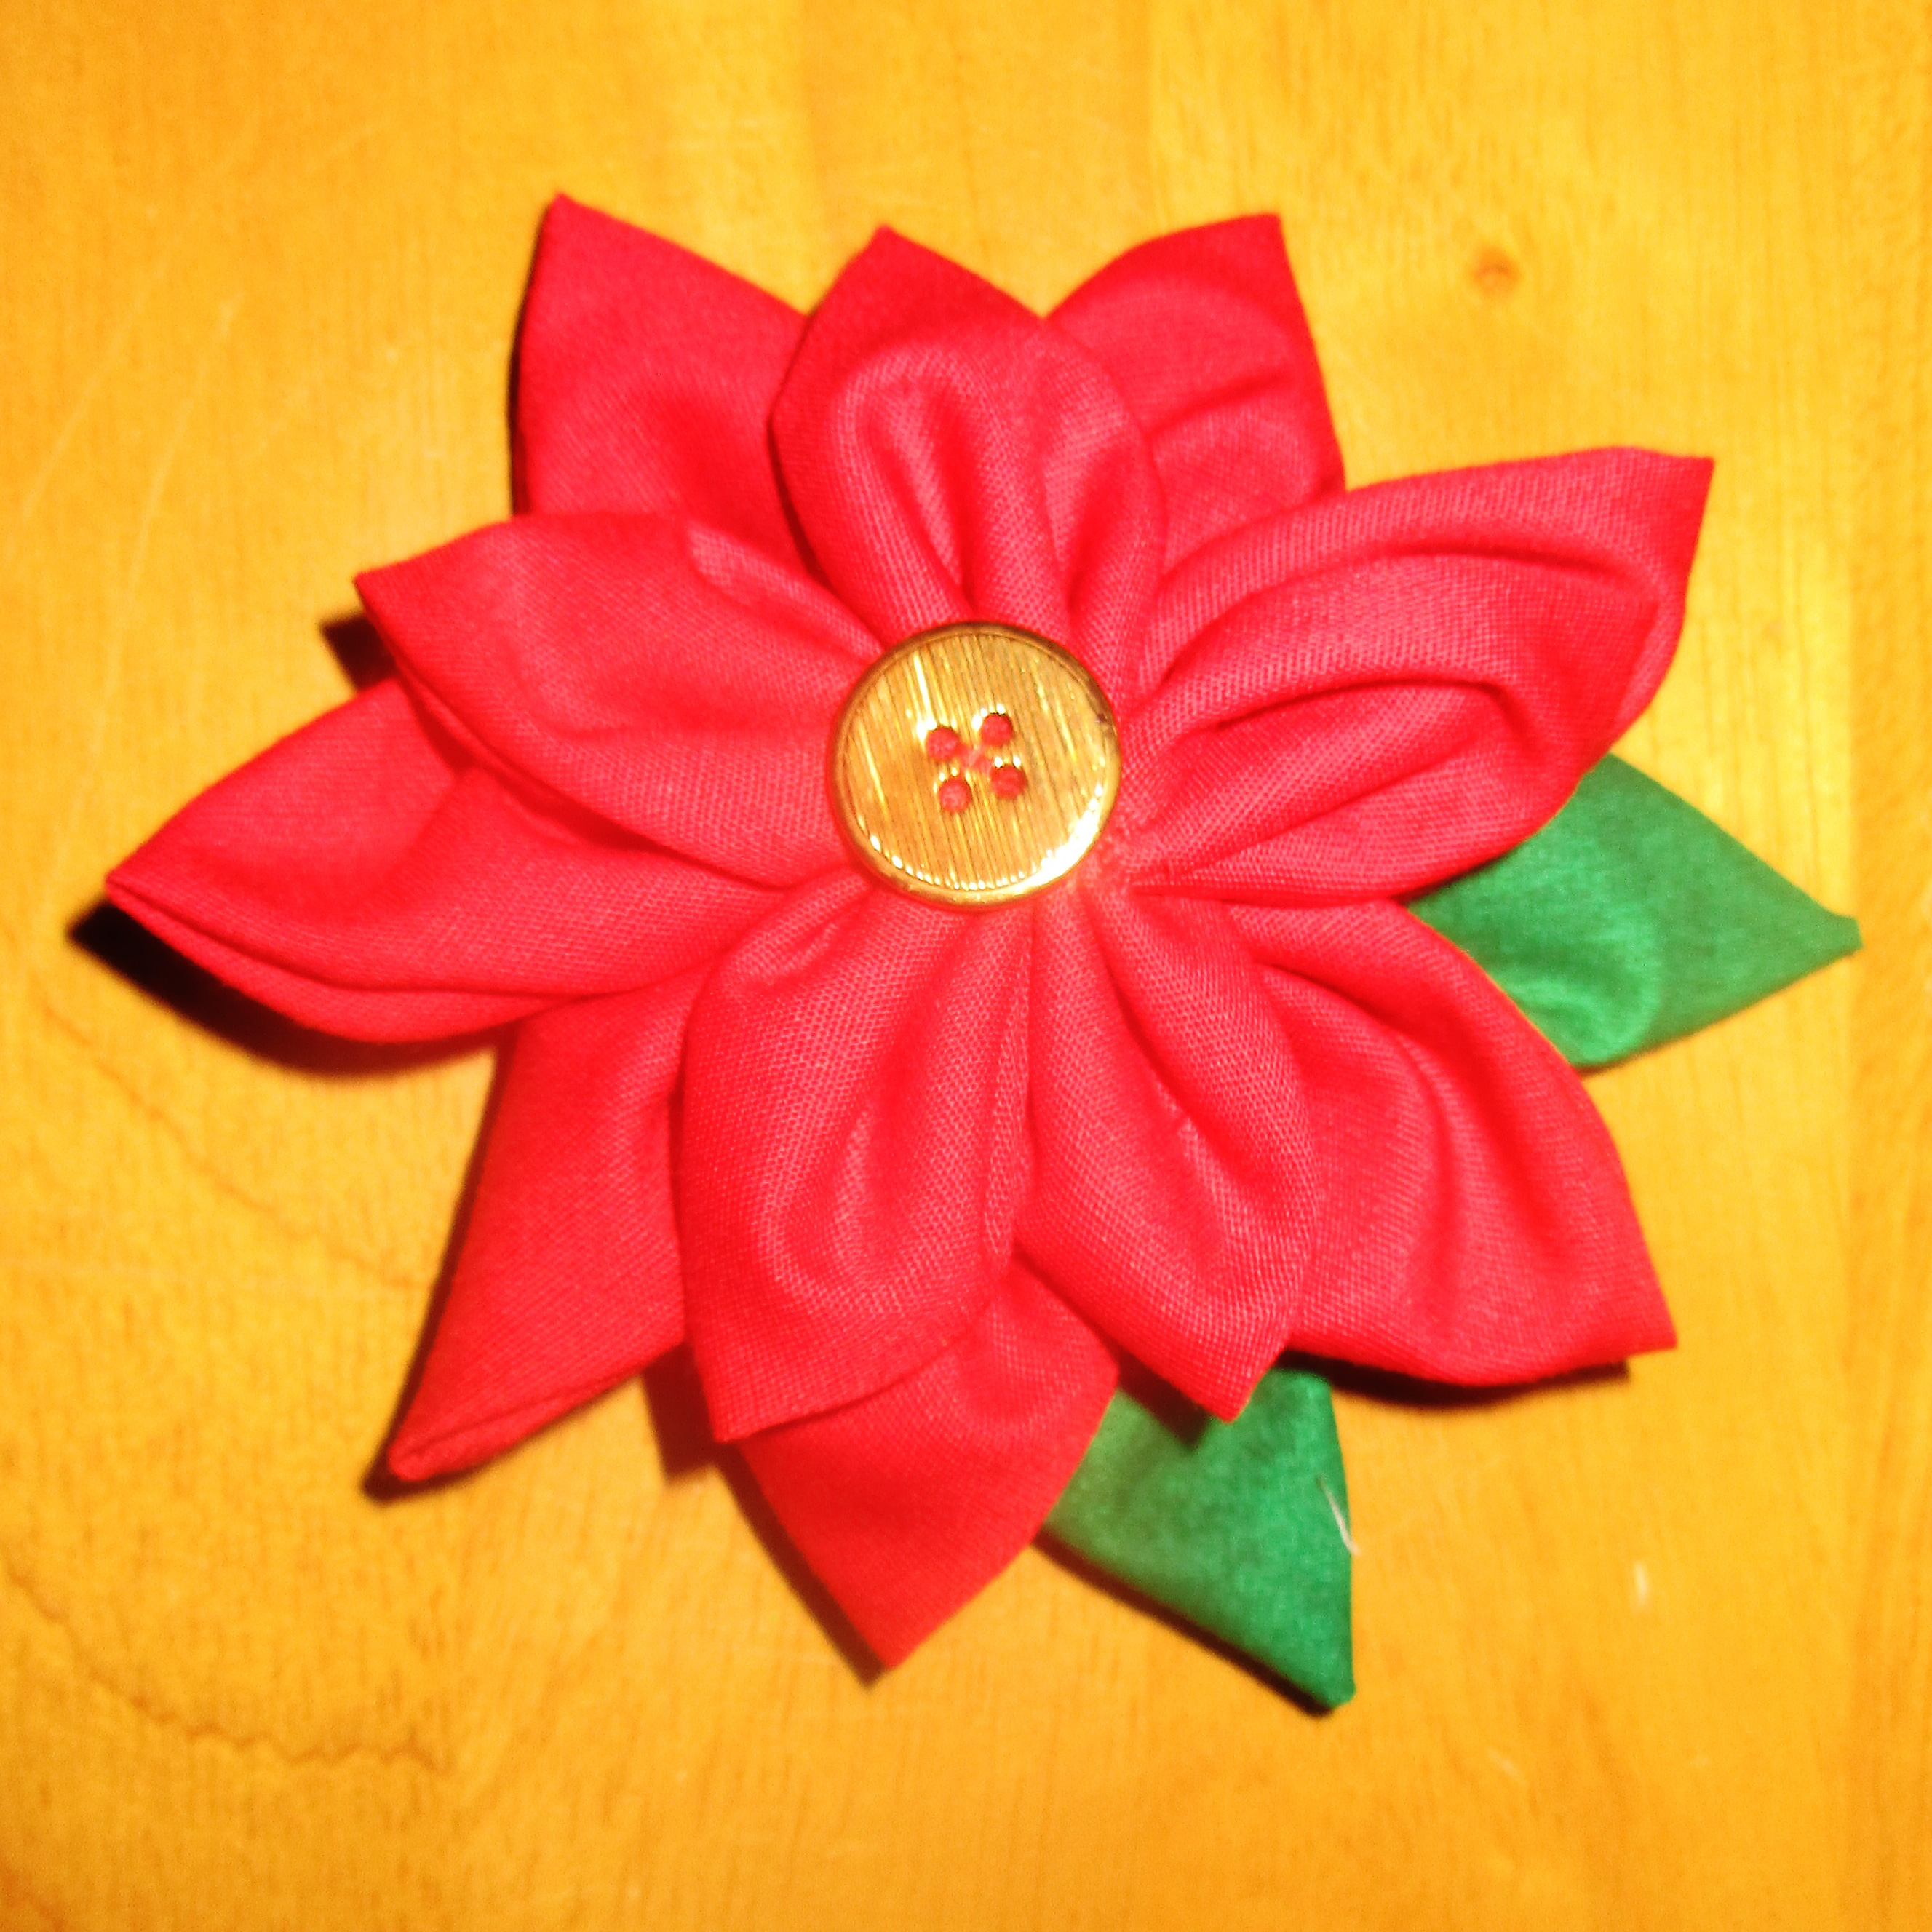
To make these double flowers, you need ten or twelve circles of fabric, a strong hand needle, thread, and a button for the flower center. You may cut five circles each of two different sized circles, or you can use all same sized circles. You may choose to cut seven rather than five for the bottom layer; these will be the larger circles if you are using two sizes.
If you would like to make leaves, cut these from slightly larger circles than you used for your largest flower petals.
You can cut your circles using an Accuquilt Go, a compass, or with the help of an Olfa circle rotary cutter.
You can also make your circles by tracing around a glass or other round object. I traced and then cut my circles several layers at a time. I used several sizes of mug and glassware and made my flowers in a few different sizes.
Sew by hand
Once you have your circles cut out, you can sit and sew them. This little project is sewn entirely by hand, and so is a great opportunity to sit and watch TV, or to have something to do while sitting in a waiting room or traveling as a passenger.
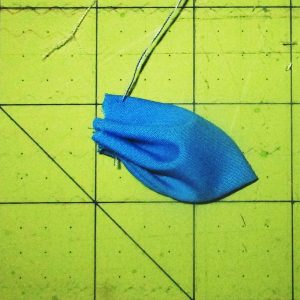
Thread a needle with a long, double length of thread. What I mean is, thread the needle and then tie the two thread ends together at the end. Then, take your first circle and fold it in half, wrong sides together, and then in half again, forming a quarter circle.
Fold circle in half, then in half again.
Then pull the thread taut to gather the petal & repeat with the next petal.
Sew a long running stitch through all four layers of the curved edge. Then pull the thread taut to gather the petal and repeat with the next petal. After you have sewn and gathered five petals, pull thread to tightly gather and sew the last petal you gathered to the first one of the five.
Sew the last petal to the first, then neaten center.
Continue to sew the raw centers of the petals tightly to each other, to tighten and neaten the inner edge of the flower center. Do this on both sides, then tie and cut your thread. You can set this flower aside for now.
Wash, rinse, repeat
Now sew another flower, perhaps using a different sized circle. Once you have both, sew them together with the smaller flower on top. If you’d like to add one or a couple leaves, do that now.
I made my leaves slightly differently than the flower petals. Instead of folding the green circles into quarter circles, I folded the circles in half, and then thirds. Then I sewed them with less gathers than the flower petals. Sew the leaves onto the back of the bottom flower layer.
Choose a matching or contrasting button or use a bit of embroidery for the flower center. Sew the button down through both layers of fabric flower.
Then sew the whole thing to a brooch pin, hair elastic, bag, or anything else. Small brooch pins work best, in my opinion, as these can then easily pin across a ponytail elastic or even a small barrette, not to mention on bags, lapels, hats, and etc.
Poinsettia pins
You can sew both flower layers from red fabric and make these into poinsettias. These will be useful during the holiday season. I plan to make small gifts of brooch pins at least, but I can think of lots of other ways to use these for holiday decorations and gifts, and I think I’ll be making a lot more of these fabric flowers in red.
You can sew both flower layers from red fabric & make these into poinsettias.
Enjoy making them
I hope they will bring joy when I give them as gifts.
I felt joyful making these and I hope they will bring joy when I give them as gifts. Whether you make just one fabric flower or a basket full, I hope you will enjoy making these as much as I did. Happy sewing!