Sewing with Confidence

Sewing with Confidence

Whether you’re a beginner or an advanced sewer, there will always be projects that seem too tough, that are hard to feel completely confident about taking on. Without a way to approach projects confidently, it can be tempting to skip doing them all together. What a shame it is when we miss out on making something special simply because it seems too hard. Instead, try using these tips to build your confidence and get that project done.

self-confidence-2121159_1280

Break it Down

Often, I find myself feeling overwhelmed by a project if I try to look ahead at all the directions. With simpler projects, I can do that and picture the whole thing coming together in my mind. With more complex projects, reading ahead sometimes makes me feel like it’s too hard. I won’t see the project. Instead, I get lost in the words of it and panic at the sight of terms I’ve not seen before.

The simplest and quickest way to overcome my fears and boost my sewing confidence is to take it one step at a time. Instead of reading through the whole thing, I only focus on the step I’m currently working on and the move on to the next. This makes it easy to look up any terms I’m not familiar with and complete each step successfully. And, of course, doing this generates more confidence. I have a hunch it will be the same for you. Give it a try and let me know how it goes.

Ask for Help

Although sewing is largely a solo hobby, that doesn’t mean you have to work through every project on your own. If you’re stuck, bring your fabric and the pattern to your local fabric or sewing machine store and ask their experts to help you out. They may be able to give you an explanation that’s easier to understand than the one written in your pattern instructions. Also, having the corresponding fabric pieces may help to show you a way to pin or cut the pieces to match what the instructions are asking you to do. And once you’ve learned it, you can apply it, confidently, to future projects.

These two tricks have helped me tackle everything from a sundress to a wedding dress with confidence and wind up with gorgeous completed projects that I’m proud to wear. The next time you’re feeling overwhelmed by a project, don’t fret. Try these two tips and get the confidence you need to complete the project without stress.

The Lace-Maker by Tropinin

The Lace-Maker by Tropinin

Once more, we’re turning to an artist’s rendering of a sewing topic for exploration and analysis, and this time, it’s coming with a couple of twists. Before we dive into those twists, let’s go ahead and introduce you to the painting that’s the focus of today’s post.

The Painting: The Lace-Maker

The Artist: Vasilii Andreevich Tropinin

The medium: Oil on canvas

The year: 1823

Picture 1

Masterpiece

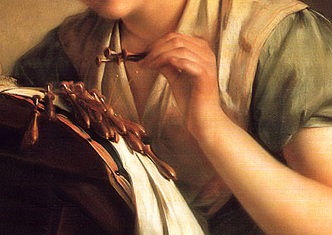
This is an eye-catching piece, and one of the most immediate concepts that separate it from works that have already been explored on the blog can be noted in its title. The topic isn’t just sewing stitches or making repairs, but rather the very specific task of making lace, which might require different tools than general sewing. The woman in the painting isn’t using a regular needle, clearly, which provides a unique view into the world of sewing.Picture 4

In fact, this entire painting is varied from some of the ones that historically came before it since it’s showing an average woman tending to the lace’s creation rather than someone from high class (“Vasilii Andreevich Tropinin: The Lace-Maker,” n.d.). This woman looks like someone you might see working on a sewing project in the comfort of home, and that quality creates a similarity between the average viewer and the painted woman. You can relate to her because it’s so akin to your approach—sewing in your own home.

Both of these aspects are showcased specifically in the painting—the tools and the woman—through the triangular configuration that’s been noted on other artistic works. Within the triangle of focus, you have the woman and the tools she’s using, allowing your eye to primarily be drawn right to them.

Picture 6

It’s about the passion, not the project

It’s also worth noting that we don’t see much of the actual lace being made. We see the woman. We see her working. But the project is mostly facing toward her, so our view of it is limited. It can be interpreted that the lace-maker herself and the process of making the lace are, to the artist, more significant than the actual project.

By extension, you could continue this logic to assume that the woman in the work is a beginner or early lace-maker, and that the process doesn’t need to be tarnished by seeing a newer lace-maker’s mistakes and missteps. This notion can be argued as mirrored in the idea that her hands look dainty as she tends to the process, which might lead the viewer to assume that she’s treading lightly into the field. She isn’t gripping the tool firmly, and the overall result can look like the carefulness and hesitance of a beginner.Picture 4

Personality and disposition

One could argue as well that the smile on her face is another detail that brings this new-lace-maker quality to life, as if the woman is happy to give this process a try and perhaps pleased with her progress. Unfortunately though, her face is the main spot where the argument could shift in favor of the woman being very secure in her craft, as if she’s done this again and again over the years. There’s no uncertain furrow in her brow or any lines of tension on her face like you might expect from someone struggling to get the hang of such an activity. Rather, she looks calm and relaxed, and that mind frame can be labeled as out of place for a new lace-maker being caught on canvas.

Picture 2

If you consider that detail—that her face is so free of lines of tension—the other elements can suddenly take a new turn as well. Maybe those hands aren’t dainty with hesitance. Maybe they’re loose from comfort with the process, like the casual grasp she has is enough to professionally finish the task. If you decide on this method of logic, the project being pointed toward the woman can mean that her comfort with the task is what’s supposed to be shown. You don’t need, from that point of view, to see the project. The woman is too at-ease with the process to be creating anything less than successful through her endeavors.

Light and shade

This notion of comfort can be seen in the lighting of the painting as well since, for the most part, everything is well-lit and in the spotlight. Other than the shady corners at the top, the space under the table, and the area underneath the platform the project is on, little is dark about this work. That sustained level of lighting speaks to an overall bright experience, and the similarity of color throughout adds to that calmness. No hue drastically sticks out, and other than the handful of dark places, nothing severely falls into the background in regard to those hues. Everything is neutral or placid enough in color to create an overall image of cohesion and balance.

With all of these elements combined, it’s sensible to interpret this as Tropinin’s attempt to showcase an average woman tending to a very specific task with so much expertise that she’s calm and tranquil throughout the experience. It’s a primarily bright experience that she feels comfort in, with little dynamism about the process due to her ease with the task while she works on a project that the viewer doesn’t need to see to know it will be a success.

References
“The Lace-Maker.” (n.d.). Russian Art Gallery. Retrieved from http://russianartgallery.org/famous/tropinin_lacemaker.htm
“Vasilii Andreevich Tropinin: The Lace Maker.” (n.d.). Rollins College. Retrieved from https://myweb.rollins.edu/aboguslawski/Ruspaint/troplace.html
One Day Sewing Projects

One Day Sewing Projects

one-day-sewing

Sometimes I don’t want a big sewing project. If I’m pressed for time or simply need to fill an afternoon or one day out of the weekend, I don’t necessarily want to start a project that will take days, weeks, or months to complete. Nor do I want the hassle and expense of shopping for supplies for a larger project. I just want to sew for a couple of hours and have something to show for it. If that’s ever happened to you, these sewing projects you can do in a day are the perfect solution.

Circle Skirt

Make this for yourself or your daughter…or making a matching mother/daughter pair. This circle skirt can be done in just a couple of hours and it’s perfect for whirling and twirling when it’s done. Unless you have large amounts of the same fabric on hand (cause you just buy fabrics you like when you see them, maybe?) you’ll need to hit the store for material. If you’ve got enough fabric on hand, you’re good to go.

Vendor Apron

Are you the one they ask to help out with bake sales, garage sales, and other school fund raisers? You need this vendor apron to keep your notepads, pens, and other supplies close at hand. It’s super simple to make with an old pillowcase or one you fell in love with at the thrift store and now need a use for. Make a bunch so the whole PTA will have one.

Trendy Fashion Tank

With this awesome pattern there’s no need to spend your hard earned money on brand name t-shirts and tanks. The trendy fashion tank is patterned after a popular JCrew top, but made by you. You’ll need jersey sheets or another source of that same material to make this pattern. Flat jersey sheets can be bought at discount stores for around $7, so it’s well worth the investment to make this shirt yourself.

Hair Bows

Not only do these work up fast, they’re a great way to use up your scraps. Hair bows never really go out of style, so make a bunch. Give them as gifts or sell them at craft fairs. Depending on the material you choose they can be vintage, modern, or anything in between. No matter what, they’re sure to be a hit!

The next time you’re looking for a quick project, try one of these projects. They take a day (or less in most cases) and leave you with a great finished piece, a feeling of accomplishment, and instant gratification. Many of these projects are also great for sew sewers since they can quickly see the results of their efforts.

Beginner Sewing Machine Buying Guide

Beginner Sewing Machine Buying Guide

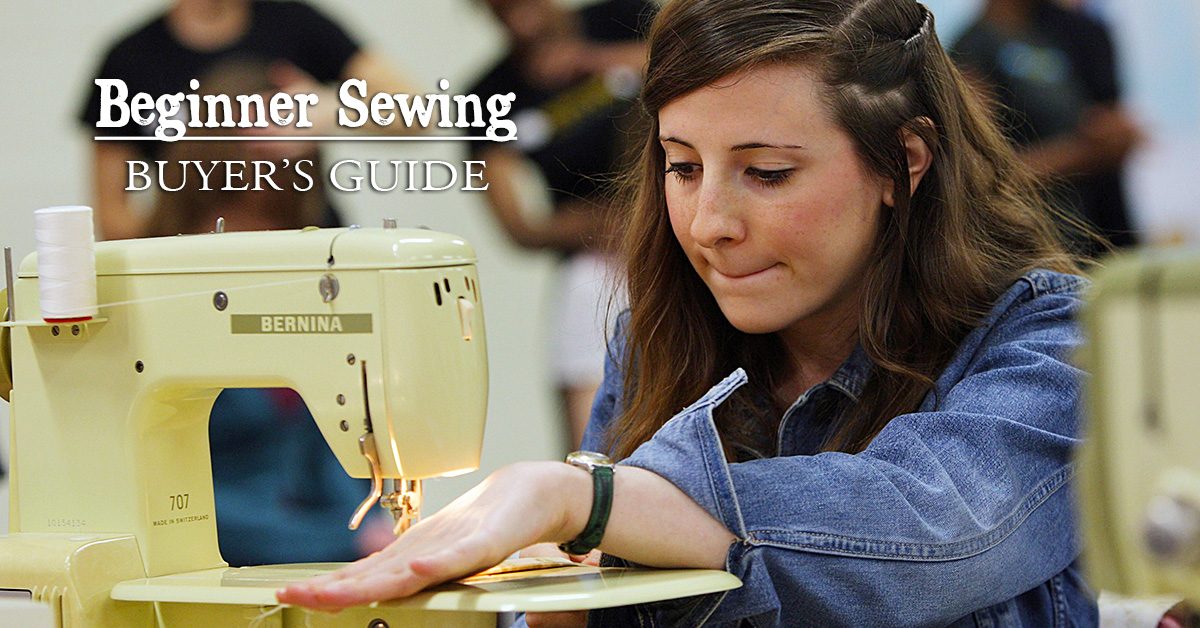
Buying a beginner sewing machine is an exciting decision that will impact your future in wonderful ways, but only if you choose a good beginner machine.

There is a huge difference between a great sewing machine and a not-so-great machine
Beginner Sewing Machine Buying Guide

The difference a well designed machine makes to a sewing beginner’s journey will save an enormous amount of frustration.  With a good machine, you will enjoy the process and learn to sew without trouble. With a poorly designed nightmare of a machine, your progress will not be near as fast. That is, if you progress at all; many beginners have thrown up their hands and given up on learning to sew thanks to an overly complicated or inferior beginner sewing machine, and this is a shame.

I’m speaking from experience here. If someone had told me these things I could have been spared an awful lot of trouble and tears. I’m not exaggerating to say tears, either; I not only cried but also screamed and wanted to tear out my hair in frustration when I was learning to sew. Learning to sew seemed so hard to do, but this was only because I was trying to teach myself on a terrible machine. I bought it at the same store where I shopped for groceries and it was, to put it mildly, a piece of junk!

If I had only known that I could have bought a much better machine for about the same amount of money, I could have enjoyed my beginner sewing experiences so much more. I’d love to save someone else that same trouble.

Start with a mechanical model sewing machine

My first recommendation is to start with a mechanical-only model. There are awesome computerized and electrical sewing machines available, and soon you will definitely want to add one of these to your collection, too. But I recommend you start with a mechanical model for two reasons.

First of all, you don’t want to confuse yourself with too many options and features when you first start sewing. I think it is best to focus on learning the basics of sewing on a good, basic machine.

And perhaps more importantly, you need to have a mechanical back-up machine in your collection before you buy an electronic or computerized machine. That’s because computerized machines require regular maintenance that you cannot do yourself. Nor can you repair any problem that might arise on a computerized machine at home.

When your machine is away, sometimes for as long as a few weeks, you cannot sew—unless you have a mechanical backup. So I think this needs to be the first sewing machine you buy.

I’d think I was sewing and then realize that I was sewing without thread! Argh, this is what made me scream and want to tear out my hair when using that machine!

Don’t buy a beginner sewing machine without these features:

Built-in needle threader

You’ll be threading your machine every time you sew.  With an easy machine, you are going to love sewing and want to make lots of things, so you will thread your machine thousands or even ten-thousands of times.

Save yourself a lot of time and trouble by getting a machine with a handy dandy built-in needle threader. Even if you are young with great eyesight and steady hands, this will still make needle threading go a lot faster for you. I wouldn’t buy a machine without this feature.

Top loading drop-in bobbin

The poorly designed bobbin system was the thing that caused me the most frustration on my first sewing machine. On that thing, the bobbin was concealed inside the front of the machine. To change it, I had to take the case off the front and then remove the bobbin casing to get to the bobbin which was held vertically inside.

Besides all those extra steps, the problem with this system was that there was no way to see that my bobbin was running low on thread. So what would happen is that my bobbin would run out without me knowing it. I’d think I was sewing and then realize that I was sewing without thread! Argh, this is what made me scream and want to tear out my hair when using that machine! I’d have to remove my project from the machine, rewind and replace the bobbin, and then start all over again. NOT fun!

A top loading bobbin system is so much better. With this system, the bobbin just pops out and drops into place without your having to disassemble a bobbin casing to get to it. Even better, this kind of system is accompanied by a see through cover plate. So you can see at a glance when your bobbin thread is low. Believe me, you want to get a machine with this feature.

Free arm capability

With a free arm, you can sew narrow, round garment pieces such as sleeves and pant hems. If a sewing machine won’t convert to free arm sewing you can’t sew these things easily, if at all.

As a beginner sewist, you will want to make many small projects. That’s because they are easy and satisfying, not to mention useful. Not having the ability for free arm sewing is unnecessarily limiting. There are basic beginner sewing machines that do limit you in this way. Be sure the machine you buy includes this important feature.

My recommendations for your beginner sewing machine:

I always recommend Janome brand machines. That is because I have seen for myself that Janome offers the best quality and the best value, by far. From my experiences with my own nightmare first machine to my experiences helping others with frustrating machines when I teach sewing classes, I have seen clearly that there is a big difference in user friendliness between different makes of machines. I can’t imagine buying any other brand and I recommend them as being the best choice for beginners and experienced sewists alike.

Janome Sewist 500

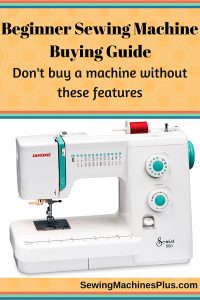
If I were buying a beginner machine, I would buy the Janome Sewist 500. I like this one because, besides offering my must-have features listed above, it goes beyond being a basic machine and offers a lot of options without being overly complicated. It has 25 different stitches, including some decorative stitches, and a one step buttonholer. I love this option on Janome machines, it makes sewing buttonholes as easy as pie.

Janome Jem Gold 660

I would also recommend this machine as being a great choice for a beginner sewing machine. It too includes all the features I would demand. And besides the fact that the price is nice, this machine is also lightweight. This makes it easy to grab and go to class or wherever else you’d like to take it. While it only has eight stitches to choose from, these include everything you need. Almost all sewing uses either a stretch or a zigzag stitch. This machine performs both, and with adjustable stitch length and width. It also has two different useful stretch stitches and a buttonhole stitch.

With either of these as your beginner sewing machine, you will be sure to enjoy learning to sew and you won’t have to suffer needless frustration. Either of these high-quality Janome machines will continue to serve you well long beyond your brief time as a beginner.

To save yourself another easily avoided frustration, be sure to read my guide to machine needle selection, too. Besides using a poorly designed beginner sewing machine, nothing else can cause you as much trouble as using the wrong size or type of needle. You won’t have to suffer this problem when you clearly understand which needle to use when.

Happy sewing to you!

Sewing for the Non-Sewer

Sewing for the Non-Sewer

Sewing seems like something that requires loads of skills and creativity. Often, that’s the case, but it doesn’t have to be. In fact, you can dip your toes in the sewing pool without even owning a sewing machine. You will need a needle and thread though, so add those to your shopping list!

Sewing for the Non-Sewer

Start Small

Making a shirt or skirt can be really overwhelming for someone who thinks they can’t sew. Instead of starting with something that big, do something smaller and less complicated with more instant gratification. For example, a fabric credit card holder or wallet. Simply choose a fabric remnant you like (ask the fabric store clerk to show you where those are) and purchase a spool of thread that coordinates with it. And don’t forget the needles!

Credit Card Holder or Wallet

At home, grab a credit card from your existing wallet. Unfold the fabric remnant and place it right side down on your work surface. A kitchen or dining room table works well. With a pencil or machine washable pen, trace the credit card then flip it so that the long side abuts where the trace mark now lies and trace it again. Using a ruler, draw a line around the full tracing to encompass the double size of the credit card about one inch from the trace line. This becomes the line you will cut on.

It may take a few tries to get this right.

If you’ve got fabric scissors, use those. If not, use the sharpest pair you’ve got in the house. Carefully cut around the outer line. Placing the right side of the fabric together, fold the fabric in half along the line where you abutted the two credit cards and iron it flat. This will help you hold and sew it evenly without needing pins.

Cut a length of thread you’re comfortable working with from the spool you purchased. To easily tie a knot on one end, lick your index finger and wrap the thread around it two or three times. Using the opposite hand, roll and slide the thread off your finger and pull the knot tight. It may take a few tries to get this right. Take the other end and thread it through the eye of the needle. It helps to wet the thread to form a point. This can be tricky even for the most skilled sewers, so stick with it if it doesn’t work right away.

Now that you’ve got the needle and thread situated, sew the two short sides of the wallet between the cut edge and the line from when you traced the cards. When you’ve reached the end of the seam, tie down the end by feeding the needle under a stitch and through the loop that creates. Pull it tight. The open long side will become the opening. First, fold down the edge halfway between the trace line and the cut edge. Again, iron flat so you won’t need pins. Sew those edges down making sure to leave the opening accessible and tie.

Finally, turn it right side out and put your credit cards inside. DONE! You just made your first sewing project. You can consider yourself a sewer and move on to machine projects!

The Final Touches (And Reinforced Lessons)

The Final Touches (And Reinforced Lessons)

Remember on my last blog post when I proclaimed that sewing isn’t baking? In the latest stages of my quilt, I’ve once again found myself facing similar details and thoughts as the ones I experienced earlier. Why? Because — as I said before — guesstimations and “until-it-looks-right” attitudes don’t necessarily spill over from the kitchen to the sewing area.

My homemade backing.

My homemade backing.

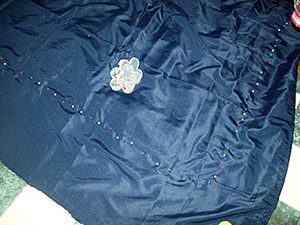
You see, I completed all the main lines of a nearly-finished quilt. What that meant, to me, was that it was time to sew on some kind of backing. My tactic for doing so? Getting a flat sheet, cutting it *very* generically around the exterior of the quilt, and trying to fold the excess material down in an appealing manner for the outer edges of the quilt. I ended up with a mess that looked something like this:

Not good, right? And I couldn’t seem to fix the issue with the backing/quilt this way. Whenever I would try to re-pin something so that the massive/slanted corner was more size-and-style-similar to the line leading up to it, the material would twist unpleasantly (like you can see). This blatant issue led me to undoing most of my pin-and-sew work connecting the backing to the actual quilt, in hopes that the lines and corners would better match up.

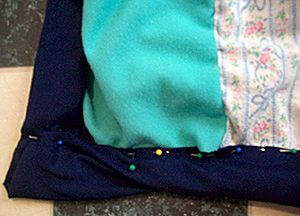
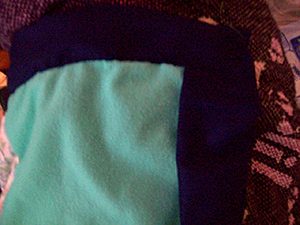
The process this go-round was a bit more precise, in that the original wrinkles in the sheet had fallen out, and the overall quilt was more carefully positioned under the sheet for more accurate results. That’s right. Under the sheet. Rather than focusing on exactly where the backing would overlap on the front, I concerned myself with making sure that the back portion was somewhat smooth against the quilt blocks. My rationale was that if I could get that territory as it should be, I could flip it over and fold over the ends with more confidence that what I couldn’t see on the back was proficient enough to allow my focus to safely fall on what I could see. Basically, if the backing was smooth, I could do things, like better decide how much material needed to be beyond the quilt blocks to fold over and work with, without worrying so much that the material on the underside was bunched or wrong in some way:

Pins, pins and more pins!

Pins, pins and more pins!

Once I flipped it over, I cut off a bit of the backing material, and I took out the pins from one side (and admittedly—accidentally—a number more!). Some of the quilt had already been sewn (I’m currently thinking of redoing that section, by the way), but beyond that stopping point, I could fold over the excess material, tuck it under itself, and pin it back down so it would create a more pleasing line and corner:

Progress is progress for an early quilter, right?

Progress is progress for an early quilter, right?

Perfect? Eh. But progress is progress for an early quilter, right? And, perfect or not, this strategy seems to have helped.

Still, knowing if the strategy will prove effective throughout the rest of the process might be something I judge later. After all, I’m less than one line into it, and there are over three sides to go (not to mention inner attachments).

In any event, this particular dilemma has led me to another tactic in learning to quilt better, and that’s to look for answers online. I’ve looked at a quilting video before, but a number of things that I’ve attempted to do are details I could’ve found assistance for online. There are charts, for instance, about how big to cut blocks, or how large a certain size of quilt should be. I might’ve literally been the girl who measured a bed with measuring tape (not sewing tape!) to see how big I should make a quilt, which I wouldn’t have had to do if I’d looked at a chart! I wouldn’t be too surprised if I took more of my sewing/quilting concerns online to try and find answers for them in the future!

Hopefully, this quilt will be finished soon, and I’ll be able to move on to another project with the skills and lessons I’ve learned up to this point. And maybe one day, I can become the quilter I want to be!