Easy, Easier, Easiest Ways to Sew Baby Blankets

Easy, Easier, and Easiest Ways to Sew Baby Blankets

My favorite ways to sew baby blankets

Every baby needs blankets and these make wonderful gifts. There are lots of ways to sew baby blankets, but after making dozens over the years, both for my own babies and for gifts, I have settled on three basic ways that I prefer to make them. These three types of blankets are each useful in their own way, and any new parent will appreciate any one or all of these styles.

Baby quilts are easy to make!

If you ever wanted to get into quilting, a baby quilt is a great place to start. Because baby quilts are small, you won’t have to wrestle with these on a regular sewing machine, as you might for a larger quilt. Start with a simple pattern which uses just squares or rectangles if this will be your first quilt.

Easy,Easier,and Easiest Ways to Sew Baby Blankets

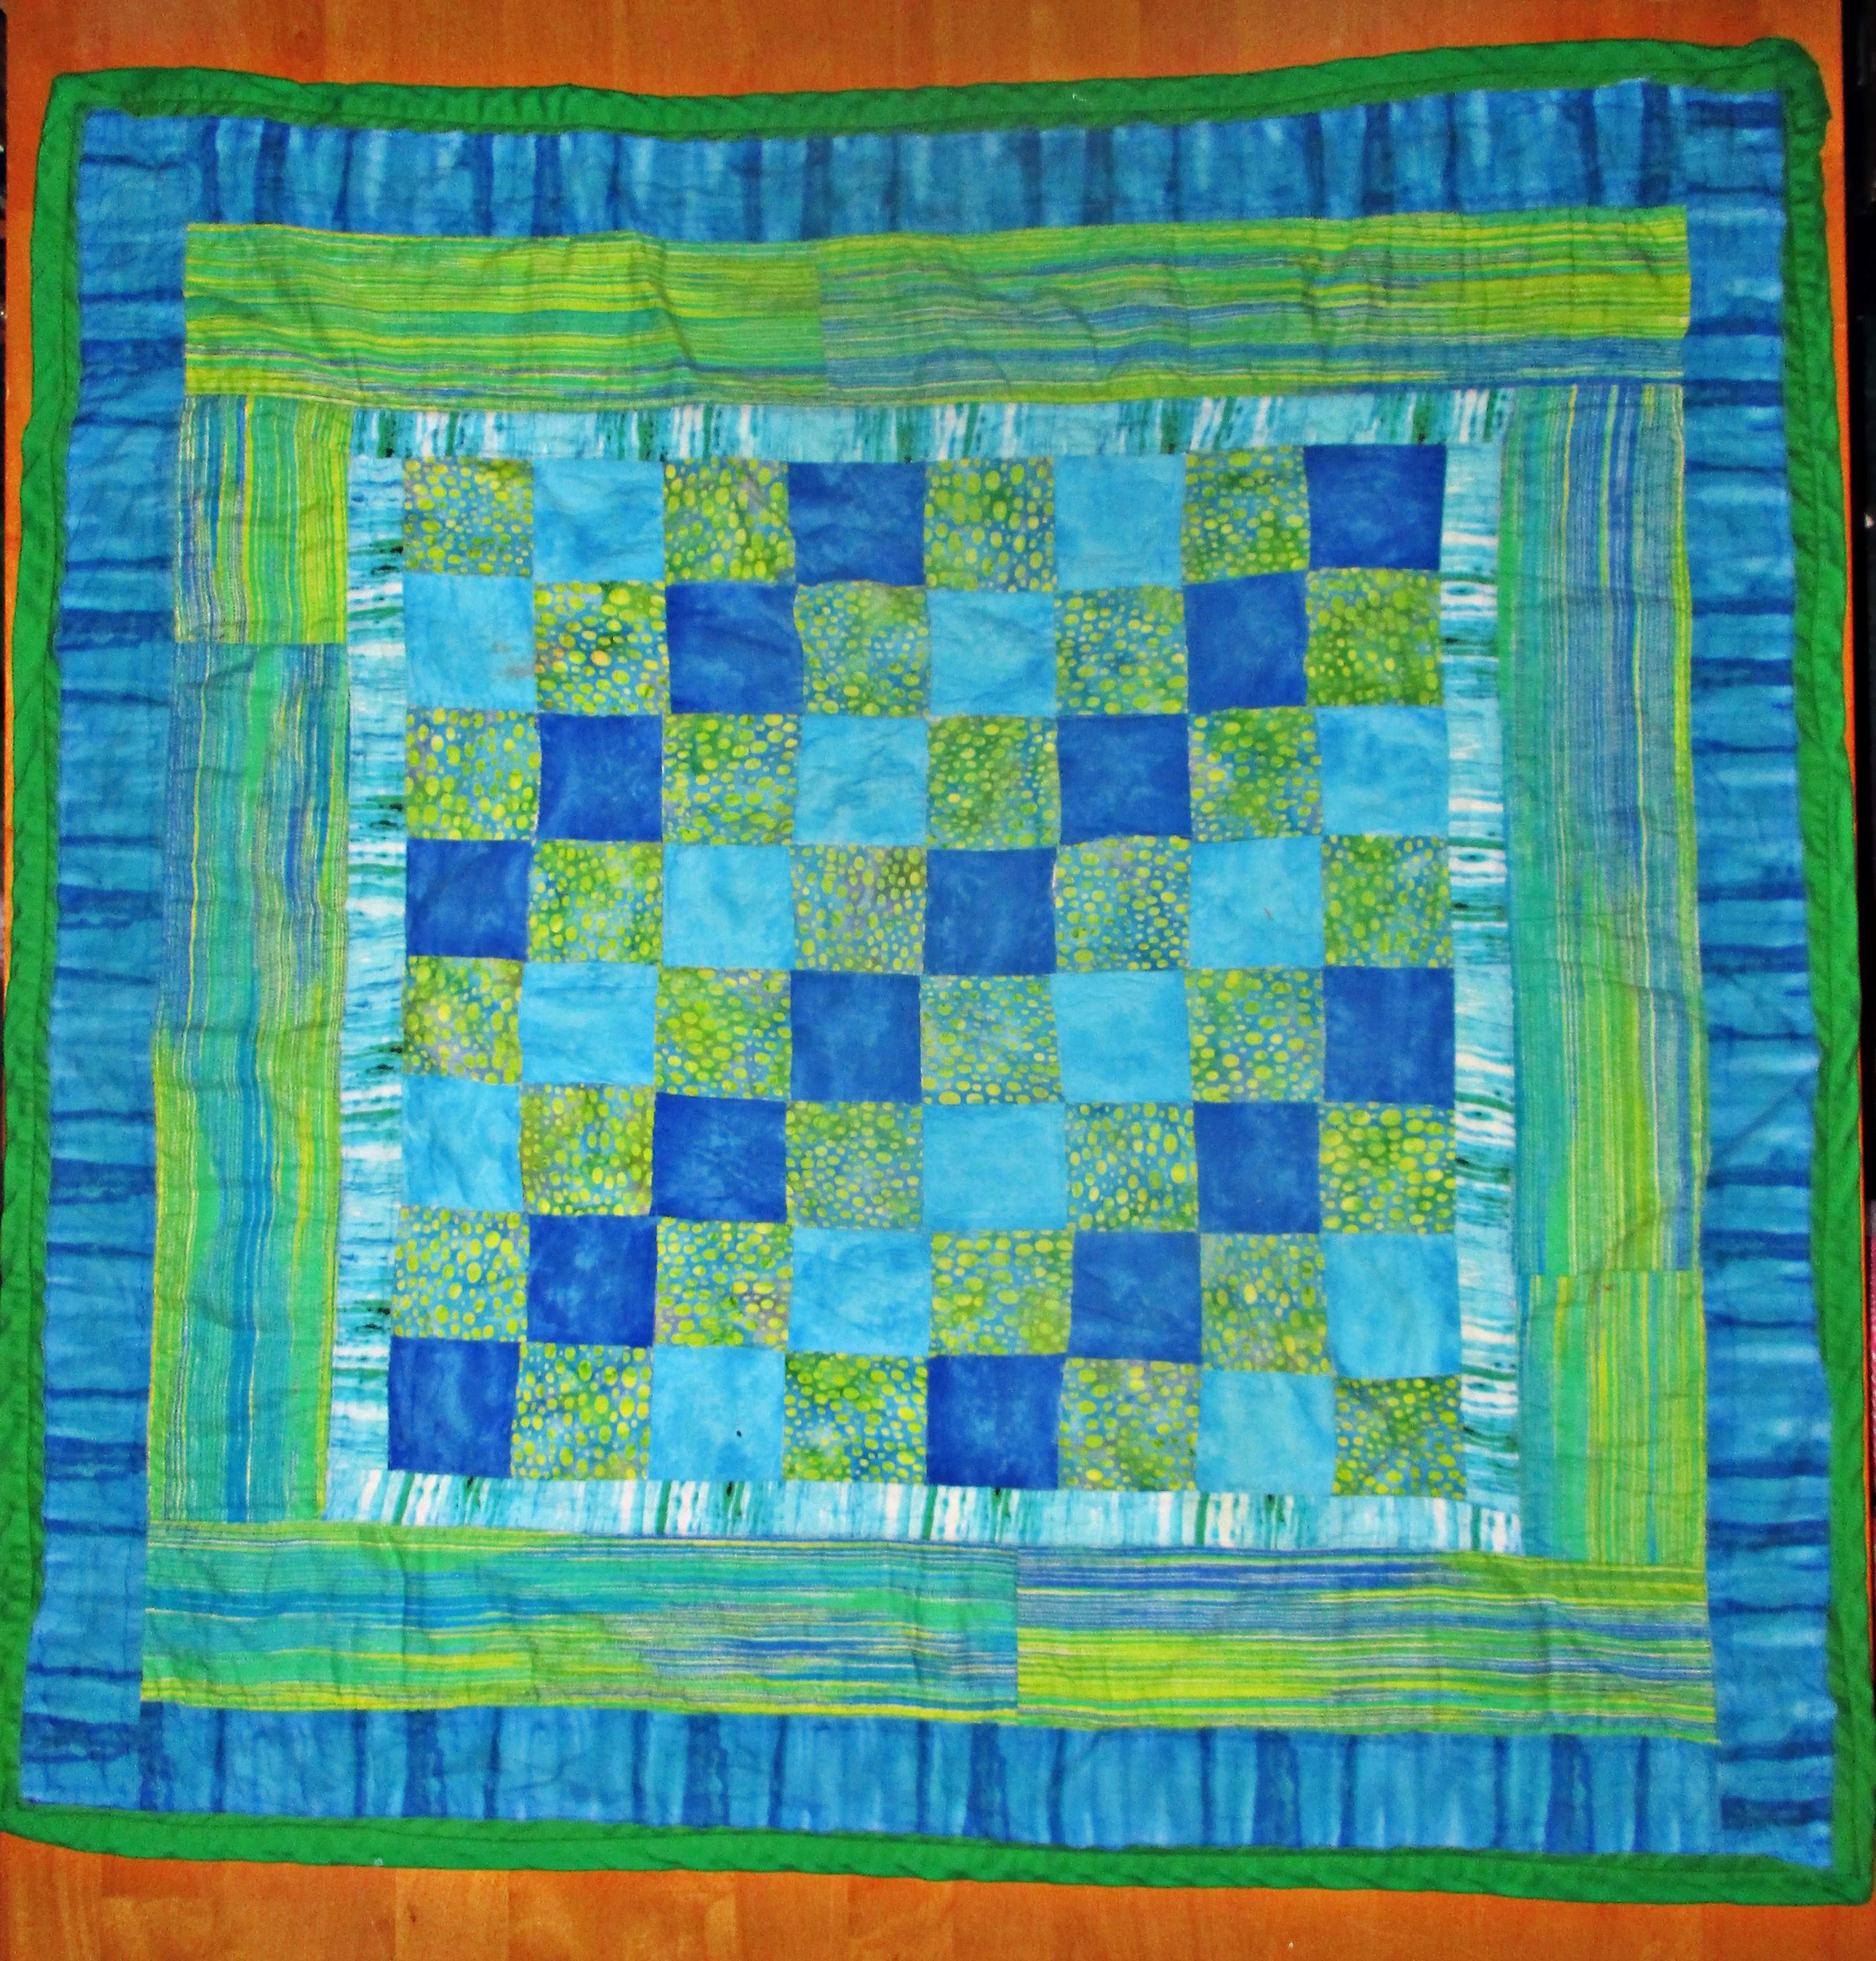
This tiny baby quilt is wrinkled to high heaven because baby outgrew it years ago and I pulled it from a box to show you!

You can choose a quilt with many small pieces if you have plenty of time to finish the quilt before baby’s arrival. I made this blue strip pieced crib quilt while I was waiting for my youngest baby’s birth. This quilt is 100% easy, but it is not the speediest of quilt projects.

Easy, Easier, and Easiest Ways to Sew Baby Blankets

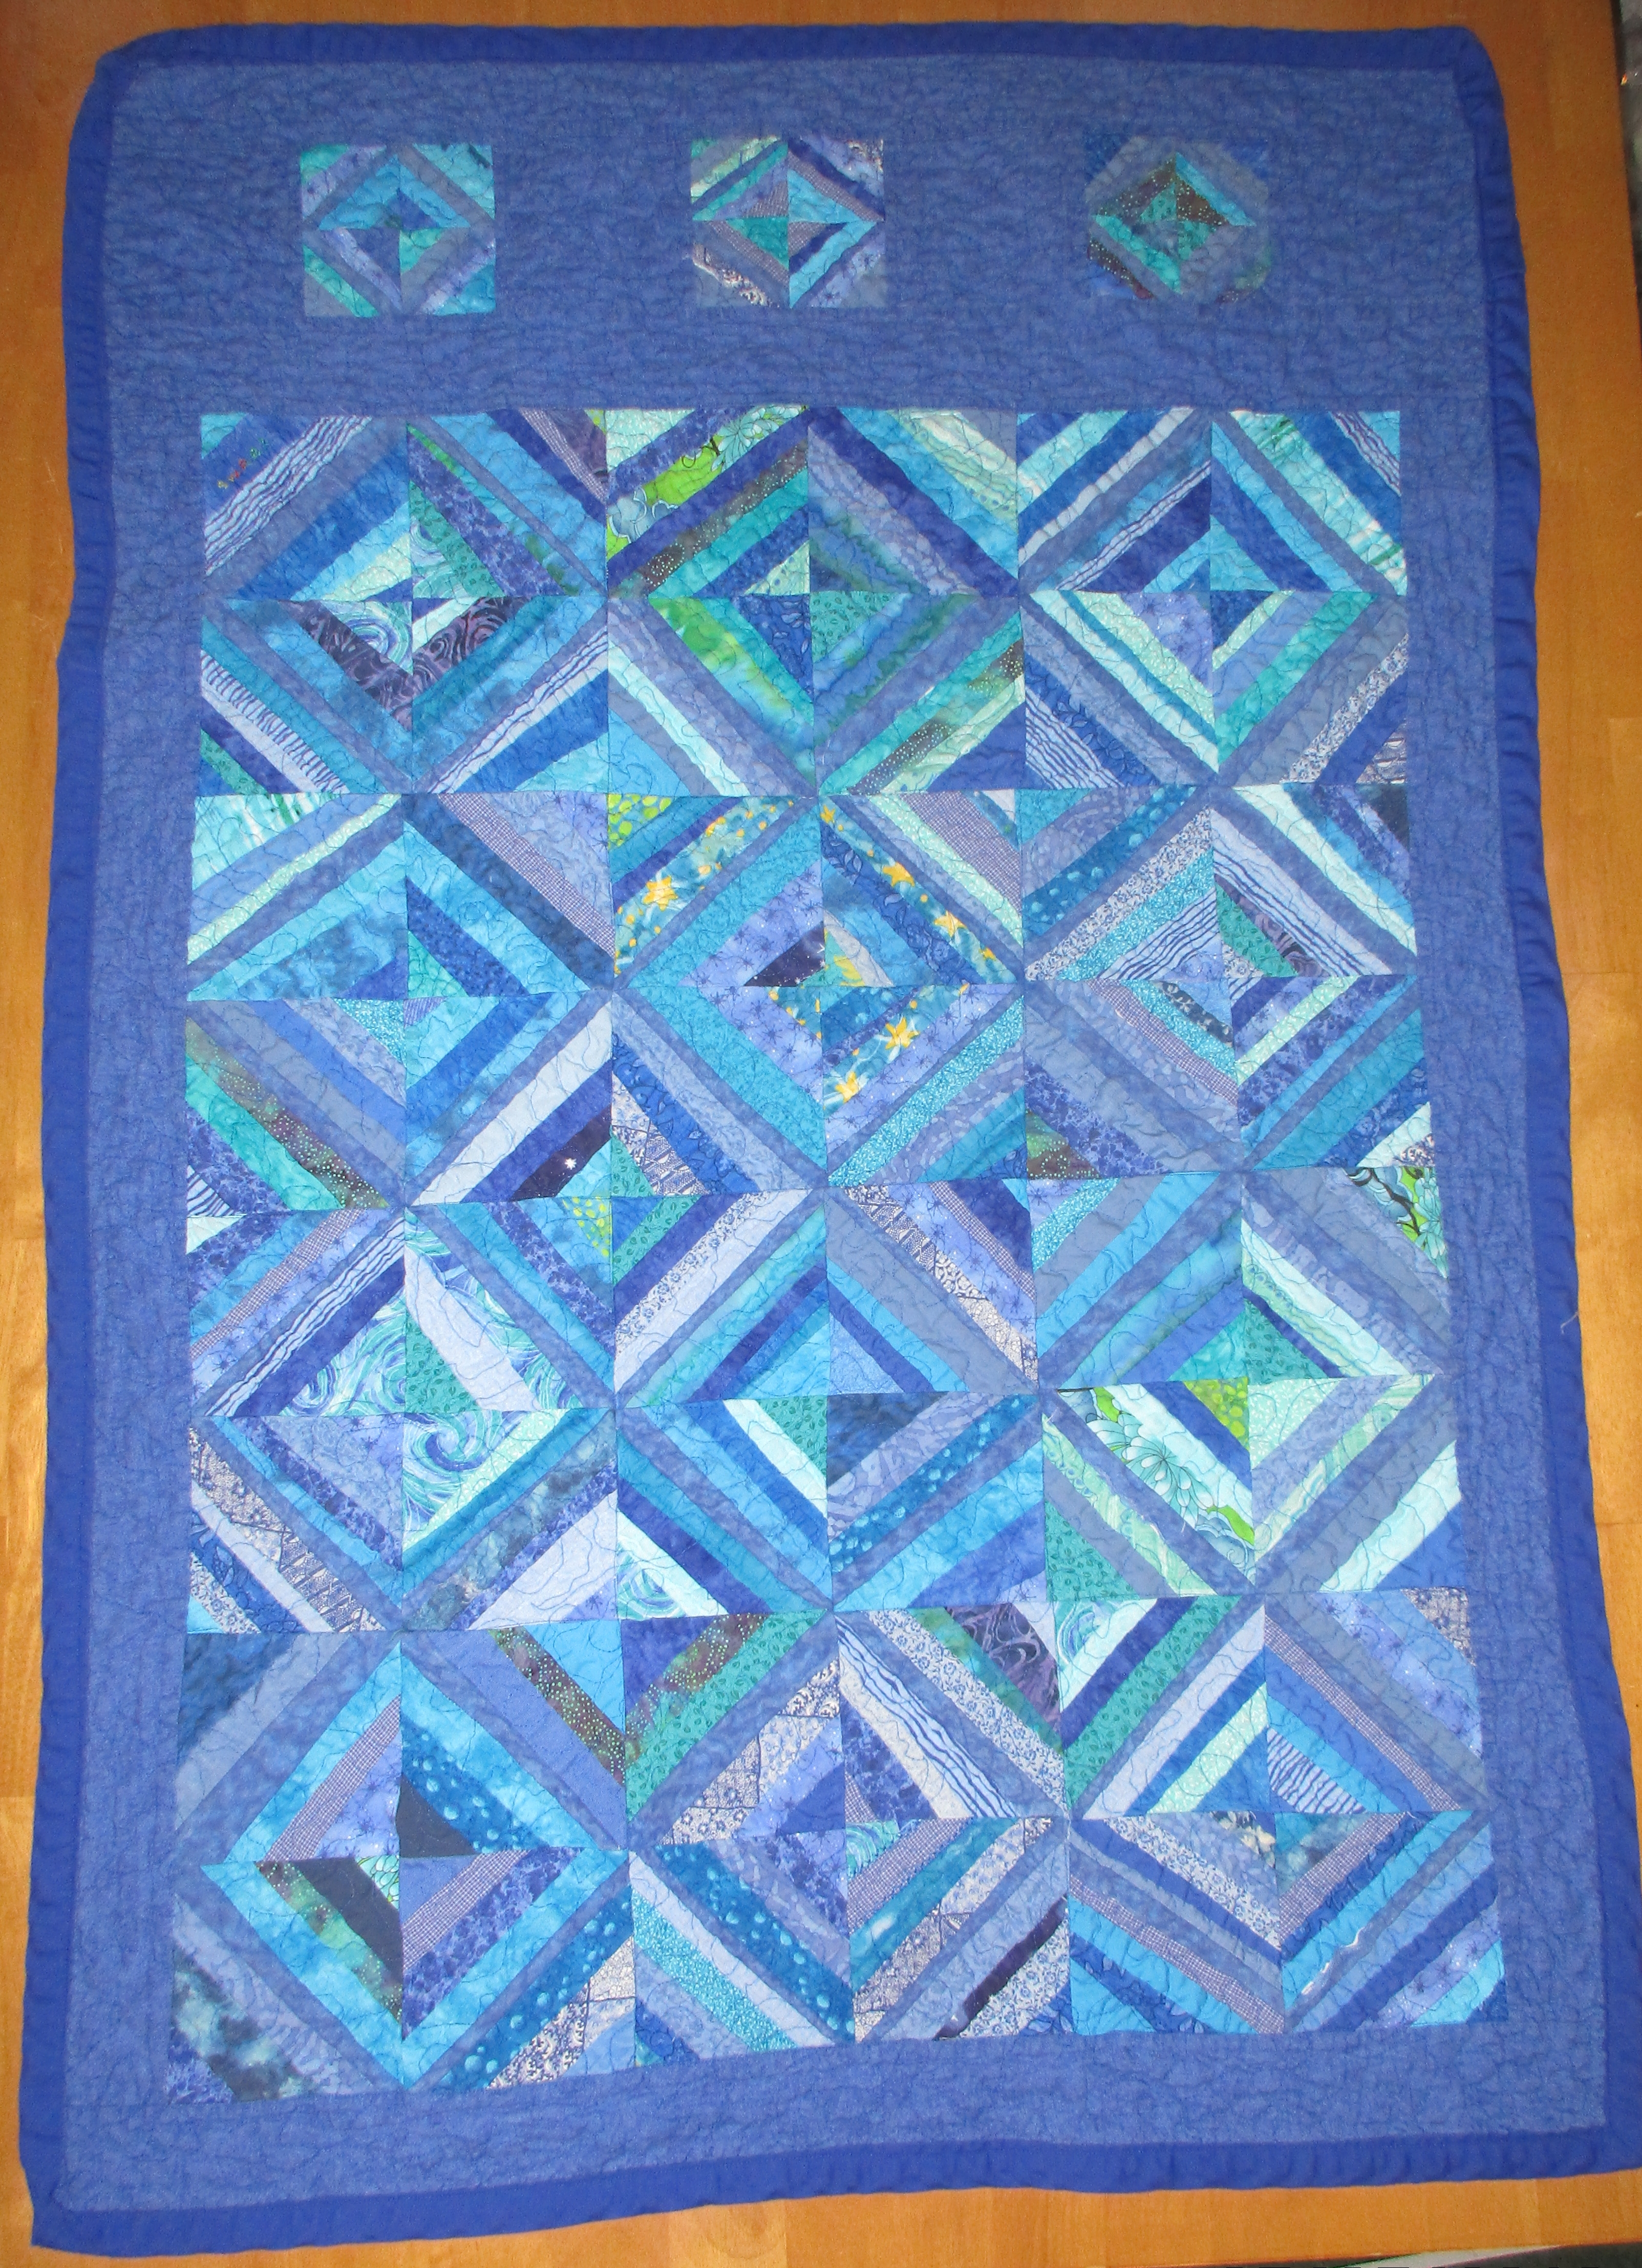
See link for tutorial for this quilt.

Bigger blocks make quicker quilts

If you’d like to make a baby quilt in a hurry, choose a design with fewer and larger blocks.  For a great example of a quick and easy baby quilt, check out Jera Brandvig’s Log Cabin baby quilt at Quilting in the Rain. Her project includes instructions for quilting as-you-go, and this is a particularly speedy method of quilt construction.

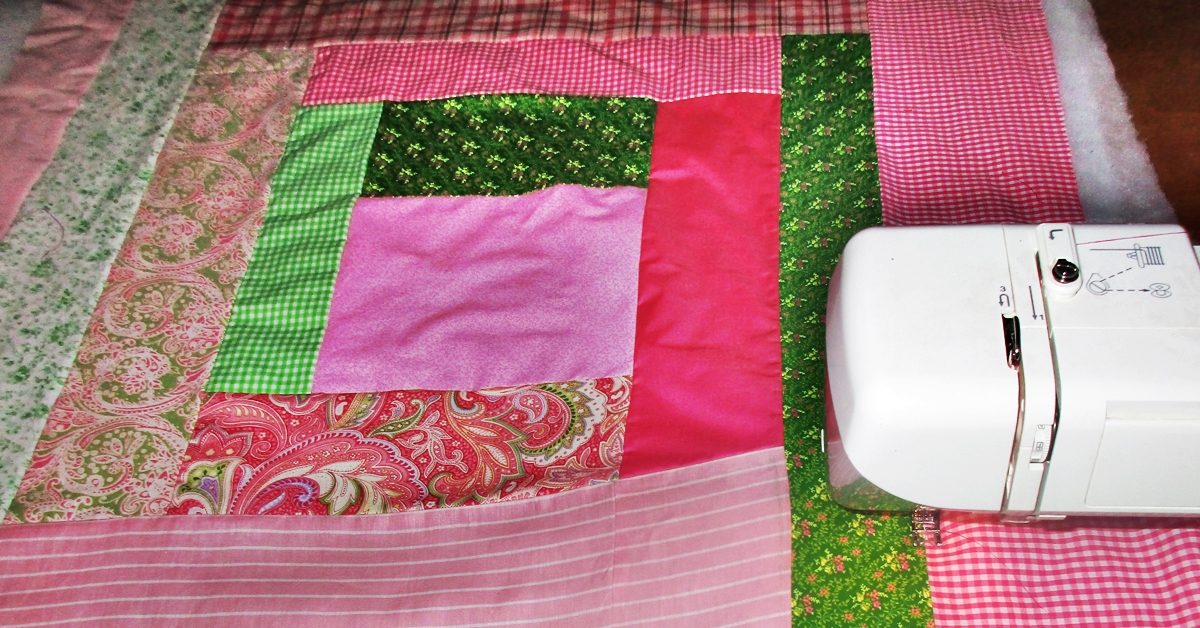
I used Jera’s idea for making one large log cabin rectangle to piece a baby quilt top this morning in about an hour. I didn’t use the quilt as-you-go method on this, however; I’m quilting it all at once using free motion quilting.

This one will be an oversized baby quilt with a super soft flannel backing. The larger size means she won’t outgrow it as fast and can enjoy it into childhood, too.

baby log cabin 1

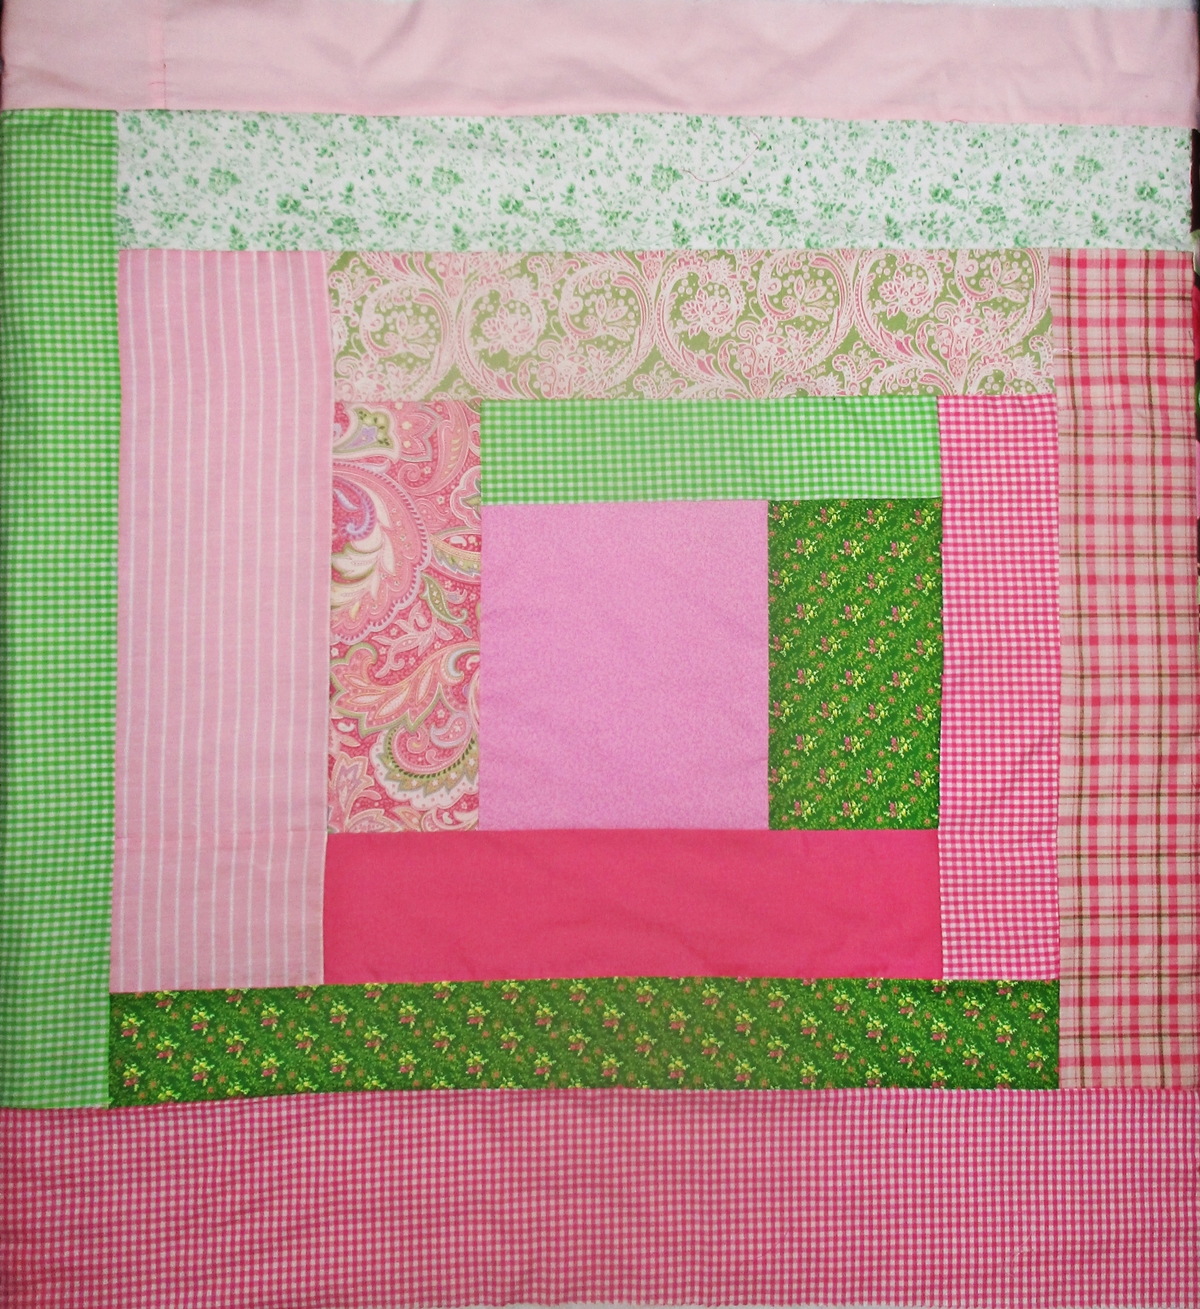
With large pieces and no precise cutting or corners, this large baby quilt top came together really quickly.

Here’s more from me on making quick quilts. Baby quilts are easy, and if you want to make one, you should. Please don’t be afraid of making quilts, it’s fun!

Easy, Easier, and Easiest Ways to Sew Baby Blankets

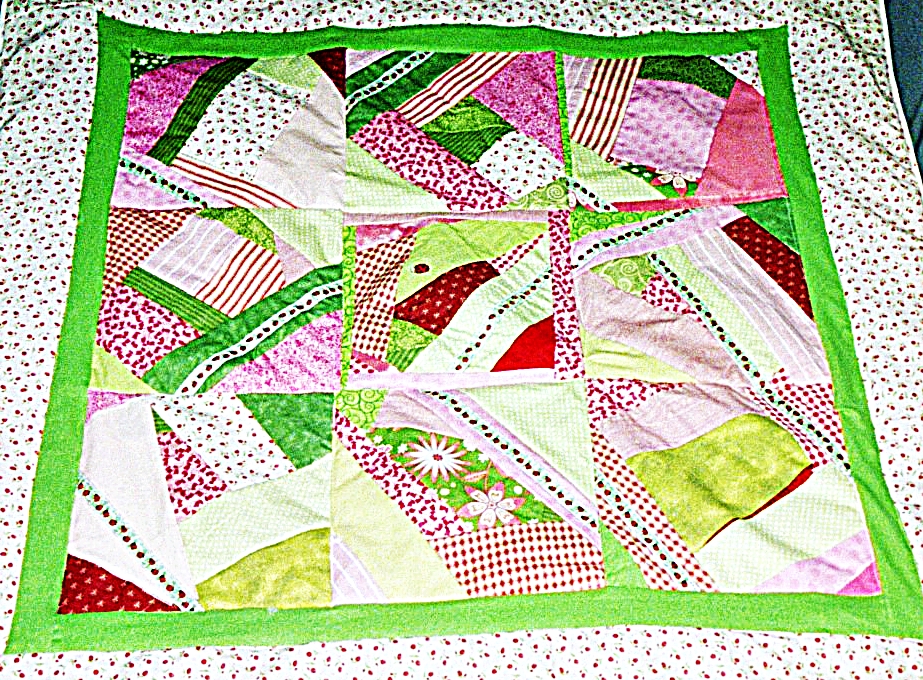
Crazy patchwork in large blocks makes an easy baby quilt, too.

An even easier way to sew baby blankets

If you don’t have the time or trouble to spare for making a baby quilt, you can sew a soft and sweet reversible baby blanket in a fraction of the time it would take to make even a simple quilt.

Easy, Easier, Easiest Ways to Sew Baby Blankets

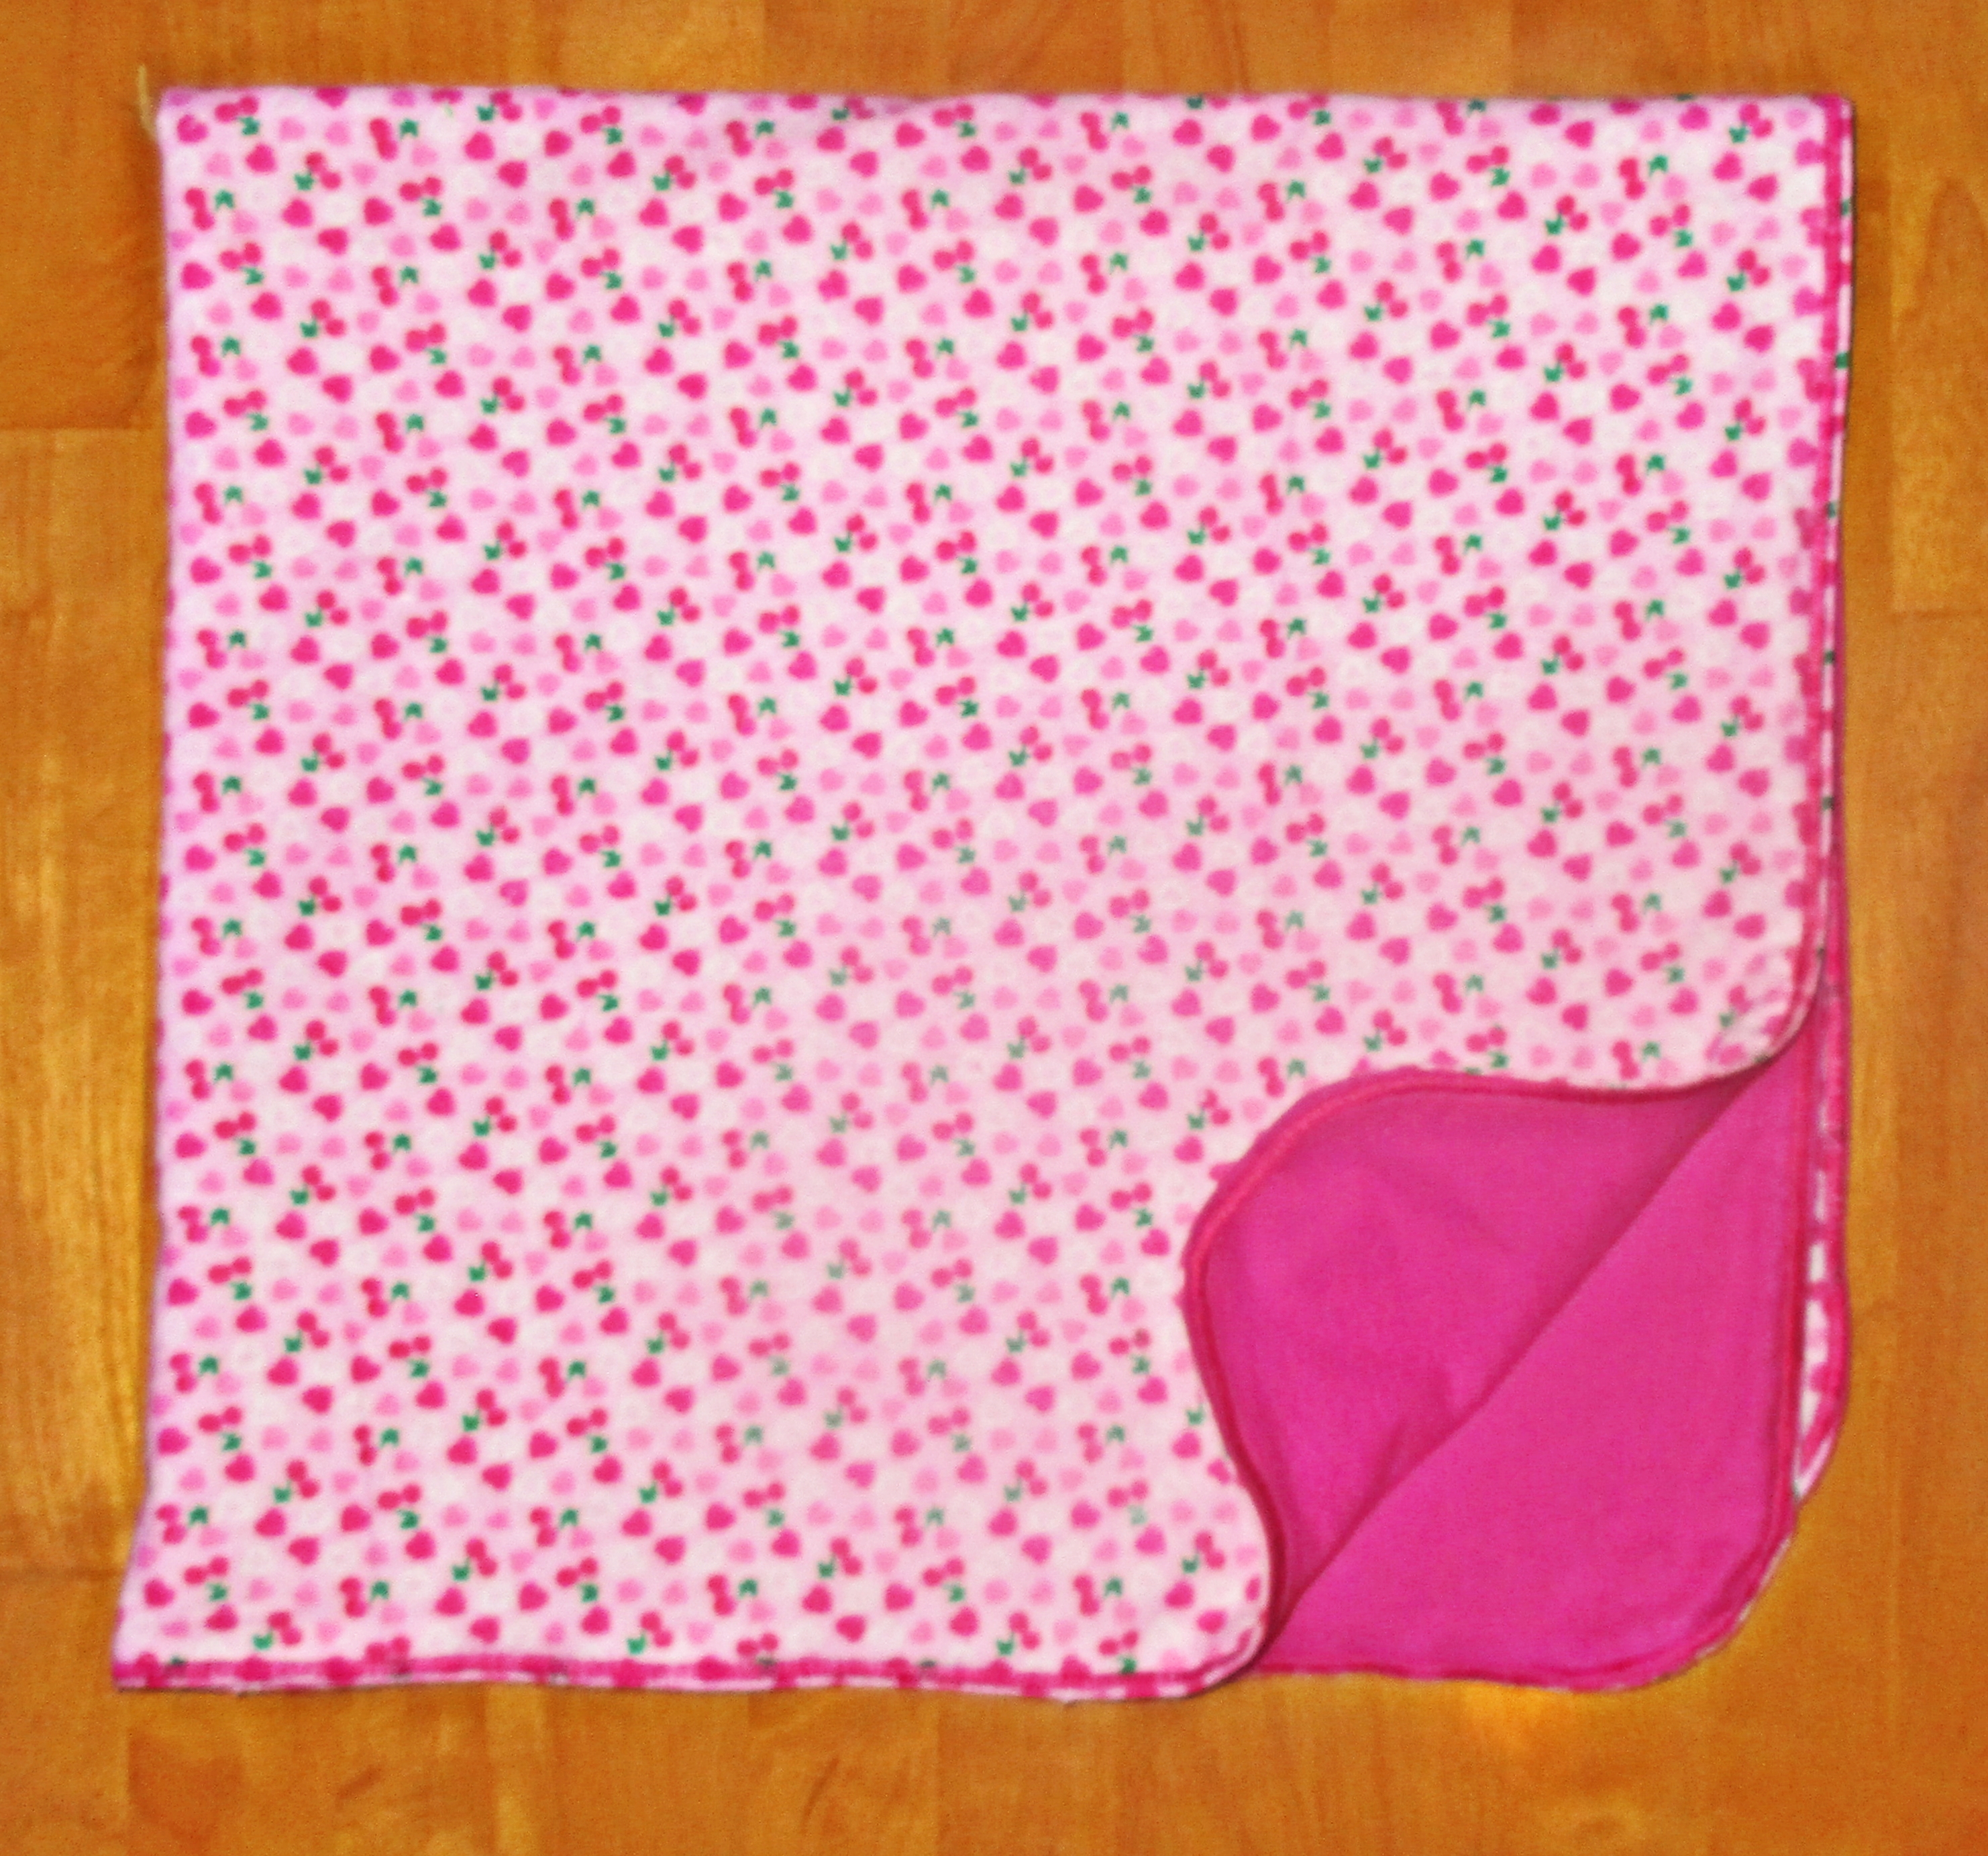
To do this, you need two same sized pieces of fabric. One yard square is a nice size, or you can make it larger, perhaps to fit a crib mattress (27″ x 52″, plus a few inches on all sides to hang over the sides). You will want at least one of these to be a soft flannel. I prefer to use flannel for both sides, but they are nice when made with quilter’s cotton on one side and flannel on the other, too.

Feel free to applique or embroider the front of one of the fabrics before assembly. This looks really sweet in the bottom corner.

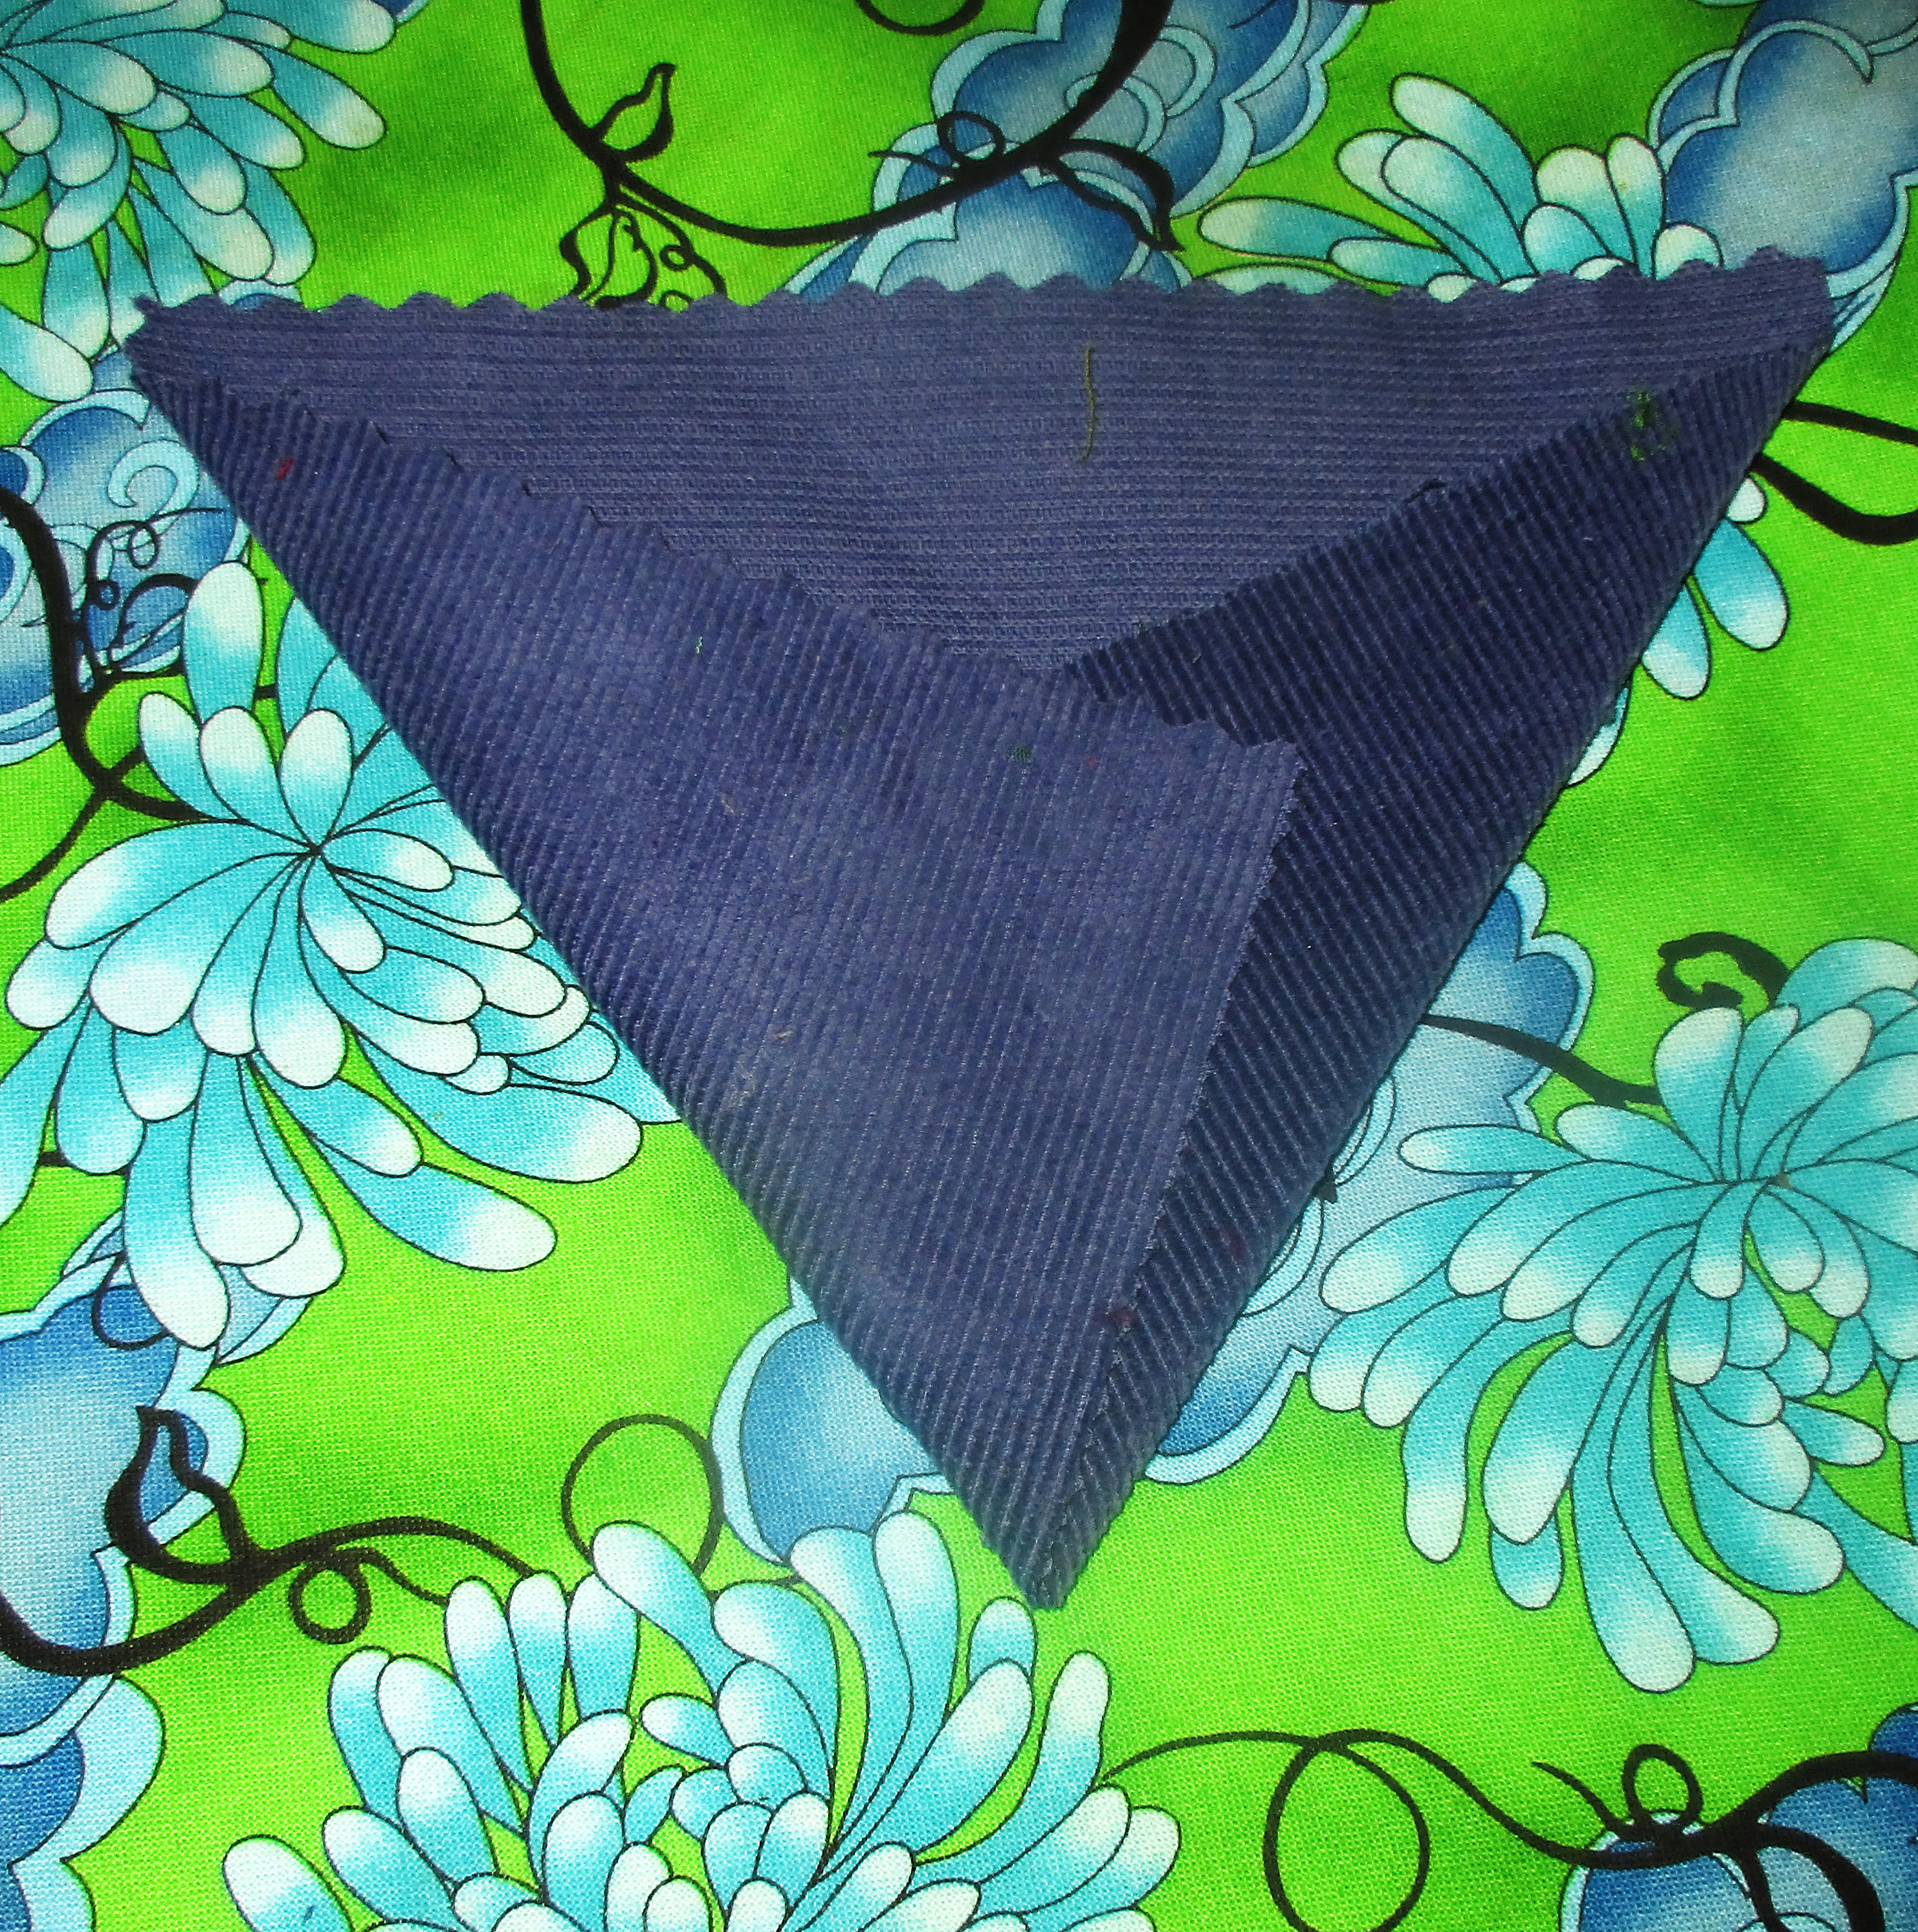
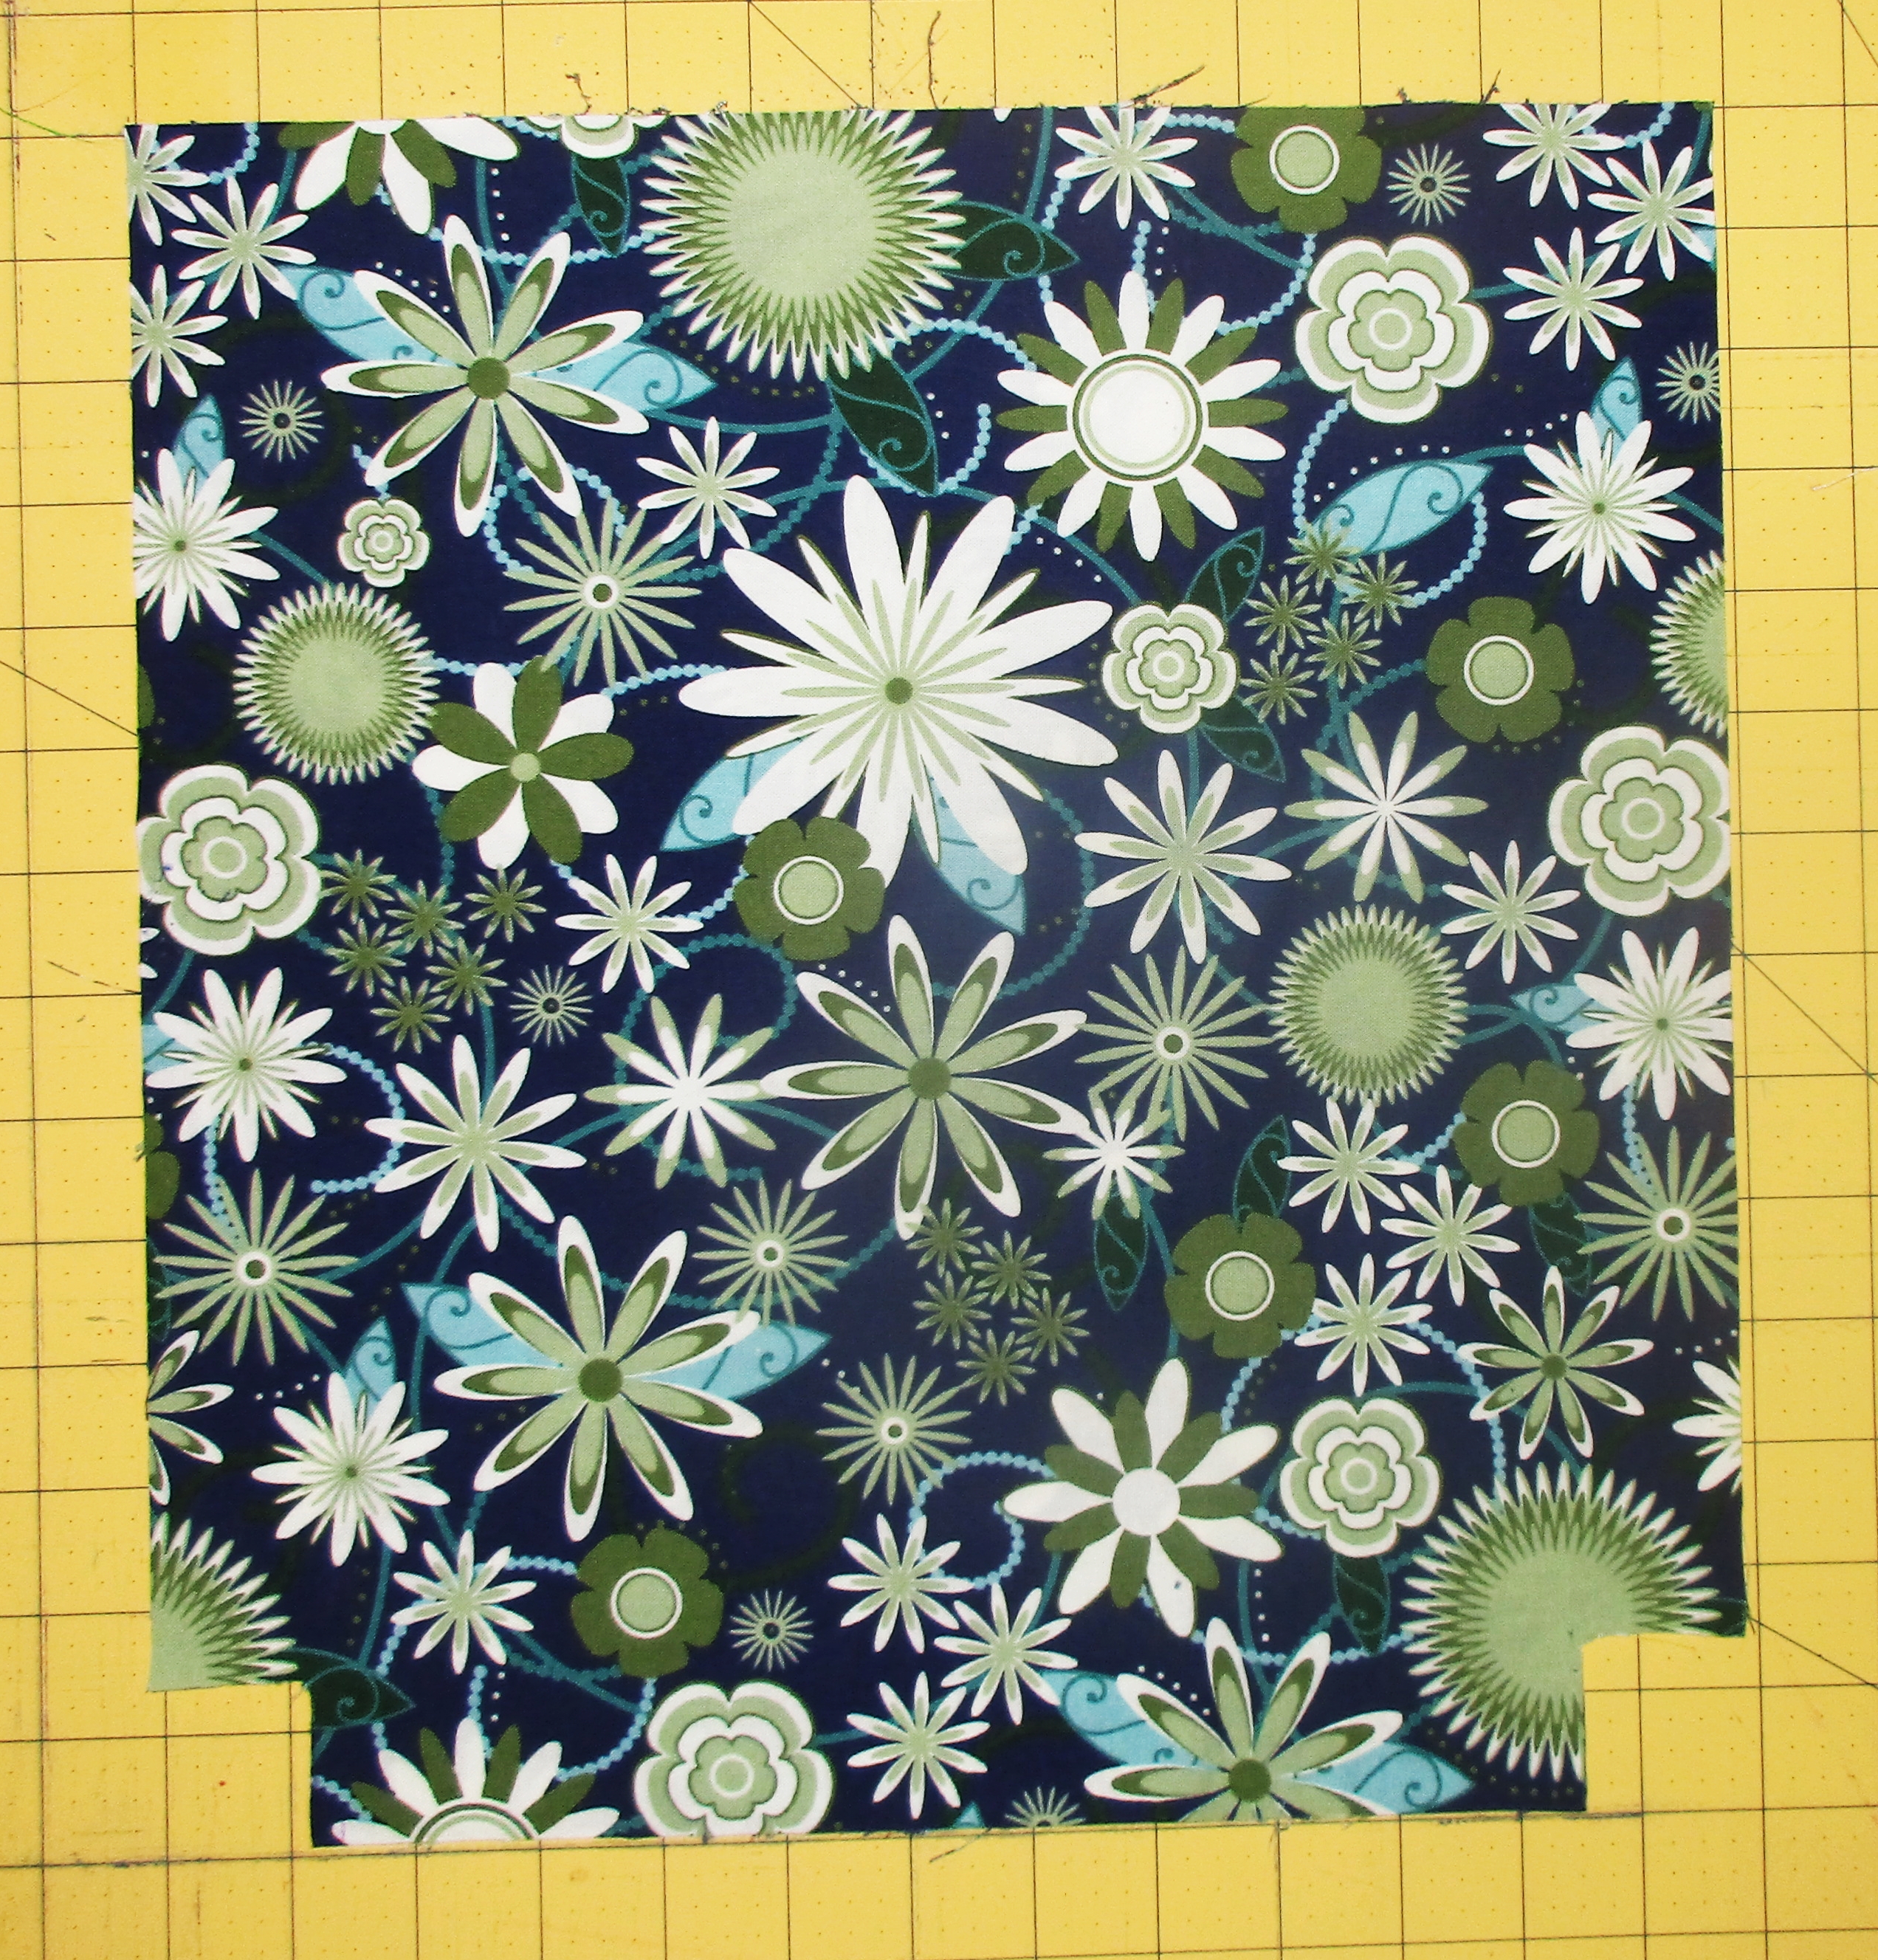
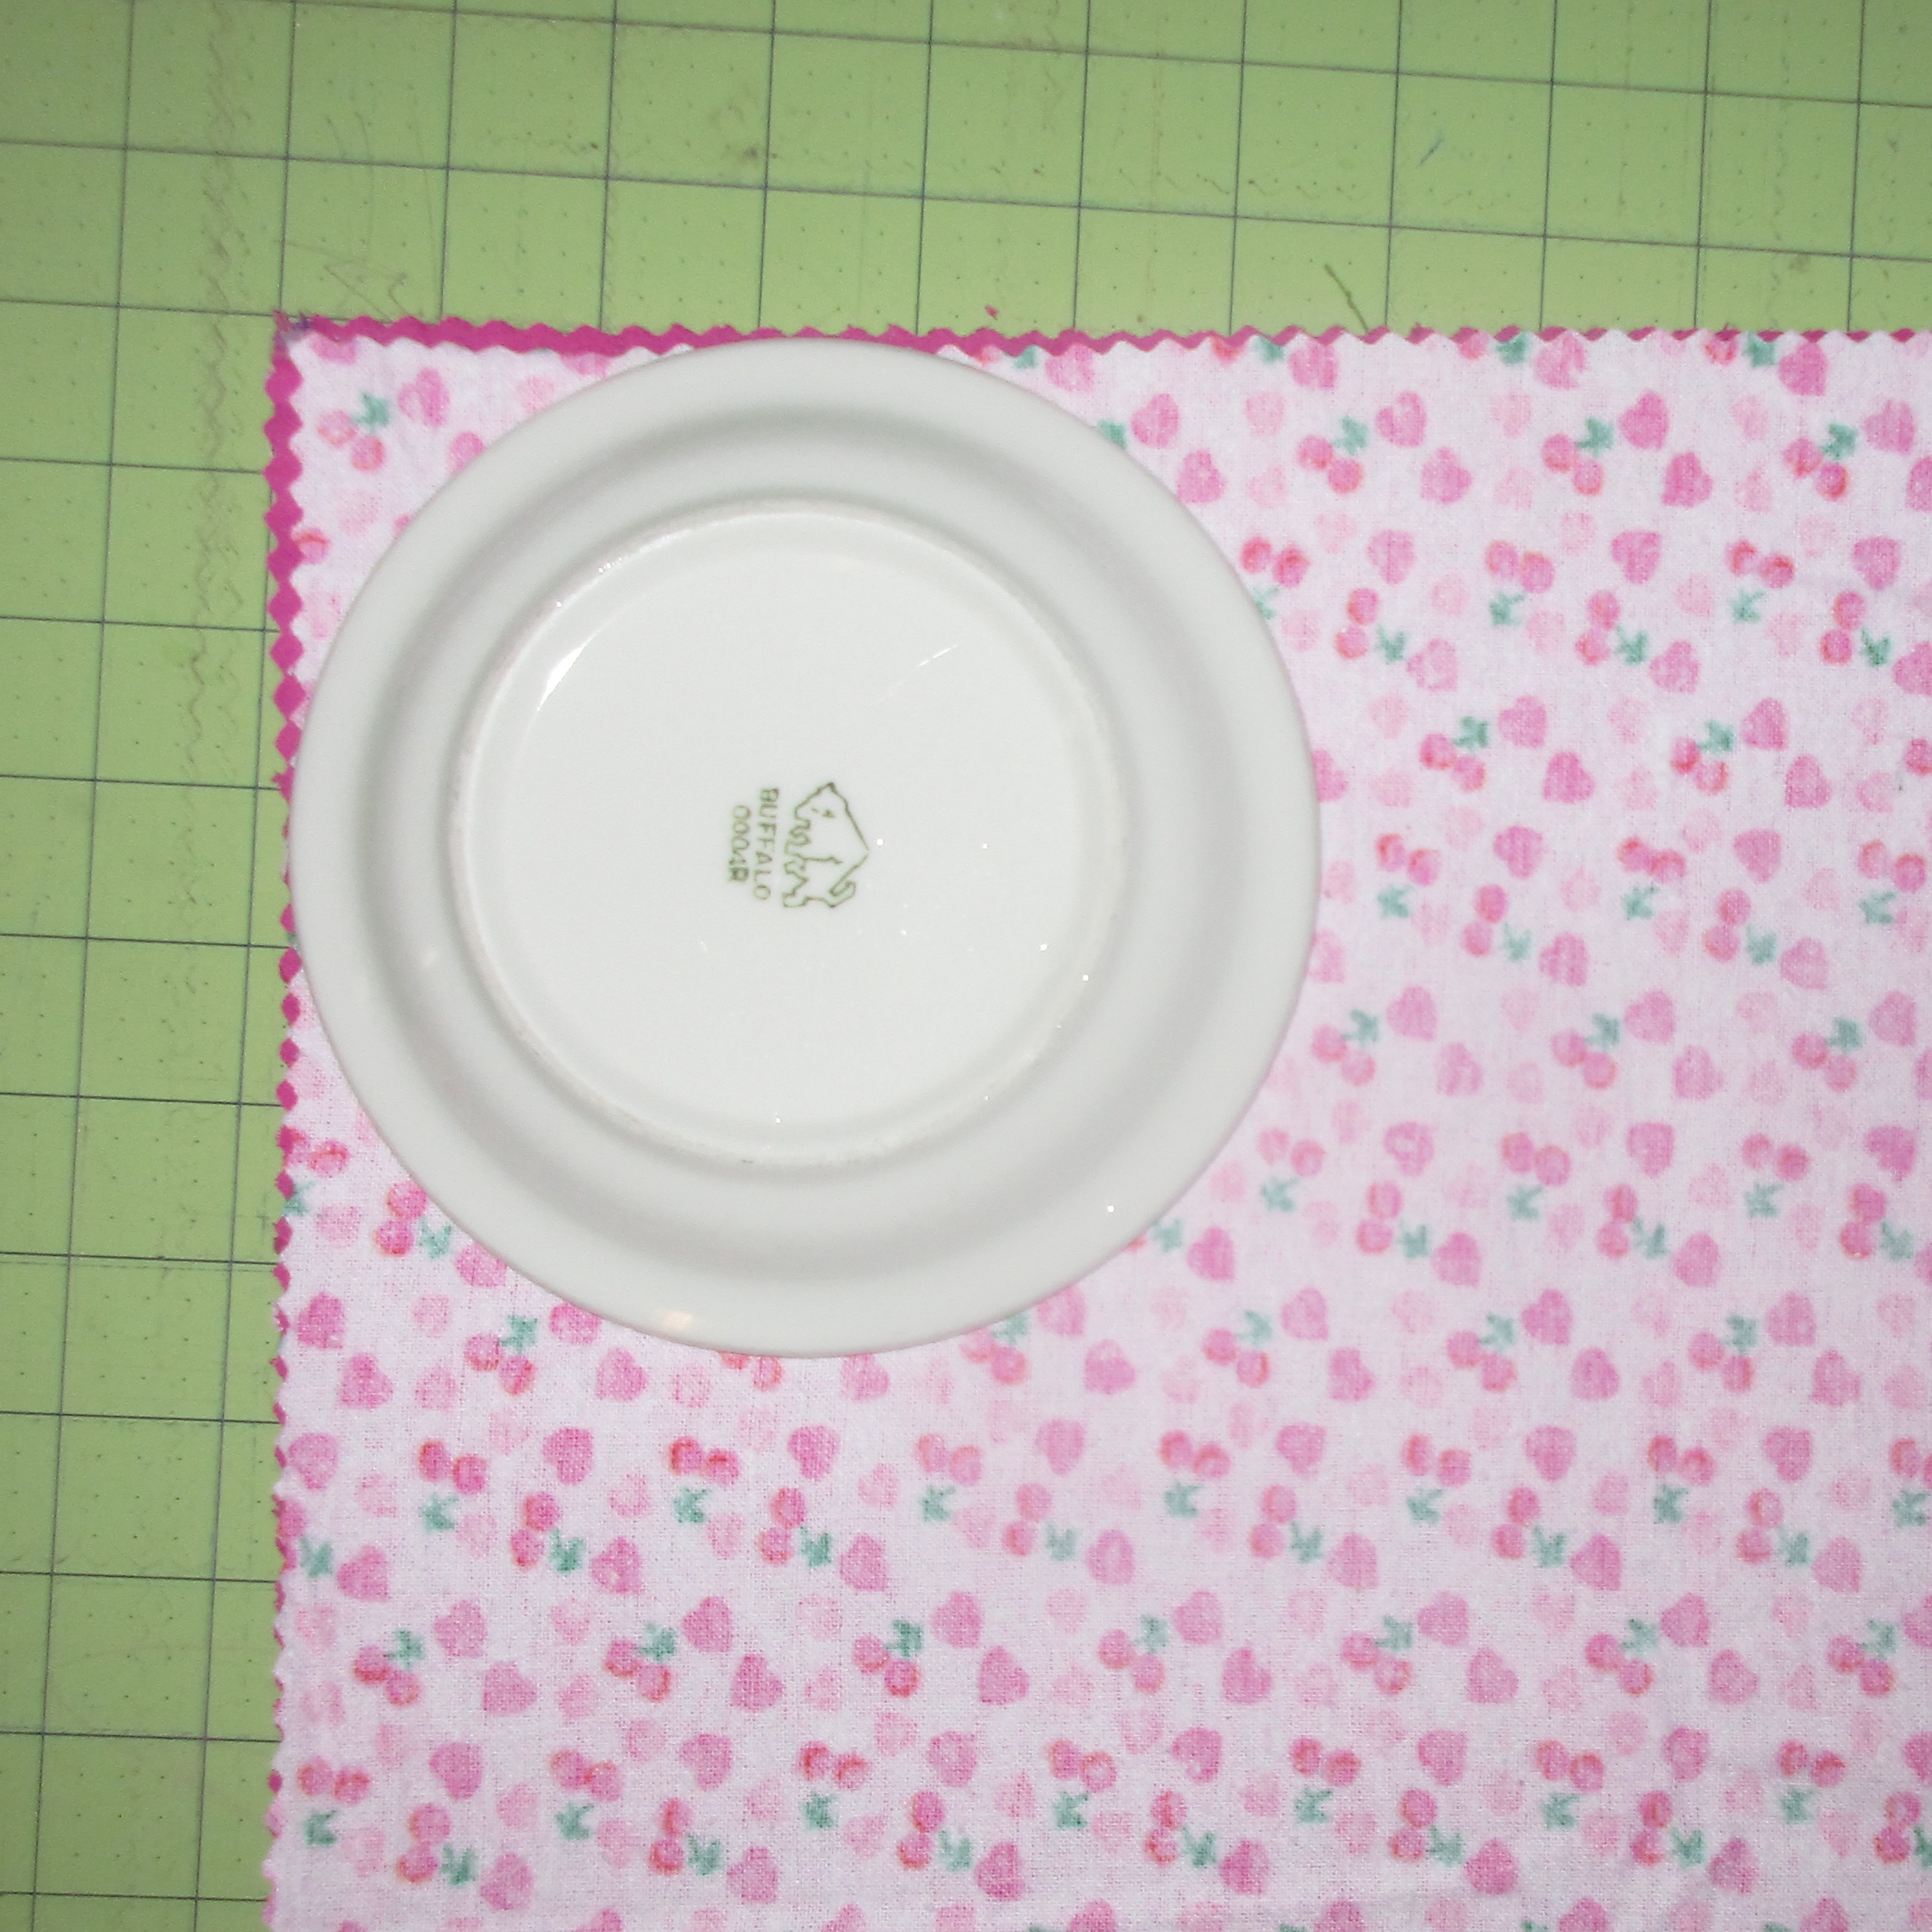
Cut the two fabrics to match and place them right sides together.  Then, using a dessert plate or saucer as a guide, curve the corners.

Easy, Easier, Easiest Ways to Sew Baby Blankets Easy, Easier, Easiest Ways to Sew Baby Blankets

Sew the two pieces together all the way around, except for an opening to turn. Turn right sides out and press. Then set your machine to make a wide, short zigzag stitch. I set mine with to a width of 5.0 and a length of 0.5. Zigzag around the edges of the blanket, about 1/8” from the edge. Be patient; stitching like this takes a lot longer than straight stitching does, so it will take quite a few minutes to go all the way around.

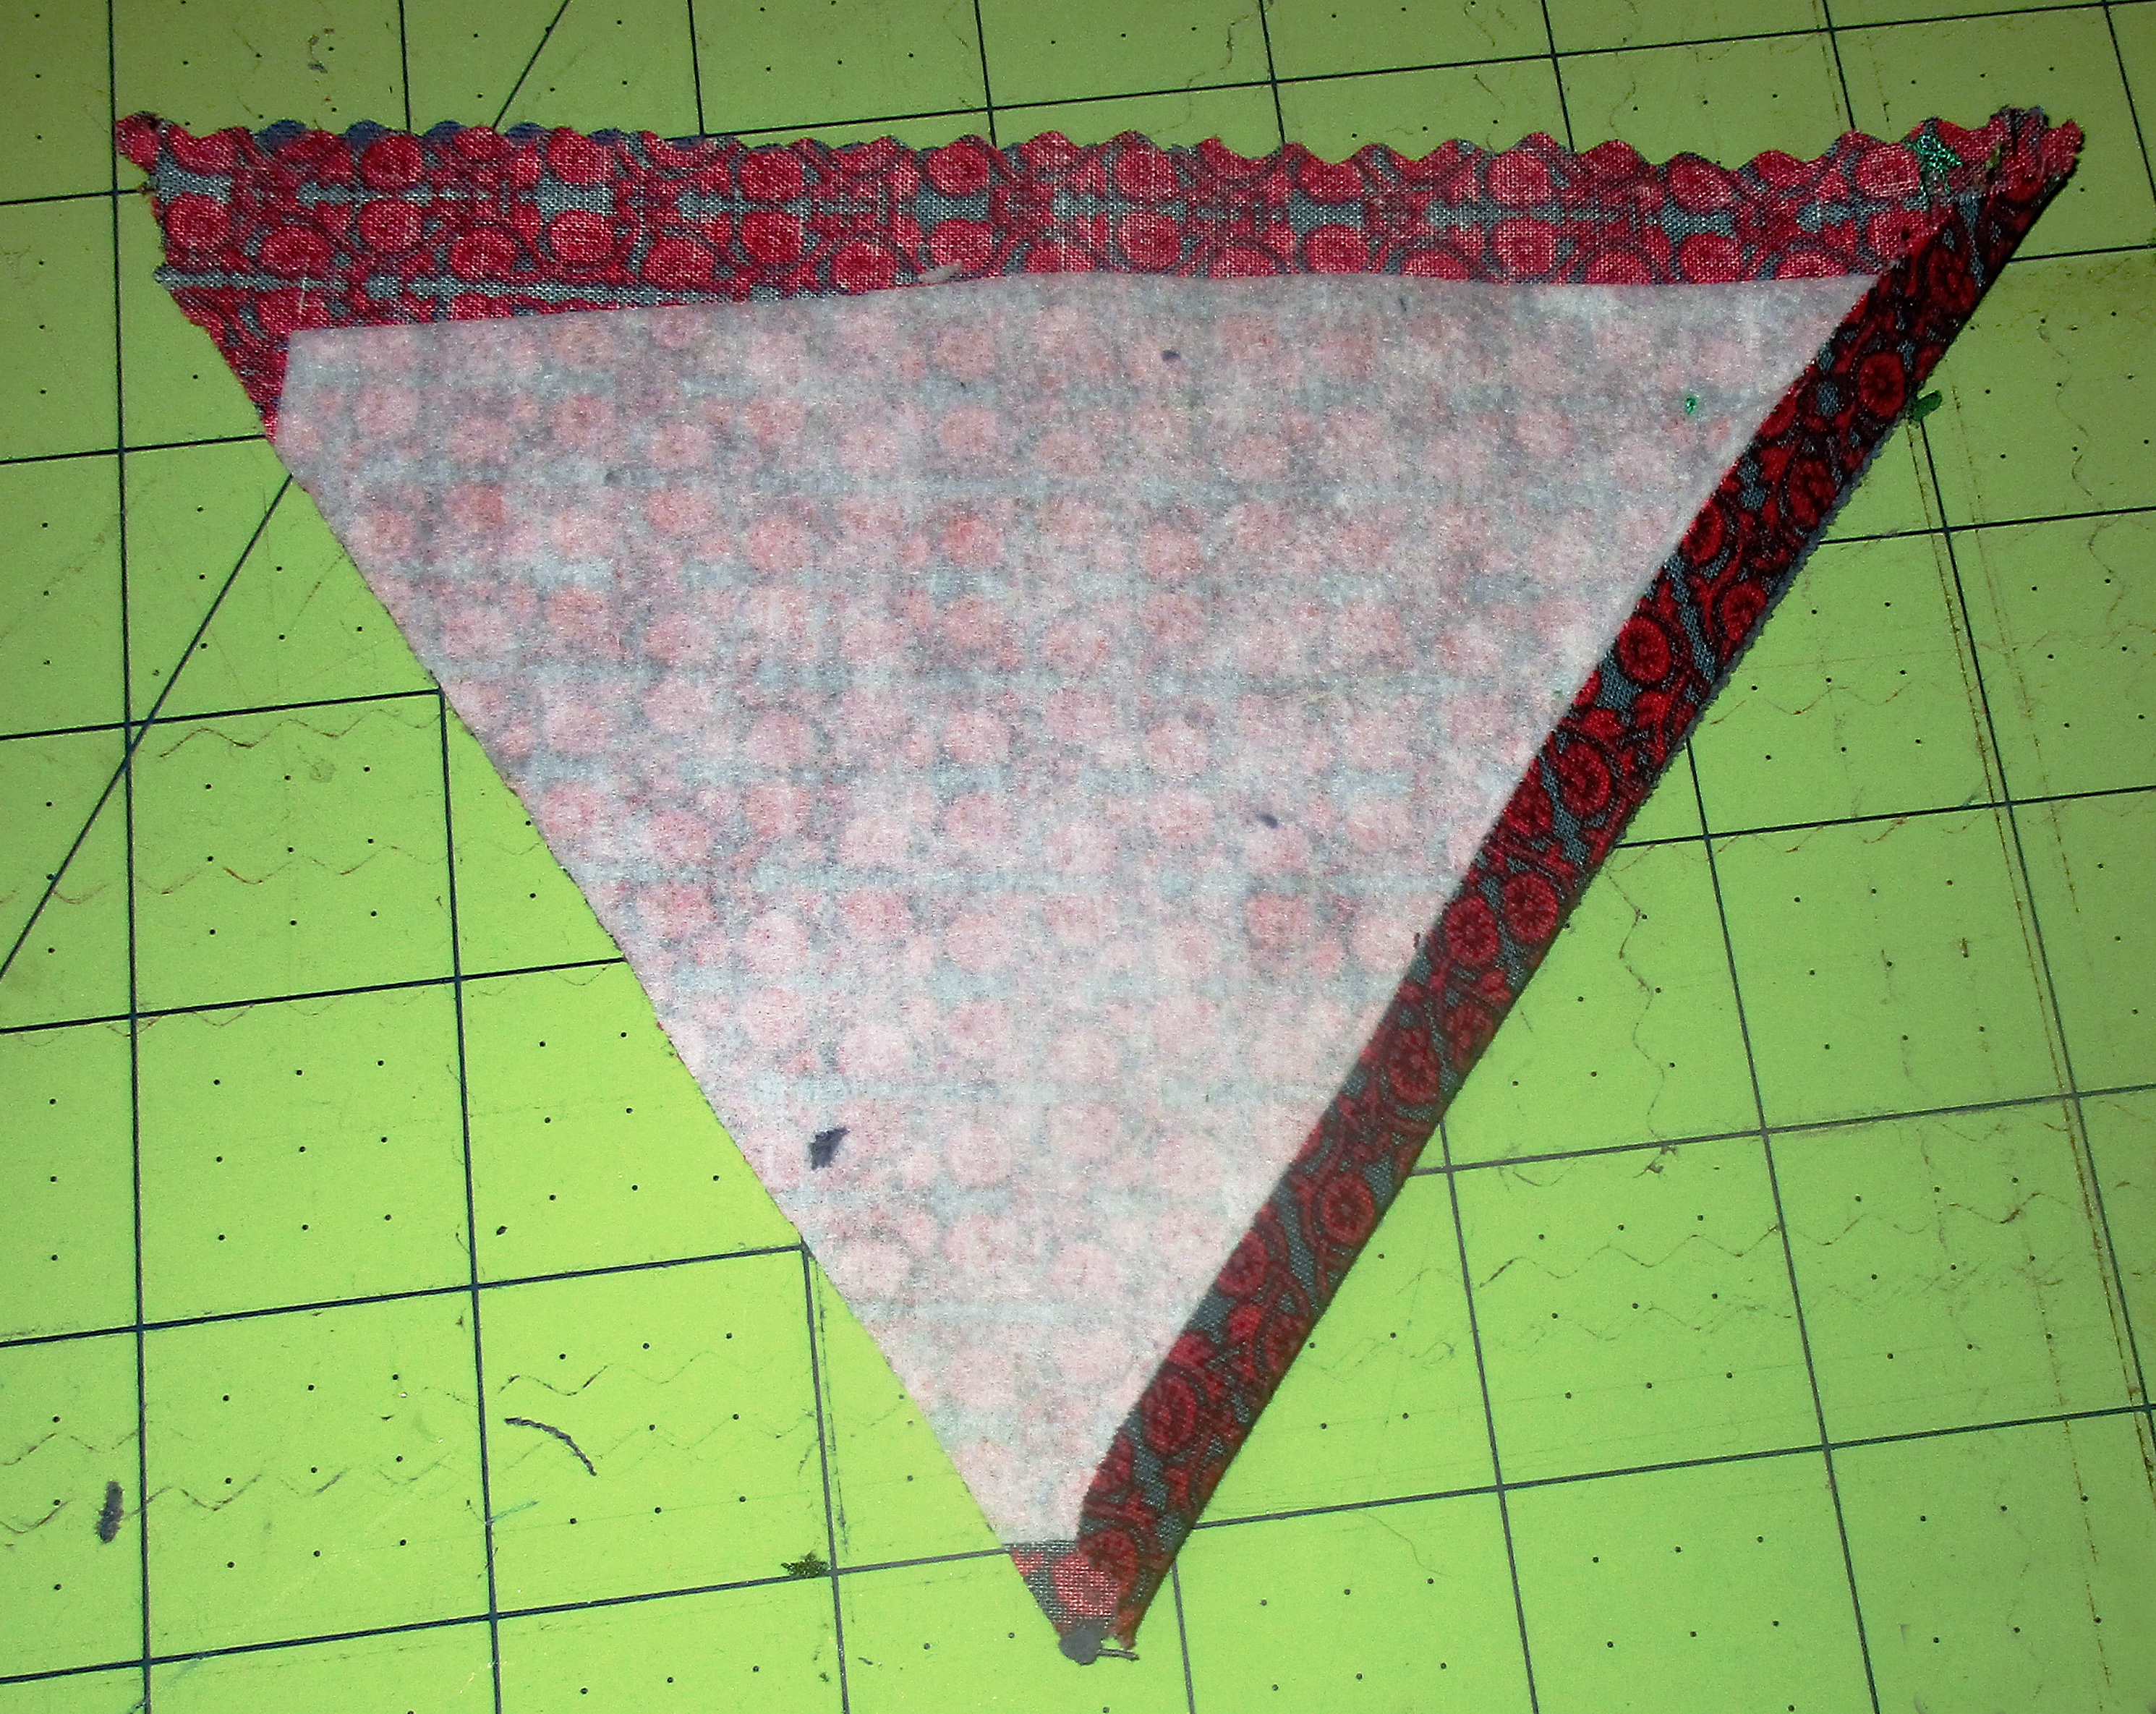
Or use binding instead

Another easy way to make this kind of double sided blanket is to layer the two fabrics wrong sides together and use bias binding all around to join them together.

I give these reversible blankets to every baby I know. Their mothers have often told me that these wind up being baby’s favorite blanket. My own boys liked these double sided flannel blankets so much that I made them to fit their beds.

Using a serger is the quickest and easiest way to sew baby blankets

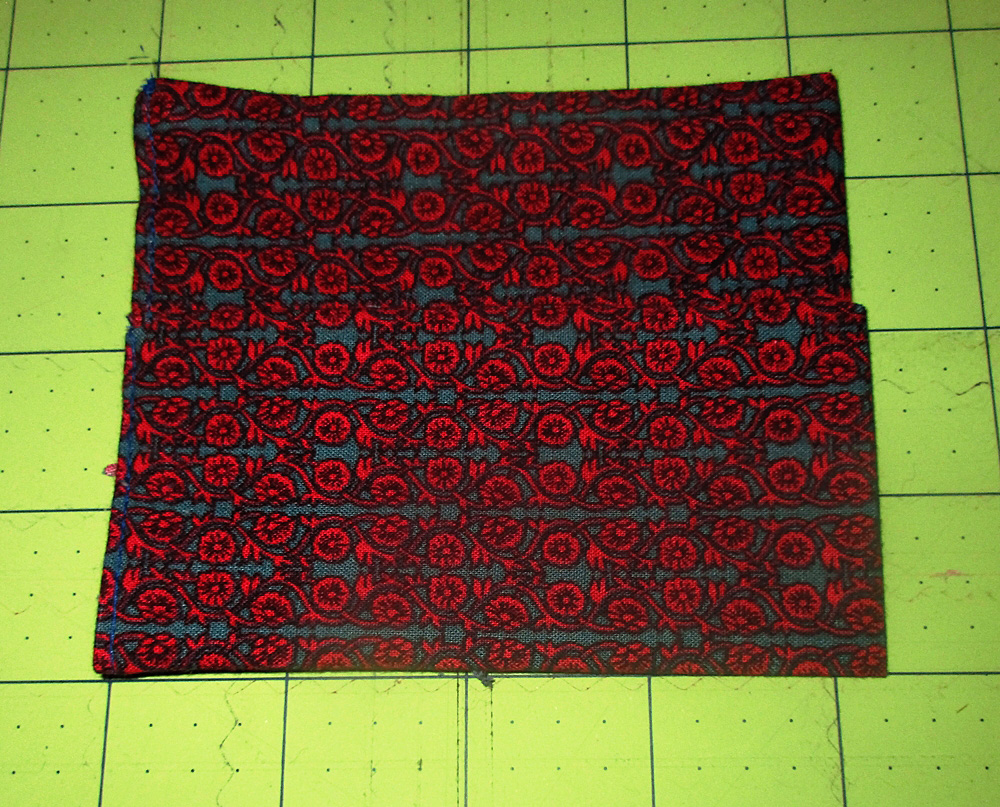
Parents of babies who like to be swaddled will need lots of single layer receiving blankets. These are also nice to have in warmer weather and for on-the-go. I always kept at least one in the diaper bag and one in the car. They couldn’t be easier to make and take less than ten minutes, including cutting and pressing time.

Easiest Baby Blanket

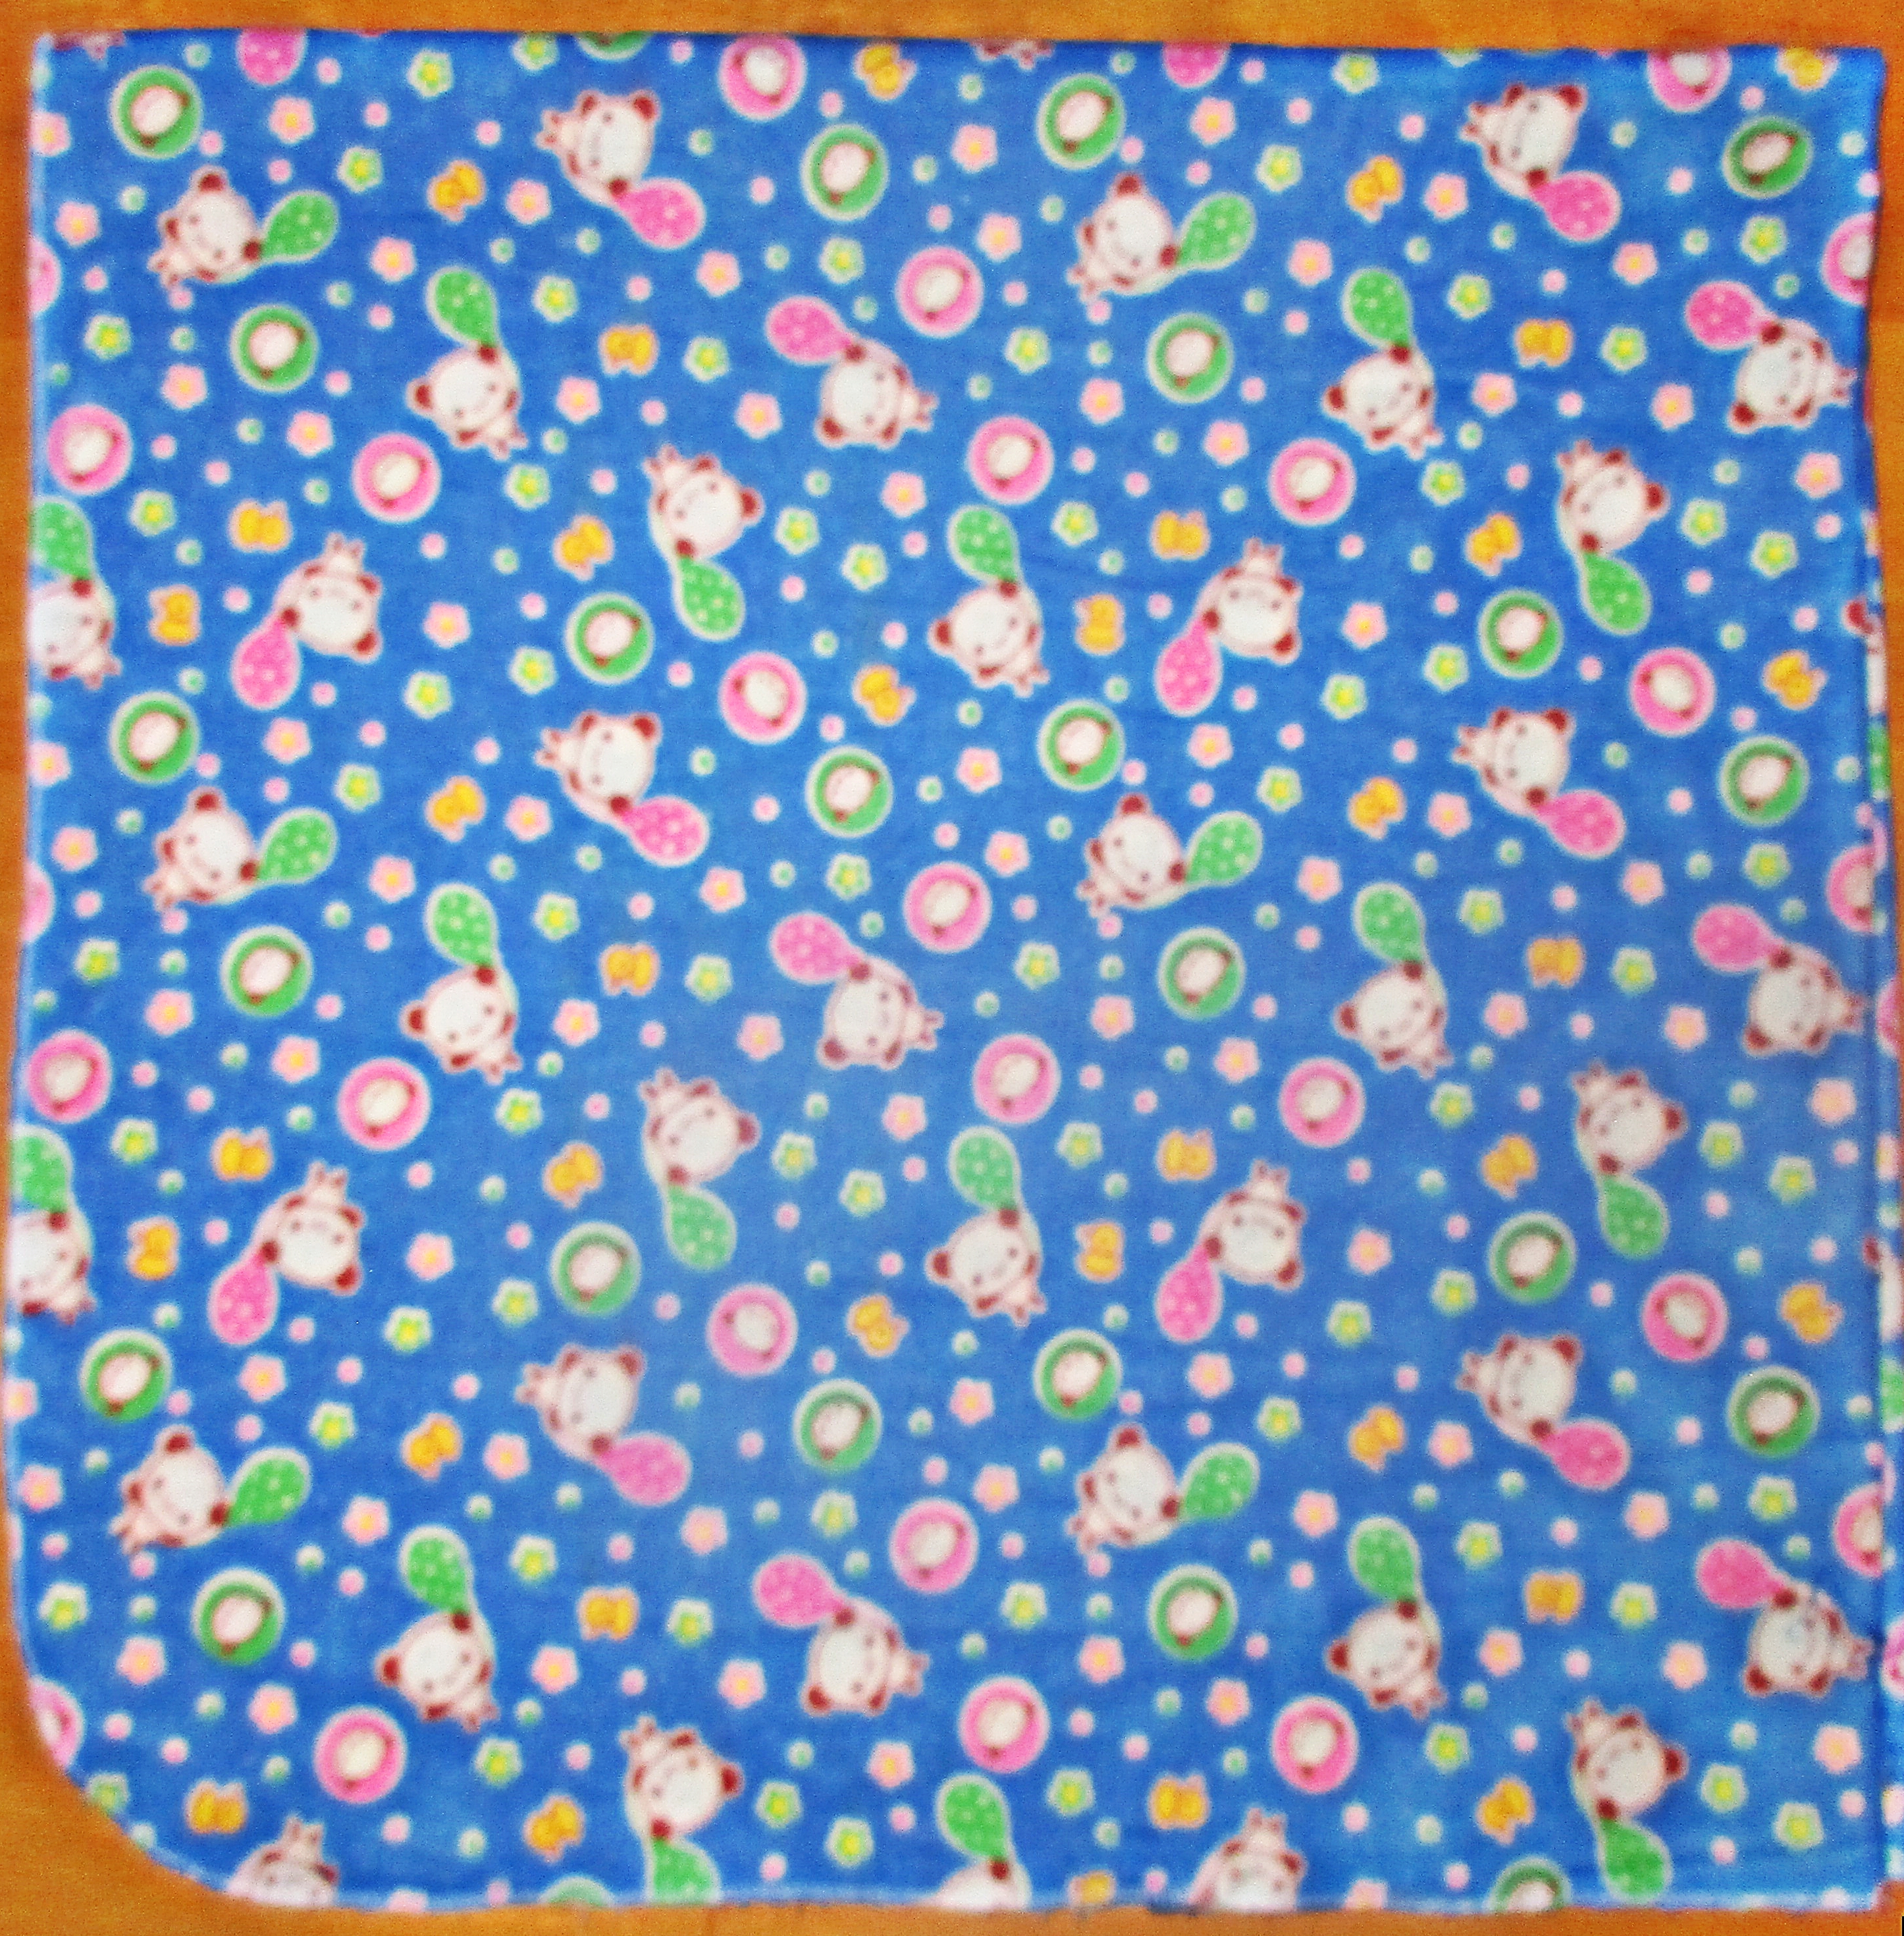
Folded in fourths here to show the corner curve. These will fold down really small to fit in your diaper bag or even the glove box.

Simply cut one piece of flannel to your desired size (one yard square is my favorite size), curve the corners, and serge all around. I set my serger to its narrowest width overlock stitch.

If you are not comfortable serging around curves, then skip the curving of the corners. To do this, just serge four straight sides, burying the end of each chain under the beginning of the stitches on the next side. Then use a tapestry needle to bury the last thread chain under your previous serging.

If you don’t have a serger yet, this is one of many reasons you will want one. Here’s my recommendation for which one to buy.

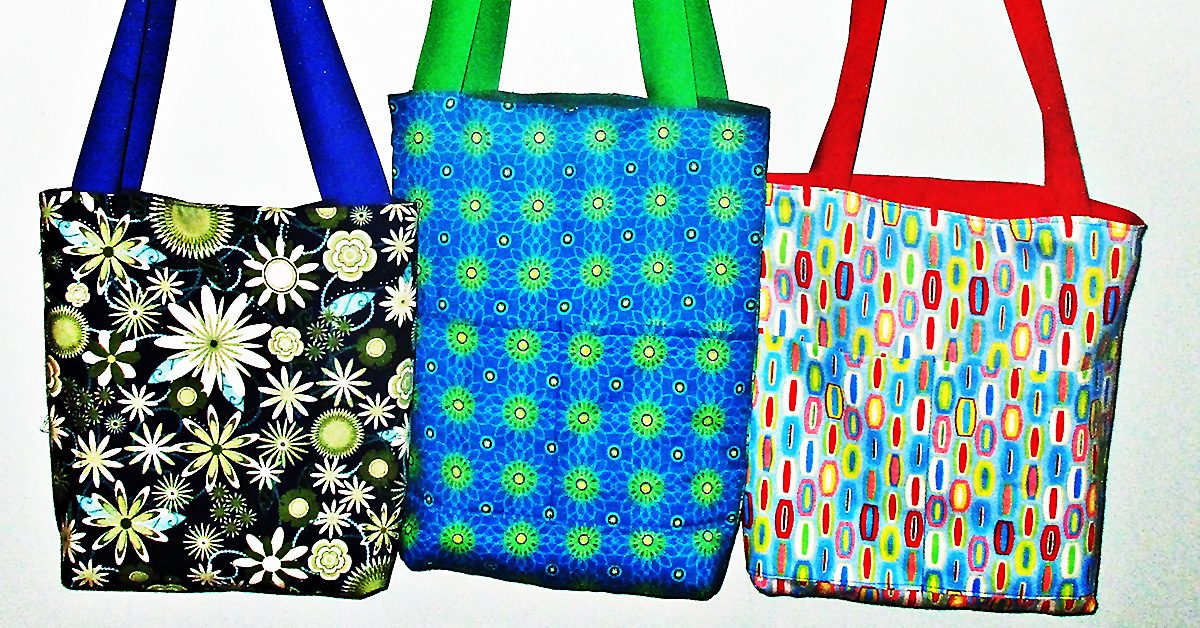
It’s easy to sew baby blankets

You can sew a quick baby quilt, a soft double-sided blanket, and a single-layer receiving blanket (or several) all in the same day. These little projects are so satisfying that I bet, like me, you’ll want to sew some for every baby you know.

Happy sewing!

Sew a Small Purse Tutorial: Tiny Tasseled Tote

Here’s my own design for a small purse tutorial.

Small purse tutorial.

Small purse tutorial.

This elegantly simple bag is incredibly easy to sew and offers endless opportunities for embellishment.  It is tiny as totes go, but as a small purse it is offers plenty of space for all your essentials, with room to spare.  It features an outside pocket big enough for your phone or sunglasses, and two inner pockets, one sized for your ID and debit card.

I really wish I had an embroidery machine; if I did I would completely cover this small bag with colorful embroidery. Since I don’t, I decided to make mine understated and casual in all one color and with minimum embellishment.  I think this denim blue corduroy is nearly a neutral color and I know it will go with much of my wardrobe.

I want to buy some silk cord to make the tassel and make a bag like this in a dressier fabric, too. Keep tuned to this blog, as I will soon share another small purse tutorial for a variation on this bag that is a lot of fun to make, too.

Without further ado, here’s this small purse tutorial, suitable for beginner sewists:

Tiny tasseled tote small purse tutorial

You need fabric for the bag body and lining, a little bit of interfacing, and yarn for the strap and tassel.

Cutting instructions

Cut:

  • 2 bag body pieces (main fabric) 7.5″ by 9″
  • 2 bag lining pieces (second fabric) 7.5″ by 9″
  • (optional) 2 interfacing pieces  7″ by 8.5″
  • (optional) 1 interfacing piece 4.5″ by 8″
  • 2 main fabric pieces 5″ by 7″
  • 2 pieces second fabric 5″ by 7″
  • 1 piece second fabric 6″ by 9″

Step one is optional – interface or quilt

If you choose to add interfacing to your bag, do it now. Because my outer fabric was corduroy and the quilter cotton lining fabric less sturdy, I chose to interface the back of my lining fabric (7.5″ by 9″ inch rectangles).  If you use quilter cotton or other lightweight fabric for the outside of your purse, then interface that instead.  Also apply interfacing to one of the 5″ by 8.5″ rectangles.

Another option is to forego interfacing and quilt one layer of your bag, either the outside or the lining. Just quilt these now, before we move on to construction.

Make the outside pocket

Take one 5″ by 7″ piece of your main fabric, and a matching piece of the lining fabric and align these right sides together. Sew around all four sides, leaving an opening of at least 2″ to turn right sides out. Clip the corners, turn, and press.

Now fold over the top about half an inch, press, and topstitch. I chose to press mine with the lining fabric forward, to show a bit of contrast on the outside of this otherwise plain blue bag. You can fold towards the inside though, if you’d rather not show off your lining fabric on the outside of your purse.

Center the pocket on one of the bag body 7.5″ by 9″ rectangles, with the hem you just sewed at the top of the bag. Sew the sides and bottom of the pocket to the bag body piece about 1/8″ from the pockets edges.

Make the inside pockets

Take the 6″ by 9″ lining fabric, and fold it right sides together to make a rectangle 4.5″ by 6″. Sew with a ¼ inch seam allowance along all three open sides, leaving an opening of at least 2″ for turning. Turn right sides out, press, and top stitch the opening closed.

Now fold one short edge of this finished rectangle upwards about 2 inches and press this fold line well. Then, center this pocket on one of the 7.5″ by 9″ bag lining rectangles, and sew the bottom and sides down on the lining fabric.

Inside pocket image.

Inside pocket image.

Sew the bag body and lining

Now take the two main fabric rectangles and put them right sides together.  Make sure the outside pocket is facing with the opening pointing up, then sew the side and bottom seams.

Then repeat for the bag lining pieces, again making sure the pocket opening is facing up before sewing the sides and bottom together. Set both bag and lining aside.

Make the tassel

Wrap yarn around the four outstretched fingers of hand about ten times. Tie the yarn together at the top of these loops with a short piece of yarn, then cut through all the loops at the bottom. Take another piece of yarn and wrap it around and around the strands, about half an inch from where you tied the yarn together at the top, then tie. Voila, a tassel!

How to tie a tassel.

How to tie a tassel.

Make the flap

Take one of the 5″ by 7″ pieces to your ironing board and place it right side down, aligned with the long edges horizontal and the short edges vertical. Then fold the bottom corners upward to make a point in the middle and press these fold lines well.

Tassel bag point image.

Tassel bag point image.

Then, cut along these pressed lines to make a triangle shaped piece for the flap. Cut a lining rectangle piece to match, too. Now, go back to your ironing board with these pieces. Fold  one of the edges you just cut to form the triangle back ¼ inch and crease this well with your iron. Repeat on the second triangle.

Tassel bag point crease image.

Tassel bag point crease image.

Now place the two triangles right sides together and sew together along the opposite side of the triangle from the side that you just creased. Clip the seam allowance from the triangle point, turn right sides out, align the creased seams you previously pressed, and press again.

Now insert the two short yarn tails from where you tied the yarn together at the very top of your tassel into the triangle point. Topstitch along the seam you just sewed, then topstitch to sew the side with the pressed seams closed, too, being sure to catch the yarn at the top of the tassel inside the seam.

The third side of the triangle flap remains open. Align this open edge with the top edge of the back side of your bag body, right sides together, and sew right along the edge to baste these pieces together.

Make your strap

To make the yarn strap, use 9 pieces of yarn about 4 feet long. Use 3 strands each to make three long braids, then braid these three all together. Secure ends by tying with another piece of yarn. Or opt to use ribbon or make a long fabric strap instead, if you prefer.

Final assembly

Take your main bag body and your bag lining body and insert one inside the other, with right sides together. The flap should be between the two bag bodies. Now place your strap inside, also between the two bag bodies, aligning each end with the side seams.

Use the free arm on your machine, and sew these together, leaving an opening to turn. You will sew the backside with the flap and the straps, and leave the opening in the front. Turn right sides out and push the lining side into the bag body. Now fold the edges of the opening inward, topstitch this opening closed, and you are done.

It’s reversible

Technically, this bag is reversible. Although, if I were going to reverse this bag, I would change the construction of the inner pocket. I wouldn’t want a debit card pocket on the outside of my bag. To do this, just omit the step of folding the inside pocket up to create the card pocket. Sew it on as a larger patch pocket instead, the same as you did for the outside pocket.

I hope you use this small purse tutorial to make one, too. What fabric will you use? How will you embellish yours?

DIY: Reversible Tote Bag Tutorial

DIY: Reversible Tote Bag Tutorial

It is easy to sew a reversible tote bag; even beginners can make this project.

It is easy to sew a reversible tote bag; even beginners can make this project.

It is easy to sew a reversible tote bag; even beginners can make this project.

You can make these in any size. My three examples are each sized slightly differently.

To make one reversible tote bag, you need 2 different bag fabrics. Depending on the sturdiness of your fabrics, you may also need medium weight interfacing or fusible fleece. You can make your bag handles from long rectangles of one or both of these fabrics, or you can use grosgrain ribbon, as I have here.

Reversible tote bag step one: cut bag pieces

Measure & mark 1.5” from both sides of the bottom corners & cut these little squares out.

Measure & mark 1.5” from both sides of the bottom corners & cut these little squares out.

Cut two squares or rectangles of each fabric to your preferred dimensions. I made these using 13” x 14”, 14” x 15” and 13” x 17” rectangles, and I have made them both much smaller and much larger.  The 13” x 17” is big enough for my laptop. But ribbon handles aren’t a good idea for a laptop bag; follow the directions for making stronger fabric handles if you plan to carry your computer.

Then measure and mark 1.5” from both sides of the bottom corners and cut these little squares out. Do this for all four pieces of your bag fabric.

Step two, optional: interfacing

If you choose to make your reversible tote bag from home decor fabric and/or canvas, you won’t need to use interfacing.

If you are using quilter’s cottons or similar lightweight fabrics, cut fusible fleece or interfacing to fit two of the bag pieces. Follow package directions to fuse fleece or interfacing to the wrong side of both pieces of one bag fabric.

Step three, optional: pockets

You can make pockets on one or both sides of your reversible tote. The easiest way to make pockets is to start with a rectangle, fold it right sides together, and sew all around, leaving an opening for turning. First topstitch the opening closed, then pin and sew the bottom and sides of the pocket to the bag.

You can make a long rectangular pocket that stretches the full width of your bag, or make square patch pockets and sew them in the middle of one or more of the bag pieces.

Step four: sew two bag bodies

Take both pieces of one of the bag fabrics and sew along the bottom and side seams with right sides together. Press seams open. Now, miter the corners by lining up the side and bottom seams you just sewed at the middle of the new seam you will form from the square cut out. Sew these seams.

Repeat with the pieces of the second bag fabric.

Step five: handles

Use a soft measuring tape or even a string hung over your shoulder to determine how long you want your straps to be. I like long shoulder straps, so I usually cut mine about 30 inches long. If you prefer to carry your tote on your arm, cut yours shorter. You need two.

I saved time making these bags by using grosgrain ribbons to make easy straps. To do this, just cut two pieces of ribbon to your desired length.

To make fabric handles, cut two long rectangles to your desired length measurement by twice your desired strap width. Apply interfacing to the wrong side of your fabric if you like.  Fold lengthwise right sides together and press. Sew along the long open edge, then turn. Press again.  Now top-stitch along both long sides.

There is no need to finish the short ends as these will be concealed between the two sections of the bag.

Step six: assembly

They are handy for carrying books, notebooks, your computer, clothes for overnight or the gym.

They are handy for carrying books, notebooks, your computer, clothes for overnight or the gym.

Insert one bag into the other, with right sides together. If your placed pockets on one side of each bag body, insert them together so that the pockets are on opposite sides. Push down the corners to make sure both bag pieces are lined up well at the bottom. Then line up the side seams from both pieces and pin these together.

Take one strap and hold one end in each hand so that the loop hangs down. Be sure it isn’t twisted and insert it between the two bag parts on one side. Measure in from the pinned side seams on each side to be sure the straps are centered. About three inches in is a good guideline, but eyeball your bag to decide on exact strap placement. Just measure the distance between strap and side seam on both sides to be sure they are even. Pin, then repeat on the other side with the other strap.

Now sew together along the top edge.  You will have to leave an opening big enough for turning; I sew across all the straps and leave the opening on one side.  Turn everything right sides out. Both sides of the reversible tote will be pointing out.

Stick your hand into the opening and poke all the corners out from the inside. Then push one bag body into the other so that it becomes a bag with handles at the top. Return to your ironing board and press. Pay attention to the edges still open from turning; you want to press the raw edges inward and neatly align for top-stitching this opening closed.

Now stitch all the way around the top of the bag and you’re done.

Make more!

Reversible tote bags are easy to sew in a hurry & the possible variations are endless.

Reversible tote bags are easy to sew in a hurry & the possible variations are endless.

Reversible tote bags are easy to sew in a hurry and the possible variations are endless. Make them in different sizes and try different fabrics and trims. Use tie-dye, quilting, appliqué, fabric paints, or any other embellishment you like.

They are handy for carrying books, notebooks, your computer, clothes for overnight or the gym. You can use them as a shopping bag, your purse, or for handmade gift giving. Pick out some pretty fabrics and make a bunch. Happy sewing!

How to Sew Easy Shorts in Just 10 Minutes

How to Sew Easy Shorts in Just 10 Minutes

You really can sew easy shorts in ten minutes. I made pairs for two of my boys and a pair for myself in half an hour, and this included stops for elastic fitting and rewinding a bobbin.

Sew Easy Shorts

For kids, sew easy shorts in 10 minutes using bandanas

Easy bandana shorts are a super quick and simple way to make cute shorts for kids.

I made these with polyester, rather than cotton, bandanas. I am collecting cotton bandanas for another project and I accidentally bought a couple that turned out to be poly.

It occurred to me that these will dry quickly and so make perfect yard shorts for my boys who are in and out of the garden sprinkler this time of year.

I’ve made these from cotton bandanas before and they have been summer favorites for all my children. They wear them so much that the cotton ones don’t last through too many seasons. So it was time for me to whip up a couple more.

You can use bandanas to make shorts to fit most any size child. Or you can make bandana pants for a baby or toddler. Here’s how to make them:

Supplies:

  • Two bandanas
  • Elastic for waist
  • Sewing machine
  • Thread
  • Scissors

Step one to sew easy shorts: measure

The key measurements you need are the child’s waist and rise. To measure rise, run the measuring tape from the waist, between the legs, to the back waist.

I like to make bandana shorts like jams using the full bandana and not measure inseam or length. If you’d like to hem your child’s pants to a specific length, you are welcome to take the leg measurements. Then you could trim the bandana from the top rather than hemming the legs. That’s what I’d do if I wanted to shorten these.

Sew easy shorts step two: cut

Fold the bandanas in half with the fold running vertically. You are going to cut out a J shaped piece from the top edges. Determine how deep and wide to cut this J shape based on your measurements.

You will want to divide the child’s rise measurement by half and add 1 inch — or up to 2 inches, if you’d like to add more room to grow.

Mark that far down from the top corner edge of the folded bandana. Then mark an inch and half to two inches in from the outside edge. Cut in a J shape between these two points, leaving a J shaped cut-out on the edges of your folded bandanas.

Fold the bandanas in half with the fold running vertically.

Fold the bandanas in half with the fold running vertically.

If I wanted to shorten the legs from the bandana lengths, I would cut that many inches off the top, before I measured and cut the J.

Step three: sew legs

Each bandana will make one leg. Fold them right sides together, and sew down the inseams, which are the edges of the bandana beneath the J crotch seam you cut out.

After you sew each leg, turn them right sides out.

Step four: sew crotch seam

With the legs right sides out, align the crotch seams of each leg piece. Make sure the leg seams you already sewed are aligned, as well as the top edges.

Sew this crotch seam with a stretch stitch, for maximum strength.

Now they look like shorts.

Now they look like shorts.

Step five: sew the waist

Now fold over about an inch at the top of the shorts, toward the inside, and press.

Sew around this seam, leaving a couple inches open, to allow for elastic insertion.

Cut elastic to the child’s waist measurement, attach a large pin to the end of the waist elastic, and thread it through the waist channel.

Then, sew the elastic ends together and top-stitch the waist closed.

Of course, you can hem them if you like, and if you did not shorten them from the top at the beginning.

Personally, I like to let little boys wear them long. The green and blue pair are longer than knee length on my youngest and look cute to me.

Voila! Ten-minute kid shorts.

Voila! Ten-minute kid shorts.

Sew easy shorts: ten minute adult yoga shorts

I used the same technique to make myself a ten minute pair of shorts, too, refashioned from a t-shirt. I made legs from the front and back panel of one of my dear’s favorite t-shirts, which he has outgrown.

Sew all the seams on these with a stretch stitch.

For mine, I cut the rise a bit short, and then added a waist section from another shirt.

This did not work out perfectly as a ten minute design, so I won’t go into detail about the waist section. Other than to say that I sewed it right sides together to the top of the shorts, and then folded it over and sewed it down on the inside atop the previous seam.

My mistaken way to do this had to add elastic for the top of this section. I want to make these and yoga pants with a crosswise knit cut short enough that it will not need elastic; the ones I just made have too much bulkiness around my already too bulky middle! I’ll hope to show how to make a yoga pants pattern here soon if I can.

But these worked well enough to wear and to love. My husband particularly loves these shorts; he’s been complimenting me on them all day. He doesn’t mind all the bulkiness around my middle, because he is responsible for it. This is what has come from having “cook dinner” on my don’t do list. He cooks things like rich stews, fried chicken, pizzas, and fat burritos and burgers every week! I’m going to have to take dinner off of my don’t-do list soon, or else I’ll have to make myself a whole new wardrobe!

I think they will be a comfy favorite, & I made them in just ten minutes for $0.

I think they will be a comfy favorite, & I made them in just ten minutes for $0.

Ten minute adult legging shorts

I made another kind of shorts for me in ten minutes, too.

I made another kind of shorts for me in ten minutes, too.

I made another kind of shorts for me in ten minutes, too.

I think of these knee length leggings as undershorts and wear them under casual short dresses.

Make these the same way as the other shorts, using stretchy knit and cutting them smaller for a closer fit.

Rather than adding bulkiness with a waistband channel, stretch a narrow elastic waistband and top stitch it down using a stretch stitch.

The elastic I had is fairly decorative,so I sewed it on the outside in this case. You can use a thicker elastic for the waistband, and sew it on the inside instead, if you prefer.

Make your own shorts

You don’t have to start with bandanas or T-shirts to make shorts.

Make elastic waist shorts to fit anyone by measuring desired length, inseam length, waist and leg circumferences (plus ease) and rise. It is easy to cut shorts to fit anyone’s measurements in just a few short minutes. No pun intended!

I encourage you to both sew easy shorts and to play with bandanas, refashion T-shirts, and have fun with fast fashion ideas like this. Happy sewing!

Sewing Machine Needles 101

Machine Needles

When I first started sewing, broken needles were part of my learning curve. This wasn’t necessary, but I had no one guiding me, and I learned as I sewed. I could have learned to sew without all that trial and error if I only had a basic education on the types and thicknesses of machine needles and their uses.

You’ll save yourself more trouble than just the inconvenience of changing a broken needle by using the right needle for each project that you sew. Your thread could break or shred, and seams could pucker or be otherwise unseemly. No pun intended. You can also mess up the machine’s timing or damage the bobbin hook. All of which would require repair.

Of course this is all true and I promise you don’t want to have to stop sewing and wait for machine repair. To save you the troubles of any broken machines, stitches, or needles, allow me to share this short lesson:

Sewing Machine Needles 101

Now you will know which machine needles to buy and what kind to put on your machine for every project you sew.

The short answer is to buy and keep stocked a variety, because you’ll need to use different sizes and types for different projects and fabrics.

Another rule to live by is to change out your needle with every project. At least be in the habit of considering this between every project. Sometimes when working on a string of small or similar projects, you might take a look at the needle to make certain it is still straight and true, and then decide to keep it for the next project too. Definitely change any needle after sewing with it for six or eight hours max.

Sewing Machine Needles: Types

Machine needles are classified according to their point type and by their gauge, or thickness. The fabric or project determines the needle gauge. While classification and types of fabric is another post, they can be broadly classified into two main types: woven and knit fabrics. Because these two types of fabrics are produced by different means, they require different types of needles.

Universal, or Regular Point Sewing Machine Needles

Use these pointy, sharp, regular machine needles to sew woven fabrics. They come in a wide array of sizes, and different fabrics and projects will need different sizes. We’ll look at needle sizes further on in this post.

Ball Point Needles

Also known as jersey needles, these have a rounded tip. Use them for sewing fabrics that are knit. These also come in various sizes. Knits include stretchy knits in varying thicknesses, and also non stretchy knits such as terry toweling. For the stretchier knits, try a stretch needle instead.

Stretch Needles

For some super stretchy fabrics like Lycra, even a ball point needle will still be prone to skipping stitches. I also find a stretch needle to be the key to working with fleece. For these difficult fabrics, a stretch needle will make the difference in being able to pull your project off well.

Wedge Needles

Used for sewing leather and vinyl, wedge needles are designed for piercing holes into these fabrics which will close in on themselves, minimizing the risk of tearing of these special fabrics.

Specialty Sewing Machine Needles

While one of the major needle types listed above will work for most every sewing project, there are many special uses for which your project might benefit by you using one of these specialty needle types, instead:

  • Jeans needles have sharp tips and strong shafts for sewing heavier fabrics
  • Embroidery needles have larger eyes to avoid breakage or damage of specialty threads
  • Topstitching needles work with heavier threads, or even with multiple threads
  • Quilting needles have tapered points and extra strong shafts for sewing through multiple layers
  • Sharps, or Microtex needles, which are even sharper and thinner than universal points and ideal for sewing on fine fabrics or cottons with a high thread count; these work great for appliqué and piecing
  • Metallics needles have teflon coated eyes, for sewing with metallic threads; other needles ravel and damage metallic threads.
  • Twin Needles, which can be universal, ballpoint, or other needle types

Sewing Machine Needles: Sizes

The thinner the material you are sewing, the thinner gauge needle you need. Heavy fabrics, or thicker projects will need thicker gauge needles. Both regular-point and ball-point needles come in sizes ranging from the thin size 8, to heavy 16 gauge and even heavy-duty sizes up to 19.

You will sometimes see these needle sizes labeled by gauge and also by needle diameter. So a size 9 gauge needle will sometimes be labeled as size 70/9; size 11 might say 80/11; then there are sizes 90/14, 100/16 and 110/18. The larger numbers refer to the needle’s thickness, in millimeters. US measurements are by gauge, European measurements use diameter.

So which size needle should you choose for which fabric? Here are my choices for the sizes you will use most often and on what fabrics and projects:

Size 9 (European 70) – Use these for sewing sheers and the finest fabrics, such as lace and chiffon.

Size 11 (European 80) – Use these with light-weight fabrics such as silk, muslin, and calicoes.

Size 14 (European 90) – Choose when sewing medium-weight fabrics such as rayon, gabardine, satin, chino, linen, denim; thick quilts. Use ballpoint size 14 for light to medium-weight knits such as tricot or jersey.

Size 16 (European 100) – Sew with a size 16 needle when using medium to heavy-weight fabrics such as: wool or wool blends, canvas, cotton duck, sailcloth, or upholstery fabric, and on thicker projects such as purses.

Size 18 (European 110) – Use these for construction of quilted bags, sewing on nylon web, and other heavy-duty projects.

Here is a helpful chart from Schmetz for further reference.

Be sure to stock needles in all these sizes and in several types so that you are always ready to sew.