Repurposing Flannel Baby Wipes to A Snuggle Blanket

Repurposing Flannel Baby Wipes to A Snuggle Blanket

Hello there! I’ve been playing with something I would like to share with you.

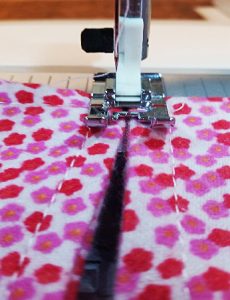
Stitch the right sides together on all 4 sides, leaving a small space open on the last side.

Stitch the right sides together on all 4 sides, leaving a small space open on the last side.

Let me warn you, it is rather novel, as I haven’t seen this done before in sewing blogs or other instructions, but it works pretty well I think.

Recently, I several kinds of small baby wipes made from soft, warm flannel. Rather than 1 layer of flannel, and just a simple serger stitch, I designed them to be thicker and have no fraying edges when washed. Each square is approximately 9″ x 9″ finished as below.

So, I used 2 pieces of the fabric, and I stitched the right sides together on all four sides, leaving a small space open on the last side to place my hand inside and pull the fabric’s right sides to the outside. What? (I heard you thinking there!)

Think of throwing a pillow case in the dryer with the inside seams showing. When dried in the dryer and smelling like Snuggle, you put your arms inside, find both far corners of the pillow case, and pull them forward to you drawing the right sides of the pillowcase to the outside or the top side. So then, I carefully ironed the edges down so I could put top-stitching about one-quarter inch from the edge of the wipe. Finished product soft, bright, cuddly wipe.

BUT WAIT! There’s more

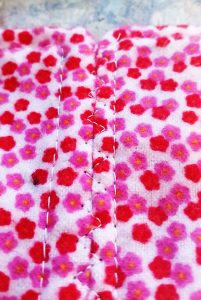
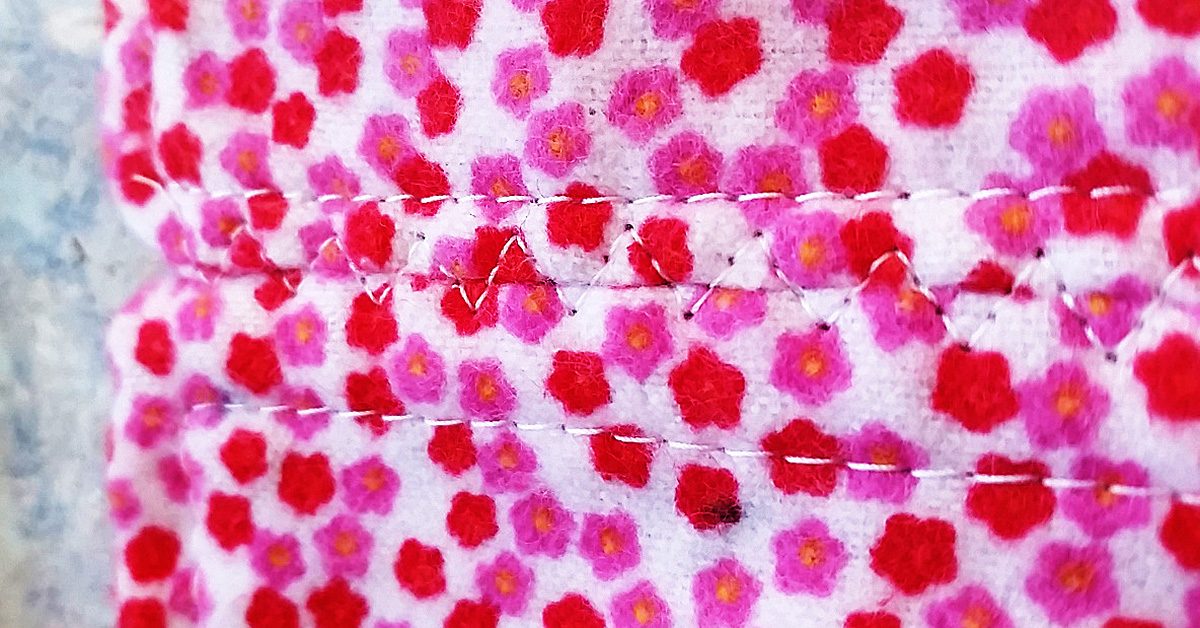
This shows how the seam was done, & it is sturdy like seam made in the traditional way.

This shows how the seam was done, & it is sturdy like seam made in the traditional way.

I thought why can’t I repurpose these cloths into something larger. It’s a small baby print, and with soft flannel on both sides, I brainstormed about how I can piece the two squares together without having to take the stitching apart of one side of each square to join them. That would involve doing all the squares accordingly, and would destroy my top-stitching.

This shows how the seam was done, and it is sturdy like seam made in the traditional way. This finished end to end seam reminds me of flat feld seams as used in my Pojagi pieces, although not quite. It also could be an alternate seam method for quilts without using a backing. A piece of batting could be added to each square to give a more padded feel to this alternate way of quilting, (like rag quilts but no raw edges or fringe.)

I hope you enjoyed my blog today, and I hope to see you again soon. I always welcome your experiences in sewing. After all, what would we do if we didn’t sew?

Take care for now.

Happy Spring! The Joy of Warmer Weather and Beautiful Flowers

Happy Spring! The Joy of Warmer Weather and Beautiful Flowers

Hi! Good to see you again!

Hi! Good to see you again!

Today, I wanted to share what I have been doing these days. It know it has been awhile since I wrote, however, I have been away from my favorite past time for other “pressing matters” (i.e. ironing hubby’s shirts, not quilt squares) and other important tasks!

Scrappy leftovers

I have an enormous collection of scraps in my sewing studio. Since I have been reorganizing in preparation to move our home, I have to make a strong effort to release some things I have collected to make packing a little easier. Well, packing is never easy, but psychologically, it forces you to consider the value of all the things you think you absolutely needed to have, right? And also, without saying, it alerts you to some of the things you want to make this hobby more efficient. No wonder it takes forever to pack and with sewing, I always think if I throw it away, I will want it later. Tough decisions, aren’t they?

So, I started with a pile of disorganized scraps, which I have previously cut for something else, some time ago. I don’t even remember what I had in mind at the time, but I need to throw them away or use them. This is just part of the large amount of fabric and bright colors I have to work with.
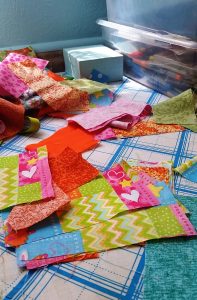
This is just part of the large amount of fabric & bright colors I have to work with.

This is just part of the large amount of fabric & bright colors I have to work with.

Improv isn’t only for comedians

Recently, I have been learning about “improvisational” sewing. It is interesting to me because I like doing things that are unique to my creativity. However, it takes you out of your comfort zone. The experts say, it reveals your creative side by working with no specific pattern, no color guidelines, no measurements, just picking up random pieces of fabric, basically scraps, and sewing them together without a pattern. It reminds me of the dreaded “improvisational” speeches required in college speech classes.

I know there are many patterns and helpful information about quilting that give exact instructions and even kits that you can complete. So, this is an adventure to test your creativity for sure.

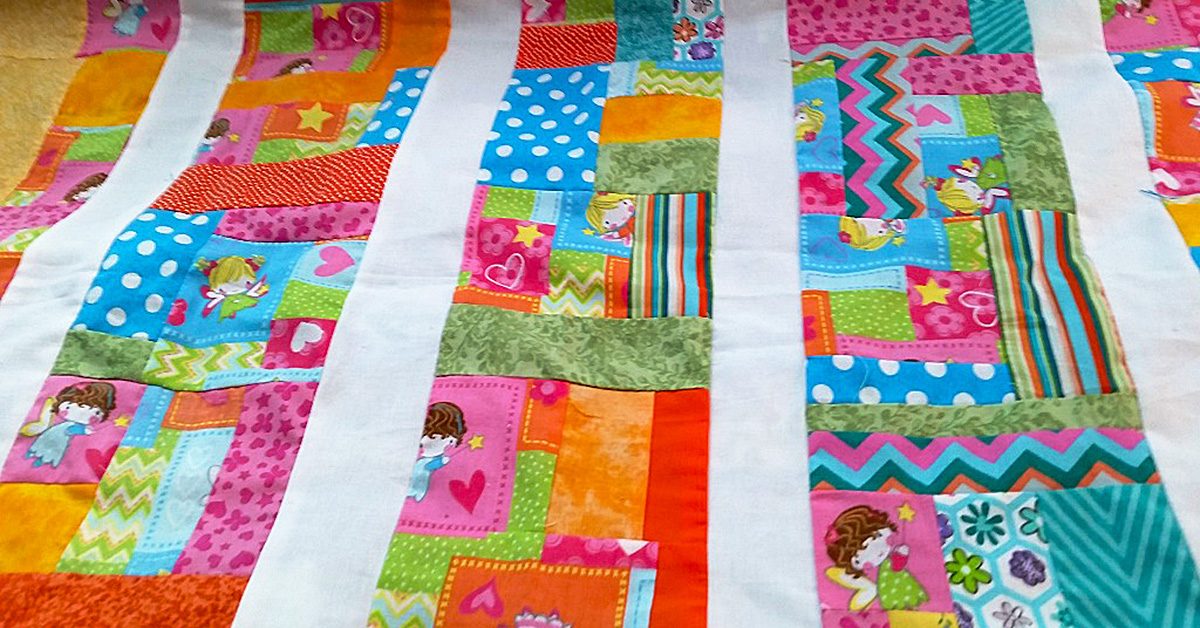
So, now I have my scraps and the easiest way to explain how this came together is: I took a medium sized scrap, and added to others to make an approximate square about 7 x 6 inches. I didn’t measure at all, just found several squares which had in this case, a little girl with a magic wand. I used the “fairy girl” as my focal fabric.
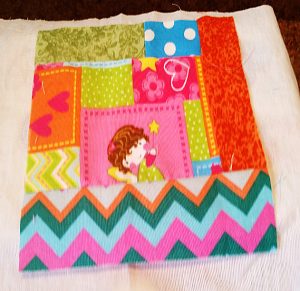
It was not too difficult because the pattern of the fabric was already woven like patchwork.

It was not too difficult because the pattern of the fabric was already woven like patchwork.

It was not too difficult because the pattern of the fabric was already woven like patchwork.

So, I just added like-colored fabric to make an extension of the pattern. No true measurements, pieces were just trimmed to fit inside the square, and the princess would appear somewhere on each one. I used the square as a template and compared the rest to the template, and then trimmed them to be the same size as close as possible. NOW… Comes my favorite friend in the WORLD while quilting! My IRON! And I need a NEW ONE at that (please refer to great wishlist choices from SewingMachinesPlus.com).

Finishing touches

So finally, I was feeling pretty good about how my unplanned, off the top of my head, quilt top was coming along. So I sewed the pieces together in 5 rows and 5 squares each. Then added white jelly roll strips between each row of 5. I had to trim it only a little to make it a true measurement all around.
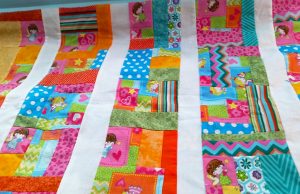
“Improvise” a cheerful quilt or smaller project & smell the beauty of your creation this spring.

“Improvise” a cheerful quilt or smaller project & smell the beauty of your creation this spring.

I still need to finish the border, batting and binding, but here’s what it looks like now. It was really fun to do, because I didn’t know how it would turn out. I should say I learned that I need solid color between busy patterns to give a quilt top a cohesive, unified look so each quilt patch is recognizable from the next. Do you mix plain fabric among many different prints?

I think you would enjoy this truly personal form of expression with fabric.

“Improvise” a cheerful quilt or smaller project and smell the beauty of your creation this spring.

Better yet, know that even without a plan, or a pattern, you can turn scraps into something as personal as you are! Then, please reply to this blog with pictures. I would love to see them. Until next time, when I will tell you about how I am repurposing handmade flannel wash clothes into a sweet little blanket and stitched without a seam. Carpe diem!

Choosing the Right Batting

Choosing the Right Batting

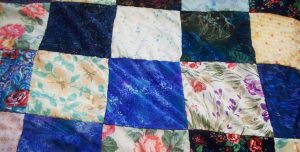
I have definite plans and goals for the new year, and not just the ones that I’ve mentioned in previous posts. I want to take another class. I want take better care of myself. I want to read more. But one thing that I want to do under the sewing umbrella is to finish up the quilt I’ve been working on for a while now. That goal happens to come in steps. Firstly, I need to finish with the patchwork design I have going on (the goal is to have twelve rows of patches) to get this top layer ready for the next two.

The quilt I’ve been working on for a while now.

The quilt I’ve been working on for a while now.

That step, though it’ll take time, is pretty cut and dry. I plan, I pin and I sew.

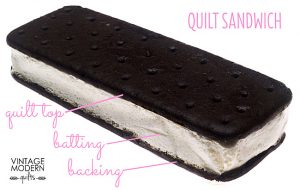
The steps that follow are the ones that merit consideration beyond those general details — like how I plan to join my quilt sandwich. Do I stitch? Do I tie? Do I spray? Decisions! (Details can be found here).

Hungry? Have a sandwich

Quilt sandwich.

The more immediate topic to debate is what kind of batting I’m going to use for the middle of my quilt sandwich. This will be, by the way, the first time I’ve used batting since I only recently realized that quilts do, in fact, need three layers to fit the official definition, thus the term “quilt sandwich.” Before, I just used the backing and the front, but I want to be more by-the-books for this one! Given that I have little to no experience with batting though, it seemed reasonable to do a bit of research on the matter so that I could make the best decision for me.

Research, I did, and I’ve come to a potential fabric for the job: Cotton.

The fabric of our lives

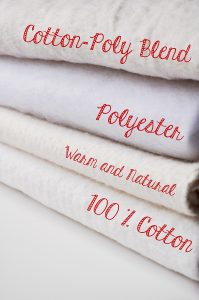
There are plenty of batting types to choose from.

There are plenty of batting types to choose from.

There are a number of reasons for this choice, and I urge anyone who is going to make a quilt to consider their own purposes and situations when choosing the right batting. While cotton might be a good choice for me, it might not be the best option for another person or another project. There are plenty of batting types to choose from — polyester, wool, blends — and to make the best decision, maybe spend some time looking into the pros and cons of each. You can find details about the possibilities here and here.

So with those other possibilities in mind, why did I choose cotton? There are a number of reasons. For one, it’s cheap. Yes, I know, cheaper isn’t always better, but for a learner on a budget, price can definitely be something worth considering! Remember that this is my first time adding batting, so it would be not-so-good to spend a bigger amount on a batting type just to mess the whole thing up! It’s also worth noting that this quilt will be for personal use, which leads into the reasoning that everything doesn’t have to be top-of-the-line quality like I might strive for if a company name was on the line. It’s for me, it’s my first experience with batting, and I think testing the waters on a smaller money scale is a good idea!

Synthetic but equal

Now, this might make you wonder why I didn’t go with polyester. Simple answer: Itchiness leads to polyester not always being my best friend! This is a personal decision, but the idea is something to keep in mind should you choose to make any kind of sewn product. If you have an allergy or a bad reaction to a certain fabric, keep that in mind so you can steer clear of it!

Choosing the Right Batting

There’s also the issue of loft, or how thick the batting is. Something like wool is high loft, meaning it’s very thick, so a quilt made with wool would be thicker. If you’re a person who gets cold all the time, wool might be your fabric for batting! For me, I want something with a lower loft so that the final product will be thinner. For one thing, I like the size that the first layer of my quilt will be, and I don’t want to shrink it too much by having it cover a thicker middle layer. For another thing, to me, higher loft looks more like a comforter, and I don’t want to go that route with this product.

Cotton is a better choice then, and it’s a fabric that I know is easy to work with on sewing projects. There’s no known itchy detail that I need to worry about, and I can feel comfortable knowing that I’m accustomed to it. I like cotton and — as weird as it might sound — I trust cotton. In addition, the recommended stitching distance for cotton is wider than other fabrics, giving more freedom in that respect.

And all of that, my readers, is a pleasant combination to deal with for my first dive into batting! How about you? Do you have a preferred batting option?