Price of Fashion

The Price of Fashion

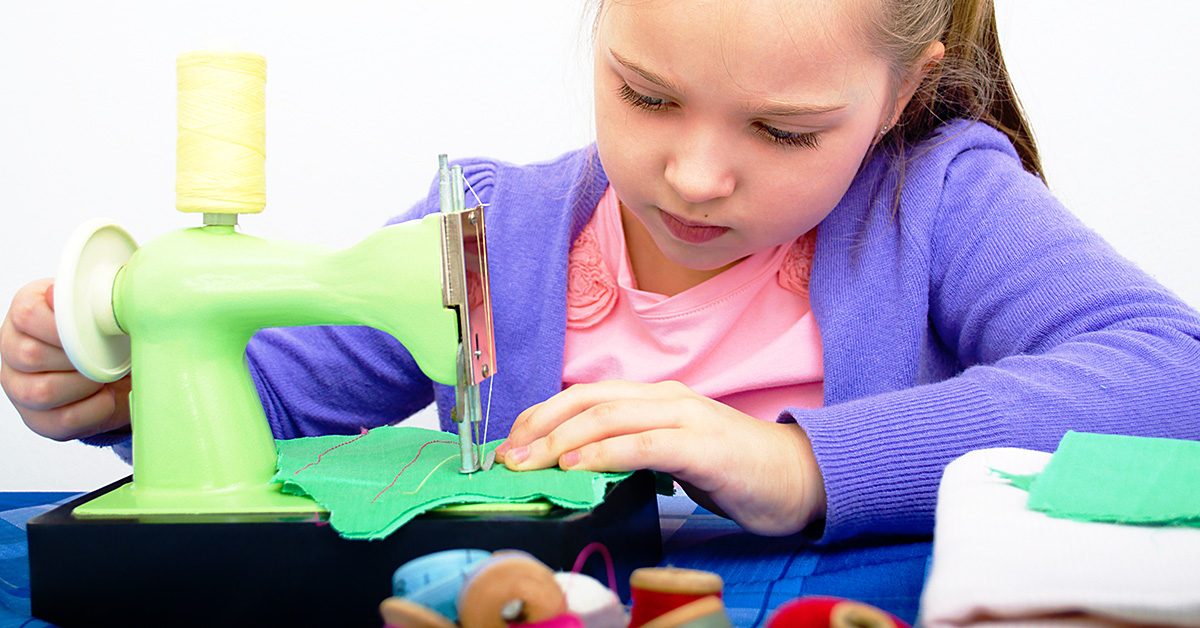
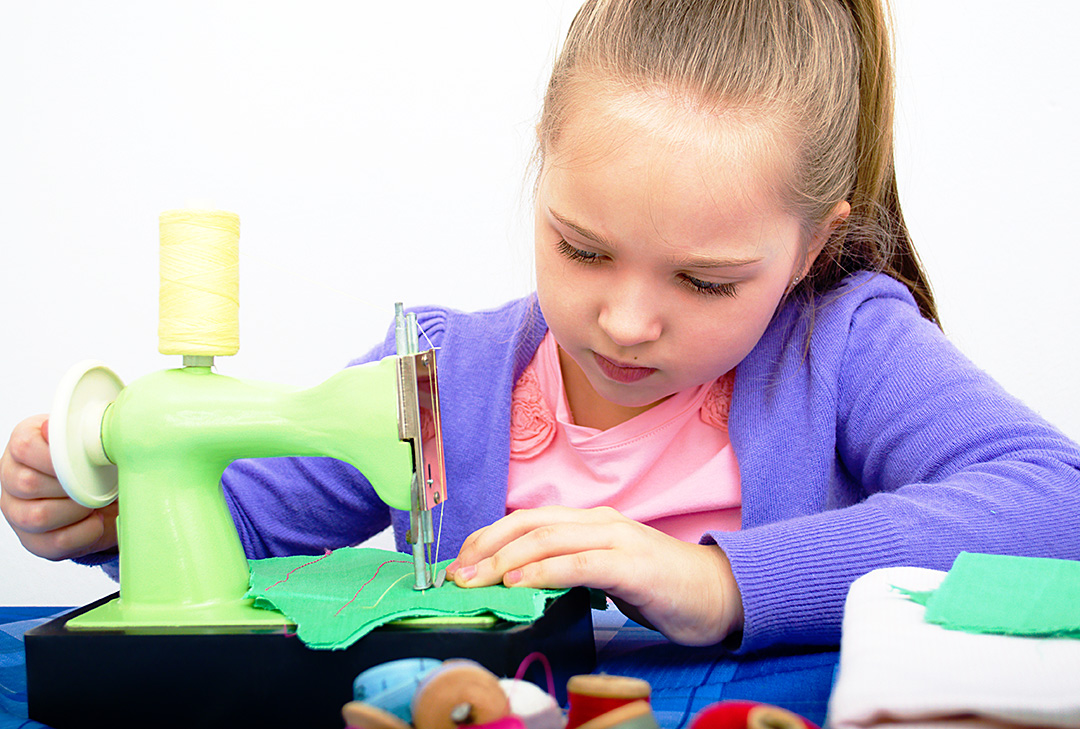
As a tailor for film and television, I often work with a lot of really high-end designer clothing. Sometimes I look at a price tag on something I’m in the process of taking apart and think, “That’s an awful lot of money for an article of clothing.” As a person who spends a lot of time taking things apart and putting them back together, I’ve got a pretty good idea of long it takes to make things. I wholeheartedly believe in paying tailors, pattern makers, and the like a respectable wage (as I’ve said before it is very skilled labor and deserves to be paid just as much as you would pay a plumber or someone to fix your car).

However, we all know that most mass produced clothing is made in factories where the workers aren’t getting much more than minimum wage (if they’re lucky). But what about the really expensive, designer stuff? Is it worth the extra money? Is it justified?

To a certain point, I think it is. If a brand uses high quality fabrics and notions, some of the extra cost makes sense. I try and think about how long it would take me to make a certain thing like, for example, a pair of pants. Not including patterning or cutting and if I were sewing at a pretty brisk pace and had made a bunch more of the exact same pants before, I’d say it’d take me anywhere from two to four hours (depending on how many pockets, if there’s top stitching anywhere, if they have a lining, and so on.) If a person working in a factory actually made a reasonable wage, that would certainly put the price point of those pants at somewhere between $80.00 and $200.00. You’d also need to factor in the time needed to cut out the pants, and pattern them, as well as the design process. So maybe then, you’d end up with a $150.00 to $400.00 pair of pants. Fairly reasonable, I’d say. It’s when you get up into the $1,000.00 range for a single pair of pants that I start to wonder.

I get that, when it comes to designer clothing, much of what you’re paying for is the name, or the design. And I’m ok with that but, is that label really worth $600.00 or more?

Again, I think it depends.

Boris Bidjan Saberi

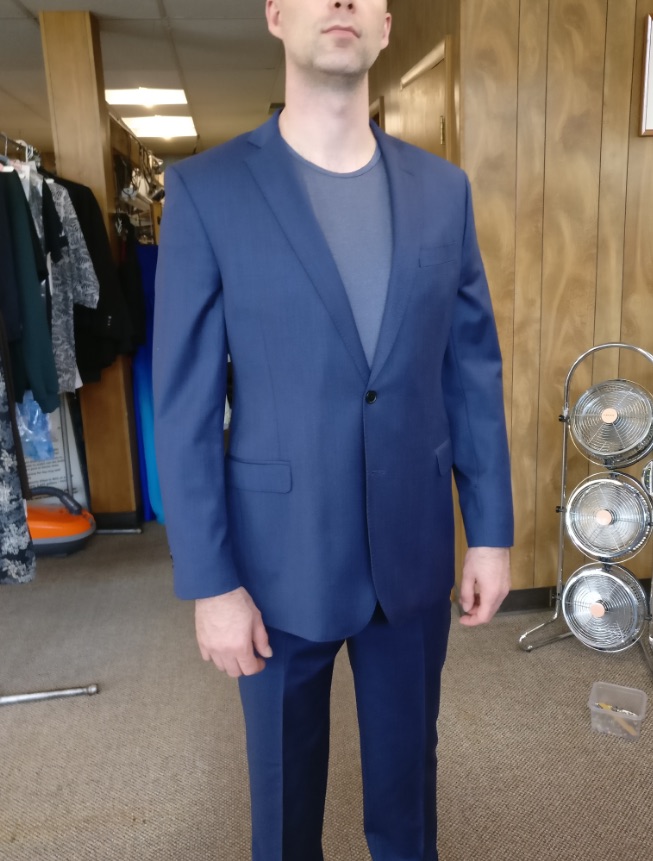
I’ve done quite a few alterations lately on Boris Bidjan Saberi men’s clothing. I just shortened the sleeves on one of his suit jackets. The jacket is very well made and the fabrics of a really high quality. The ‘buttons’ are cool metal cufflinks – real metal, not plastic. The label says the jacket was handcrafted in Spain. A big part of Boris apparel is that each piece is supposedly a ‘one-off’, which means it’s unique and no one will have exactly the same one as you. That’s pretty cool, I think. The suit jackets are priced starting at around $1,100.00. This price seems quite reasonable to me if it really is a handcrafted garment (which it certainly seems to be).


'hand crafted in spain'

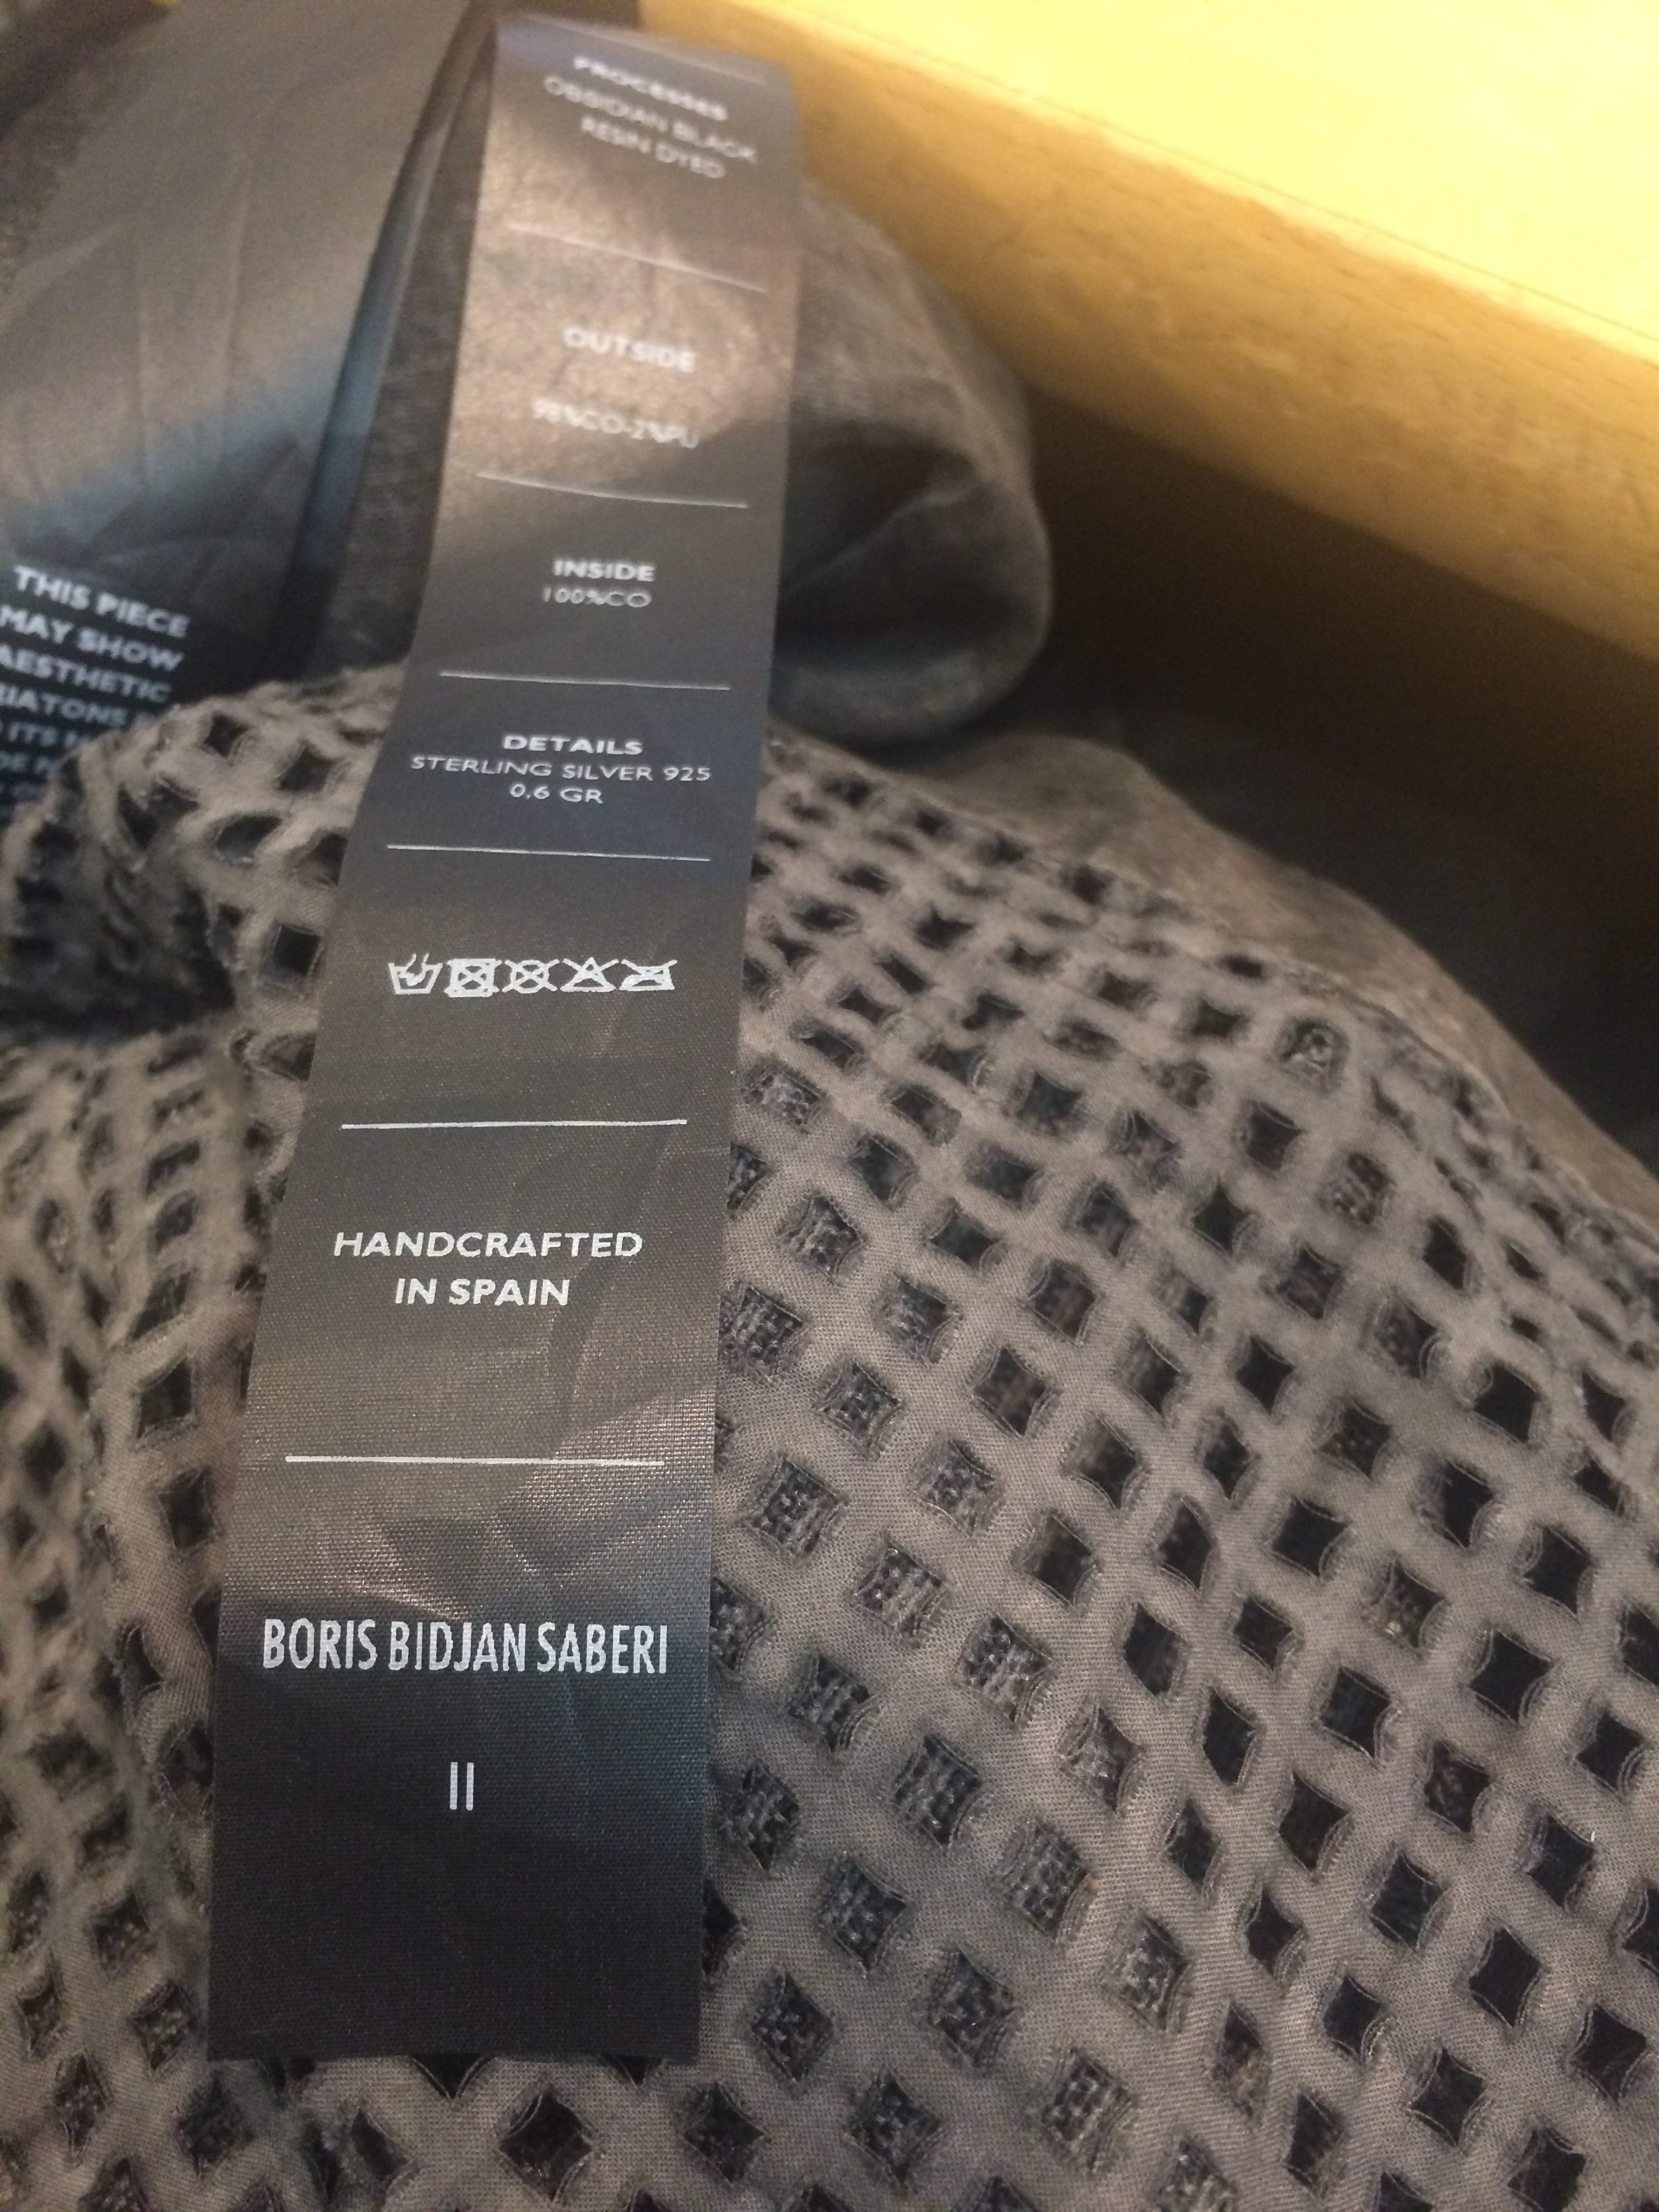
‘Hand crafted in spain’.

metal cuff link style buttons

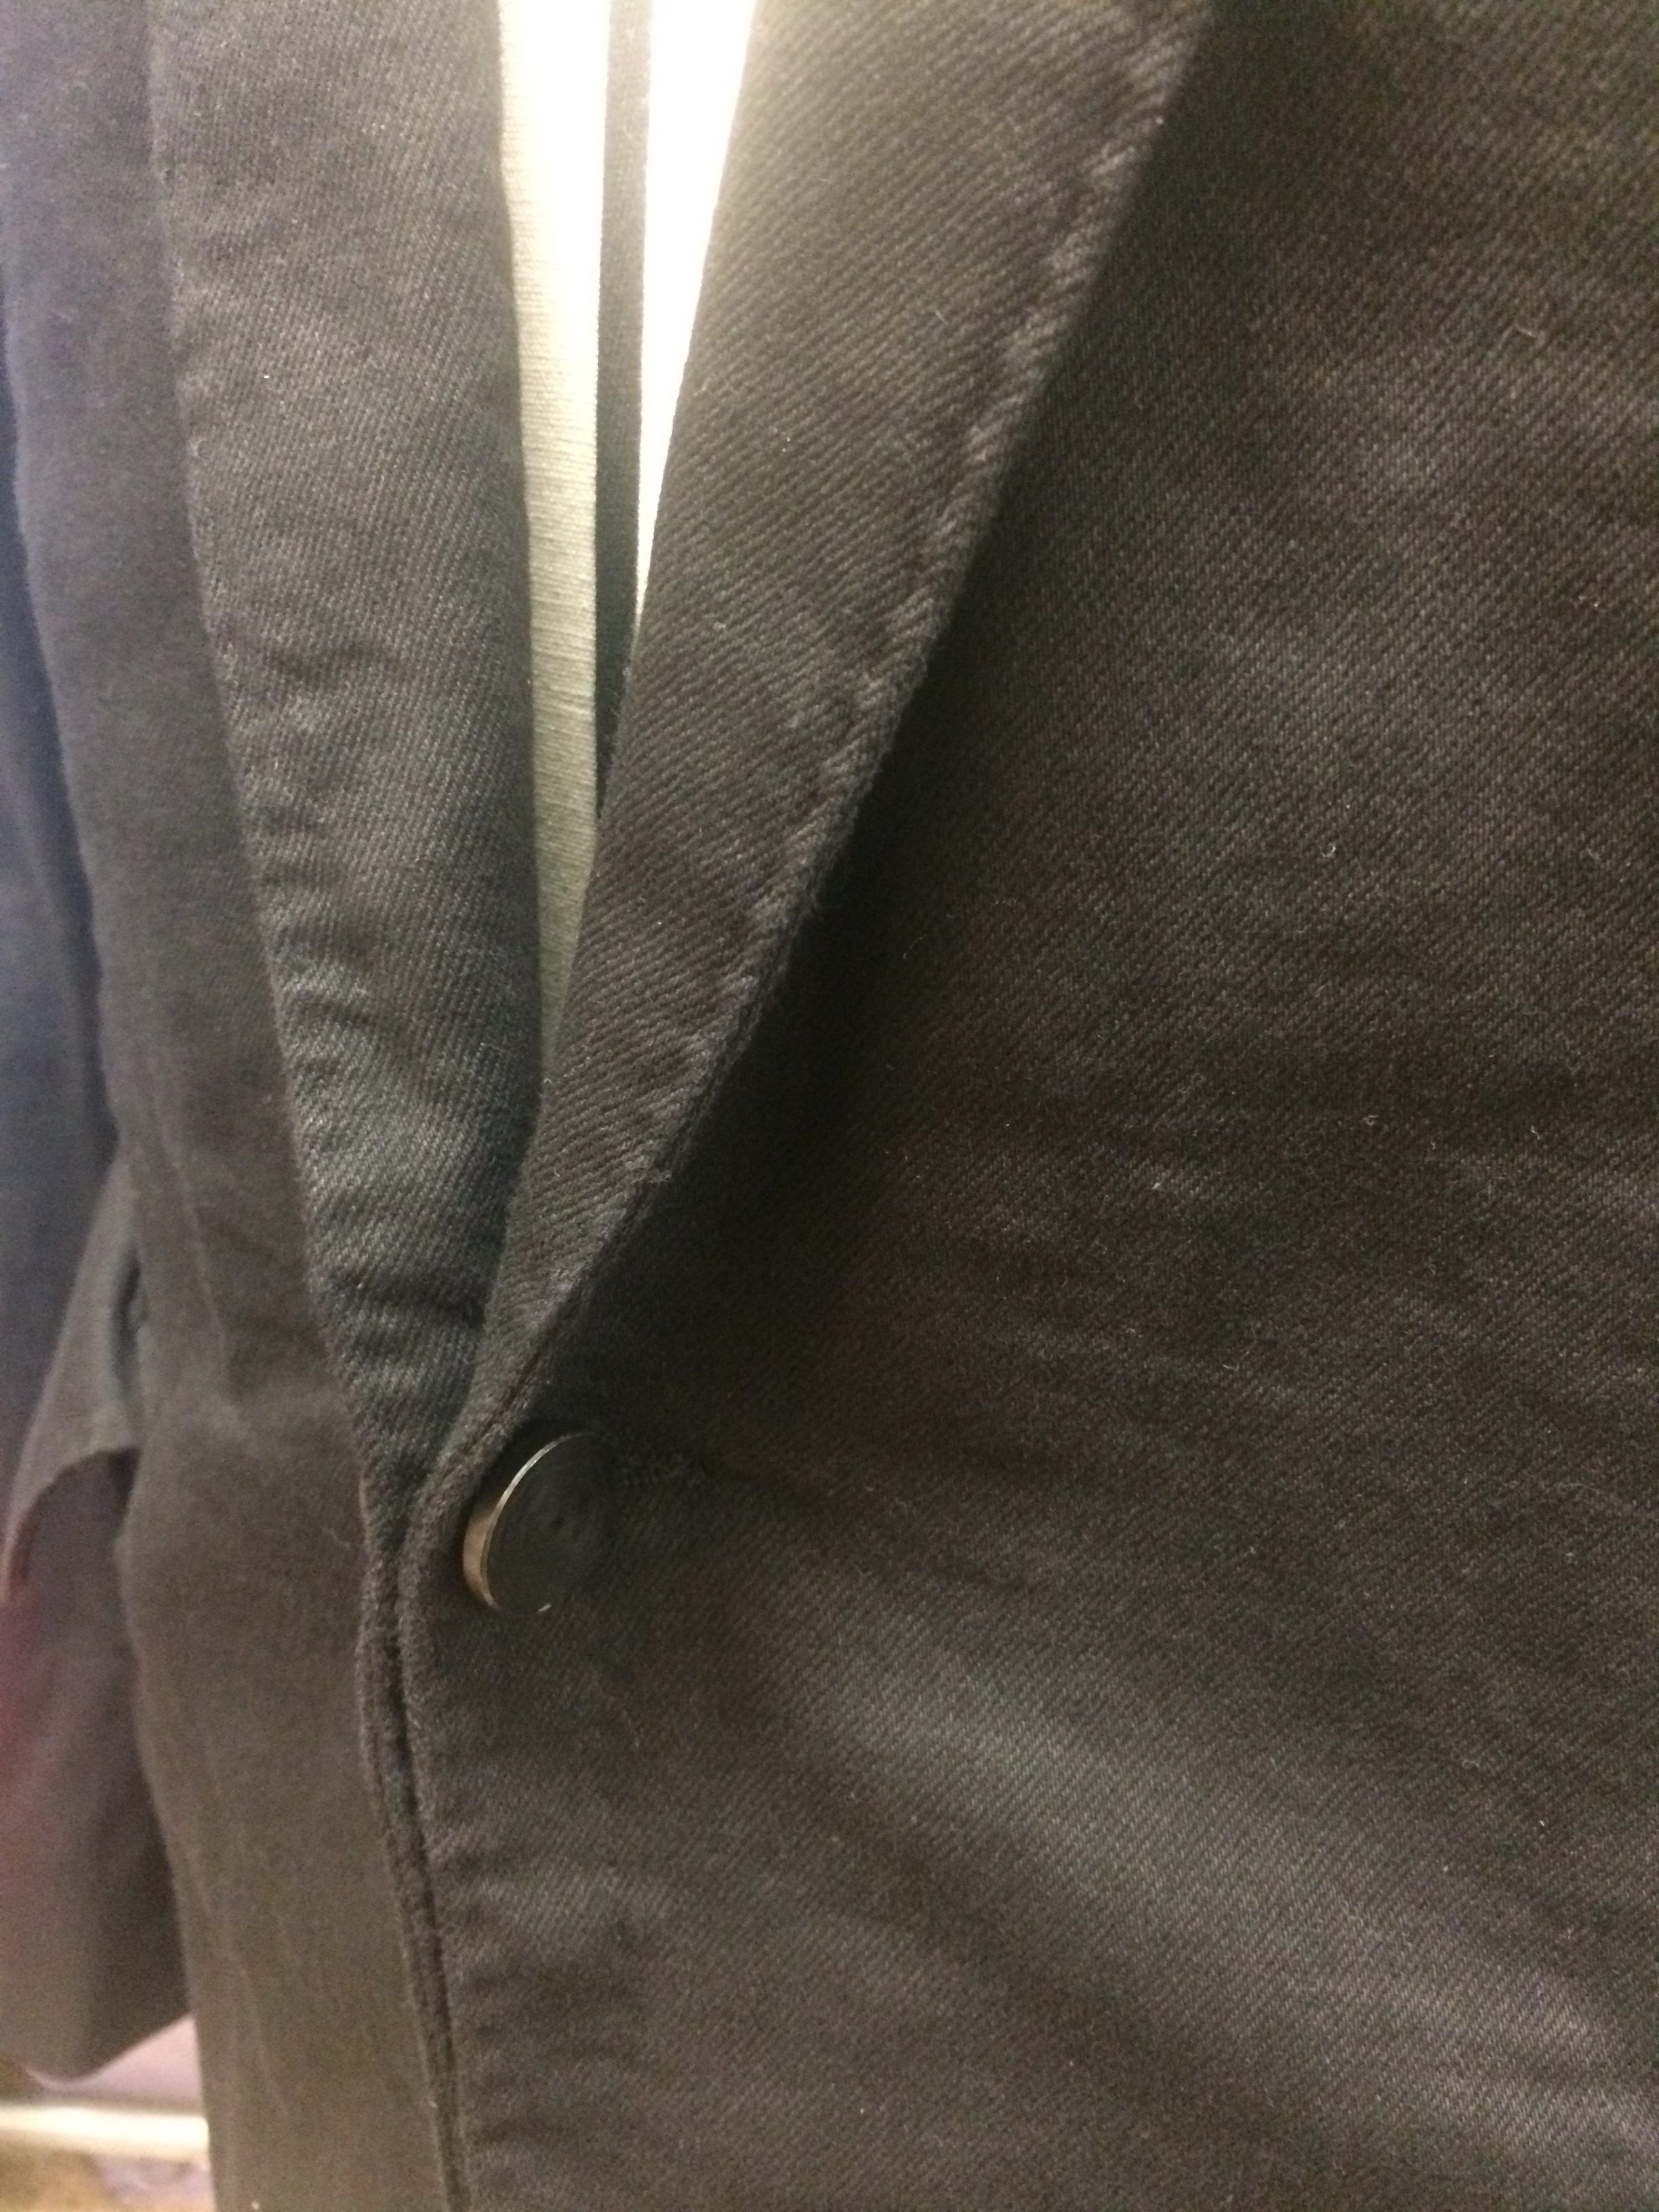
Metal cuff link style buttons.

What would you pay?

I guess my point in all of this is that there are some clothing brands and designers that may very well be ‘worth’ the high price, especially if their manufacturing processes align with your own ideas of ethics and sustainable businesses. If you care about these kinds of things, it is important to do your own research and make your own decisions (as it is with most things in life, I suppose).

There’s an interesting fashion show event happening this week called Wear Your Values. The event, on September 14th, will showcase 15 ethical fashion clothing brands and portray the life cycle of a garment to show how, when, and where human rights abuses take place in apparel manufacturing. There will also be a film on a day in the life of a garment worker. The show is presented by the Oslo Freedom Forum, an annual conference hosted by the Human Rights Foundation and Remake, a group of fashion enthusiasts that strive to inspire consumers to research the brands they buy (something I think is really important).

If you happen to be in New York City, try and go check out this event yourself.

Sewing Baby Toys

Sewing Baby Toys

I just learned that a dear friend of mine is pregnant. After the announcement and our subsequent celebratory lunch, my mind starting thinking about what I could make to welcome her child into the world. It’s too early on to know if it will be a boy or a girl, which also means I’ve got plenty of time to make something by hand and from the heart. Here’s a few of the baby toys I’m thinking about making. I’d love to hear your thoughts on them!

adorable-20374_640

Two-Sided Baby Blanket

I love this idea. I used to love my two-sided comforter because I could flip it around based on my mood (and also based on which side had less cat hair…) My friend and her man are super unique, so I know their baby’s room is going to have flair and style. A reversible baby blanket would be right up their alley. Of course, I’d want it to match the colors they choose for the nursery, so I’ll have to check about that before I start.

Super Soft Receiving Blanket

Like all babies, I’m sure my friend’s bundle of joy is going to want to be held A LOT. And I know my friend is up to the task. She’s going to be an amazing mom! The new arrival is due in the February/March timeframe, so it will still be cool where we live. It makes me think that a super soft, and warm receiving blanket will help new mom and baby snuggle and bond.

Crunchy Jellyfish

It won’t be long before that new bundle of joy is putting everything in his or her mouth. (By the way, I’m certain it will be a girl.) Between teething and the need to understand the world using all her senses, her mouth is going to be full of all sorts of stuff. I love this crunchy jellyfish pattern because it will give her something safe to mouth on and it’s so cute!

Sun Toy

Along the same lines as the crunchy jellyfish, this sun toy is super cute and great for littles ones putting everything in their mouths. It’s got loads of textures too, making it entertaining in many ways. And when baby decides it’s time to throw her toys, it’s soft and won’t hurt or damage anyone or anything.

So, if it was your friend having a baby, which of these cool baby gifts would you make?

The Problem with Over Fitting

The Problem with Over Fitting

In my almost 30 years in the film and television business, I’ve worked with a lot of different designers. Every designer has a specific way they like things to fit, at least in the film and television world. Tailors at men’s suit stores like Brooks Brothers, or department stores like Nordstroms, have standard fit and length parameters they follow.

They’ll tell you that a suit jacket hem must end at a certain point on the wrist and the proper length of the jacket is determined by whether or not you can curl your hand around the hem in a certain way. They’ll also tell you that a pant hem needs to have a specific amount of break over the front of the shoe (the amount the hem buckles in when you’re standing straight up).

In television and film, these things can vary depending on what designer you’re working with. I have five or six different designers I work with fairly regularly and they all have specific ways they want things to fit. I’ve worked with them enough to know what each of them like. One of them likes suit pant hems on the short side but lots and lots of ‘stack’ when it comes to jean hems. Another always wants a rake in the hem because they hate to see an actor’s socks showing in the back when he walks. One likes the shirt sleeves to show a ¼” below the suit jacket. Another tends to want things very slim fitted.

One size fits all

As a tailor, one of the most annoying fit attributes is when a designer wants you to, essentially, over fit something (none of the designers I work with regularly do this). By over fitting I mean, they want me to fit something so tightly that there are absolutely no wrinkles present anywhere at anytime. The main problem with this is that it’s only achievable if the actor or actress happens to be a non-moving, stationary dress form or mannequin. And, as I’m sure you know, most are not.

Actors move, clothing wrinkles. If you fit a dress too tightly, it’s going to ride up at the slightest provocation. If you fit a man’s suit jacket within an inch of its life, the actor won’t be able to lift his arms.

There are a lot of wrinkles I can fix, but I can’t get rid of them all. An over fitted garment looks just as bad on camera as one that isn’t fitted enough. Unless you start putting all kinds of extra seams into a thing, you’ll never be able to get something that isn’t spandex, completely wrinkle free all the time. Wrinkle free-ness is only completely achievable when the actor stands in one specific way and doesn’t move at all, ever.

Oxygen is overrated

I can’t tell you how many times a designer has insisted I take something in so tightly that after it’s done, the actor complains about not being able to breathe. I usually don’t take anything in as much as I pinned in a fitting if I’m working with a designer like this. I honestly find it ridiculous that there are costume designers who don’t understand that when humans move, the clothes they are wearing also move. Sometimes there are wrinkles, and this does not mean that the garment is not fitted correctly.

Stylists who dress people for print or short shoots like commercials tend to fit things more tightly because they’re not used to dressing people for realistic scenarios and situations that involve actual movement.

Stylists who dress people for print or short shoots like commercials tend to fit things more tightly because they’re not used to dressing people for realistic scenarios and situations that involve actual movement.

Stylists who dress people for print or short shoots like commercials tend to fit things more tightly because they’re not used to dressing people for realistic scenarios and situations that involve actual movement. In a photo shoot for print, there is no movement so you can over fit to your heart’s content. That’s why clothing never fits you like it does the model in the catalogue or on the website. And this is not a bad thing.

I’ve also worked with designers who do this thing where they grab a whole wad of fabric center back to demonstrate how something should be taken in. Well, first, when you do that, you’re pulling the side seams into a weird place that they shouldn’t be. Unless its men’s pants, I rarely take something in just from the center back, especially if it’s a wad-full of fabric. One reason is that I like to avoid having to reset the zipper if possible and secondly, it probably needs to come in from the side seams and the side back seams anyway. Or, if it’s four to six inches, it might make sense to purchase the garment in a smaller size. If I were building the garment from scratch, I’d want to recut it if possible.

Stress fractures & signs you are doing it wrong

I don’t know if other people notice this but when I see a dress with side seams that swing backward instead of hanging straight, I think that someone who didn’t really know what they were doing did that alteration. Costume Designers don’t necessarily need to know all the nuances of fit and balance but they should know enough to trust a good tailor when they have one.

Sadly, it normally doesn’t do any good to try and explain yourself to a designer who tends toward over fitting. They’ll just assume you don’t know what you’re talking about.

When I find myself in a situation with a center-back-wad-pulling designer, I just nod and pin it, then alter it in the way I think is best.

Because, as any tailor who’s been in the television and film business for awhile knows, “alter as pinned” is simply a suggestion (and a way to appease an over zealous fitting designer).

Sewing with Cats

Sewing with Cats

You’ve seen posts about sewing projects for cats. I think I might’ve even written one. The thing is, I don’t know about you, but my cats would never tolerate most of those projects. Not ever! What they will do, quite gleefully, is attempt to help me while I’m sewing. Clawing fabric while I’m trying to lay it out, stealing pins (which terrifies me because they could choke or worse), and running away with the tissue paper pattern pieces just as I was about to grab them. Sound familiar? And heaven forbid I close them out of the room! With four of the fluffy babies running around, that’s a losing battle. So, instead, I’ve learned to sew with cats. Honestly, I think living with four of them and giving meds, special food, etc. only to those who need it qualifies me as an official cat herder!

cat-468232_640

The secret to sewing with your cats is to make other things more interesting than what you’re doing. I’ve learned, the hard way, that that’s not always as easy as it sounds. Throwing catnip toys for them provides a short-term distraction for them, but it also means I have to stop what I’m doing. Not ideal by any means. I’ve gotten more creative with my solutions.

Play time

Tissue paper pieces are great! They think they’re getting the pattern pieces, only they’re not. The deal here, though, is you have to let them steal it so they think they’re getting away with something. Simply handing them the scrap of tissue paper is great for about 30 seconds until they see you’ve got a “better” piece. When you let them steal it, it’s a much more exciting, and long lasting, distraction for them.

And laser lights. What cat doesn’t love to chase the red light? I know, you’re probably wondering how I can play red light with them and still sew. Simple – I hang the light from the ceiling and give it a push. If I had a ceiling fan, I’d hang it off there. Just put a piece of masking tape over the button to hold it down and use a piece of string or an elastic to hang it. You’ve never seen cats this confused and excited. I love when they sit and look up at it with their head moving the same direction and speed as the light. Hilarious!

Fabric scraps. My cats love to make themselves a bed out of the fabric I’m trying to use. Super annoying! I deal with this by pretending like I’m using a large scrap piece and then letting them steal it from me. Just like with the tissue paper, letting them think they got what they want is key. Once they’re settled in on the fabric scrap, I can move on to my project without their interference.

Sewing with cats is challenging, but using these few distraction methods, it’s quite possible – and fun for both you and your furry friends.

Bringing the Autumn Vibe into Your Home

Bringing the Autumn Vibe into Your Home

Out of all four seasons that we experience throughout the year, my absolute favorite in regard to nature is autumn. A part of the reason for that is I live in mountain territory, and when the leaves start changing colors, it’s hard to find something that compares to how beautiful that is. It’s enough to try and think of ways to embrace the same visual within my home so that the beauty of fall can decorate my inside world as well.autumn-1072827_960_720

Because of my love of the season, I took to the Internet to find projects that would create that autumn vibe, and my initial thoughts about it seem to be backed up again and again through other sites.

All you need to do is to make sure you’re bringing the right elements into your sewing projects to represent fall. Sure, there are more specific notions of pumpkin-shaped pillows, but even something as basic as choosing the right fall traits to add as embellishments can make an ordinary throw pillow, blanket, or wall hanging represent the season.

Color pallet

For one thing, you should definitely consider your colors for fall projects since those bright, vivid hues melded together are synonymous with the season. Orange, yellow, red, and remnants of green are all a part of the typical fall-grasped leaf, so make sure you choose fabrics and embellishments that showcase those colors. Remember that fall leaves are often a series of these hues, so mix and match them in your projects to have a full autumn experience with your sewing project.fall-foliage-1740841_960_720

If you only have white fabric, try dying it to create the autumn theme. Anyone who has seen the final product of a tie-dye shirt knows the process leads to a series of patterned and blended colors, so you can use that general idea to mingle autumn colors on your fabric. You can blend the tips of orange in with the beginnings of the yellow, with little spots of green throughout, and the inconsistent spacing of the colors can really drive home the look of fall leaves.tie-dye-510230_960_720

Beyond your color choices, think of other seasonal elements that you can use to display autumn throughout your home. Pumpkins, candy corn, acorns, haystacks—all of these things can be used as inspiration for your projects through finding ways to represent their likenesses in sewing projects. A new quilt could look lovely with a scene that’s covered in fall elements, like pumpkins lining the area where haystacks and classic barrels are stationed. If you ground that setting in fall colors and embellishments of candy corns and acorns surrounding it, you’d have a creation to bring out of storage every fall to embrace the season.pumpkin-991825_960_720

You can shape your throw pillows, as mentioned, like pumpkins—or candy corn, acorns, fall leaves—and these little additions of autumn can boost the fall vibe in your home.

Reason for the season

One specific fall project is this leaf table runner. All you’d need to do is cut out fabric with a leaf pattern using fall colors—maybe dying them for that mixed feel—then sew them as individual leaves. You can add in the details of lines and spots of variation with fabric pens to give your leaves a more realistic feel than just a series of plain fabric. From there, you can sew them together in this slanted pattern to bring a bit of fall from one side of your table, mantle, or shelf top to the other. With the right skill and effort, this project could be finished well before the official beginning of fall later this month!Felt-Leaves-Table-Runner_Medium_ID-456743

This idea of embracing fall in your home can be applied to your kitchen as well by thinking of fall themes for potholders, in your bathroom through an autumn-inspired wall hanging, and any other room where a fabric splash of fall goodness would be fitting. Just let your imagination run with you, and you can come across a way to embrace the beauty of autumn in every single room of your home through the right colors and right embellishments!halloween-72937_960_720

Better still, once it’s time to put away your fall decorations, you can be clearing space to make room for your Christmas decorations, meaning you can trade one seasonal method of décor for another without having to do much rearranging. Keeping with the seasons by using beautiful, self-made details—with little fuss—equals a great situation from beginning to end!

Be sure to start brainstorming what elements represent fall to you, and go get the right fabric and supplies for bringing those projects to life!

The Dos and Don’ts of Sewing: Cinderella Style

The Dos and Don’ts of Sewing: Cinderella Style

One of the most classic Disney movies is Cinderella, the 1950’s cartoon version of the popular fairy tale. In this story, we see Cinderella go from being a young girl who loses her mother and has to live with an unloving step-family to a woman who’s optimistic enough to take a chance by going to a fancy ball and catching the prince’s eye.

Every detail about this story line isn’t perfect—if she’s Prince Charming’s love, why can’t he recognize her without this shoe business?—but it’s still a staple for a lot of people in regard to movies they adored as children.

For a person who grows to appreciate sewing, the film can have another level of intrigue because sewing is a part of the story. Before the Fairy Godmother comes by to provide Cinderella her glittering, beautiful gown, she goes through the process of planning her own dress, which will be constructed from tools and materials within her home. The actual dressmaking happens at the hands of a team of friendly rodents once they realize Cinderella is too busy to finish the project herself, and the musical scene connected to their sewing is one of the most recognizable ones from Disney.Disney4

Beyond those aspects of familiarity and youth, there’s unique sewing advice happening within that dressmaking scene that you could apply to sewing endeavors. All it takes is a little consideration and a bit of imagination to find those gems of guidance within the lighthearted scenes of sewing.

For instance, these mice have applicable tools at their disposal to see this dress come to life. There’s no machine in sight, but you do see other sewing essentials, like needle, thread, scissors, and chalk, all of which can at least be representations of things that are useful for sewing. The chalk, as an example, can be replaced by soluble pencils to trace your cutting lines, and like the bulky chalk the mice are using, you can wash out the remnants later. With that strategy, you’re making sure you’re sewing in a more precise way without forever damaging the fabric. Good strategy, mice!Disney5

As the dress is being assembled through pulley systems and such, the mice have a dress form setup to keep the fabric in its most natural wearing position. This detail cannot be overstated if you’re going to sew clothing like Cinderella’s dress because it makes you able to see the dress as it should be rather than bunching it up or expanding it unnaturally on a flat surface. You can tell how the dress will look, and you could prevent a time or two of accidentally sewing your dress sides together in the wrong places. Like the mice, make sure you have that form for these purposes!Disney3

Unfortunately, though, the mice didn’t quite get everything right, and it makes sense to note those things as well. For example, you probably want to use a better method of organizing your supplies than a simple wicker basket that you can dive into. Even if you’re just tossing all of your supplies into a container like this and reaching in to gather what you need, if your organization is lacking, you could end up getting a sewing needle or straight pin in your hand. For the mice, this is particularly bad since the needle is about as tall as they are, but even for human-sized sewing fans, a straight pin in the hand can hurt!Disney2

For this reason, you should consider organizing your sewing utensils better than our Cinderella mice friends! Use different containers for different items, have shelves to display them, use chest drawers to keep them stored… Whatever your strategy, do yourself the favor of not piling everything into one area that’s dooming you to minor injury!

One more detail the mice get wrong is how simple they make assembling this dress seem. Sure, they employ pulleys that you probably won’t work with, but let’s be honest. Cinderella simply points out a picture in a book that she wants her dress to look like and gives very basic instructions about what needs to be done, and the mice infer all of the in-between information even though there are no measurements listed at all in the book.Disney

Fortunately for the mice, the foundation of this dress is already assembled since Cinderella is intending to alter something that she already has—another good tip from the mice: use what’s around you!—but if you take this at face value, the process is too simple. Without having measurements, at least, you could be setting yourself up to fail.Disney6

So rather than just picking a picture, use a pattern or at least take the measurements of the person who’s supposed to wear the finished product. Remember, after all, that the dress Cinderella intends to alter is her mother’s—not hers. There could’ve easily needed to be some redefining done to make it fit Cinderella just right, and the mice take a risk by not being more specific. On this, don’t be like the mice! Be measure-specific!

In the end, while the mice got some things very right and some things pretty wrong, it’s a catchy scene with an upbeat song that embraces sewing in a youthful manner. So, embrace the mice’s optimism, apply their useful techniques, and learn from what they did wrong.


Reference for all photos
Disney, W. (Producer), & Geronimi, C., Jackson, W., & Luske, H. (Directors). (1950). Cinderella [Motion Picture]. United States: Walt Disney Company.
When Alterations Go Wrong

When Alterations Go Wrong

Things don’t always go as expected. Sometimes you do something and it fails to turn out like you imagined it would. Or it just doesn’t look as good as you wanted. Sometimes you unintentionally execute a crappy alteration.

There’s no reason to panic or get upset when this happens. You simply fix whatever it is. A problem only arises when you don’t see that something has gone awry or you try and convince someone that nothing is wrong; the garment just needs a good press.

twisting sleeves

twisting sleeves

Ironing and a healthy dose of steam can right all kinds of wrongs but neither of those things can make a bad alteration, good.

The old distraction trick

This past week, a Costume Designer friend of mine, Lauren, called to ask if I could look at a suit jacket for a friend of hers. He’s getting married in a few weeks and had purchased a Brooks Brothers suit. Brooks Brothers had recommended a tailor for him to go to for alterations.

The suit didn’t need all that much, just a little taking in on the sides to slim it a bit. When my friend’s friend – I’ll call him Dan – went to pick up his suit and tried on the jacket, he noticed some strange twisting in the sleeve. His fiancé (I’ll call her Kate), was with him.

They both pointed out the twisting to the tailor, but the man kept insisting that all they needed to do was send the suit out to be pressed and they should take a look at the back because it was smooth. You know, the old distraction trick.

Well, Dan and Kate weren’t really buying it, but they paid the man and took the suit to the dry cleaners to be pressed professionally. As they suspected, when they picked up the suit, nothing had changed. The sleeves were still hanging in a sort of corkscrew way. That’s when they asked Lauren if she knew someone who could help and they ended up calling me.

Its much easier to fix your own alteration snafus than it is to remedy the ones of others, mainly because you know what you did to get to where you are. When you’re not the one that started the whole thing, you have to use a bit of detective work.

Before I told Kate and Dan that I could fix the twisting sleeves, I opened the lining of the jacket to see what I could see. Men’s suit jacket sleeve linings are stitched in by hand at the armseye so that’s where to open them up.

I took out the sleeve lining from the back notch to the front notch, then unattached the lining body from the jacket body at the armseye.

Suit jackets are constructed fairly standardly when it comes to seam allowances. I could see that the side back seam of the jacket had been taken in, but just in the back, as well as the side front seam above the pocket. All of that had been done quite nicely, and the shoulder part of the sleeve was smooth and lovely. The problem was with how the bottom portion of the sleeve had been put back in.

Fitted Armholes

Men’s suit jackets, as a rule, have pretty fitted and constricting armholes. When you take in the side back and side front seams, you make the armhole smaller. If you don’t take in the seams equally front and back, you change where the bottom of the sleeve is (where a side seam would be if men’s suit jackets had side seams). You have to compensate for this in some way or your sleeve will be off balance and hang in a weird way.

Which is what happened in this instance. There are a couple ways the original tailor could have prevented this.

He could have taken in the sleeve itself the same amount he took in the body of the jacket. I don’t normally do this, though, unless the entire sleeve really does need to be slimmed. A better, more accurate way, to solve the twisting sleeve problem (in my opinion, at least) is to drop the armseye, starting from the back notch and ending at the front notch. What this does is make the armhole bigger and, essentially, the same size it was before you took in those jacket seams.

Oh boy…

In this particular jacket, not only did the tailor neglect to lower the armhole, but, when he eased the too big sleeve into the smaller jacket armseye, he rotated the whole bottom part of the sleeve too far forward.

Once I dropped the armseye, the sleeve, once again, fit perfectly and I was able to line up the bottom of the jacket body with the bottom of the sleeve. No more twisting!

Dan and Kate are happy now – though they’re asking the first tailor for some money back. I don’t think the man is necessarily a bad tailor because his alteration didn’t turn out so well (everyone does a wonky alteration every now and again) but, I do think he maybe doesn’t know what he’s doing because he didn’t see that something was wrong when Dan tried the jacket on.

It’s ok to make mistakes and have to do something over. It’s not ok to tell someone that nothing is wrong and not offer to fix it. Even if you think they’re wrong. And especially if it’s a suit they’re going to wear at their wedding.

On Being Genuine and Working with Children

On Being Genuine and Working with Children

I’m currently working on a little six episode new series for Amazon. The main stars of the show are three young actors ranging in age from 10 to 16. People often ask me if working with child actors is difficult and how it differs from working with the regular full sized, adult actors.

I honestly enjoy working with kids, especially the three on my current job. I’ve made quite a few garments for our leading young actor, who is all of 10 years old. And he’s one of the most professional, intelligent, and appreciative actors I’ve ever worked with. Last week he told me that the pair of pants I had made him were, “the best pair of pants he’s ever put on.”

Of course, he’s only 10 so he has quite a few years of trying on different pairs of pants ahead of him. But, he meant it. He’s an extremely genuine young man. Which got me to thinking about the ways in which people interact with each other, especially when it comes to clothing and style, and even sewing.

Starting early

Sewing is something I’ve been doing for most of my life, at least ever since I was about 8 or 9 (and I’m getting dangerously close to 50 these days), yet I can probably count on two hands and maybe one foot the number of genuine accolades I’ve received from others in regards to my work. Not that I do this tailoring things for the compliments. God knows the television and film business is pretty much the last place you’ll find that type of thing (unless you’re someone like an actor or a producer or a director.). And most of the time it’s all okay. I don’t need a lot of recognition or (really, any) glory.

But, I’m not going to lie, receiving appreciation and actual, true admiration for something I made, even coming from a 10 year old, was quite wonderful. Actually, I think I should amend that sentence to say, especially coming from a 10 year old.

On Being Genuine and Working with Children

Drafting patterns for children is no more difficult than for adults, once you get used to the different proportions. One thing I learned early on in regard to making kids clothes is that they (the kids) can sometimes experience growth spurts in the middle of the run of a show or even during the time it takes to film a television season or a movie.

I always leave extra seam allowance in the hems and center backs of things, something I’m sure Moms who sew for their own kids do all the time too. Back in my Alley Theatre Christmas Carol days, we had a stock of clothing we used every year for the urchins. They often had hems that came all the way up to the knees and center back seams that extended more than half way to the side seams.

Fabric – choose wisely

Something to keep in my mind when making children’s clothes is fabric choices. You want to make sure you don’t use anything that might be itchy or rough against their skin. And the more durable it is the better. I always reinforce any seam that’s going to get a lot of strain. Another little thing that we do often in the television business is to buy more than one of any particular clothing item. That way, if something happens to the shirt an actor or actress is wearing, like a chocolate or grass stain, the set costumer just needs to switch it out for new one. On the show I’m currently on, we usually have at least three multiples of all the kids’ wardrobes.

Of course, this means I have to alter three of everything we use. But, it’s all fine. Kids clothing is not very big and, for some reason, everything seems kind of adorable when its small.

The one really great thing about working with children, though, is that, for the most part, they still have a sense of awe and wonderment for the fact that they’re getting paid to spend all day playing make believe and dressing up in costumes made especially for them. And, although they get tired and occasionally grumpy (just like adults do) they definitely exude an infectious joyfulness that makes me truly happy to make them all sorts of fun and unique clothing.

Because, when a 10 year old (going on 40) tells you that “I bet even something you make when you’re having a bad day will be awesome,” you can’t help but smile.

So, spread some joy if you can this week. Give someone a genuine compliment. Make something special for a young person that makes them feel as if they can do and be anything. The world can always use more of that.

Shibori Techniques, Tips, and Projects

Shibori Tie-Dye Techniques, DIY Tips, and Projects

What is Shibori?

Bound resist dye methods, which we know as tie-dye, have been around almost as long as civilization itself. Many cultures have contributed techniques to this ancient craft. Perhaps none have contributed as widely as the Japanese, who began developing their methods, known as shibori, as early as the 8th century.

Shibori Tie-Dye Techniques, DIY Tips, and Projects

Shibori Techniques

"<yoastmark

Shibori traditionally uses natural dyes, most often indigo. Dyers pleat, sew, tie, bind, or even wrap the fabric around a pole. Let’s look at these different methods now:

Arashi

With the arashi method of shibori, dyers wind a long and narrow piece of kimono cloth diagonally around a pole, then scrunch the fabric tightly together and bind with thread. This method produces a pattern reminiscent of rain, hence the name, which means “storm.”

Arashi shibori

Arashi shibori made with wide pvc pipe in place of a pole

Itajime

For itajime, or shape-resist, shibori, the cloth is first folded, then pressed between blocks of wood and secured with clamps or ties. The wood resists the dye and leaves a repeating pattern on the finished cloth. Shapes can be simple, such as square or rectangular blocks, triangular, or more elaborate, with wood shapes cut into various free form designs.

Kanoko

If you’ve ever tie-dyed before, you’ve likely practiced kanoko shibori methods without even knowing it. These are the familiar tied designs such as bull’s eyes and repeating circular or other motifs. Dyers make these designs by tying off sections of fabric, often including pebbles, popcorn kernels, coins, or other found objects repeatedly or randomly throughout the fabric.

Kumo

Kumo shibori is a pleated and bound method that creates spiderlike veining and circular designs. Dyers pull the fabric into peaks, twist or pleat, then bind with thread. Kumo designs may be any size, with small, repeating, all-over patterns or just one large kumo to cover an entire piece.

Shibori Tie-Dye Techniques, DIY Tips and Projects

Kumo shibori

Miura

In miura shibori, the thread is not tied at all. Rather, thread is simply wrapped, usually twice, with thread. Tension holds the entire piece together. Because this method is easier and can be accomplished with the help of machinery, it was perhaps the most historically used method for producing shibori designs. This method most often uses hooks to draw up tiny sections of fabric, which are individually wrapped.

Kimono, from the collection of Gentry Klossing, with finely detailed miura and nui shiboro

Kimono, from the collection of Gentry Klossing, with finely detailed miura (the diamonds) and nui (the waves) shiboro

Nui

Nui shibori uses stitching, either by hand or machine, rather than tying, to create designs.  From simple running stitches which gather and pleat, to flowers or other intricately stitched designs, nui shibori runs the gamut from super easy to unbelievably complex.

DIY Shibori Tips

shibori agistadler

photo courtesy of AgiStadler, Flickr

Shibori traditionally uses natural dyes, especially indigo. Jacquard makes an easy-to-use, pre-reduced, indigo dying kit, for a great price, too.  If you go this route, use a 5-gallon or larger bucket or plastic bin with a lid. Set this up and plan to dye outside for the sake of mess management. This dye kit will color a lot of fabric and will last 5 days when covered, so you can plan to spread the project over several days.

Or use any hot-water dye

You can also use synthetic dyes to achieve a shibori look, but be sure to use the kind prepared with a hot water dye bath. Natural dyes are immersion dyes, and so any synthetic dye you use should be this kind, too. Don’t use the popular squirt-to-apply types of dyes for your shibori projects.

I used a synthetic denim blue color dye bath in my stainless steel kitchen sink to achieve a softer blue for my batch of shibori pictured in this post. To get a darker and more authentic indigo color, you can mix denim and navy. Sarah Gibson from Room for Tuesday suggests mixing one bottle of Rit denim with half a bottle of Rit navy. Her pillows dyed in this bath look great!

Pillow project at Room for Tuesday

Pillow project at Room for Tuesday

Important DIY tips:

  • Wear gloves! Otherwise you’ll likely find it impossible to get the blue/black dye off your hands and, especially, fingernails. Besides being unsightly, this is not good because dyes are toxic chemicals which you’d rather not absorb into your system!
  • Take your time preparing the fabric. And have all fabric fully prepared for the dye bath BEFORE you start to prepare it. I rushed when tying the beans to make my kanoko circles and made a mess with my grid design! Take your time, do not hurry.
  • Rinse items individually until the water runs completely clear, then untie. If you don’t rinse completely before removing ties, your designs will turn out less crisp.

Easy shibori projects

Shibori is fun and you will enjoy it most if you start with simple techniques. Kanoko, Kumo, and Itajime are particularly beginner-friendly methods to use. You can shibori dye any item of white or off-white natural fiber fabric, such as cotton. You can even dye synthetic fabrics, as long as you choose a dye formulated for synthetics. I noticed Rit makes these now.

You can easily dye T-shirts, skirts, pillows and pillowcases, socks, scarves, and small fabric pieces in your kitchen sink. Sheets, curtain panels, and fabric yardage are easy to dye, too, though you may want to use a tub larger than your sink for these.

shibori altnoun shibori lisa dusseault shibori lisadusseault

I’m planning to use the fat quarters and long strips that I dyed today to make either a patchwork skirt and a top or a dress. I might make that project a tutorial for another post soon.

Have fun!

Shibori is fun, with near endless choices to explore. Unwrapping your dyed and rinsed shibori pieces to see the finished designs is as exciting as opening a real gift. Play with dye and have fun with it!

Flickr images licensed under the Creative Commons license.
Back to School and My First Alteration

Back to School and My First Alteration

It’s the middle of August and, according to the Internet, Back to School time.

It’s the middle of August and, according to the Internet, Back to School time.

I was such a geeky, nerdy kid that I always loved going back to school in the fall. And I always liked autumn clothing better than summer clothing. Probably because I have a soft spot for anything plaid and earth toned, both of which tend to be predominate in fall fashions.

Turn back the clock


I grew up in the 70s and 80s when J. C. Penney and Sears still put out their big book catalogues. I spent hours going through those, ear marking the pages that pictured the clothing items I most wanted. We never actually ordered anything from the catalogues. My mom was a big proponent of in-person shopping. Even to this day, she’s not so keen on ordering things from the internet.

Instead, on a Saturday or Sunday in August, she’d load all four of us kids into the van for a trip to Midway Mall or, if we were feeling fancier, Great Northern Mall. Midway Mall is in Elyria, Ohio and it had a Penney’s and a Sears. (I suspect it still does.) Great Northern Mall is in North Olmstead. We always thought of it as being a bit more high end the Midway Mall though I have no idea if that was true or not. Great Northern had a Penney’s and Sears as well but, it also had a Macy’s.

I would spend hours searching the racks for the garments I had identified in the catalogues, or something as similar as I could find. Then I’d try on a pile of clothing in the dressing room. I always wanted much more than Mom’s budget would allow so then I’d go through a lengthy editing process until my choices added up to what Mom was able to spend. Every year there was one thing I desperately wanted that Mom didn’t want to buy for me because she thought it was too trendy and I’d lose interest in it after a month or two.

Every year there was one thing I desperately wanted that Mom didn’t want to buy for me because she thought it was too trendy and I’d lose interest in it after a month or two.

Every year there was one thing I desperately wanted that Mom didn’t want to buy for me because she thought it was too trendy and I’d lose interest in it after a month or two.

Pin striped adventures

When I was 12 or 13 and in junior high school, I was obsessed with pin striped pants and ties. Mom agreed to buy me one pair of pin striped jeans but told me if I wanted any more, especially the wide legged, pleated pair, I’d have to figure out how to make them myself. As for the ties, she had some old ones from her father I could have.

I had no idea at this time how to go about making a pair of pants. I also didn’t happen to have any pinstriped fabric lying around.

But my Dad did, at least he had some pinstriped pants shoved deep into his closet that he never wore. The pair I liked the most were rust and brown and one Saturday afternoon when both he and my Mom were at work, I extracted them from the closet.

They were, of course, humongous on me but I knew how to sew so I figured I could alter them to fit. I was afraid that someone would come home and stop me mid alteration so I didn’t bother taking anything apart first. I just started adding pleats to the waistband, two to each side that I topstitched all the way down the legs. Then two in the back. I chopped off the hem, unintentionally rendering the pants capri-length. When I put them on, I decided the capri-length made them more fashion-y and I was going to wear them to school the next day.

Zero photo evidence

I wish there was a photo of me in these pants but there is not.

I wish there was a photo of me in these pants but there is not.

I wish there was a photo of me in these pants but there is not. I did put them on Monday morning, along with a brown turtleneck, a brown belt, and my flat brown capezio lace up shoes. The pants were bulky since I hadn’t trimmed any of the fabric out when I altered them and the legs stuck out because of the same but I thought they looked cool. When I walked into the kitchen, my Mom did a double take. She opened her mouth to say something then closed it again. I waited for her to yell at me or, worse yet, to give me the “I’m so disappointed in you” look.

But, instead, she stifled a laugh and said, “Well that explains why there was brown thread all over the sewing room. Next time, you really should trim out some of the excess fabric. That waistband wouldn’t be so bulky then.”

“You’re not mad?” I asked.

I’m not. I’ve been telling your father for years to get rid of those pants. But we should probably ask him if it’s ok.”

And there marked a three or four year period of me altering my father’s 1960s clothing to fit me. My mom was happy that I didn’t ask her to buy me as much at Penney’s and Sears. I was happy that I had clothes that were not like everyone else’s. And my dad was just happy that me repurposing his old trousers gave my mom one less thing to nag him about (my father was never very good at throwing “perfectly good” old items away).

I don’t know what the other kids at school really thought about my vintage dad wardrobe. I was already considered weird before I started donning old pinstriped pants so I suspect it just solidified that sentiment. I am, though, forever thankful to my parents for letting me develop my own little bizarre fashion style, and for encouraging my sewing habit.

Whoever would’ve thought it would turn into a lucrative career.