I just learned that a dear friend of mine is pregnant. After the announcement and our subsequent celebratory lunch, my mind starting thinking about what I could make to welcome her child into the world. It’s too early on to know if it will be a boy or a girl, which also means I’ve got plenty of time to make something by hand and from the heart. Here’s a few of the baby toys I’m thinking about making. I’d love to hear your thoughts on them!
Two-Sided Baby Blanket
I love this idea. I used to love my two-sided comforter because I could flip it around based on my mood (and also based on which side had less cat hair…) My friend and her man are super unique, so I know their baby’s room is going to have flair and style. A reversible baby blanket would be right up their alley. Of course, I’d want it to match the colors they choose for the nursery, so I’ll have to check about that before I start.
Super Soft Receiving Blanket
Like all babies, I’m sure my friend’s bundle of joy is going to want to be held A LOT. And I know my friend is up to the task. She’s going to be an amazing mom! The new arrival is due in the February/March timeframe, so it will still be cool where we live. It makes me think that a super soft, and warm receiving blanket will help new mom and baby snuggle and bond.
Crunchy Jellyfish
It won’t be long before that new bundle of joy is putting everything in his or her mouth. (By the way, I’m certain it will be a girl.) Between teething and the need to understand the world using all her senses, her mouth is going to be full of all sorts of stuff. I love this crunchy jellyfish pattern because it will give her something safe to mouth on and it’s so cute!
Sun Toy
Along the same lines as the crunchy jellyfish, this sun toy is super cute and great for littles ones putting everything in their mouths. It’s got loads of textures too, making it entertaining in many ways. And when baby decides it’s time to throw her toys, it’s soft and won’t hurt or damage anyone or anything.
So, if it was your friend having a baby, which of these cool baby gifts would you make?
This weekend my family is going backpacking. It’s the first time all four of us, my husband, myself, and our two daughters, ages 7 and 4, will go on an overnight backpacking trip together. My husband, Eric, compiled a detailed list of the things I’d need to bring (he is taking care of the girls’ packs. Rad guy, right?).
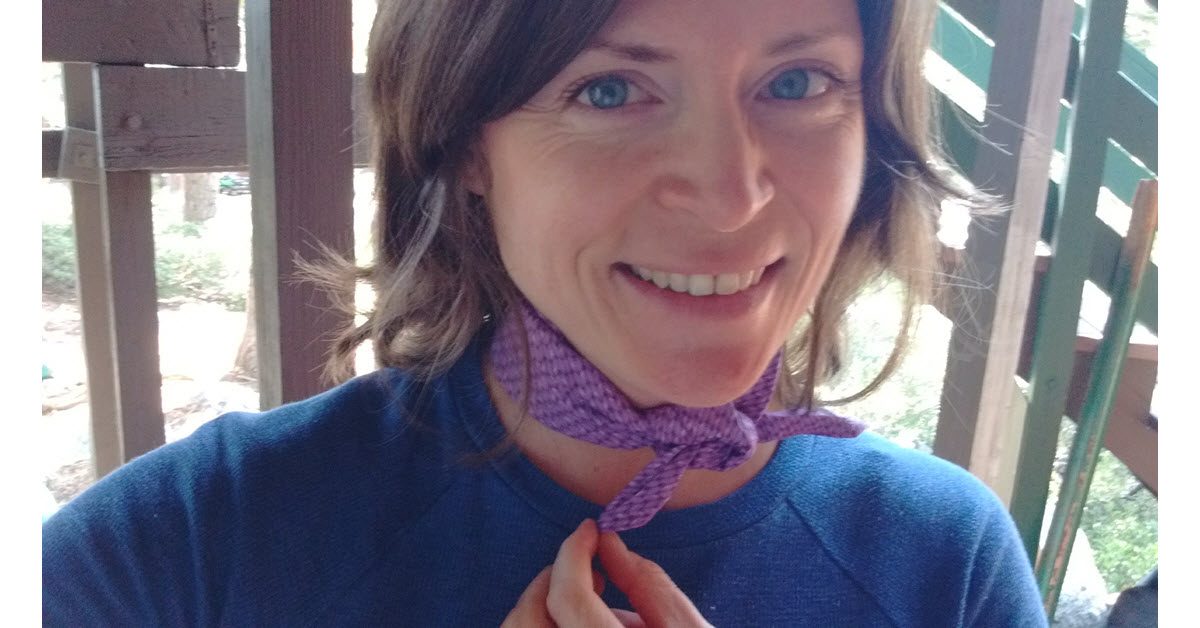
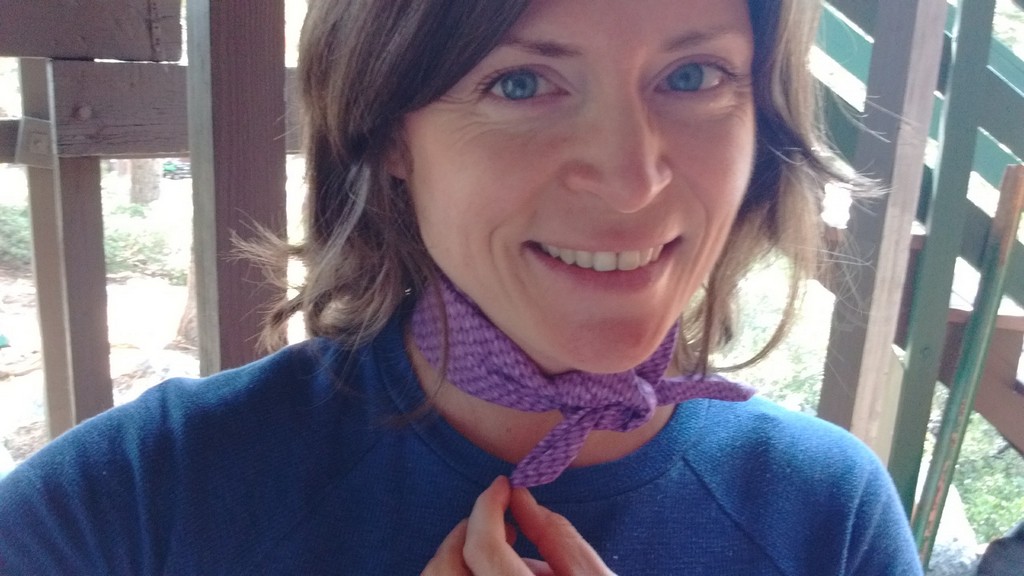
On that list was a bandana. It’s been awhile since I had a bandana but I remember how useful they were when I used to go backpacking. They can be used as sweat catchers, scarves, headbands, face masks, pot holders, to keep the sun off your face or neck, and even to tie a tourniquet. Honestly, their uses are endless. I just didn’t have one and darned if I was going to buy a bandana off of Amazon when I have a wall full of fabric bins and a sewing machine.
Getting started…
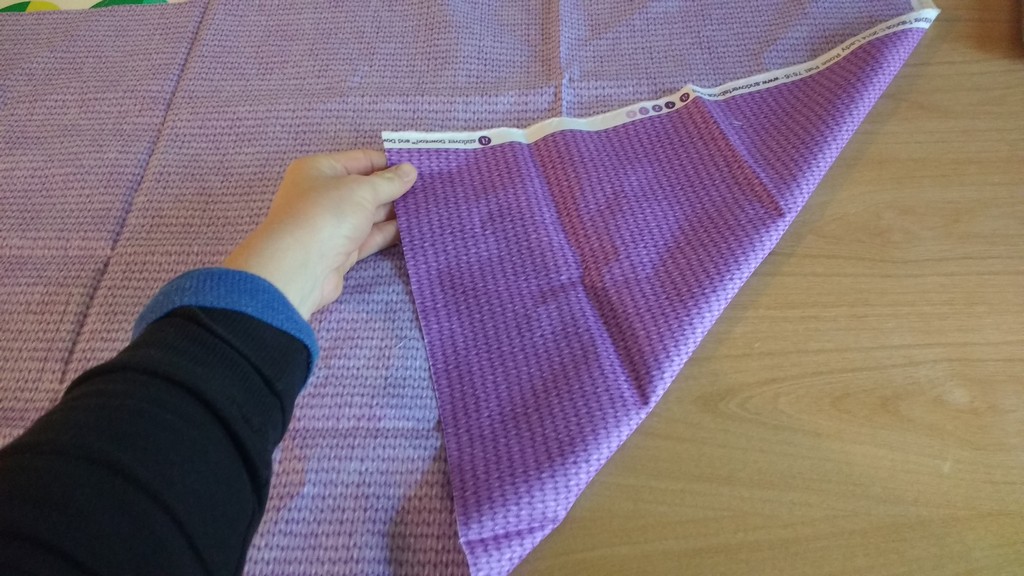
I grabbed a ½ yard of fabric which was a little over 18″ tall. If you have a bigger neck than me (that’s me in the photos) or want a larger bandana, grab 3/4 of a yard of fabric.
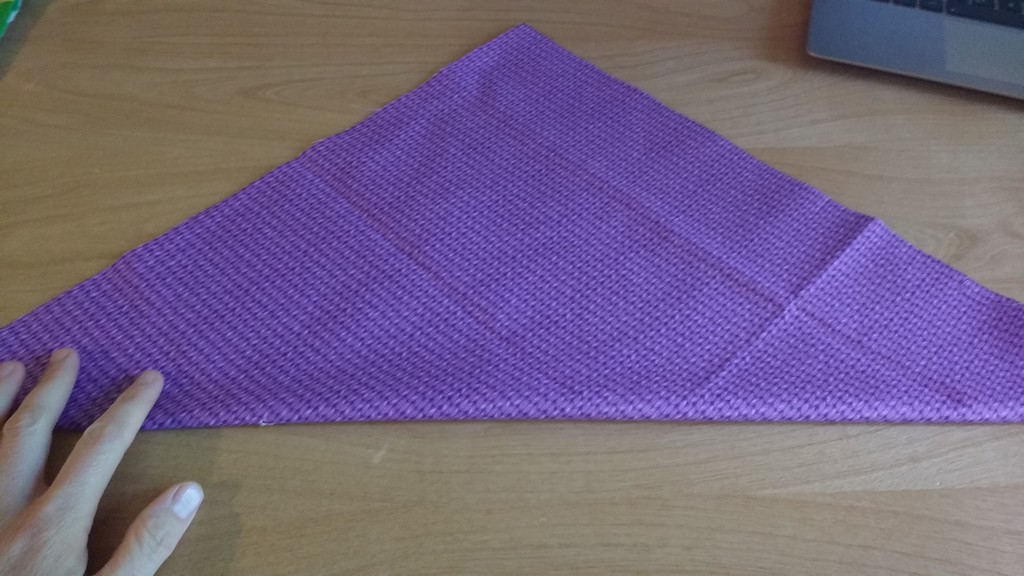
I cut out an 18″ x 18″ square. Again, size up if you want a larger finished piece. Once you’ve cut the square, roll it up and test it out unhemmed. Does it fit around your neck? Around your head? If you want it big enough to create a possible tourniquet, around your thigh?
Key step
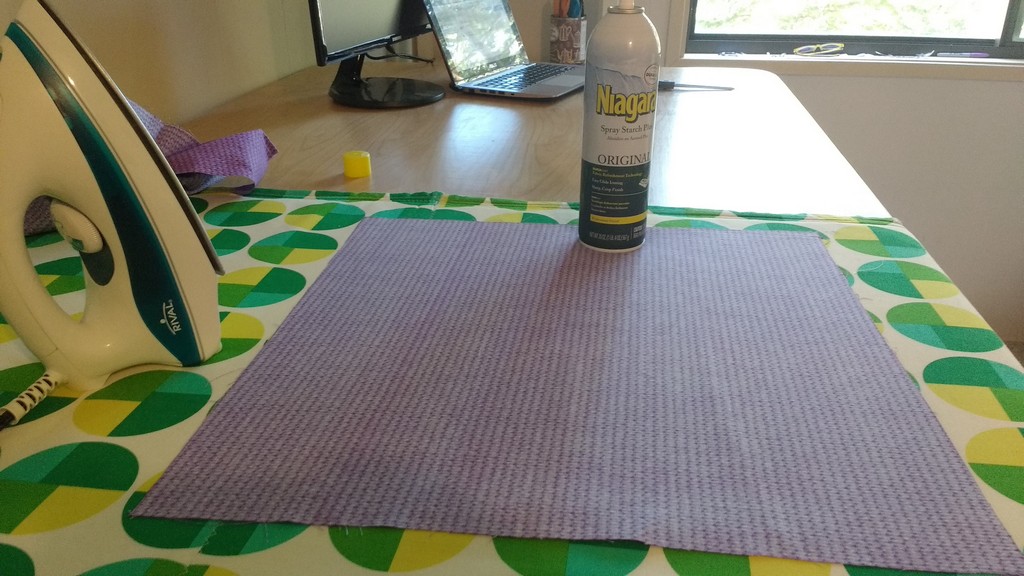
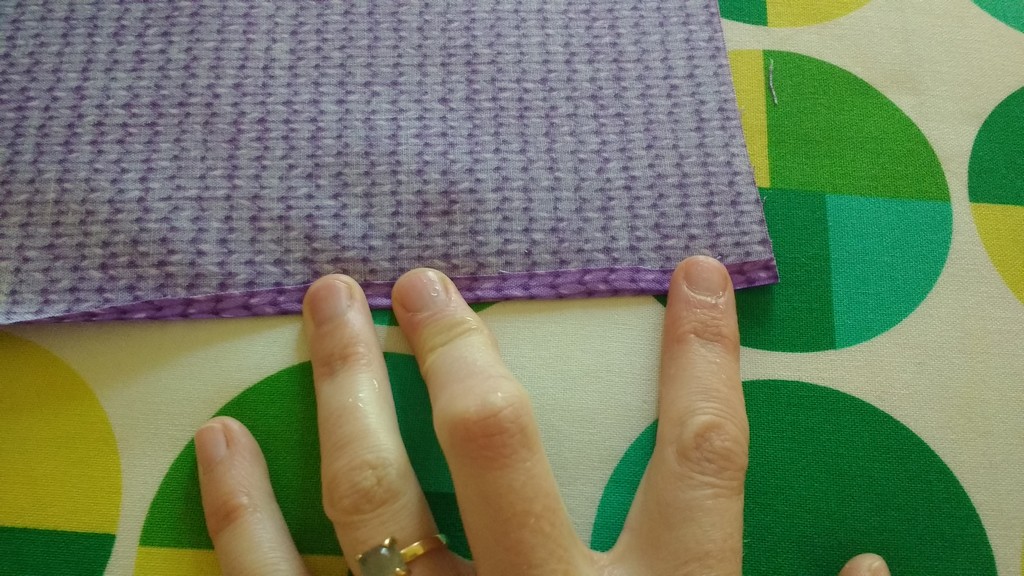
Now is the most important part. Press and starch that sucker, especially around the unfinished edges.
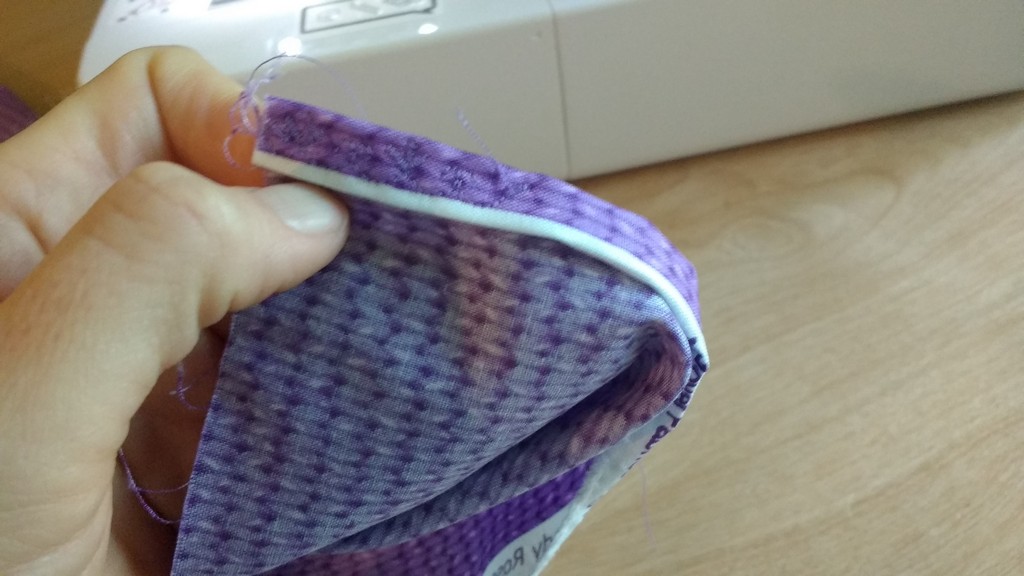
You can make your hems as large or as small as you like. I like bandanas with TINY hems, so I rolled mine over even smaller than ¼”, pressing and starching all the way around. Then I doubled that over again, pressing and starching.
Start pinning
Done! At this point, you could pin the pressed and started hems but I have a feeling that if you used enough starch they are going to stay put while you sew.
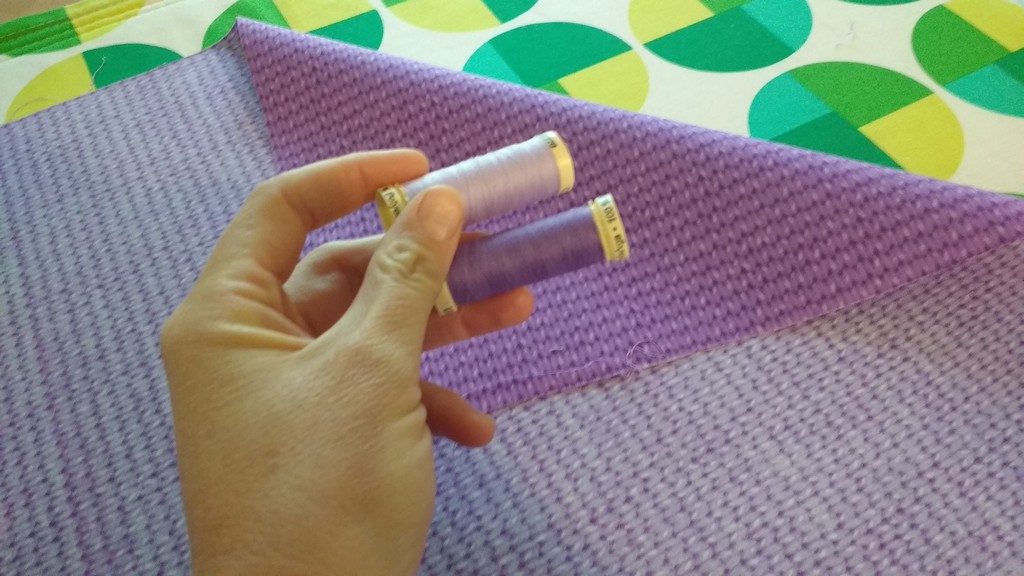
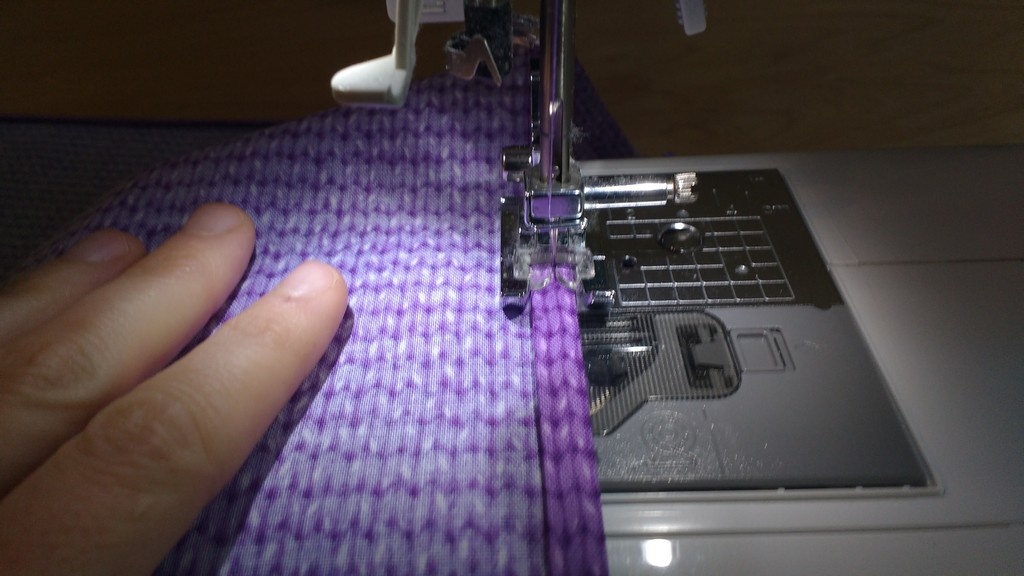
Pick your thread. For this project I went with a purple that matched but once it was finished I wished I had gone with the lighter purple just for a fun contrast. You live and you learn.
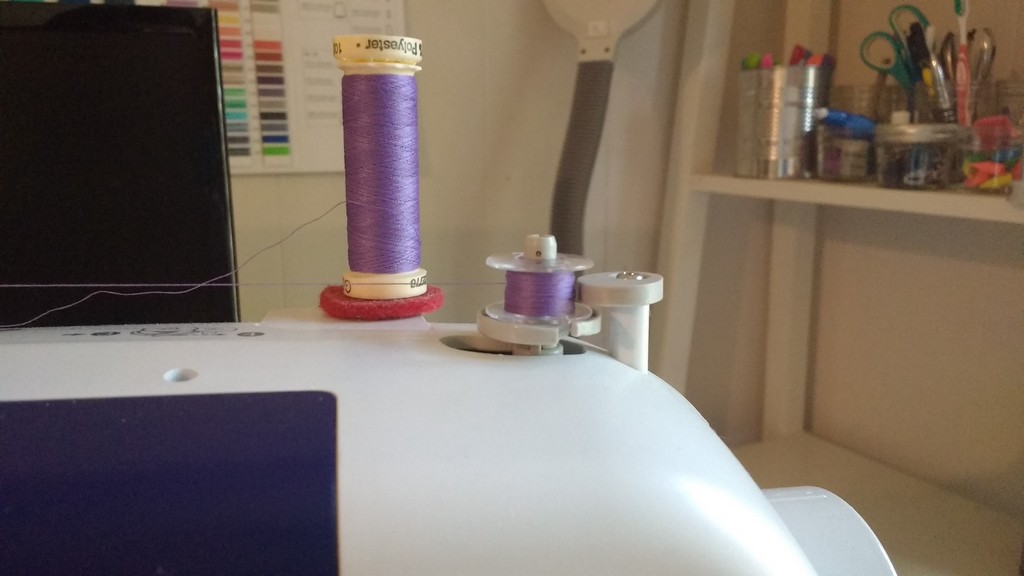
If you are going to use a decorative stitch, make sure you have enough thread in your bobbin.
I tested out this decorative stitch on a separate piece of fabric first. I wanted a stitch that would look good and keep my hem nice and flat.
Easy-peasy
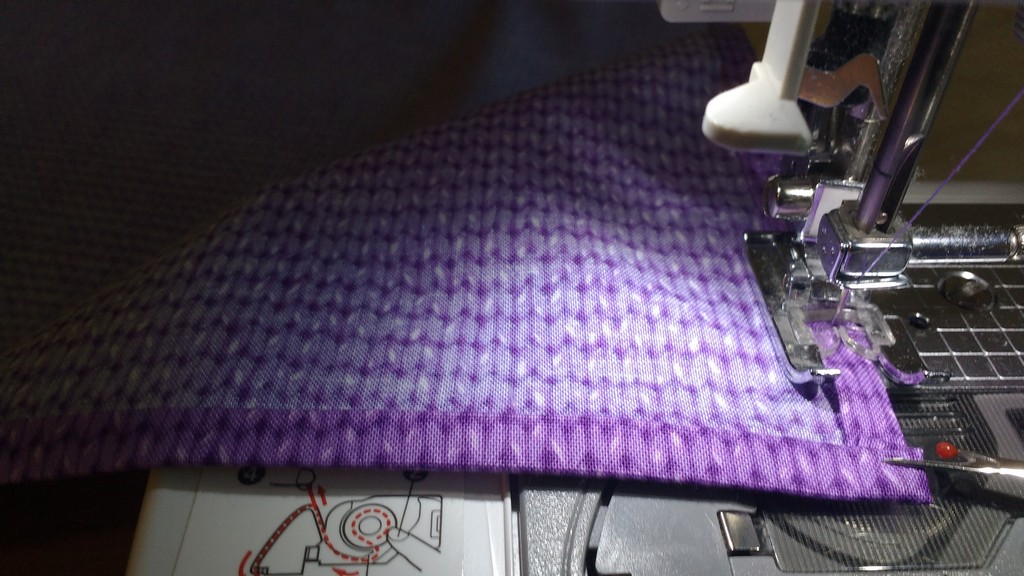
Start sewing a square. This is the easiest part after your prep work to get there.
If you have a shallow hem, use a seam ripper to hold down the corners as you go.
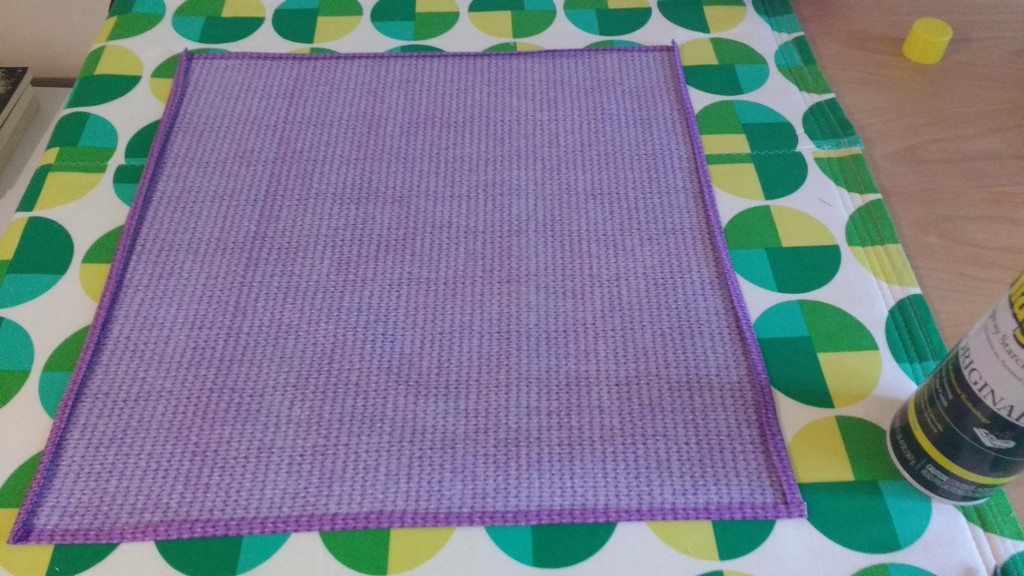
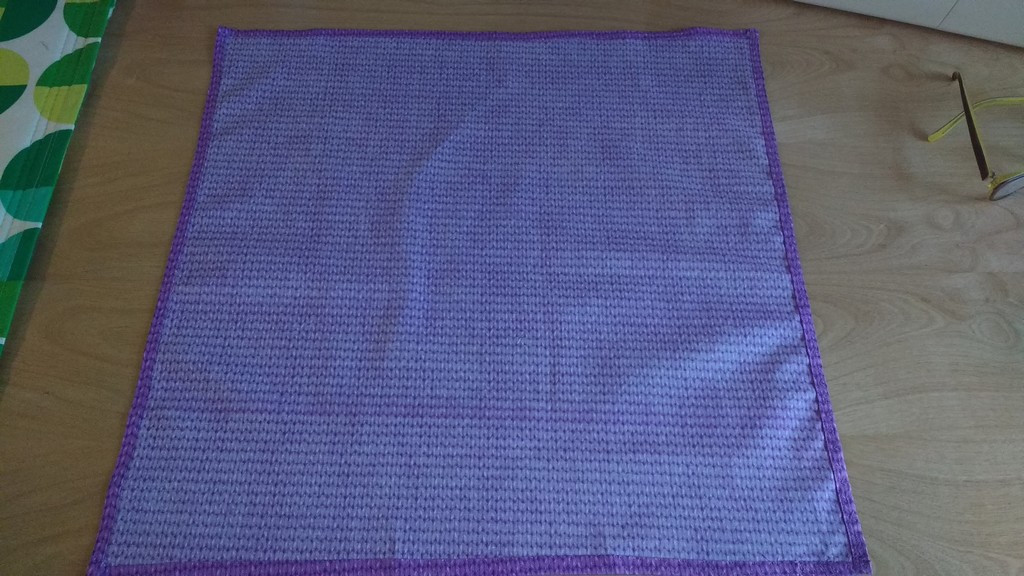
Admire your creation
Look that beauty! And you didn’t spend $12 on Amazon for it.
Try it on and enjoy. Happy camping!
———————————————————————————– Charlotte Kaufman is a writer and sewist in Mammoth Lakes, California. She specializes in marine and home interiors and continues to fall more and more in love with quilting. You can follow her at charlottekaufman.com.
In my almost 30 years in the film and television business, I’ve worked with a lot of different designers. Every designer has a specific way they like things to fit, at least in the film and television world. Tailors at men’s suit stores like Brooks Brothers, or department stores like Nordstroms, have standard fit and length parameters they follow.
They’ll tell you that a suit jacket hem must end at a certain point on the wrist and the proper length of the jacket is determined by whether or not you can curl your hand around the hem in a certain way. They’ll also tell you that a pant hem needs to have a specific amount of break over the front of the shoe (the amount the hem buckles in when you’re standing straight up).
In television and film, these things can vary depending on what designer you’re working with. I have five or six different designers I work with fairly regularly and they all have specific ways they want things to fit. I’ve worked with them enough to know what each of them like. One of them likes suit pant hems on the short side but lots and lots of ‘stack’ when it comes to jean hems. Another always wants a rake in the hem because they hate to see an actor’s socks showing in the back when he walks. One likes the shirt sleeves to show a ¼” below the suit jacket. Another tends to want things very slim fitted.
One size fits all
As a tailor, one of the most annoying fit attributes is when a designer wants you to, essentially, over fit something (none of the designers I work with regularly do this). By over fitting I mean, they want me to fit something so tightly that there are absolutely no wrinkles present anywhere at anytime. The main problem with this is that it’s only achievable if the actor or actress happens to be a non-moving, stationary dress form or mannequin. And, as I’m sure you know, most are not.
Actors move, clothing wrinkles. If you fit a dress too tightly, it’s going to ride up at the slightest provocation. If you fit a man’s suit jacket within an inch of its life, the actor won’t be able to lift his arms.
There are a lot of wrinkles I can fix, but I can’t get rid of them all. An over fitted garment looks just as bad on camera as one that isn’t fitted enough. Unless you start putting all kinds of extra seams into a thing, you’ll never be able to get something that isn’t spandex, completely wrinkle free all the time. Wrinkle free-ness is only completely achievable when the actor stands in one specific way and doesn’t move at all, ever.
Oxygen is overrated
I can’t tell you how many times a designer has insisted I take something in so tightly that after it’s done, the actor complains about not being able to breathe. I usually don’t take anything in as much as I pinned in a fitting if I’m working with a designer like this. I honestly find it ridiculous that there are costume designers who don’t understand that when humans move, the clothes they are wearing also move. Sometimes there are wrinkles, and this does not mean that the garment is not fitted correctly.
Stylists who dress people for print or short shoots like commercials tend to fit things more tightly because they’re not used to dressing people for realistic scenarios and situations that involve actual movement.
Stylists who dress people for print or short shoots like commercials tend to fit things more tightly because they’re not used to dressing people for realistic scenarios and situations that involve actual movement. In a photo shoot for print, there is no movement so you can over fit to your heart’s content. That’s why clothing never fits you like it does the model in the catalogue or on the website. And this is not a bad thing.
I’ve also worked with designers who do this thing where they grab a whole wad of fabric center back to demonstrate how something should be taken in. Well, first, when you do that, you’re pulling the side seams into a weird place that they shouldn’t be. Unless its men’s pants, I rarely take something in just from the center back, especially if it’s a wad-full of fabric. One reason is that I like to avoid having to reset the zipper if possible and secondly, it probably needs to come in from the side seams and the side back seams anyway. Or, if it’s four to six inches, it might make sense to purchase the garment in a smaller size. If I were building the garment from scratch, I’d want to recut it if possible.
Stress fractures & signs you are doing it wrong
I don’t know if other people notice this but when I see a dress with side seams that swing backward instead of hanging straight, I think that someone who didn’t really know what they were doing did that alteration. Costume Designers don’t necessarily need to know all the nuances of fit and balance but they should know enough to trust a good tailor when they have one.
Sadly, it normally doesn’t do any good to try and explain yourself to a designer who tends toward over fitting. They’ll just assume you don’t know what you’re talking about.
When I find myself in a situation with a center-back-wad-pulling designer, I just nod and pin it, then alter it in the way I think is best.
Because, as any tailor who’s been in the television and film business for awhile knows, “alter as pinned” is simply a suggestion (and a way to appease an over zealous fitting designer).
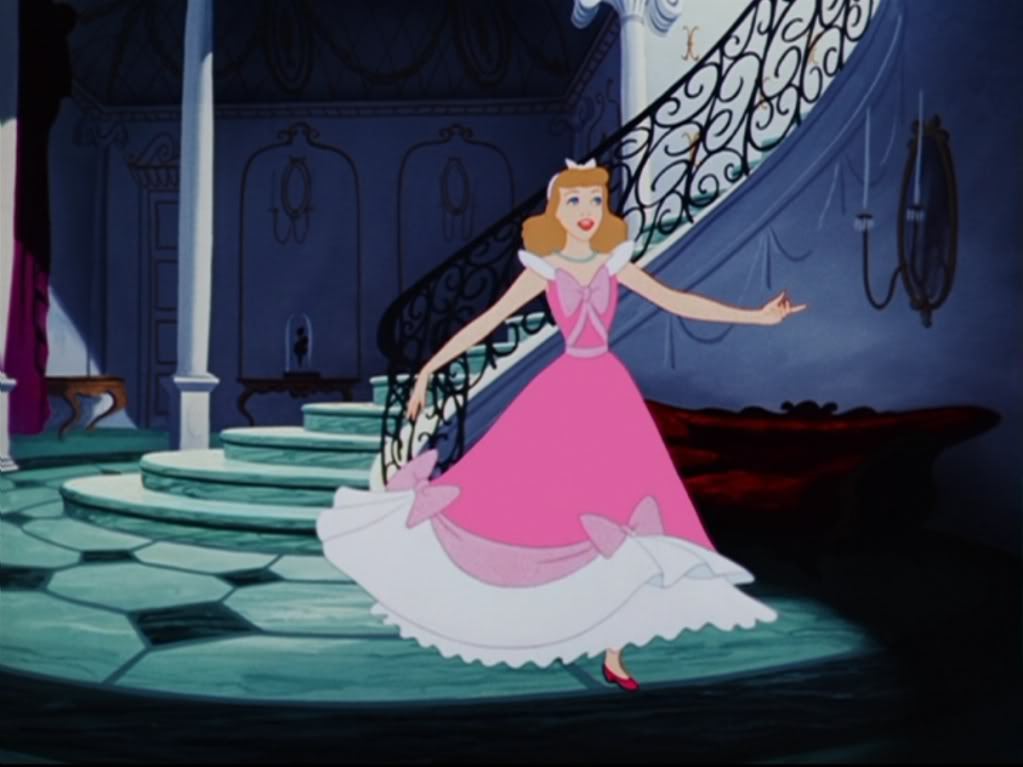
One of the most classic Disney movies is Cinderella, the 1950’s cartoon version of the popular fairy tale. In this story, we see Cinderella go from being a young girl who loses her mother and has to live with an unloving step-family to a woman who’s optimistic enough to take a chance by going to a fancy ball and catching the prince’s eye.
Every detail about this story line isn’t perfect—if she’s Prince Charming’s love, why can’t he recognize her without this shoe business?—but it’s still a staple for a lot of people in regard to movies they adored as children.
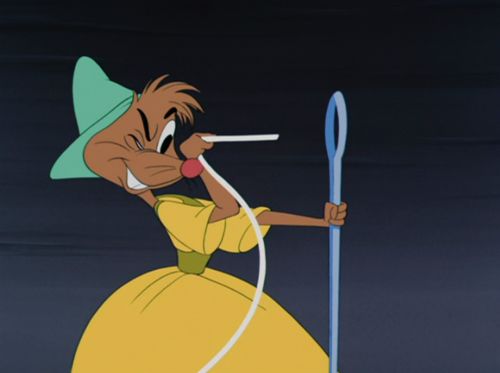
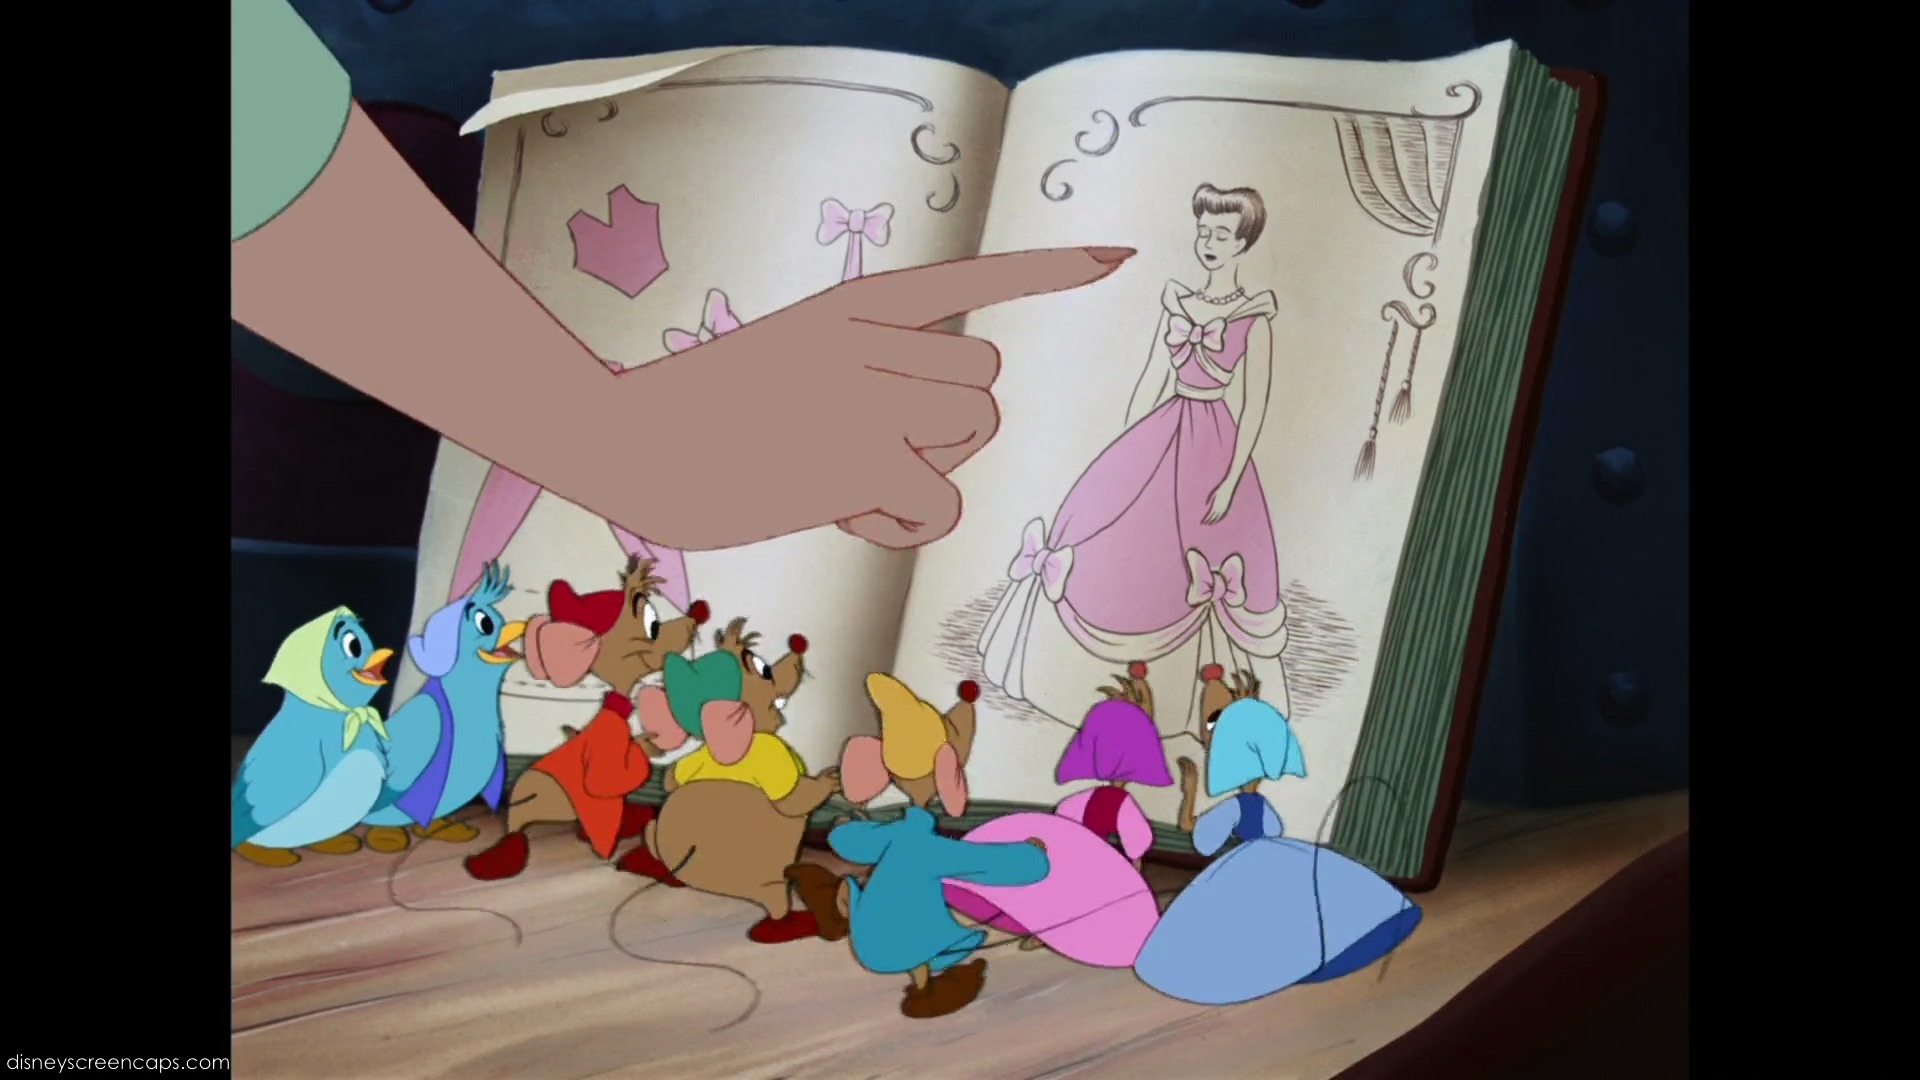
For a person who grows to appreciate sewing, the film can have another level of intrigue because sewing is a part of the story. Before the Fairy Godmother comes by to provide Cinderella her glittering, beautiful gown, she goes through the process of planning her own dress, which will be constructed from tools and materials within her home. The actual dressmaking happens at the hands of a team of friendly rodents once they realize Cinderella is too busy to finish the project herself, and the musical scene connected to their sewing is one of the most recognizable ones from Disney.
Beyond those aspects of familiarity and youth, there’s unique sewing advice happening within that dressmaking scene that you could apply to sewing endeavors. All it takes is a little consideration and a bit of imagination to find those gems of guidance within the lighthearted scenes of sewing.
For instance, these mice have applicable tools at their disposal to see this dress come to life. There’s no machine in sight, but you do see other sewing essentials, like needle, thread, scissors, and chalk, all of which can at least be representations of things that are useful for sewing. The chalk, as an example, can be replaced by soluble pencils to trace your cutting lines, and like the bulky chalk the mice are using, you can wash out the remnants later. With that strategy, you’re making sure you’re sewing in a more precise way without forever damaging the fabric. Good strategy, mice!
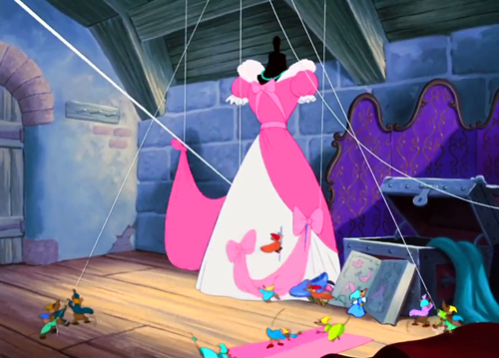
As the dress is being assembled through pulley systems and such, the mice have a dress form setup to keep the fabric in its most natural wearing position. This detail cannot be overstated if you’re going to sew clothing like Cinderella’s dress because it makes you able to see the dress as it should be rather than bunching it up or expanding it unnaturally on a flat surface. You can tell how the dress will look, and you could prevent a time or two of accidentally sewing your dress sides together in the wrong places. Like the mice, make sure you have that form for these purposes!
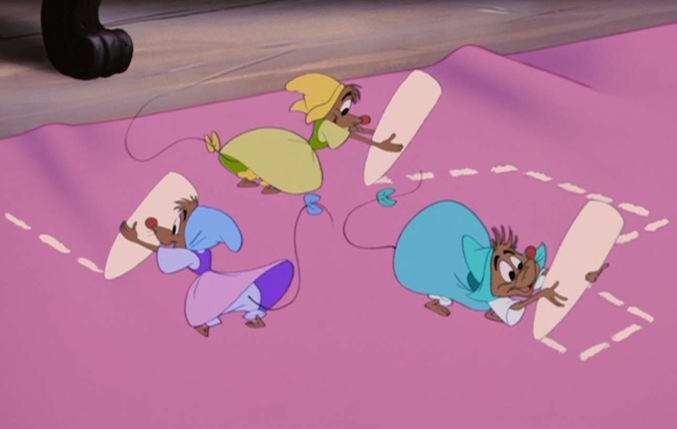
Unfortunately, though, the mice didn’t quite get everything right, and it makes sense to note those things as well. For example, you probably want to use a better method of organizing your supplies than a simple wicker basket that you can dive into. Even if you’re just tossing all of your supplies into a container like this and reaching in to gather what you need, if your organization is lacking, you could end up getting a sewing needle or straight pin in your hand. For the mice, this is particularly bad since the needle is about as tall as they are, but even for human-sized sewing fans, a straight pin in the hand can hurt!
For this reason, you should consider organizing your sewing utensils better than our Cinderella mice friends! Use different containers for different items, have shelves to display them, use chest drawers to keep them stored… Whatever your strategy, do yourself the favor of not piling everything into one area that’s dooming you to minor injury!
One more detail the mice get wrong is how simple they make assembling this dress seem. Sure, they employ pulleys that you probably won’t work with, but let’s be honest. Cinderella simply points out a picture in a book that she wants her dress to look like and gives very basic instructions about what needs to be done, and the mice infer all of the in-between information even though there are no measurements listed at all in the book.
Fortunately for the mice, the foundation of this dress is already assembled since Cinderella is intending to alter something that she already has—another good tip from the mice: use what’s around you!—but if you take this at face value, the process is too simple. Without having measurements, at least, you could be setting yourself up to fail.
So rather than just picking a picture, use a pattern or at least take the measurements of the person who’s supposed to wear the finished product. Remember, after all, that the dress Cinderella intends to alter is her mother’s—not hers. There could’ve easily needed to be some redefining done to make it fit Cinderella just right, and the mice take a risk by not being more specific. On this, don’t be like the mice! Be measure-specific!
In the end, while the mice got some things very right and some things pretty wrong, it’s a catchy scene with an upbeat song that embraces sewing in a youthful manner. So, embrace the mice’s optimism, apply their useful techniques, and learn from what they did wrong.
Reference for all photos
Disney, W. (Producer), & Geronimi, C., Jackson, W., & Luske, H. (Directors). (1950). Cinderella [Motion Picture]. United States: Walt Disney Company.
French seams are a way to finish a seam so there are no raw or exposed edges of fabric on the seam. They work great for thin or delicate fabric, or any project where you want both the outward showing and inward showing seams to look good.
Some people balk at trying them and I think it’s because it feels like you are sewing in reverse. To start a French seam you have to sew a seam on the right side of the fabric, and that just feels wrong. I get it, I do. But if you trust the process, you’ll love how it all turns out.
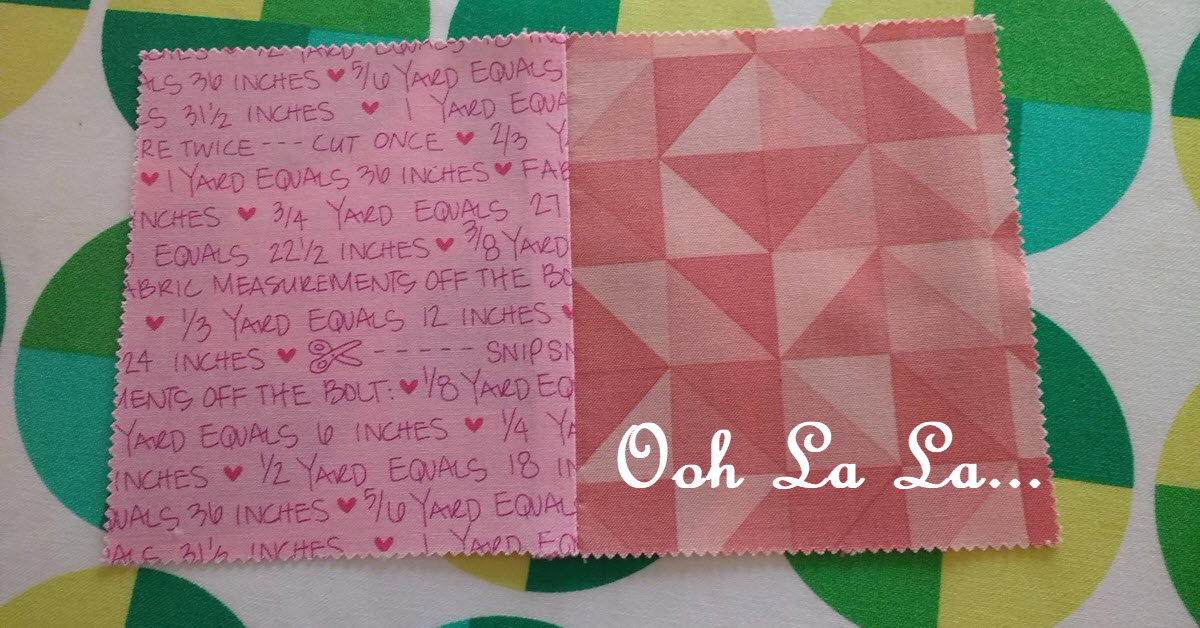
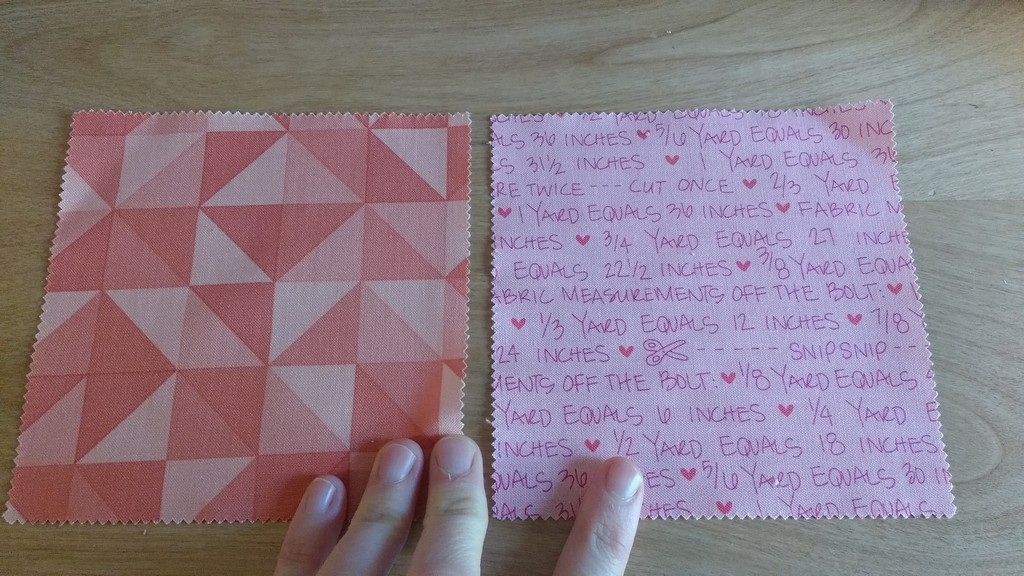
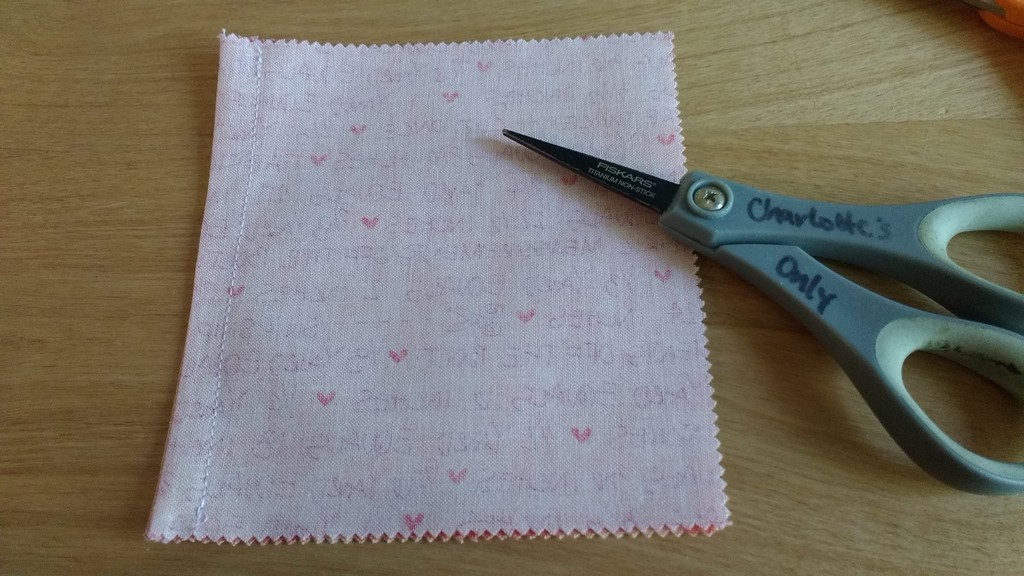
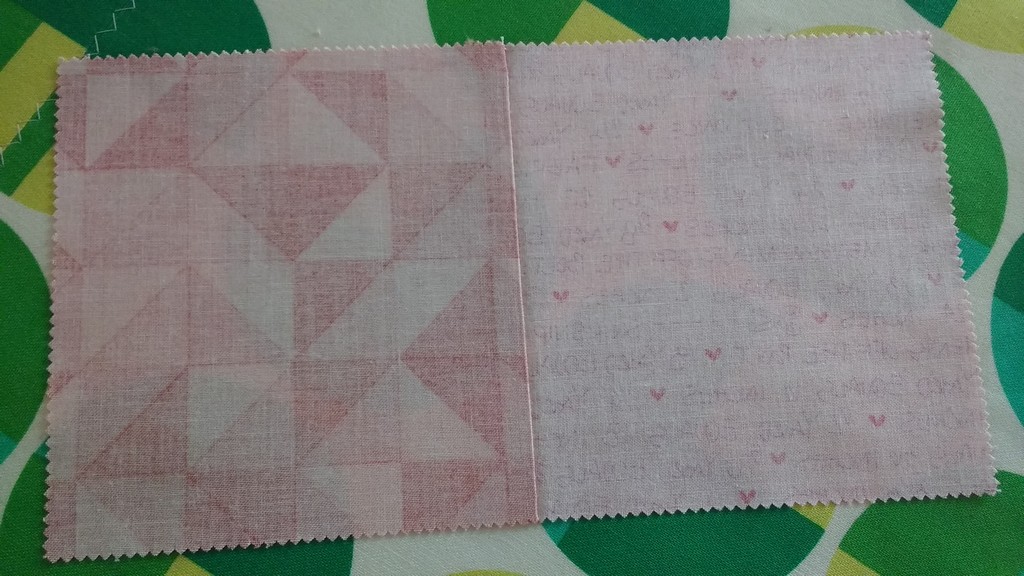
Here is an example on two pre-cut fabric squares. I’m going to join these together with no exposed seams by using the French seam method. First, place the fabric WRONG sides together.
Now sew your seam. Your seam allowance will depend on the fabric you are using and the type of project. For ease of explanation I did a ½” seam.
Next, cut down the excess fabric a bit and then head to your ironing board. Do NOT skip ironing when sewing French seams. As with most sewing projects, ironing can make all the difference.
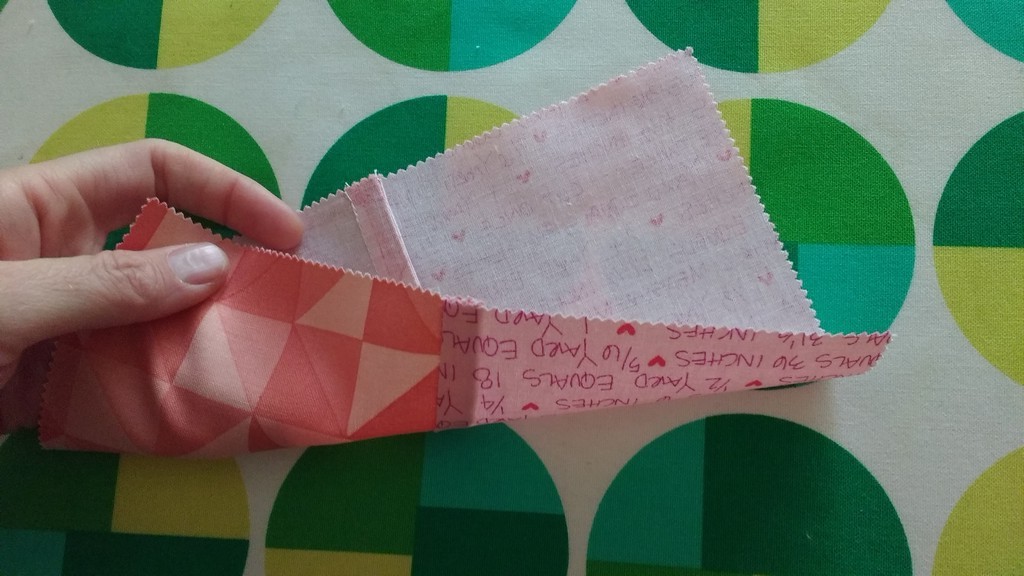
Iron the seam to one side. Flip the fabric over and iron the seam on the reverse as well.
Now fold the fabric on the seam you’ve created. I like to iron this too. For good measure, you can pin the fabric in place so it doesn’t move when you sew again.
Take the fabric over to your machine and sew another seam, this time on the wrong side of the fabric. You want to sew a seam that is wide enough to fully enclose the raw seam on the inside portion. I sewed ½” again (remember I had trimmed down my previous raw edge to about ¼”.)
Voilà! Now your seams are completely encased. Très bien.
The last and important step is to press once again. Open up your seam and press on the front AND back of your fabric.
You’ve done it! THAT is a French seam. The applications are endless, just trust the process and don’t worry about starting a seam on the right side of fabric. Happy sewing!
———————————————————————————–
Charlotte Kaufman is a writer and sewist in Mammoth Lakes, California. She specializes in marine and home interiors and continues to fall more and more in love with quilting. You can follow her at charlottekaufman.com.
Things don’t always go as expected. Sometimes you do something and it fails to turn out like you imagined it would. Or it just doesn’t look as good as you wanted. Sometimes you unintentionally execute a crappy alteration.
There’s no reason to panic or get upset when this happens. You simply fix whatever it is. A problem only arises when you don’t see that something has gone awry or you try and convince someone that nothing is wrong; the garment just needs a good press.
twisting sleeves
Ironing and a healthy dose of steam can right all kinds of wrongs but neither of those things can make a bad alteration, good.
The old distraction trick
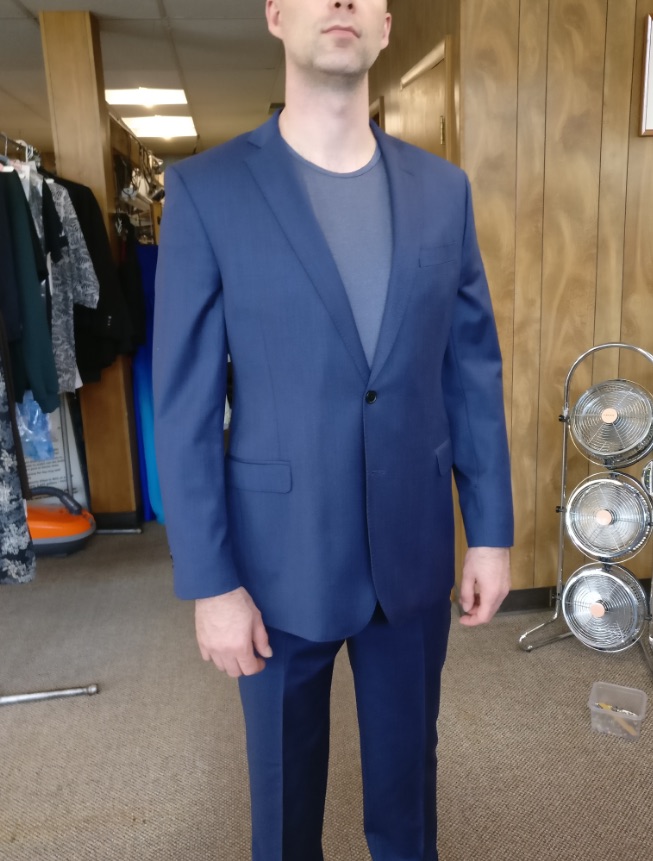
This past week, a Costume Designer friend of mine, Lauren, called to ask if I could look at a suit jacket for a friend of hers. He’s getting married in a few weeks and had purchased a Brooks Brothers suit. Brooks Brothers had recommended a tailor for him to go to for alterations.
The suit didn’t need all that much, just a little taking in on the sides to slim it a bit. When my friend’s friend – I’ll call him Dan – went to pick up his suit and tried on the jacket, he noticed some strange twisting in the sleeve. His fiancé (I’ll call her Kate), was with him.
They both pointed out the twisting to the tailor, but the man kept insisting that all they needed to do was send the suit out to be pressed and they should take a look at the back because it was smooth. You know, the old distraction trick.
Well, Dan and Kate weren’t really buying it, but they paid the man and took the suit to the dry cleaners to be pressed professionally. As they suspected, when they picked up the suit, nothing had changed. The sleeves were still hanging in a sort of corkscrew way. That’s when they asked Lauren if she knew someone who could help and they ended up calling me.
Its much easier to fix your own alteration snafus than it is to remedy the ones of others, mainly because you know what you did to get to where you are. When you’re not the one that started the whole thing, you have to use a bit of detective work.
Before I told Kate and Dan that I could fix the twisting sleeves, I opened the lining of the jacket to see what I could see. Men’s suit jacket sleeve linings are stitched in by hand at the armseye so that’s where to open them up.
I took out the sleeve lining from the back notch to the front notch, then unattached the lining body from the jacket body at the armseye.
Suit jackets are constructed fairly standardly when it comes to seam allowances. I could see that the side back seam of the jacket had been taken in, but just in the back, as well as the side front seam above the pocket. All of that had been done quite nicely, and the shoulder part of the sleeve was smooth and lovely. The problem was with how the bottom portion of the sleeve had been put back in.
Fitted Armholes
Men’s suit jackets, as a rule, have pretty fitted and constricting armholes. When you take in the side back and side front seams, you make the armhole smaller. If you don’t take in the seams equally front and back, you change where the bottom of the sleeve is (where a side seam would be if men’s suit jackets had side seams). You have to compensate for this in some way or your sleeve will be off balance and hang in a weird way.
Which is what happened in this instance. There are a couple ways the original tailor could have prevented this.
He could have taken in the sleeve itself the same amount he took in the body of the jacket. I don’t normally do this, though, unless the entire sleeve really does need to be slimmed. A better, more accurate way, to solve the twisting sleeve problem (in my opinion, at least) is to drop the armseye, starting from the back notch and ending at the front notch. What this does is make the armhole bigger and, essentially, the same size it was before you took in those jacket seams.
Oh boy…
In this particular jacket, not only did the tailor neglect to lower the armhole, but, when he eased the too big sleeve into the smaller jacket armseye, he rotated the whole bottom part of the sleeve too far forward.
Once I dropped the armseye, the sleeve, once again, fit perfectly and I was able to line up the bottom of the jacket body with the bottom of the sleeve. No more twisting!
Dan and Kate are happy now – though they’re asking the first tailor for some money back. I don’t think the man is necessarily a bad tailor because his alteration didn’t turn out so well (everyone does a wonky alteration every now and again) but, I do think he maybe doesn’t know what he’s doing because he didn’t see that something was wrong when Dan tried the jacket on.
It’s ok to make mistakes and have to do something over. It’s not ok to tell someone that nothing is wrong and not offer to fix it. Even if you think they’re wrong. And especially if it’s a suit they’re going to wear at their wedding.
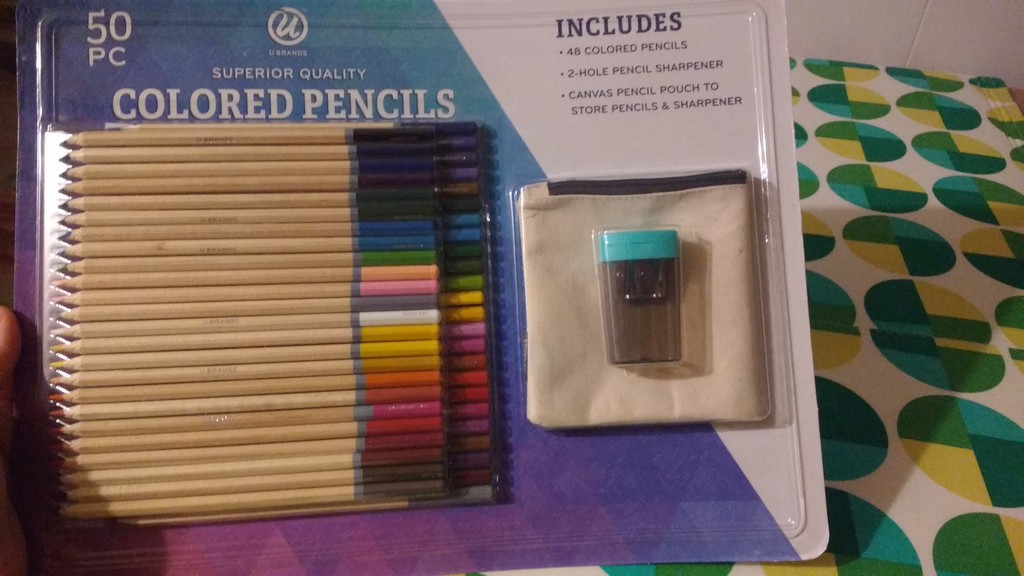
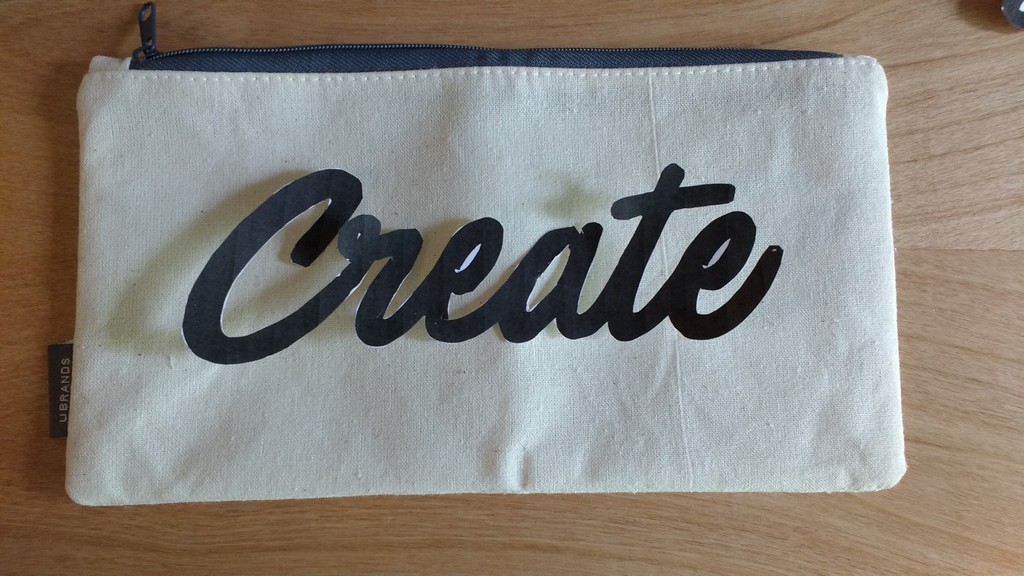
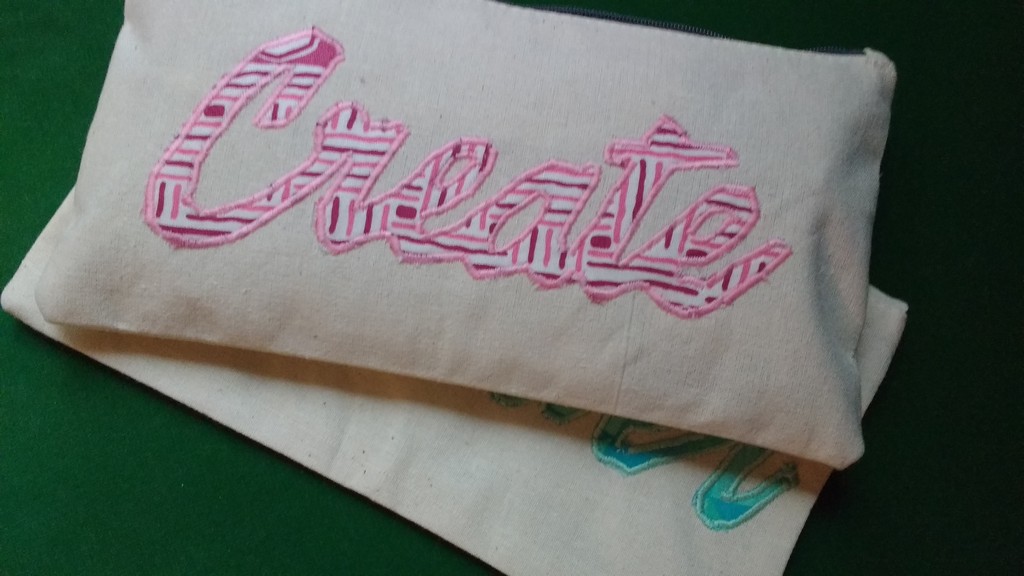
Recently I saw this set at Costco that includes 50 colored pencils, a pencil sharpener and a plain zippered pouch. I nabbed two but I think I’ll go back and grab some more because I turned them into something cool and I want to do it again.
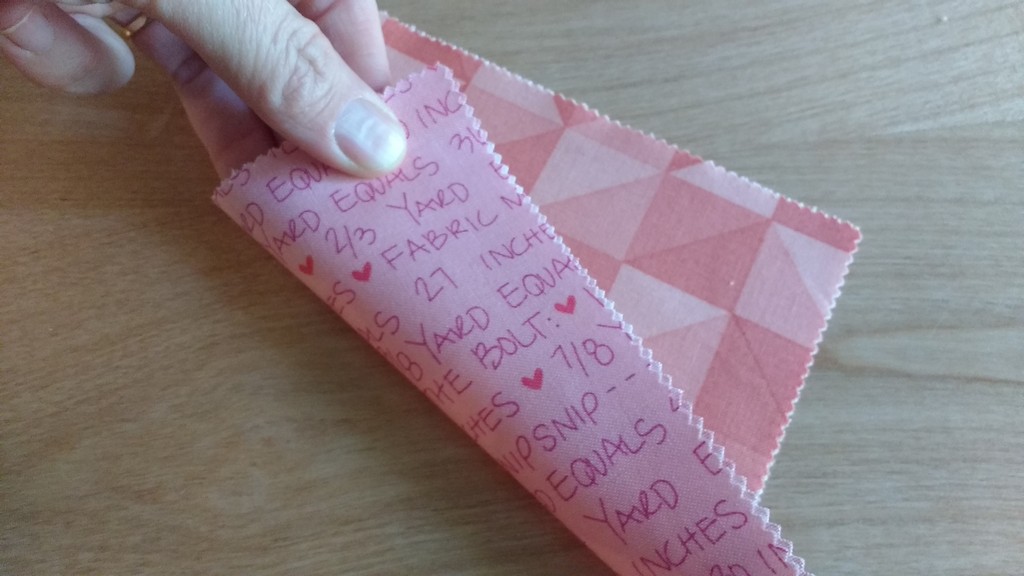
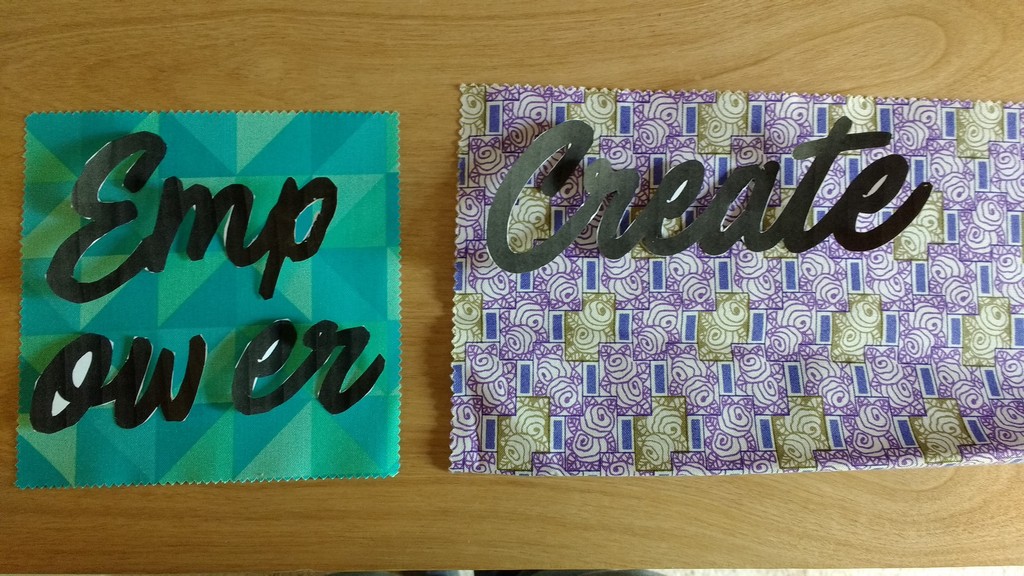
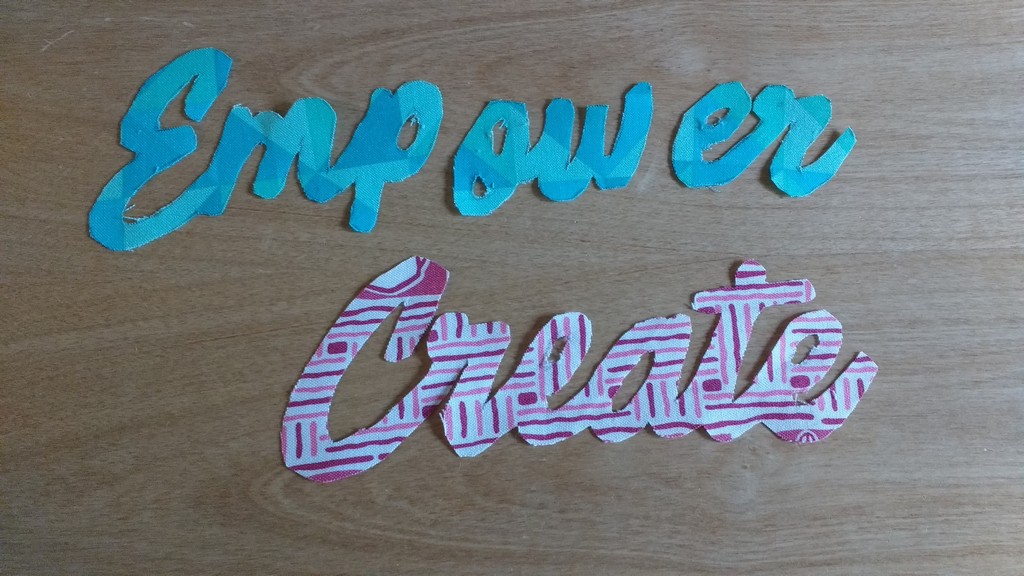
Here’s what I did. I printed out two words, one for each case, and then used them as patterns to draw the words onto fabric. The font is a free font I downloaded from dafont.com called Painted Paradise.
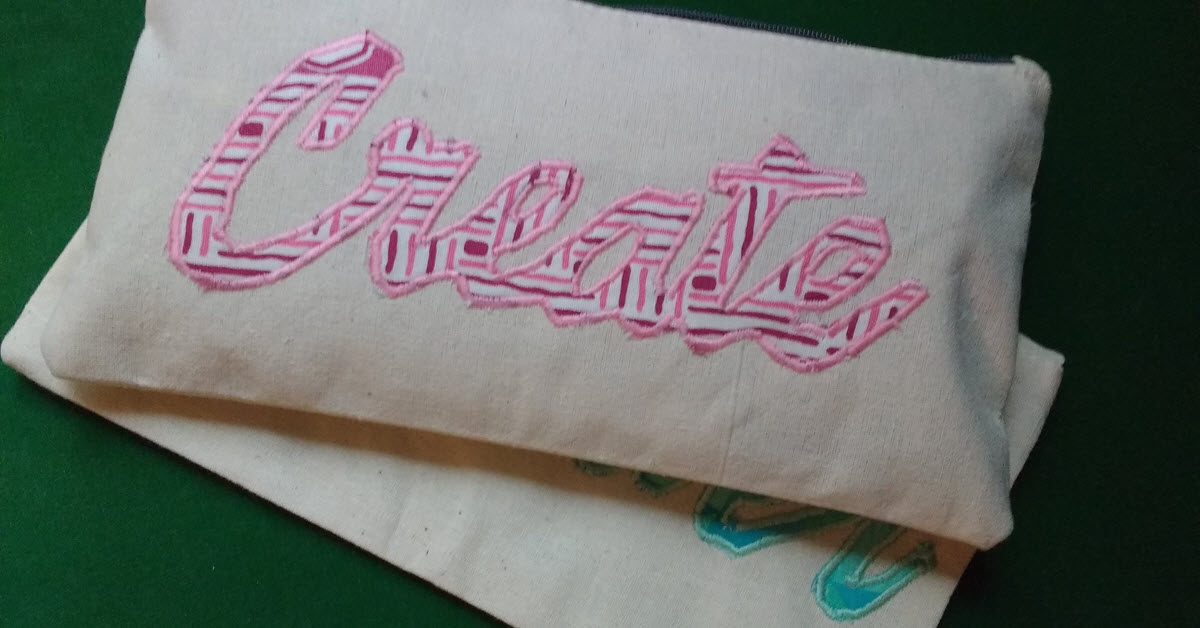
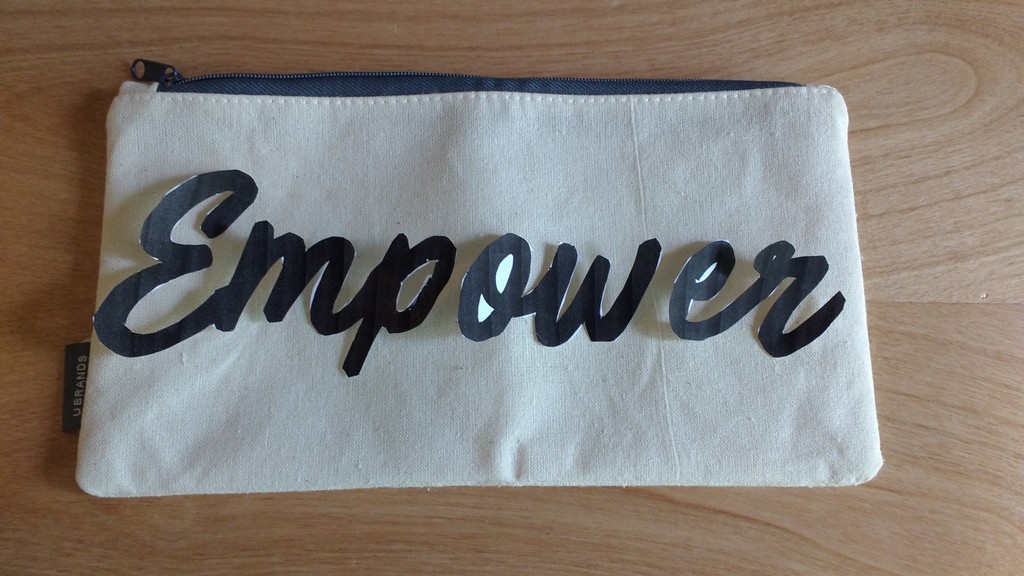
Empower printed out in three sections and I was able to place them on a charm square from my fabric stash. Create printed out as one word so I used a layer cake precut for it.
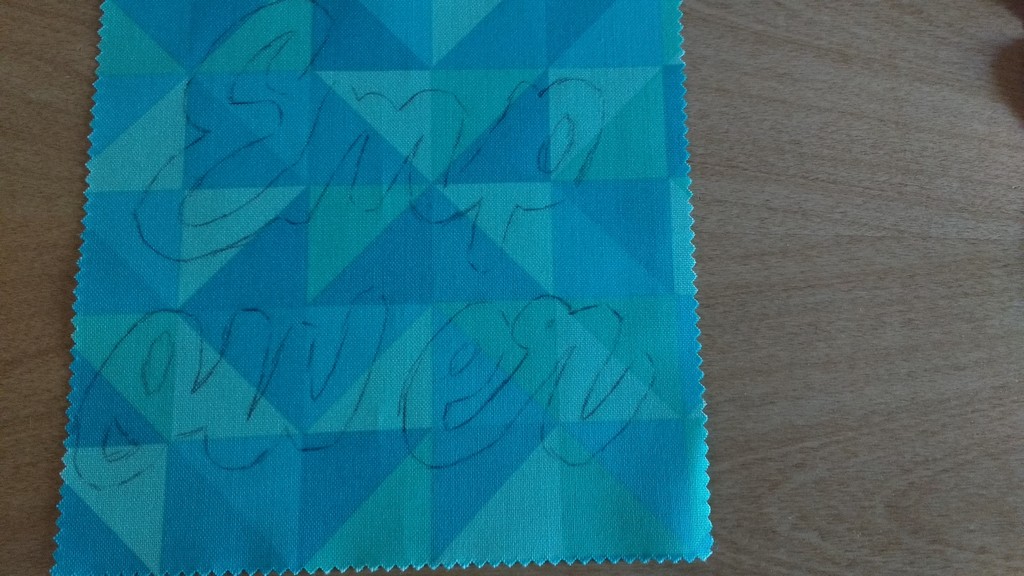
I used a freshly sharpened pencil and held the paper down as I traced.
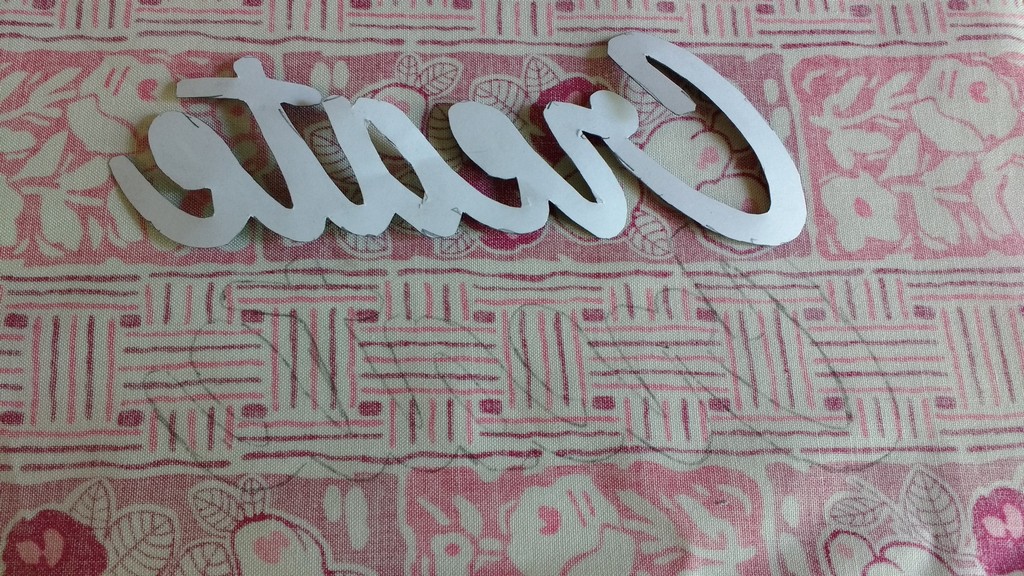
For this fabric, it was easier to flip the words upside down and draw on the backside of the fabric (I eventually chose a pink fabric instead of the purple you see above).
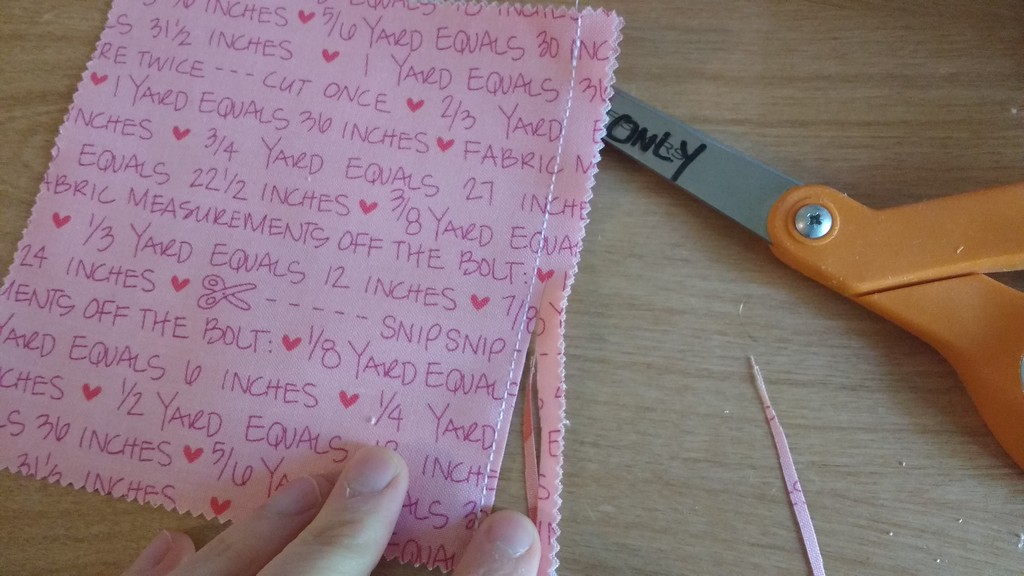
Use some sharp scissors, and patience, and cut out the words.
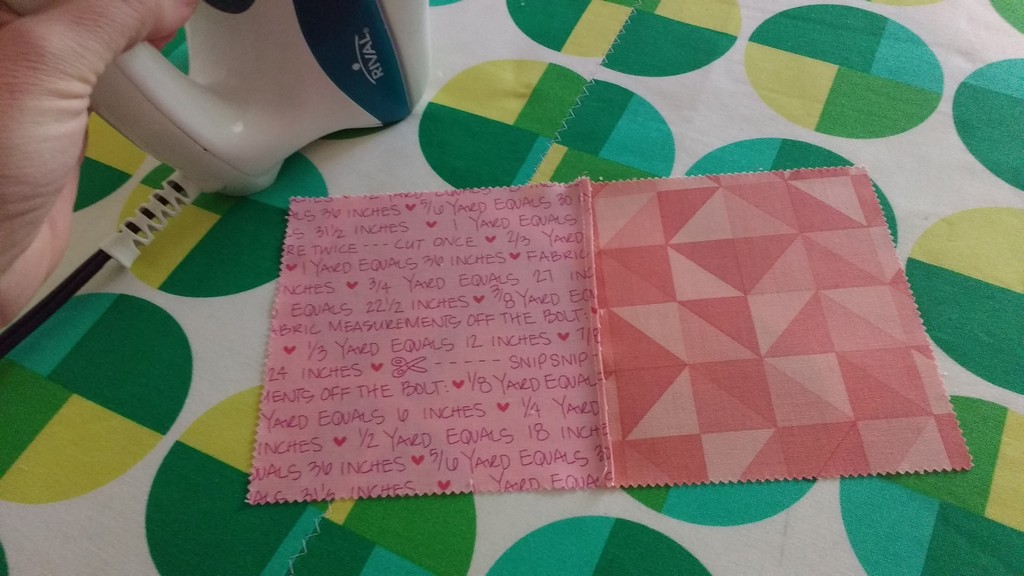
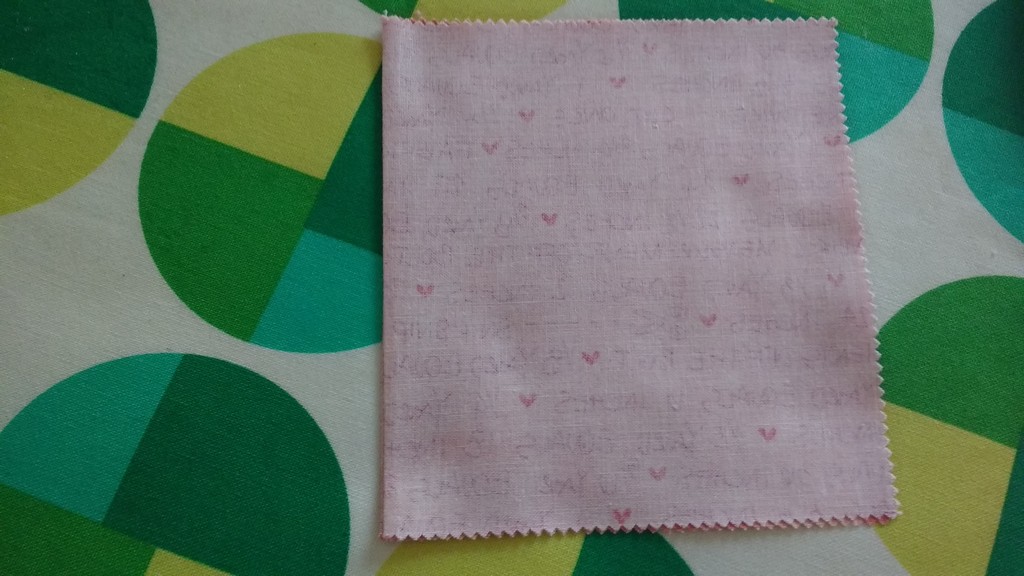
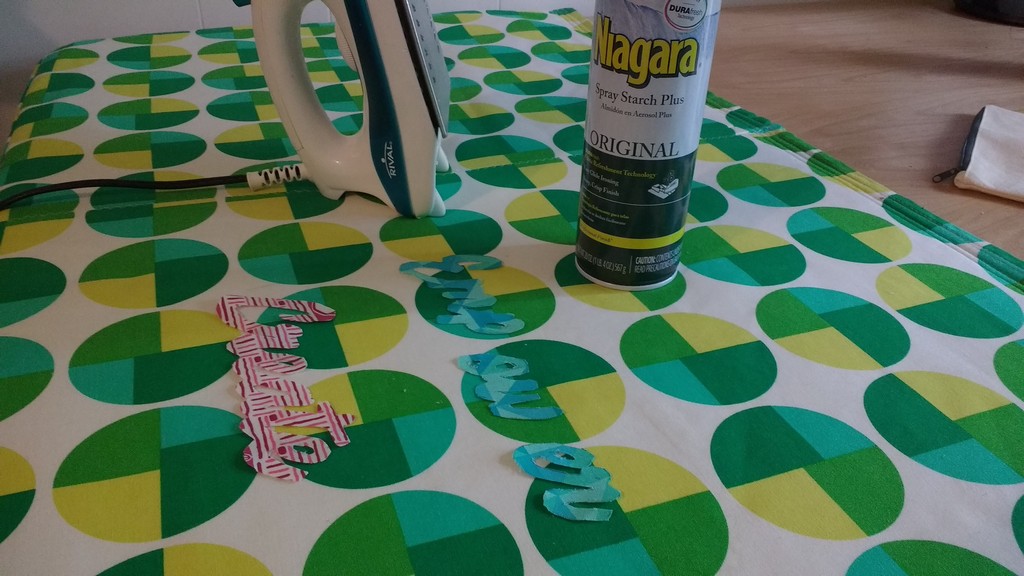
I ironed and starched the words to get them very crisp.
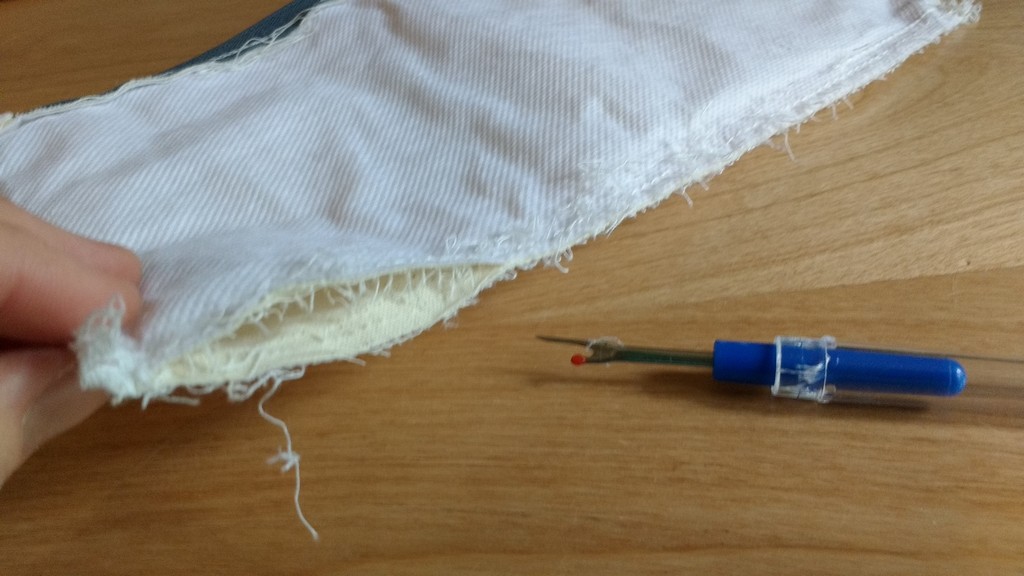
Next up: taking out the seams of the pencil case. This actually went pretty fast as I ran my seam ripper along the serged seams and then opened the fabric and pulled out the inner seams.
I did this to both cases and then took a moment to pull out as many of the remaining threads as possible to create a clean working space on the fabric (and my table).
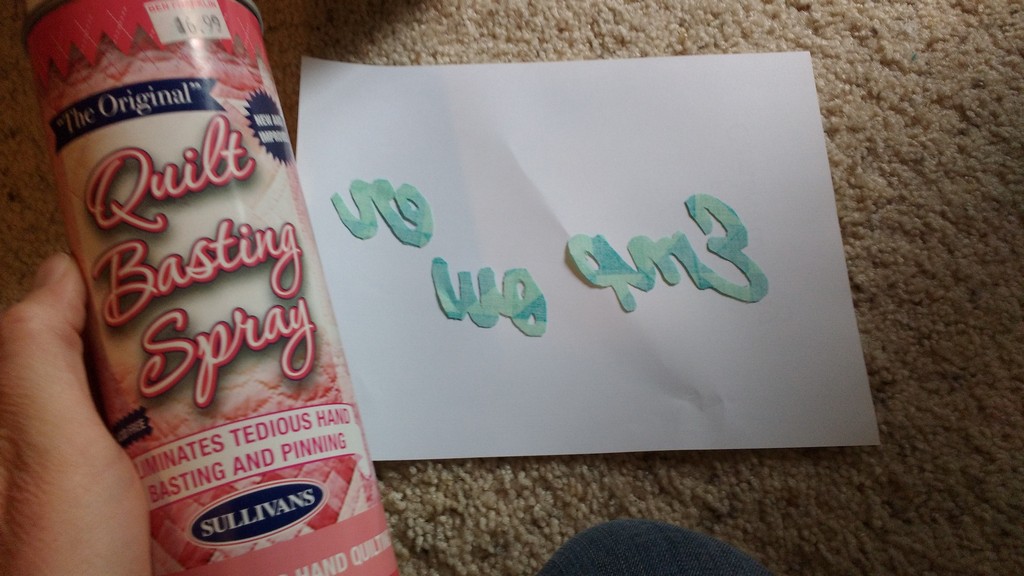
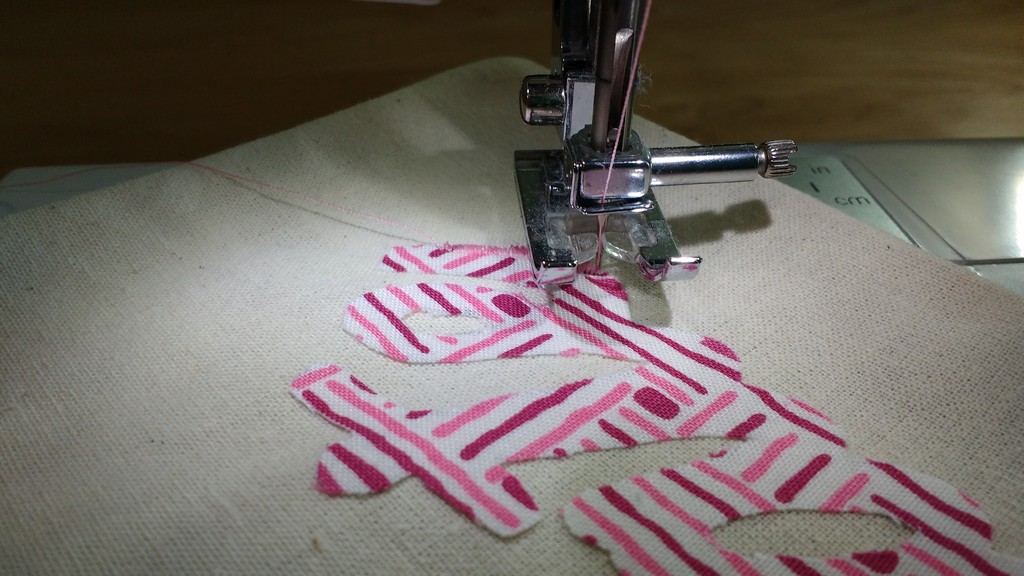
This is my handy quilt basting spray. I placed the words wrong sides up on a piece of paper and then sprayed fabric glue on them. Then I positioned the words on each pencil case where I wanted them.
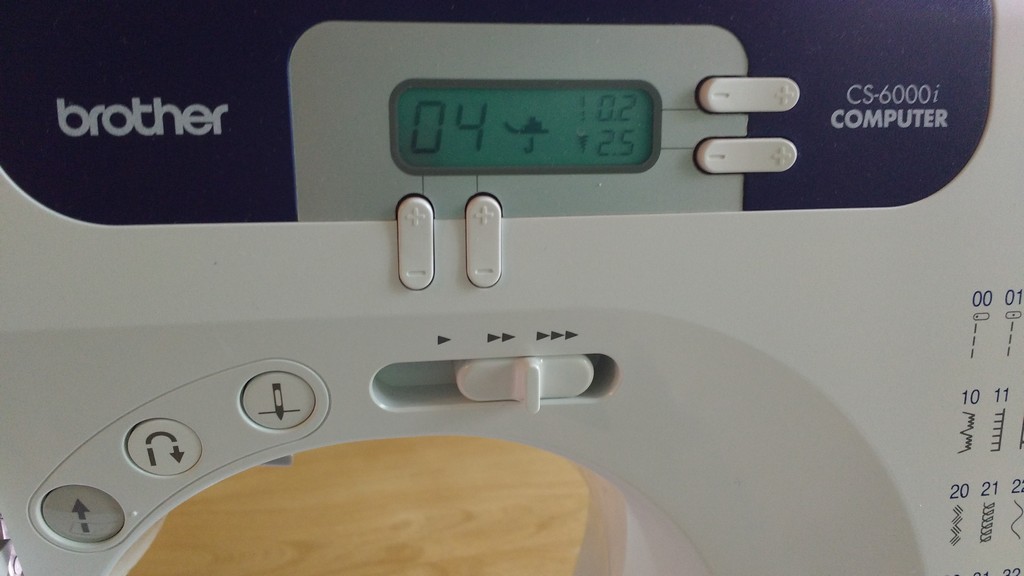
My plan was to basically embroider the words onto one side of the pencil cases. I learned a great embroidery stitch, called a satin stitch, on my machine. You create this look by selecting a zig zag stitch and then reducing the stitch length to almost zero. You can play with the numbers/look to find what you like.
I practiced on some scrap fabric and then got to work.
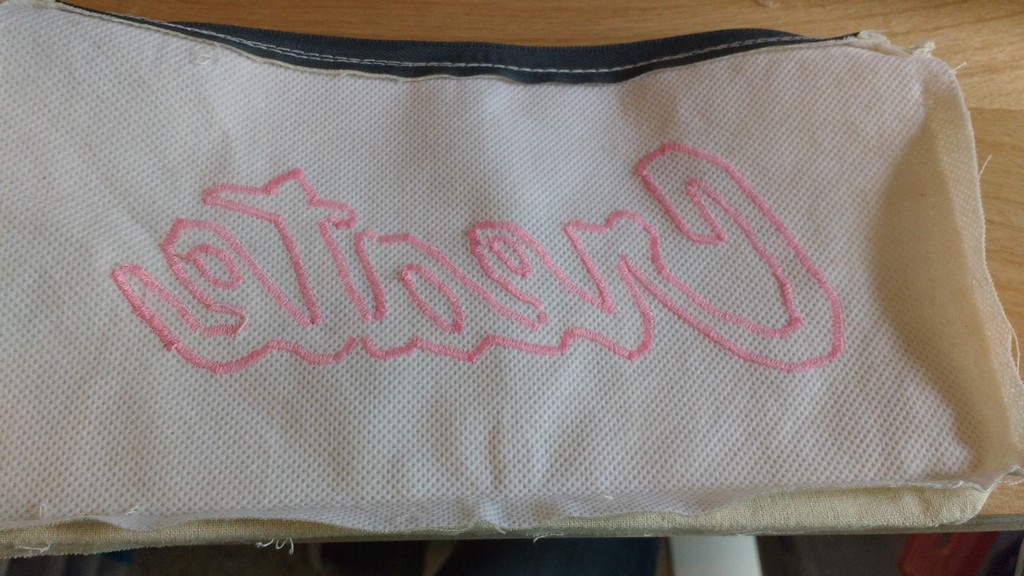
Here’s what it looked like from the back when I was done. It even looks cool inside out!
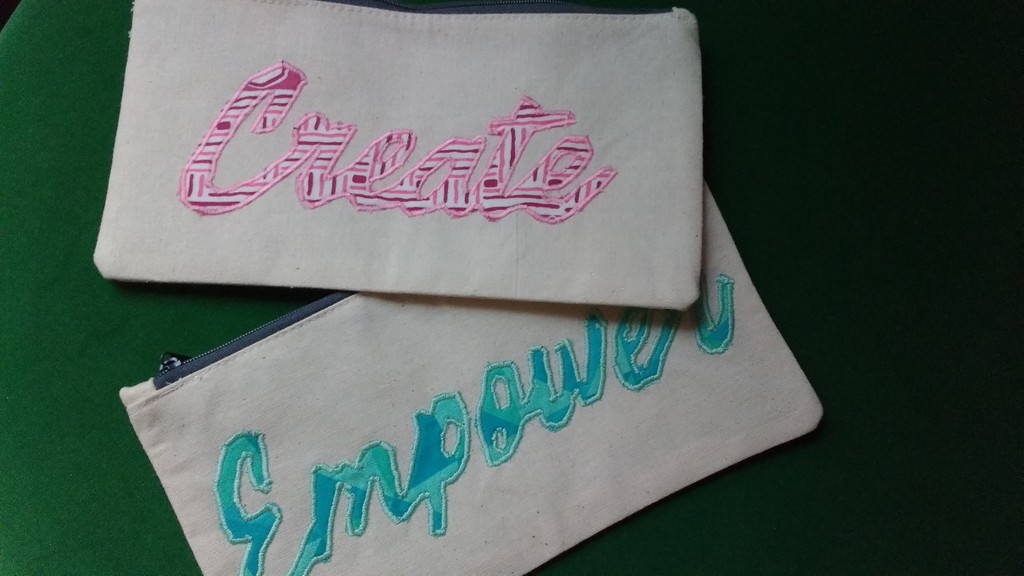
After I finished embroidering each case, I pinned each one closed and resewed the cases back up. Then I turned the cases right side out, pressed them, and look at these beauties!
The Create case is for me. It’s rare I make something for myself and I’ve been in a really creative mood lately so I thought it appropriate. The Empower case is for my friend, Kate, who empowers other women. I definitely think I’ll be making more of these personalized cases in the future.
———————————————————————————– Charlotte Kaufman is a writer and sewist in Mammoth Lakes, California. She specializes in marine and home interiors and continues to fall more and more in love with quilting. You can follow her at charlottekaufman.com.
Bound resist dye methods, which we know as tie-dye, have been around almost as long as civilization itself. Many cultures have contributed techniques to this ancient craft. Perhaps none have contributed as widely as the Japanese, who began developing their methods, known as shibori, as early as the 8th century.
Shibori Techniques
Shibori traditionally uses natural dyes, most often indigo. Dyers pleat, sew, tie, bind, or even wrap the fabric around a pole. Let’s look at these different methods now:
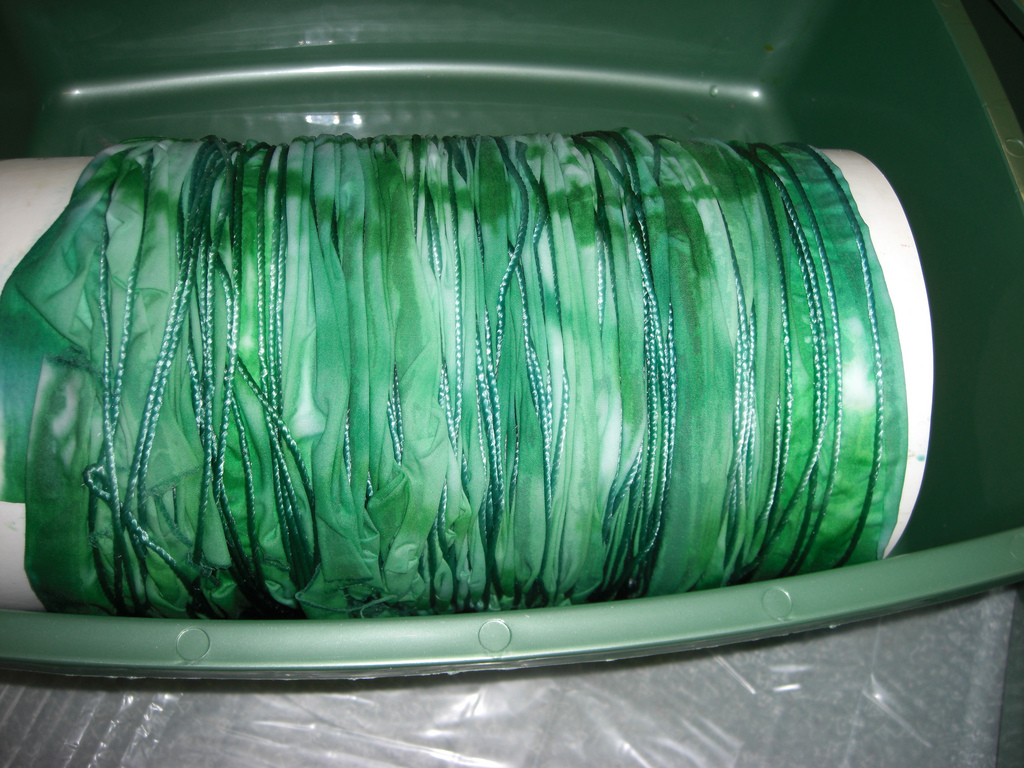
Arashi
With the arashi method of shibori, dyers wind a long and narrow piece of kimono cloth diagonally around a pole, then scrunch the fabric tightly together and bind with thread. This method produces a pattern reminiscent of rain, hence the name, which means “storm.”
Arashi shibori made with wide pvc pipe in place of a pole
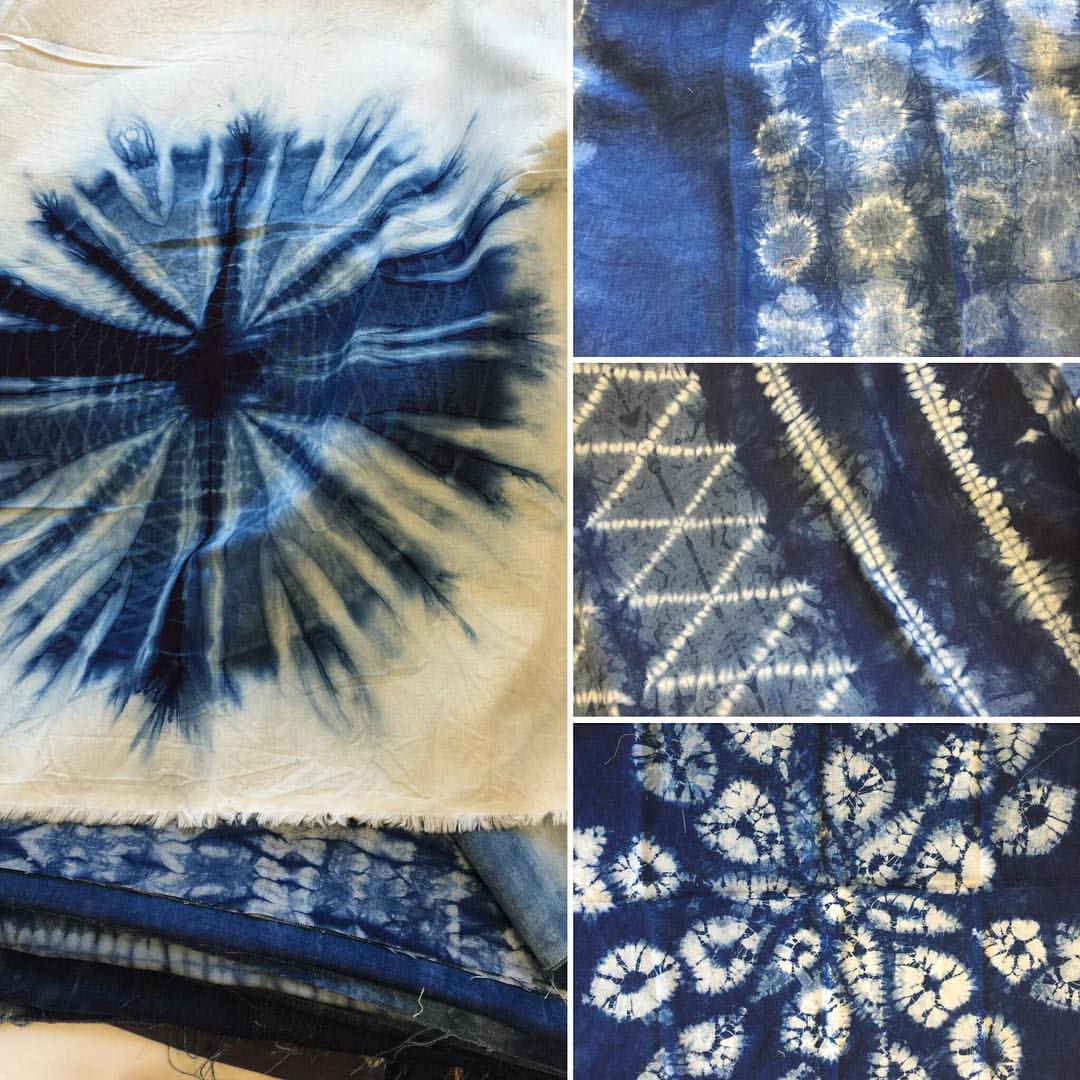
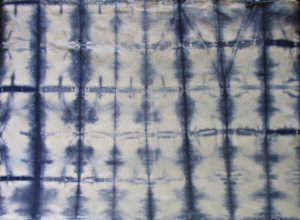
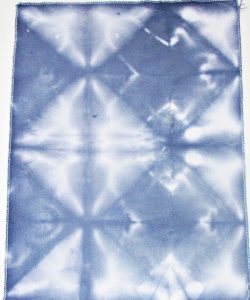
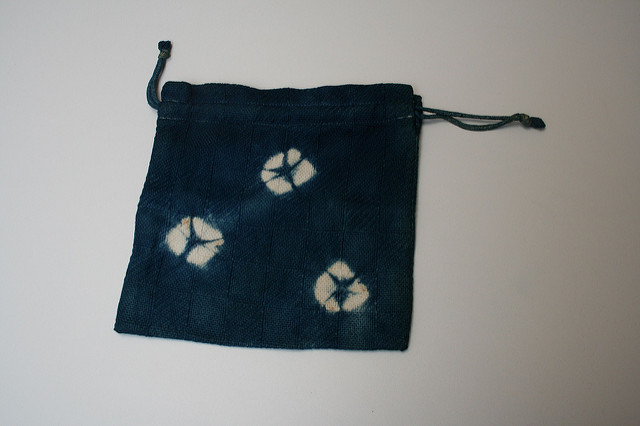
Itajime
For itajime, or shape-resist, shibori, the cloth is first folded, then pressed between blocks of wood and secured with clamps or ties. The wood resists the dye and leaves a repeating pattern on the finished cloth. Shapes can be simple, such as square or rectangular blocks, triangular, or more elaborate, with wood shapes cut into various free form designs.
This fabric was accordion folded, then pressed between two rectangular blocks.
I pressed this flannel between two triangular blocks.
And I used the same triangle blocks to make this different design.
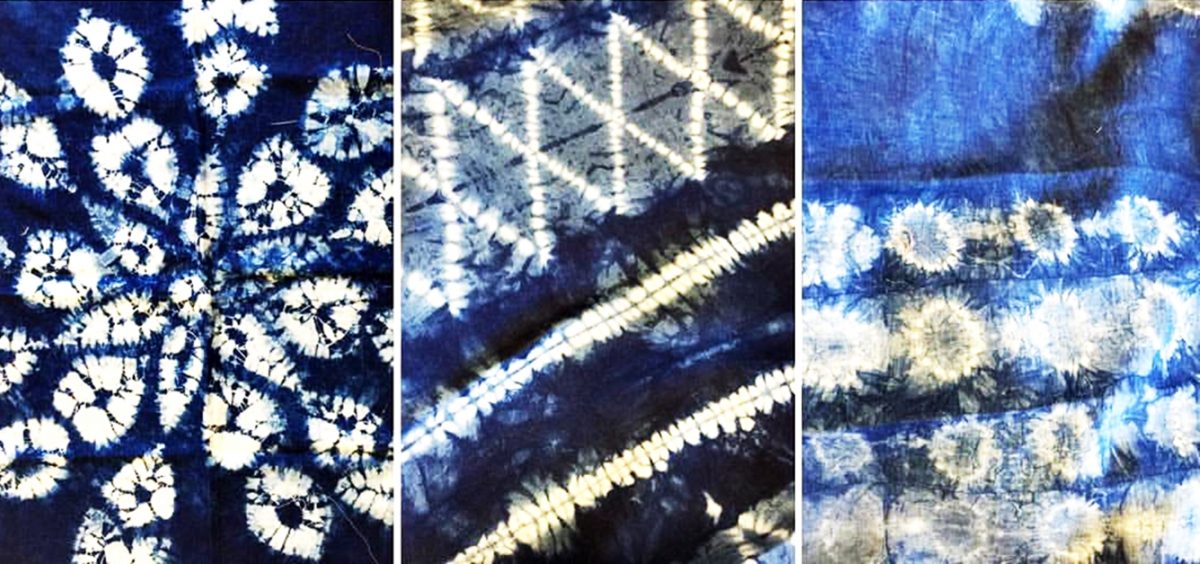
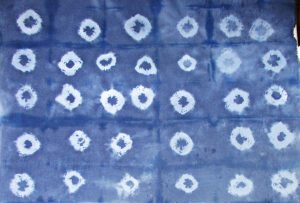
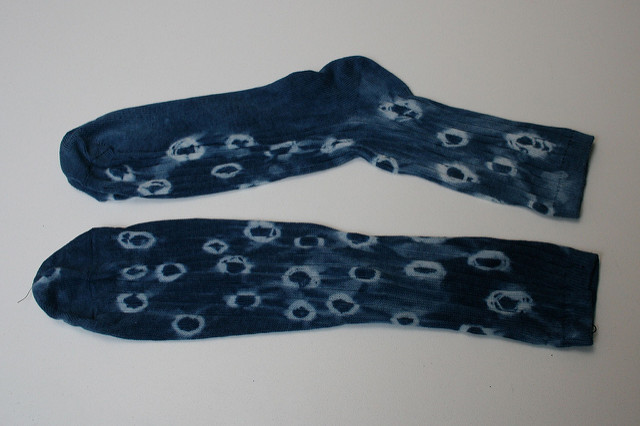
Kanoko
If you’ve ever tie-dyed before, you’ve likely practiced kanoko shibori methods without even knowing it. These are the familiar tied designs such as bull’s eyes and repeating circular or other motifs. Dyers make these designs by tying off sections of fabric, often including pebbles, popcorn kernels, coins, or other found objects repeatedly or randomly throughout the fabric.
Overdyed kanoko shibori. Circle shapes made with azuki beans.
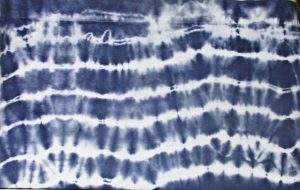
I gently pleated, then bound this one with rubber bands for these wavy lines.
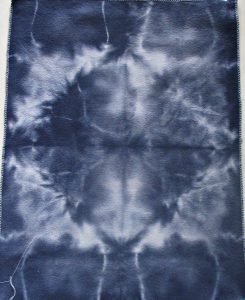
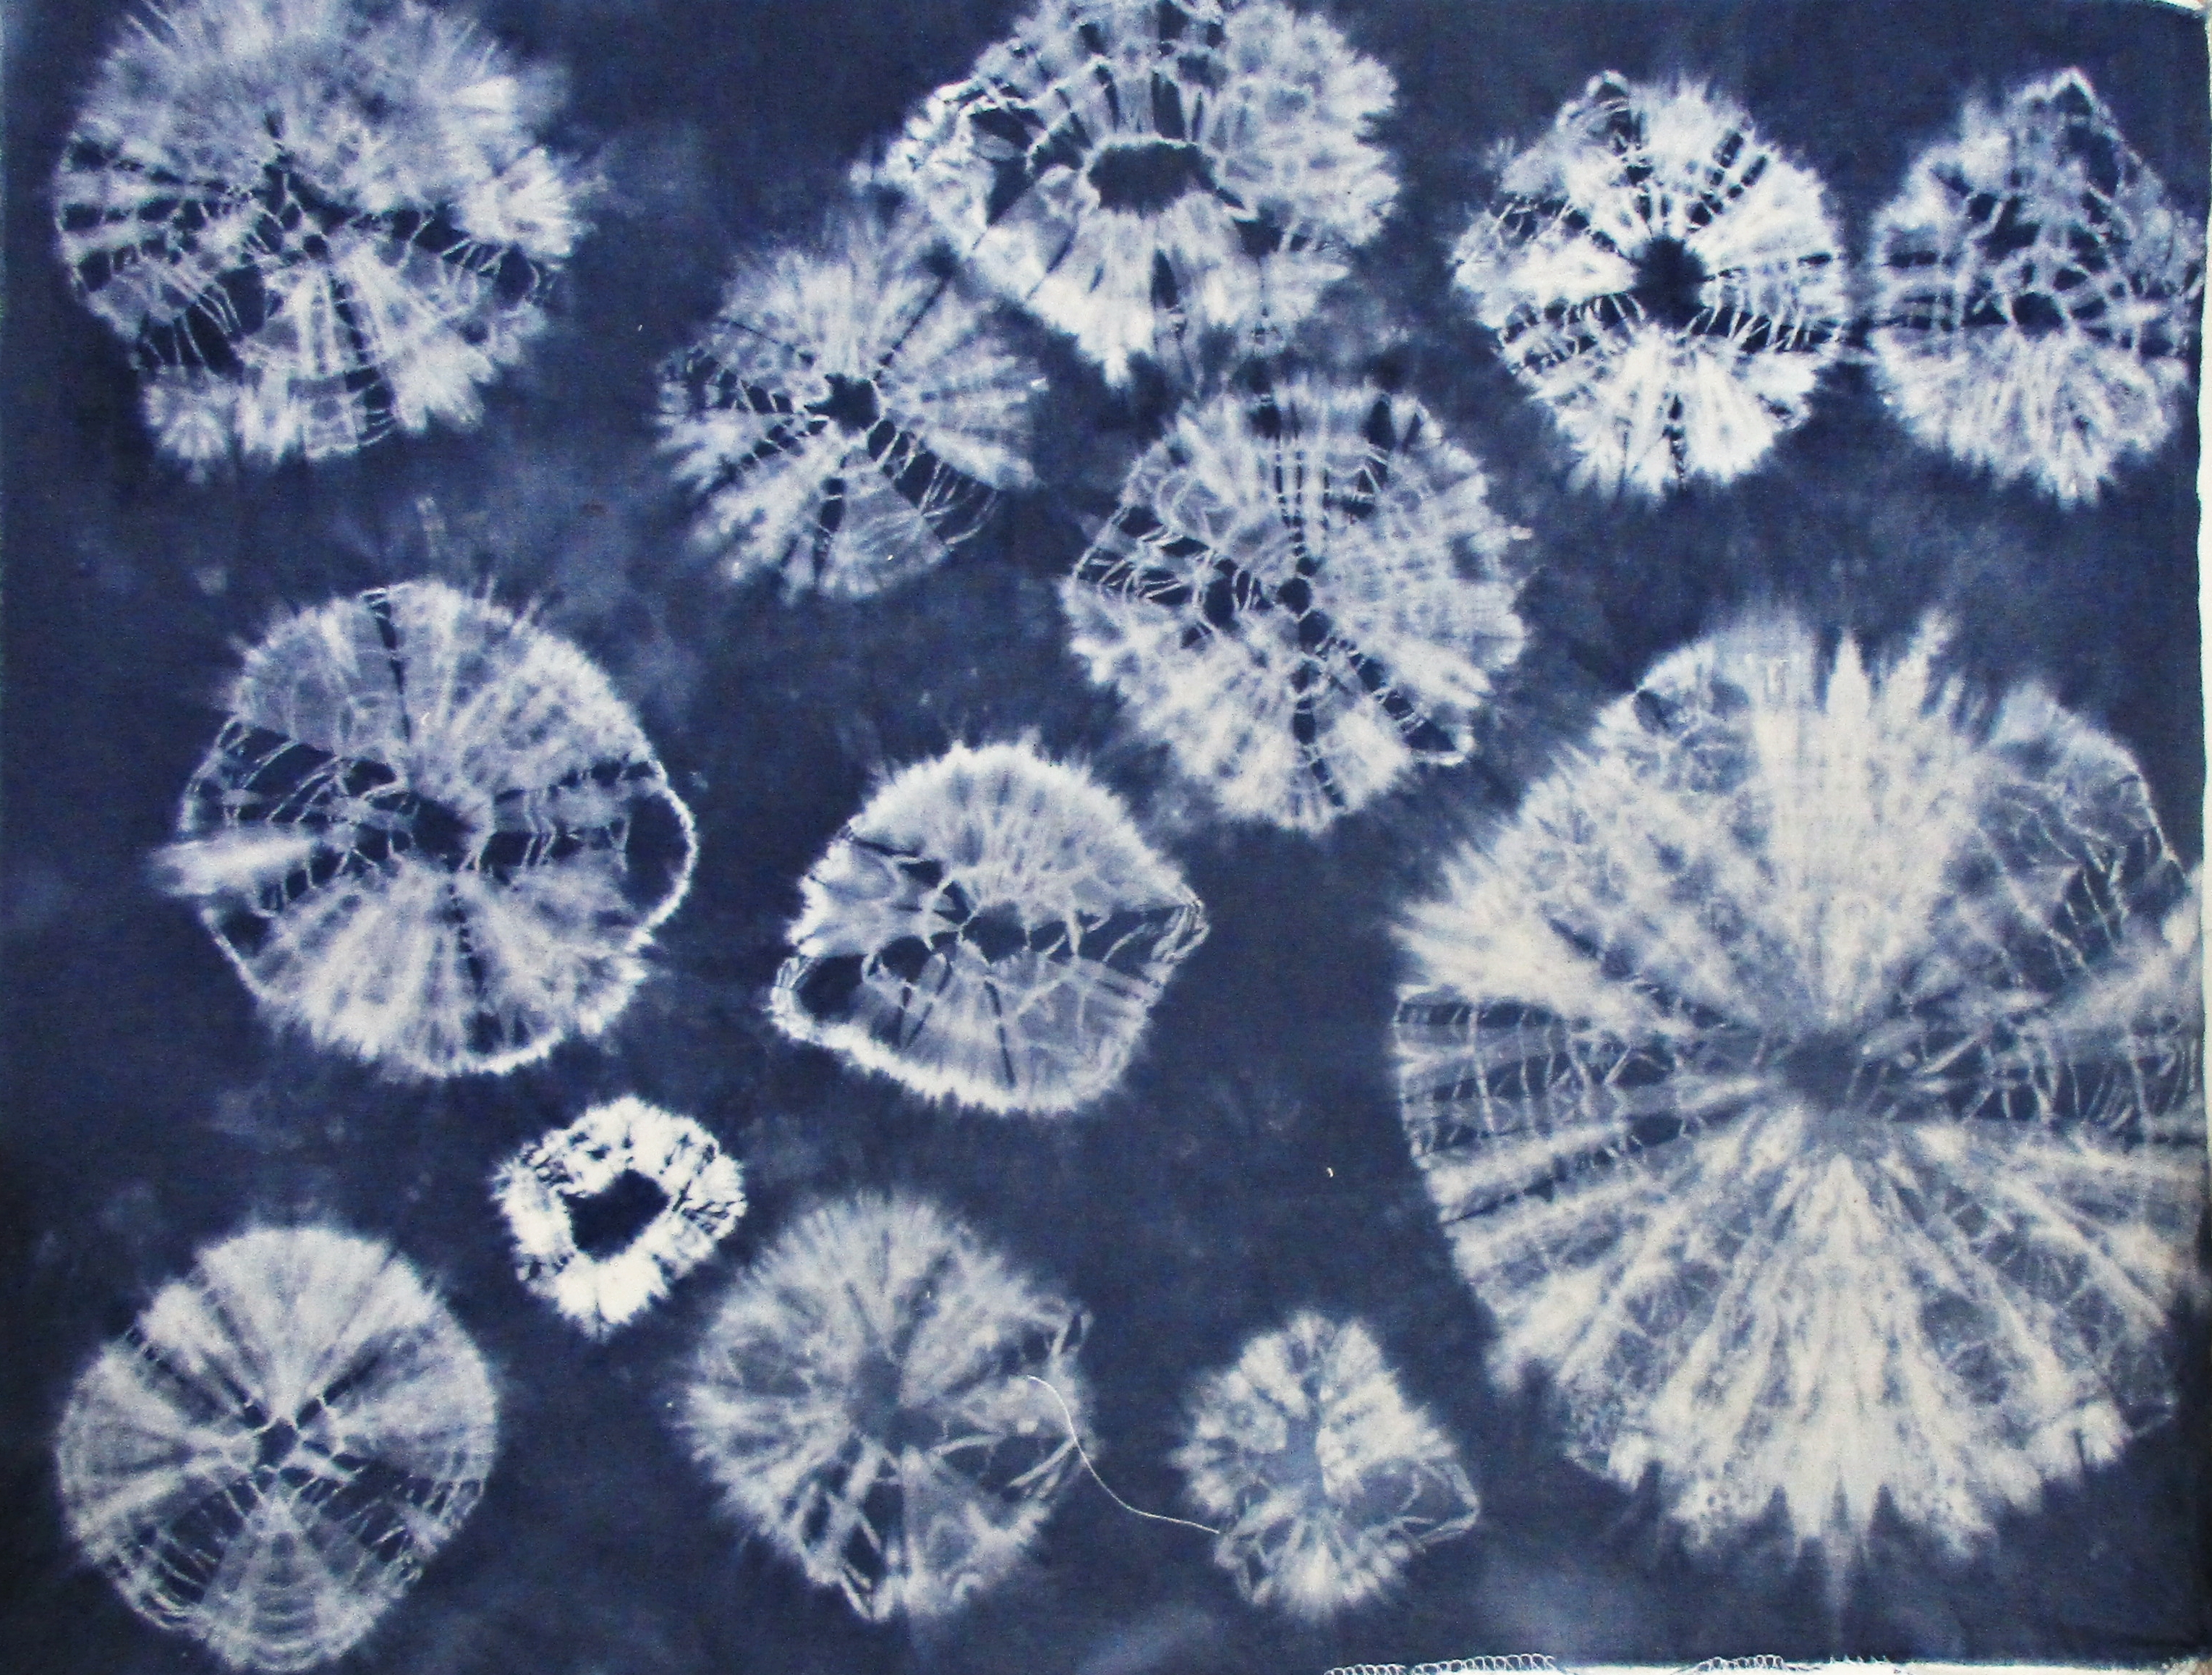
Kumo
Kumo shibori is a pleated and bound method that creates spiderlike veining and circular designs. Dyers pull the fabric into peaks, twist or pleat, then bind with thread. Kumo designs may be any size, with small, repeating, all-over patterns or just one large kumo to cover an entire piece.
Kumo shibori
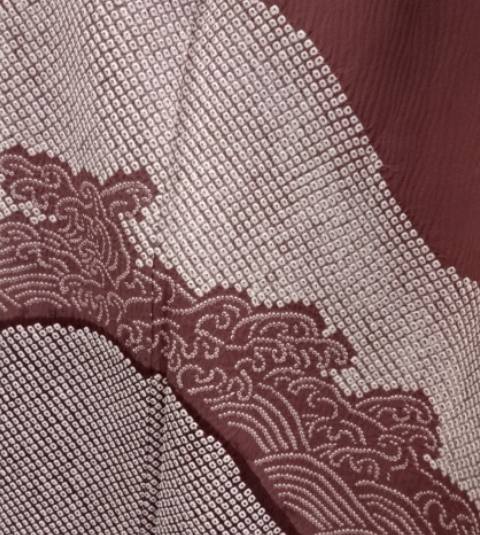
Miura
In miura shibori, the thread is not tied at all. Rather, thread is simply wrapped, usually twice, with thread. Tension holds the entire piece together. Because this method is easier and can be accomplished with the help of machinery, it was perhaps the most historically used method for producing shibori designs. This method most often uses hooks to draw up tiny sections of fabric, which are individually wrapped.
Kimono, from the collection of Gentry Klossing, with finely detailed miura (the diamonds) and nui (the waves) shiboro
Nui
Nui shibori uses stitching, either by hand or machine, rather than tying, to create designs. From simple running stitches which gather and pleat, to flowers or other intricately stitched designs, nui shibori runs the gamut from super easy to unbelievably complex.
DIY Shibori Tips
photo courtesy of AgiStadler, Flickr
Shibori traditionally uses natural dyes, especially indigo. Jacquard makes an easy-to-use, pre-reduced, indigo dying kit, for a great price, too. If you go this route, use a 5-gallon or larger bucket or plastic bin with a lid. Set this up and plan to dye outside for the sake of mess management. This dye kit will color a lot of fabric and will last 5 days when covered, so you can plan to spread the project over several days.
Or use any hot-water dye
You can also use synthetic dyes to achieve a shibori look, but be sure to use the kind prepared with a hot water dye bath. Natural dyes are immersion dyes, and so any synthetic dye you use should be this kind, too. Don’t use the popular squirt-to-apply types of dyes for your shibori projects.
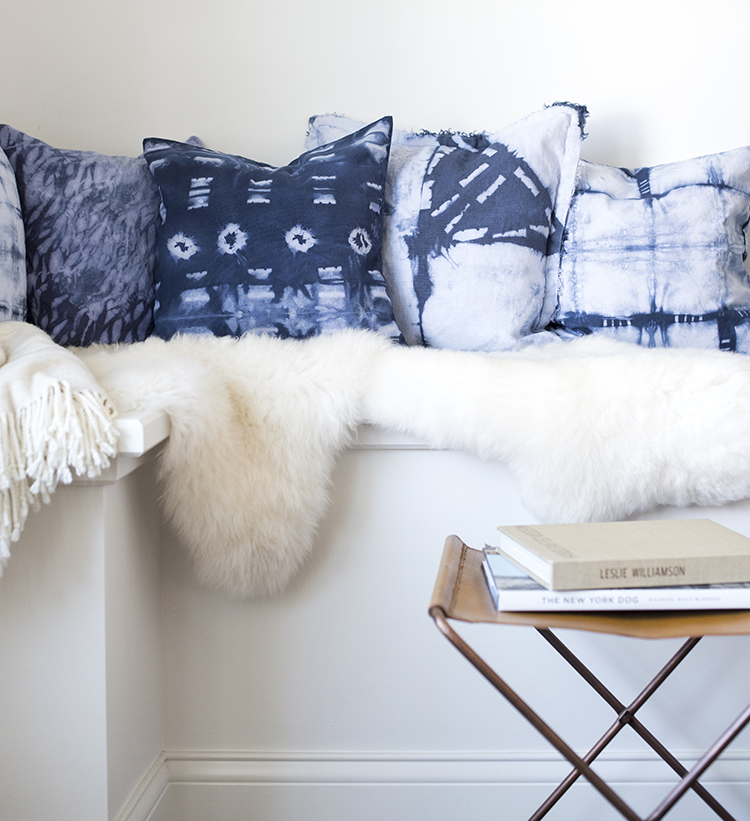
I used a synthetic denim blue color dye bath in my stainless steel kitchen sink to achieve a softer blue for my batch of shibori pictured in this post. To get a darker and more authentic indigo color, you can mix denim and navy. Sarah Gibson from Room for Tuesday suggests mixing one bottle of Rit denim with half a bottle of Rit navy. Her pillows dyed in this bath look great!
Pillow project at Room for Tuesday
Important DIY tips:
Wear gloves! Otherwise you’ll likely find it impossible to get the blue/black dye off your hands and, especially, fingernails. Besides being unsightly, this is not good because dyes are toxic chemicals which you’d rather not absorb into your system!
Take your time preparing the fabric. And have all fabric fully prepared for the dye bath BEFORE you start to prepare it. I rushed when tying the beans to make my kanoko circles and made a mess with my grid design! Take your time, do not hurry.
Rinse items individually until the water runs completely clear, then untie. If you don’t rinse completely before removing ties, your designs will turn out less crisp.
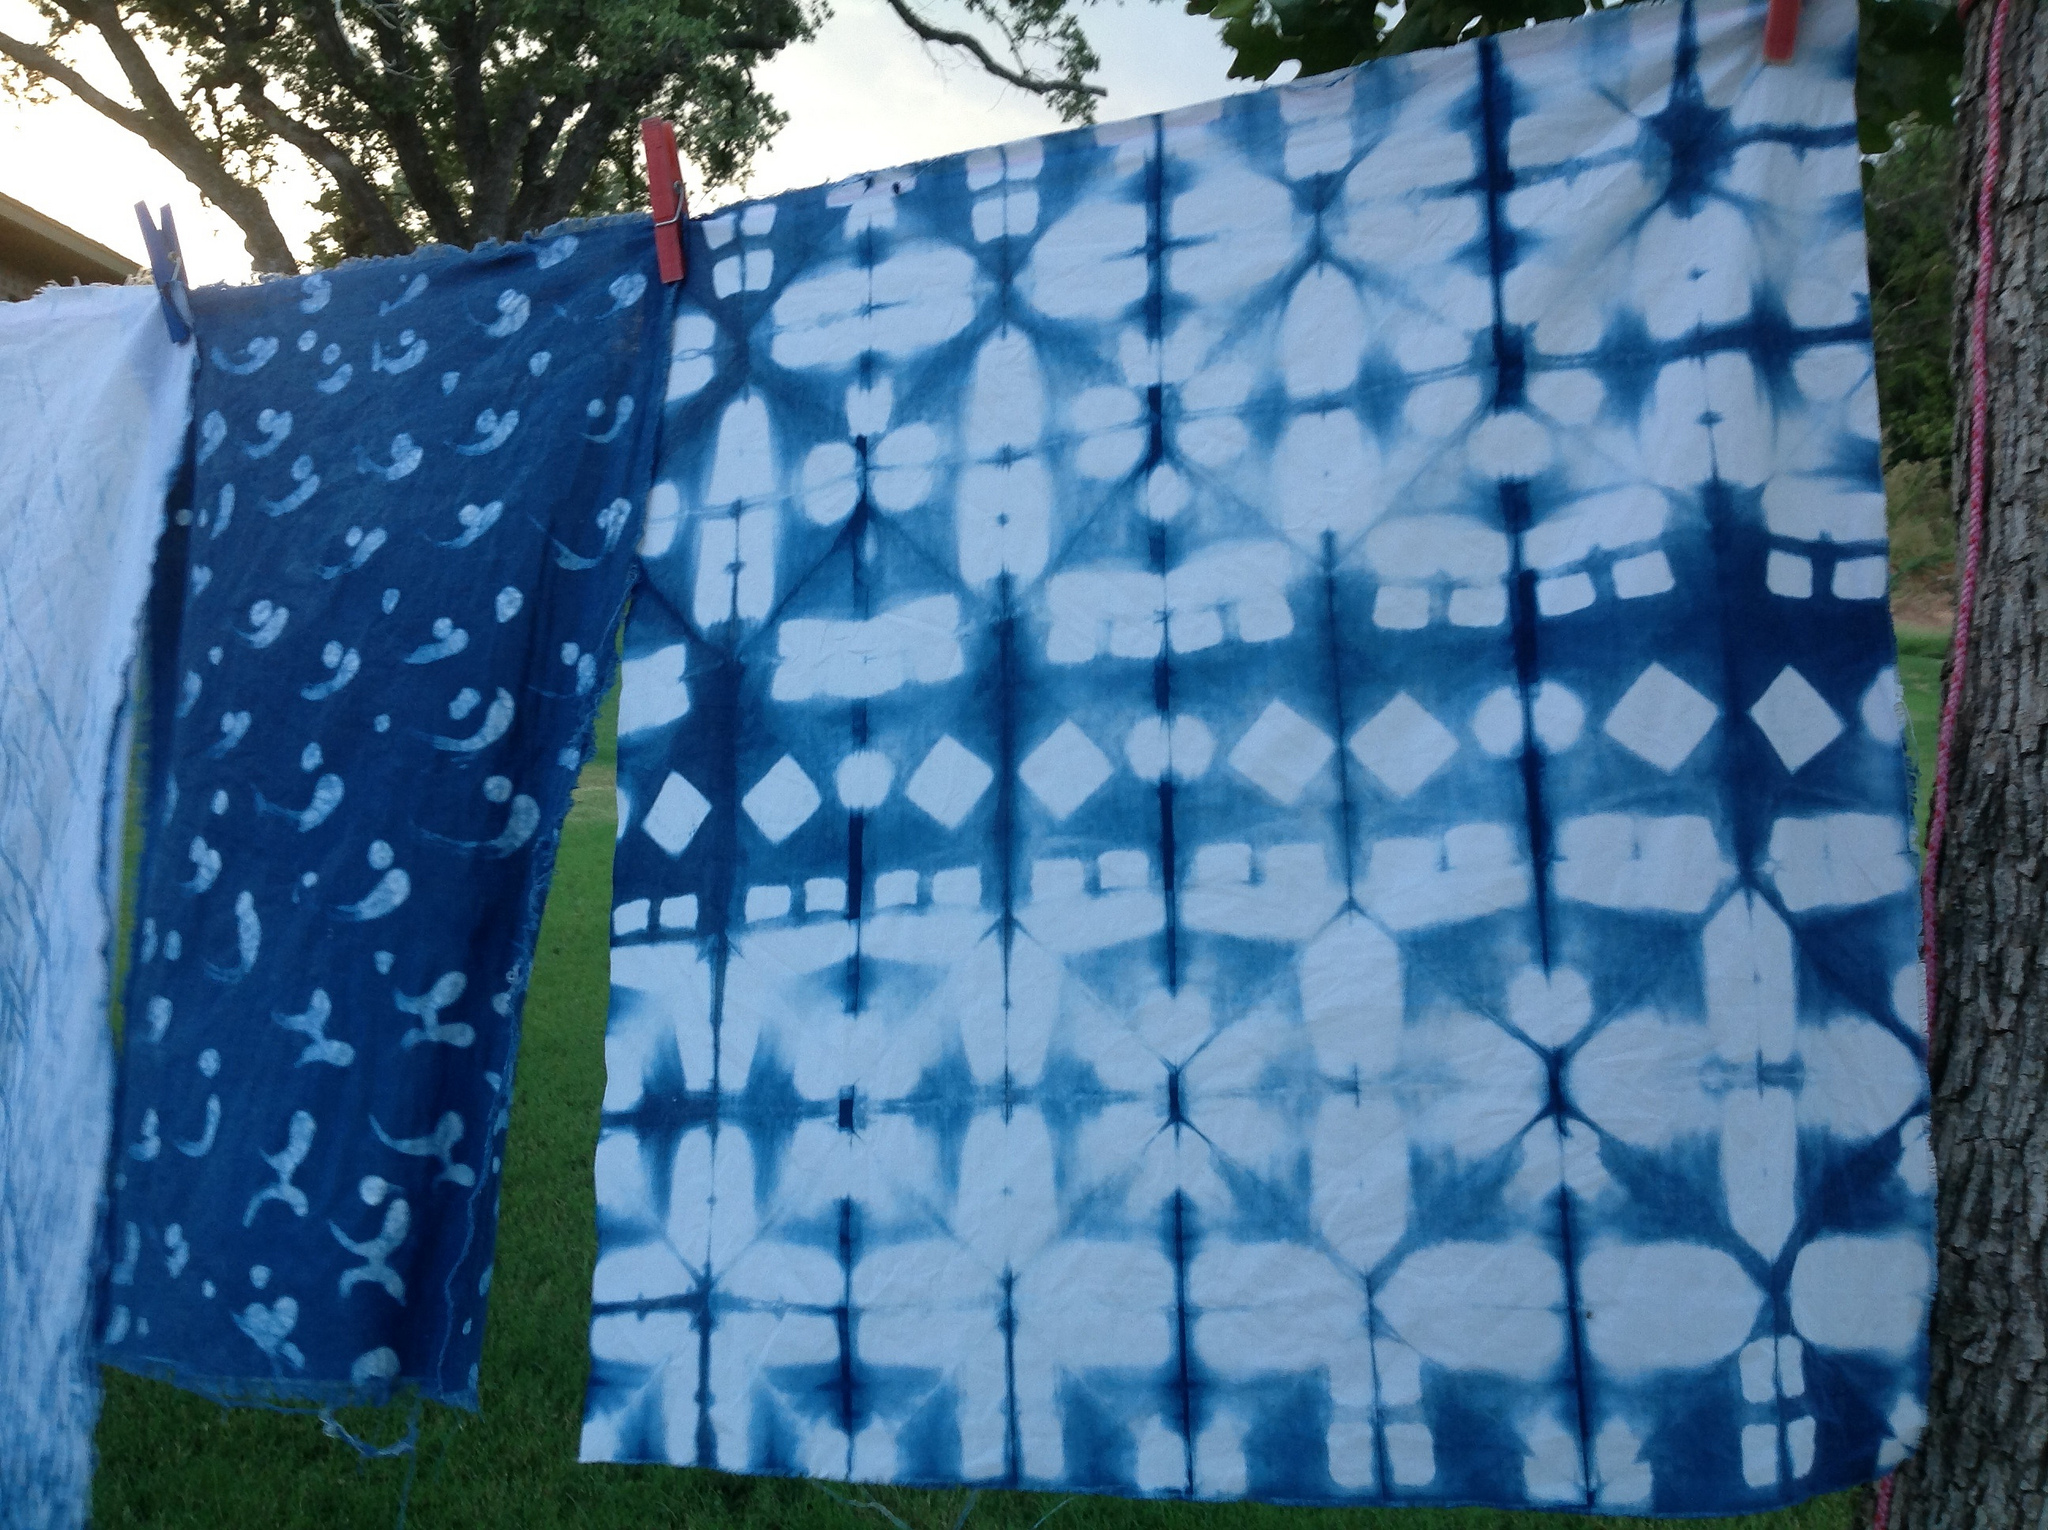
Easy shibori projects
Shibori is fun and you will enjoy it most if you start with simple techniques. Kanoko, Kumo, and Itajime are particularly beginner-friendly methods to use. You can shibori dye any item of white or off-white natural fiber fabric, such as cotton. You can even dye synthetic fabrics, as long as you choose a dye formulated for synthetics. I noticed Rit makes these now.
You can easily dye T-shirts, skirts, pillows and pillowcases, socks, scarves, and small fabric pieces in your kitchen sink. Sheets, curtain panels, and fabric yardage are easy to dye, too, though you may want to use a tub larger than your sink for these.
I’m planning to use the fat quarters and long strips that I dyed today to make either a patchwork skirt and a top or a dress. I might make that project a tutorial for another post soon.
Have fun!
Shibori is fun, with near endless choices to explore. Unwrapping your dyed and rinsed shibori pieces to see the finished designs is as exciting as opening a real gift. Play with dye and have fun with it!
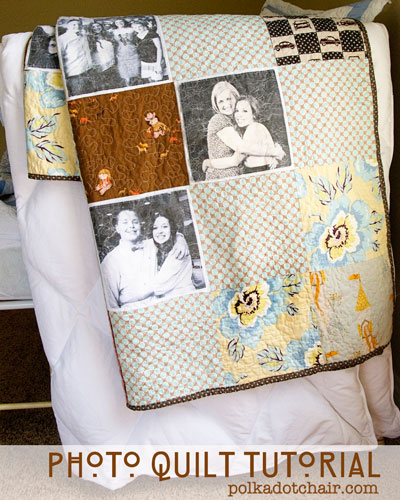
Once again, we come to the point on this blog where it’s reasonable to look into a new quilt type. The reason for this specific interest for this post is because I happened to figure out that making a certain type of quilt is a lot less difficult than I expected. In fact, I’m toying with the option of making one of these for a Christmas present this year.
But I’m getting ahead of myself. First, let’s look at the quilt type I’m referring to, and then we’ll go into the ease and benefits of making one.
The type of quilt in question is a photo quilt, and it gets its name in the way you might expect—it includes photographs in its design. Now, you can order a printed throw like this through a store, but if you’re going to own or gift something that’s as sentimental as a series of personal photographs, it makes sense to add in that additional personal touch of sewing it yourself.
Up until recently, I never realized how simple this prospect could be because I couldn’t grasp how printed photographs made their way to a quilt—unless, of course, you bought the quilt that way. As it turns out, the process is actually simple. You can treat it like a general patchwork quilt—so long as you have printable fabric at your fingertips.
With that one addition to your sewing supplies, you can browse through your pictures to find the perfect ones for your project.
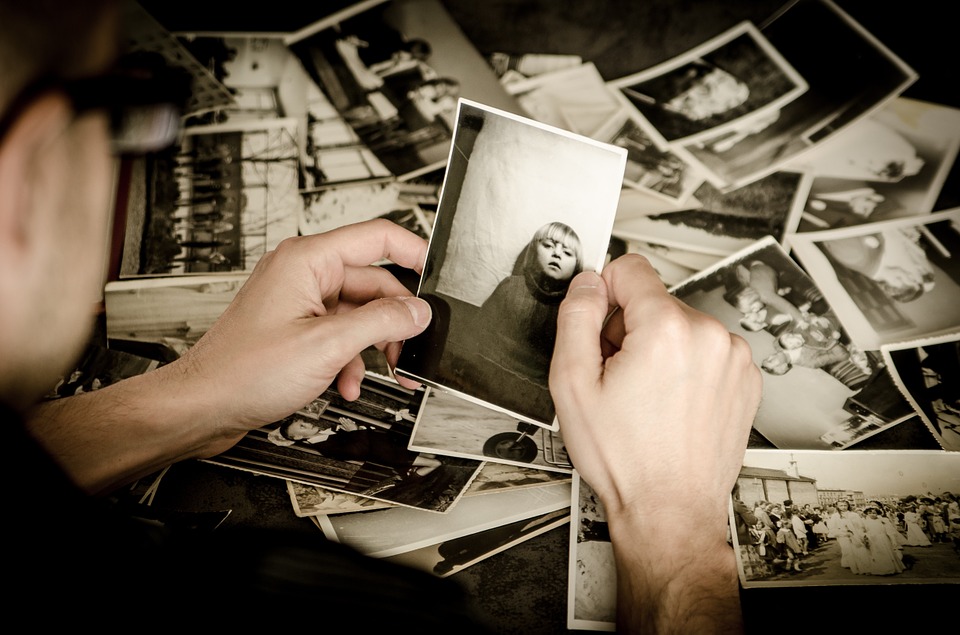
If you’re going to create a photo quilt for a wedding gift, for instance, concentrate on images of the right couple together. Once you find enough fitting photographs for the prospect, scan them if you only have print copies and get to printing on that fabric! From there, you’ll need to rinse it and iron it to keep the ink from ruining in the wash or bleeding where you don’t want it to go. You can find those details here.
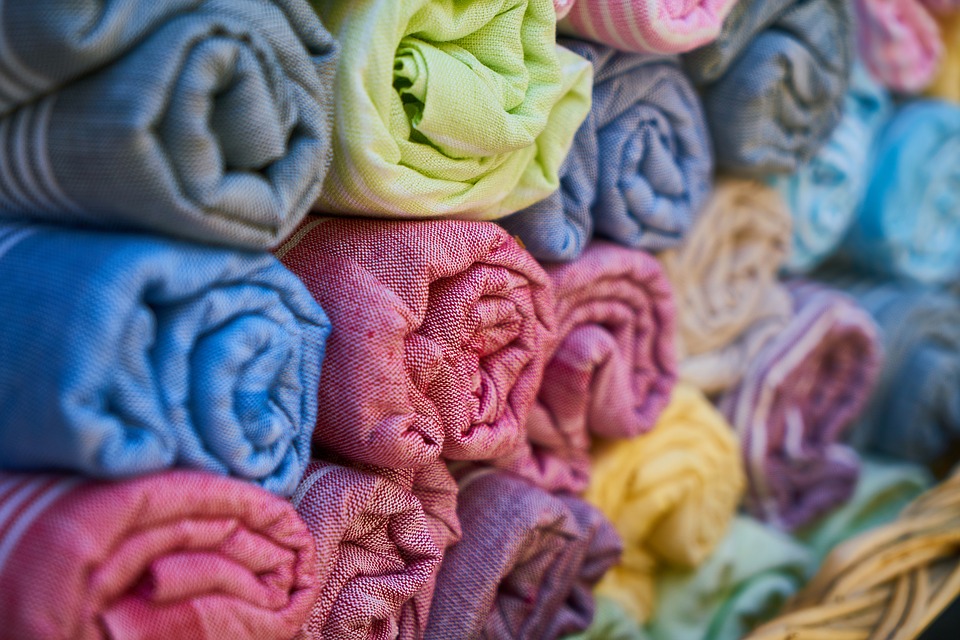
You can pick and choose other fabrics that complement the theme and look of the images to build the rest of the quilt, and you can tend to the trimming and sizing of the photo blocks in the same manner that you would any other fabric style. Essentially, you’re doing nothing differently expect printing and preparing some of your fabric rather than purchasing all of the fabrics already printed.
This is a simple prospect, but it’s a wonderful idea to add personalization to quilts for your own home, for a nursery, for a gift… The process shows care because you searched for the right pictures and because you took the time to piece everything together yourself rather than run to a store to have it printed for you. In a world so technologically advanced, this is one of the ways to use technology to bring a personal quality to something homemade.
Remember that the fabric you pair your photographs with can add value to your work in that they can carry out a particular theme that you’re going for. If you’re creating a graduation quilt (like in the link provided) and you want to showcase all of the graduate’s high school friends for a keepsake to take to collage, choosing fabrics that represent their school’s colors or mascot would be useful, as would ones that reflect typical graduation items—like caps or diplomas.
For a Mother’s Day present, you could consider what your mom’s favorite colors and items are and use them for inspiration in regard to other fabric choices. If she adores light blue and lilac, pairing the photographs with those hues can add a level of care to the overall product since it’s another bit of evidence that you know the recipient well enough to pattern the design for them.
You could also use these for your own purposes as well, such as printing off photographs from your trip to Rome or Venice for a European-themed work that showcases the pictures you took during your stay. Even a moment that might seem trivial could be represented through one of these quilts, like the first time you baked with your children. Just take enough photographs to commemorate the experience, then pair your printed photographs with colors that reflect the baked goods you created together. It’s a big way to remember in detail such a small moment.
Overall, I’m very much interested in trying my hand at this quilt type, and you can expect updates as I go through the process of trying to construct one. It’s so personal, and I look forward to testing the waters on the matter—especially to see how well the ink stays in place through my own personal experience.
Have any of you ever tried a photo quilt? Suggestions? Let me know!
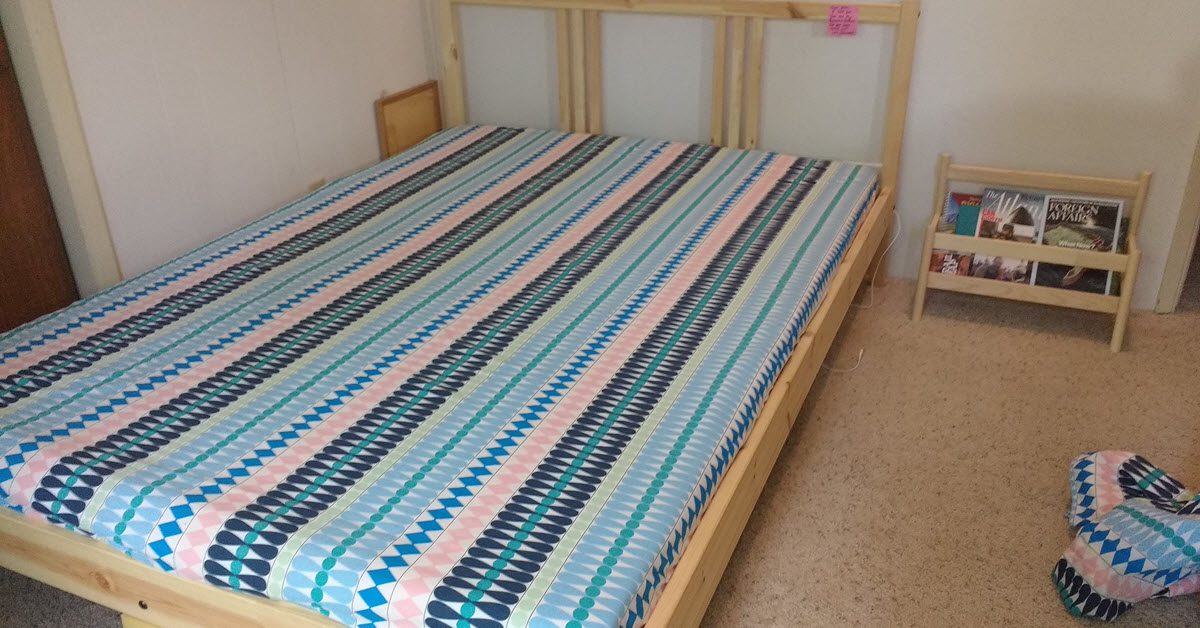
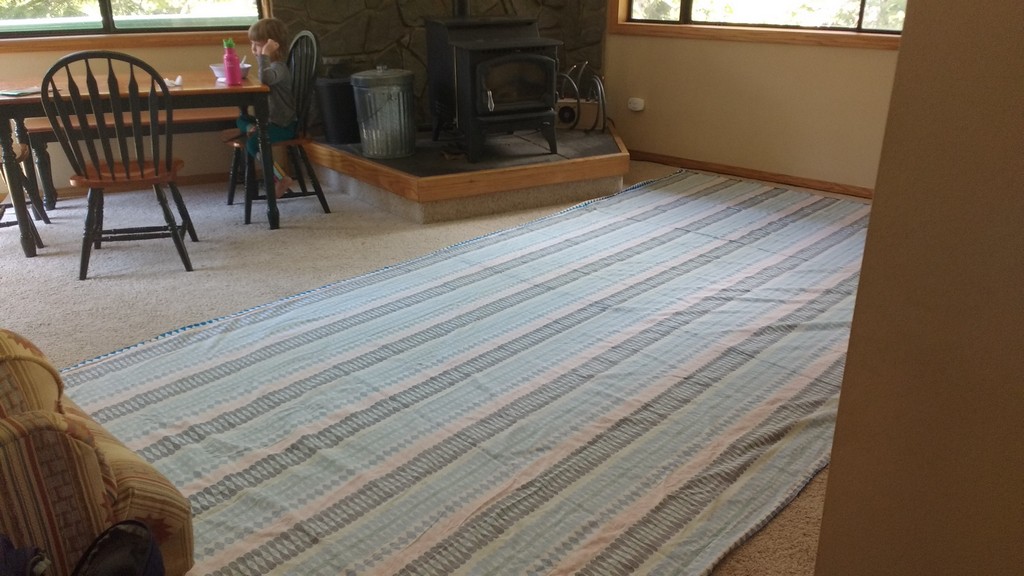
I’m a huge fan of custom bedding. In this post I’d like to show you how to turn a duvet cover into a set of fitted bed sheets. You will need a duvet cover that is the size of your mattress or larger. Our mattress is a queen and so is this duvet cover from Ikea. First, I prewashed the cover and then turned it inside out.
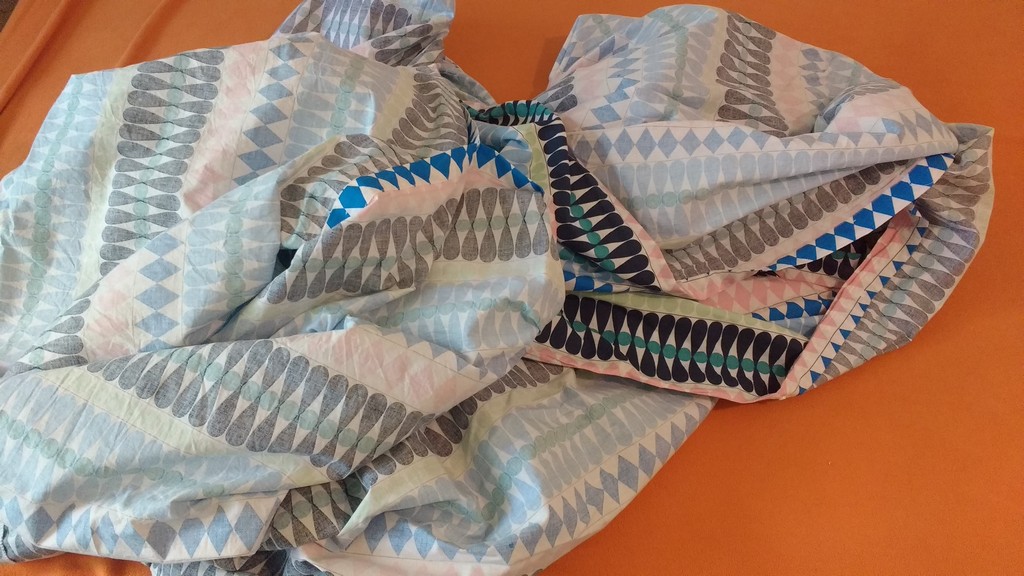
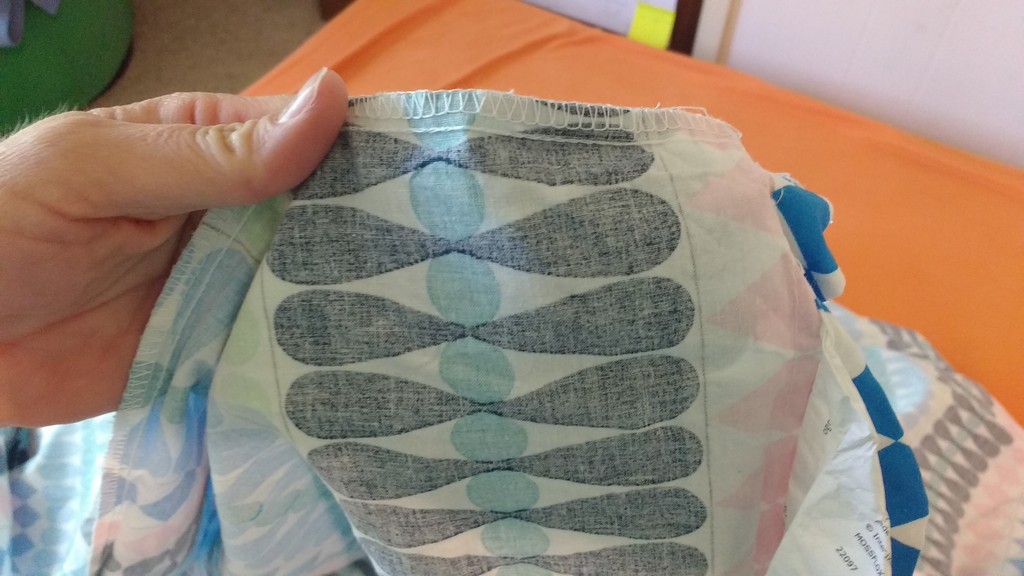
I don’t waste time trying to unpick the seams of the covers. I take my scissors and simply cut off all the seams around the three sides that are sewn.
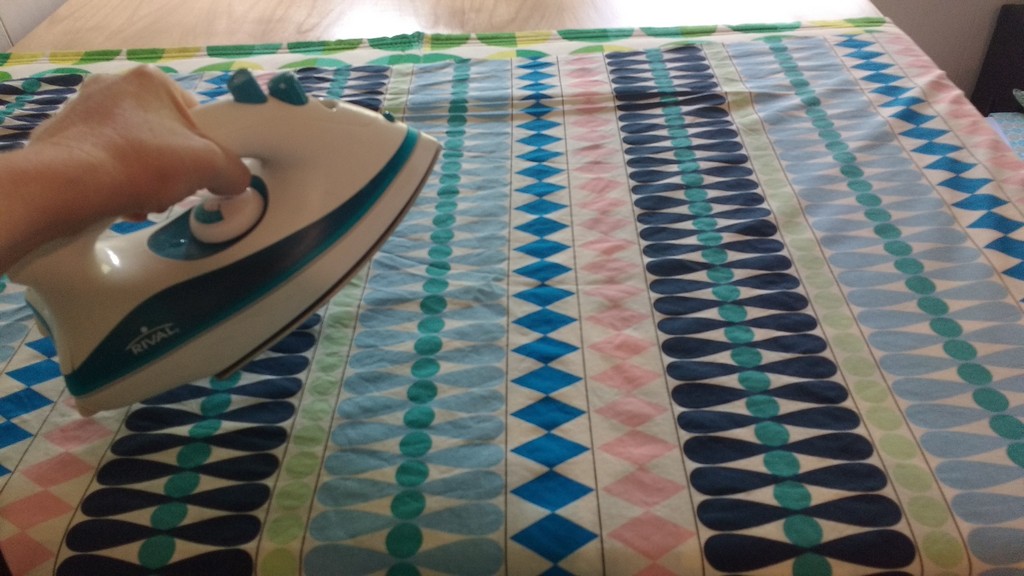
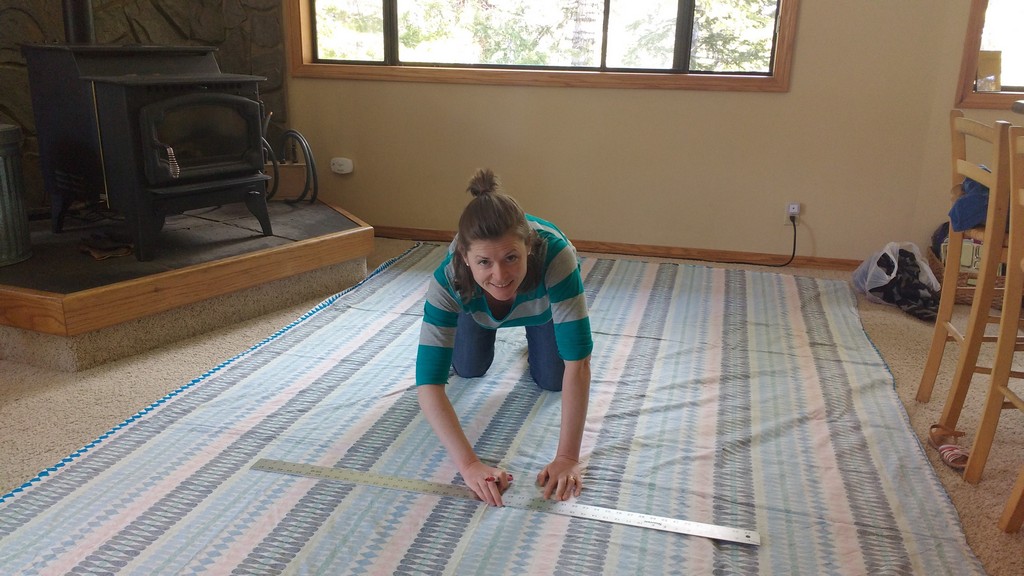
Iron the large rectangular piece of fabric that you’ve created by chopping away the seams.
You should have a nicely ironed and very long piece of fabric now. Turn to your mattress and find its length and width. My mattress is a custom size. It’ dimensions are 53” x 75”.
The width is 4”. I add an extra 2” for a fitted sheet to wrap under the mattress and an additional 1” for seams (½” plus ½” for turning). To find the total length and width I need for a fitted sheet then, I add 7” + (width or length) + 7” = total width or length needed. In my case I needed a large rectangle 67” x 89”.
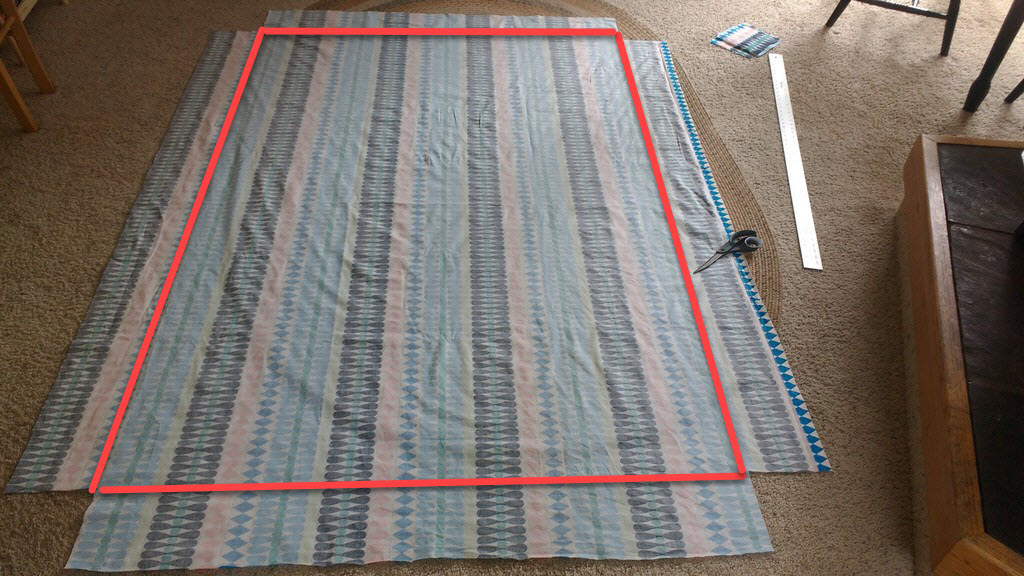
First I mark the shorter side of the sheet and cut the long strip of extra fabric away. Then I mark the length of the first sheet and then the length of the second sheet. For the second sheet you will often be a few inches short. If this happens I take fabric from the long side piece I discarded and sew it onto the ends to elongate it.
Now cut out 7” squares (or whatever your measurement is which will depend on the depth of your mattress). If you did your math right, the rectangle formed between those cut out squares will equal the same length/width as your mattress.
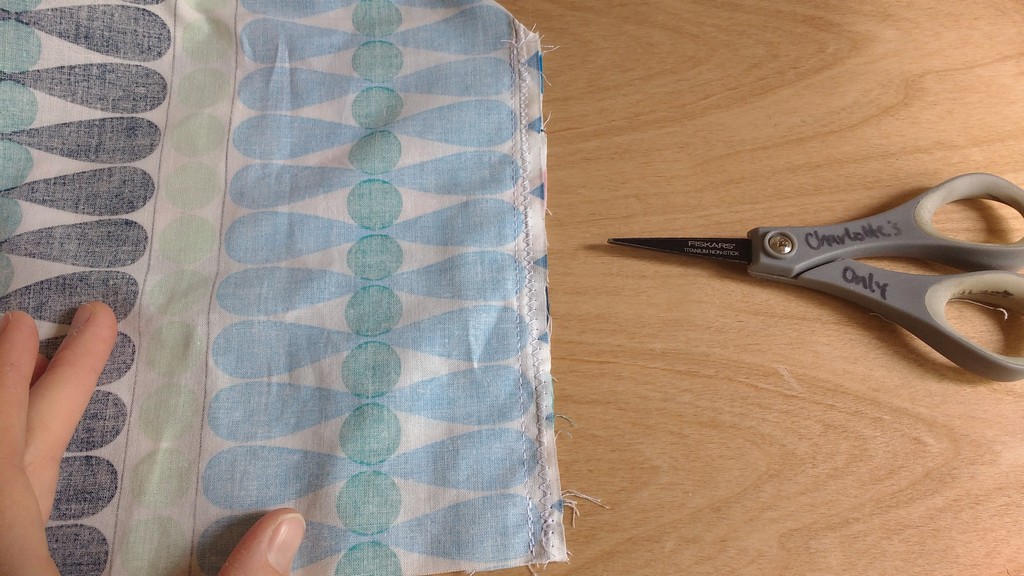
If you want to make the second sheet right away, then sew any fabric you need to make it long enough, and then repeat the process, cutting out the 7” squares. I made two fitted sheets because we don’t use top sheets but you could make the second sheet a top sheet.
Take your fabric to your sewing machines and sew the corners together. I sew first a straight stitch and then finish with a zig zag. Do this for all four corners.
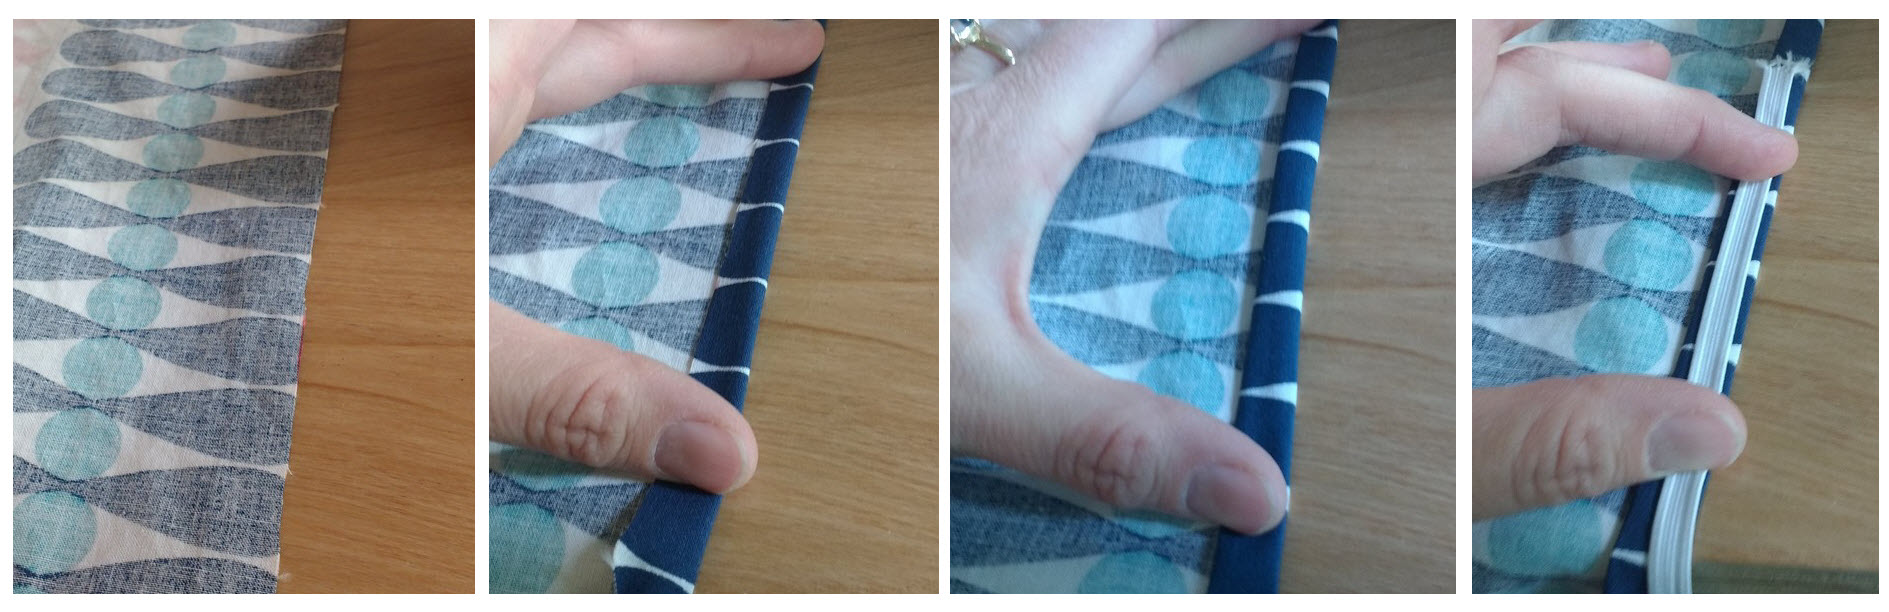
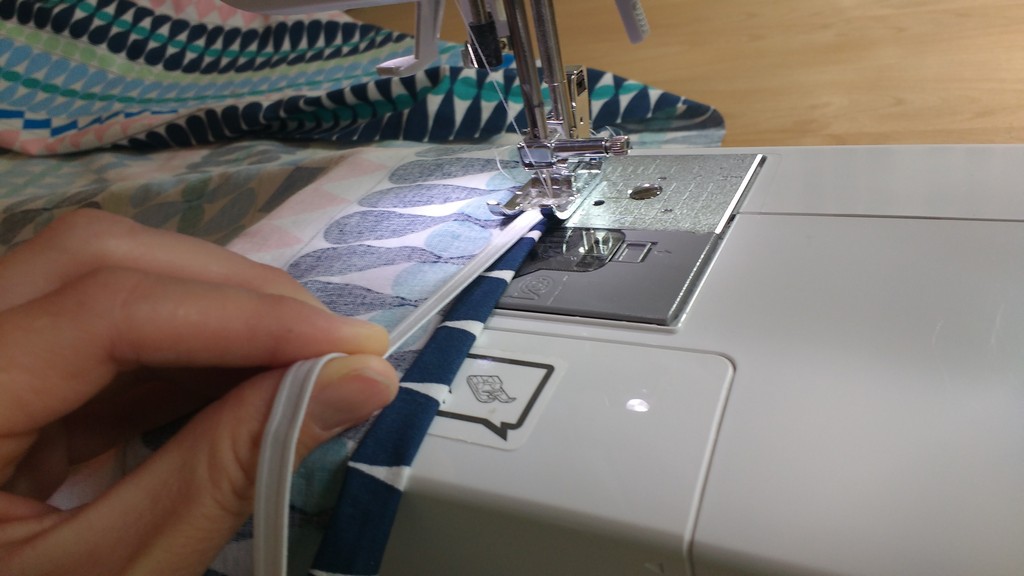
There are many ways to finish the edges of a fitted sheet. I like to finger fold over the fabric by ½” then another ½”, then place the elastic on top. I move that over to the machine and begin sewing a zig zag stitch.
Once I’ve secured the elastic, I begin to hold it taught (but too tightly) and sew around the entire sheet this way. I finger fold over the fabric, hold the elastic taught, sew and repeat over and over until I’ve made it completely around.
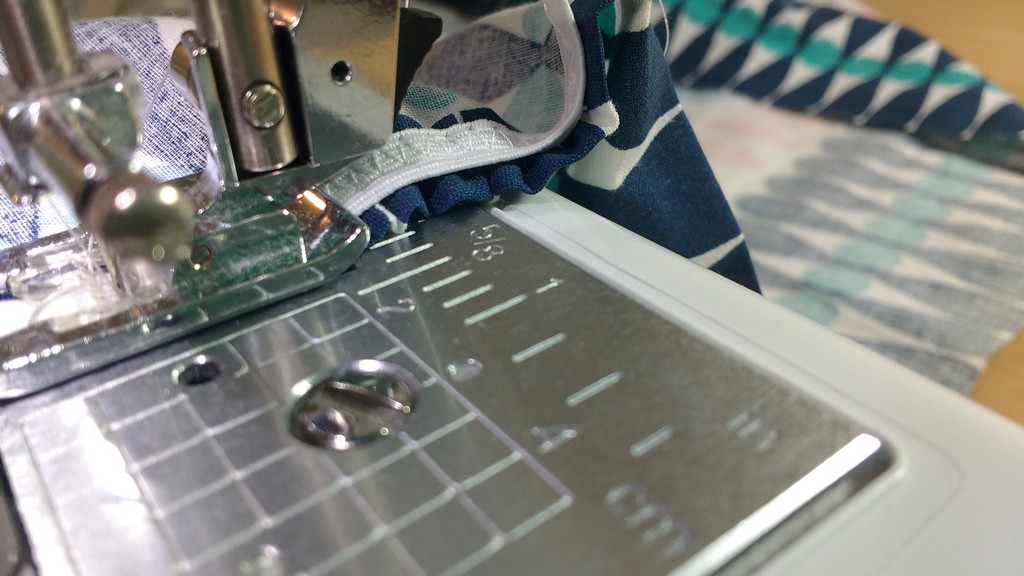
Soon the seams will look like this as you keep working.
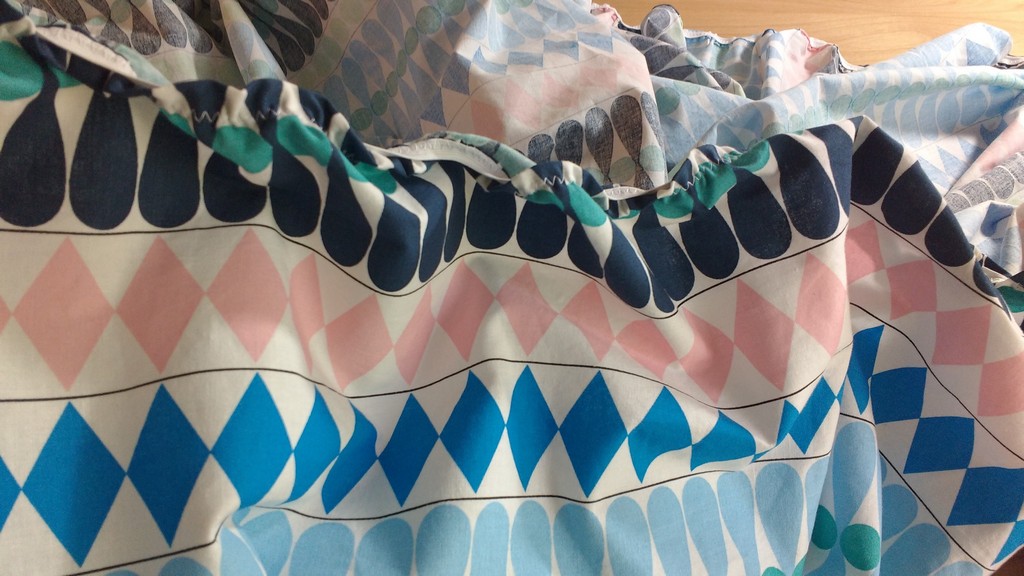
And here’s what it will look like when you are done.
Take it over to the bed and try it out. If you’ve done your math right, and not pulled your elastic too tightly, it will fit like a dream. Make the other sheet now and you’ll have a spare.
———————————————————————————– Charlotte Kaufman is a writer and sewist in Mammoth Lakes, California. She specializes in marine and home interiors and continues to fall more and more in love with quilting. You can follow her at charlottekaufman.com.