Hi! Good to see you. Hope you are having warm weather like here in Texas!
Today, I want to just give you a quick lesson for mending project.
My current task is to shorten a pair of my hubby’s leisure pants. They are a pair of soft flannel pants that he bought a while back, and they (uhhh) kind of surfaced as I was packing my sewing studio to move. I secretly panicked when he reminded me, he hasn’t seen them in a while! I sweetly said, “Oh yes, dear, I have them. They are on the mending list.”
That’s a call to action for me! So he went out to do his errands, and I scrambled in to find the buried pants.
So as quickly as possible, I found my also found a few necessary tools to accomplish this goal, hopefully in the time he was gone.
I assembled:
Pins
Olfa 45 mm Rotary Cutting mat, the one which is 18″ x 24″
Rotary Cutter
Acrylic Ruler (these packages at SewingMachinesPlus.com come with everything you need all together – great deal!!)
I also keep on hand a few smaller rulers, such as the June Taylor Shape Cut/Sprint as well as the Handi Quilter Mini Ruler for smaller projects. SewingMacinesPlus.com has a great selection of rulers and other supplies for your sewing needs.
Back to the project, now
The first step was shortening the pants which were about 4 inches too long. I turned the pants inside out so they were ready to measure and sew. I measured and cut the 4 inches off both legs.
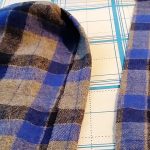
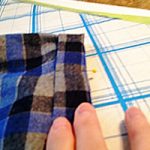
Turning the edge toward the top of the pants about ¼ inch, I pressed with my iron. They can be pinned first if you want to be precise, however, actually I just winged it, but hey, I was in a hurry.
Then turning again approximately an inch, (actually two finger widths) I measured a press a crease again.
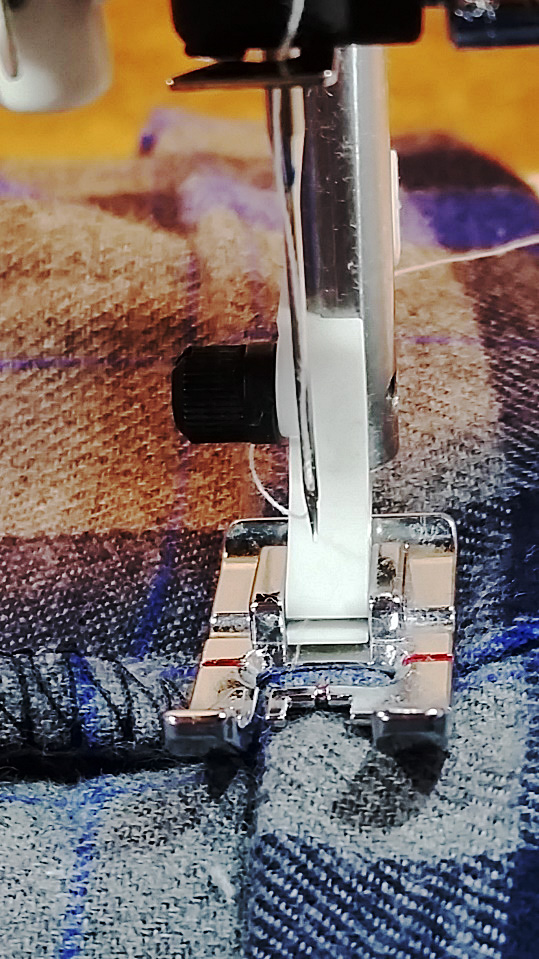
I changed my bobbin thread to black since it would show on the right side, and carefully stitched a new hem very close to the fold.
Step 1: Cut off 4″, turn in ¼” & press. I like to press any folded edges when I sew as it is easier to keep the measurement consistent while I sew.
Step 2: Fold again to about 1” width. Press again or pin to insure accuracy. Then, finally, last step!
Ta da!
Last, stitch very close to folded edge on both legs, press the hem flat & you are done!
Last, stitch very close to folded edge on both legs, press the hem flat, and you are done! Or you can also blind-hem stitch by hand. I find that hand-stitching is very relaxing and gratifying when the stitches come out nice and neat.
So, what kinds of project do you have waiting to be mended? It’s a rewarding thing to do when you compare the cost of new clothes to some time devoted to thinking through the best way to refurbish something that takes just a few minutes to fix. Please be assured, measurements with rulers are better than measuring with fingers, and results are more professional. Rushing never works for me without tearing out something.
Back to packing and discovering other projects waiting for me. Nope, maybe tomorrow. Hubby is home!
Some of the beautiful silk & cotton rugs can take up to 14 to 16 months to make.
I visited a carpet making school while I was in Egypt.
The school, on Sakkara Road in Giza, was called ‘New Egypt for Oriental Carpets’. The building was a vast stone structure, wide stone steps leading up to the second floor showroom and into the main entrance on the ground floor.
Back to school
The front wood doors opened into a vast, high ceilinged, airy room. Looms of varying widths, reaching from floor to ceiling lined the walls. On two sides, children manned the looms. They were of all different ages, the youngest appearing to be around 7 – all the way up to 16 or 18.
Each child sat a wood bench in a front a loom longer and wider than at least three or four of himself. They were all boys.
The children, along with learning how to make hand tied rugs from wool and silk and cotton, also study reading and writing. Acquiring the skill of carpet making allows them the opportunity to stay in their hometowns and earn a good wage for a trade. They can also continue their education elsewhere if they desire.
My guide and I stopped behind one of the youngest boys. He turned with a toothy grin to wave at me, then turned back to his loom. The speed and dexterity of his fingers as he tied the long strands of wool into knots was mesmerizing.
The oldest group of carpet makers at the school were no longer pupils but artists. They didn’t work from a preconceived mapped out design but from pictures in their own heads.
The youngest pupils work on the simpler designs made predominately of wool. They have long sheets of paper that show the colors required to complete a specific design – kind of like the directions that come with any rug latch-hook kit you can buy at a craft store. But much more complicated and a lot more extensive.
Snatch the pebble from my hand, Grasshopper
Another young man of about 13 years of age was working on a rug made of cotton and silk.
“Slow down,” said my guide, “Slow down so she can see.”
He dutifully slowed his flying fingers. He worked across the loom width-wise, tying strands of silk to a sturdy cotton thread already inserted in the loom. When he finished a row, he used a wired brush to push the knotted strand down tight against its neighbor.
He demonstrated the trimming process that happens at the completion of a rug, using heavy scissors to trim the fuzz like you do to an old sweater when it’s balled and pilled up.
On the backside of the rug, I could see the long threads left where he changed colors of silk. After he’d woven in all the strands, he would go back and cut and tie all the ends so that the back of the rug looked as beautiful and clean as the front.
The student becomes the master
The oldest group of carpet makers at the school were no longer pupils but artists. They didn’t work from a preconceived mapped out design but from pictures in their own heads. They used smaller looms they could stand up at, manipulating the contraption up and down with a lever by their feet, tying and weaving the yarns with their hands.
Some of the rugs can take up to 14 to 16 months to make – truly astounding in this world of mass, quick consumerism. All of the students and artists I encountered at the school seemed to have a genuine pride for what they were doing, and a patience I suspect is increasingly rare in the instant gratification, selfie-taking, googling, internet shopping world of many western civilizations.
Works of art
As soon as I laid eyes on you, I knew that you’d be mine.
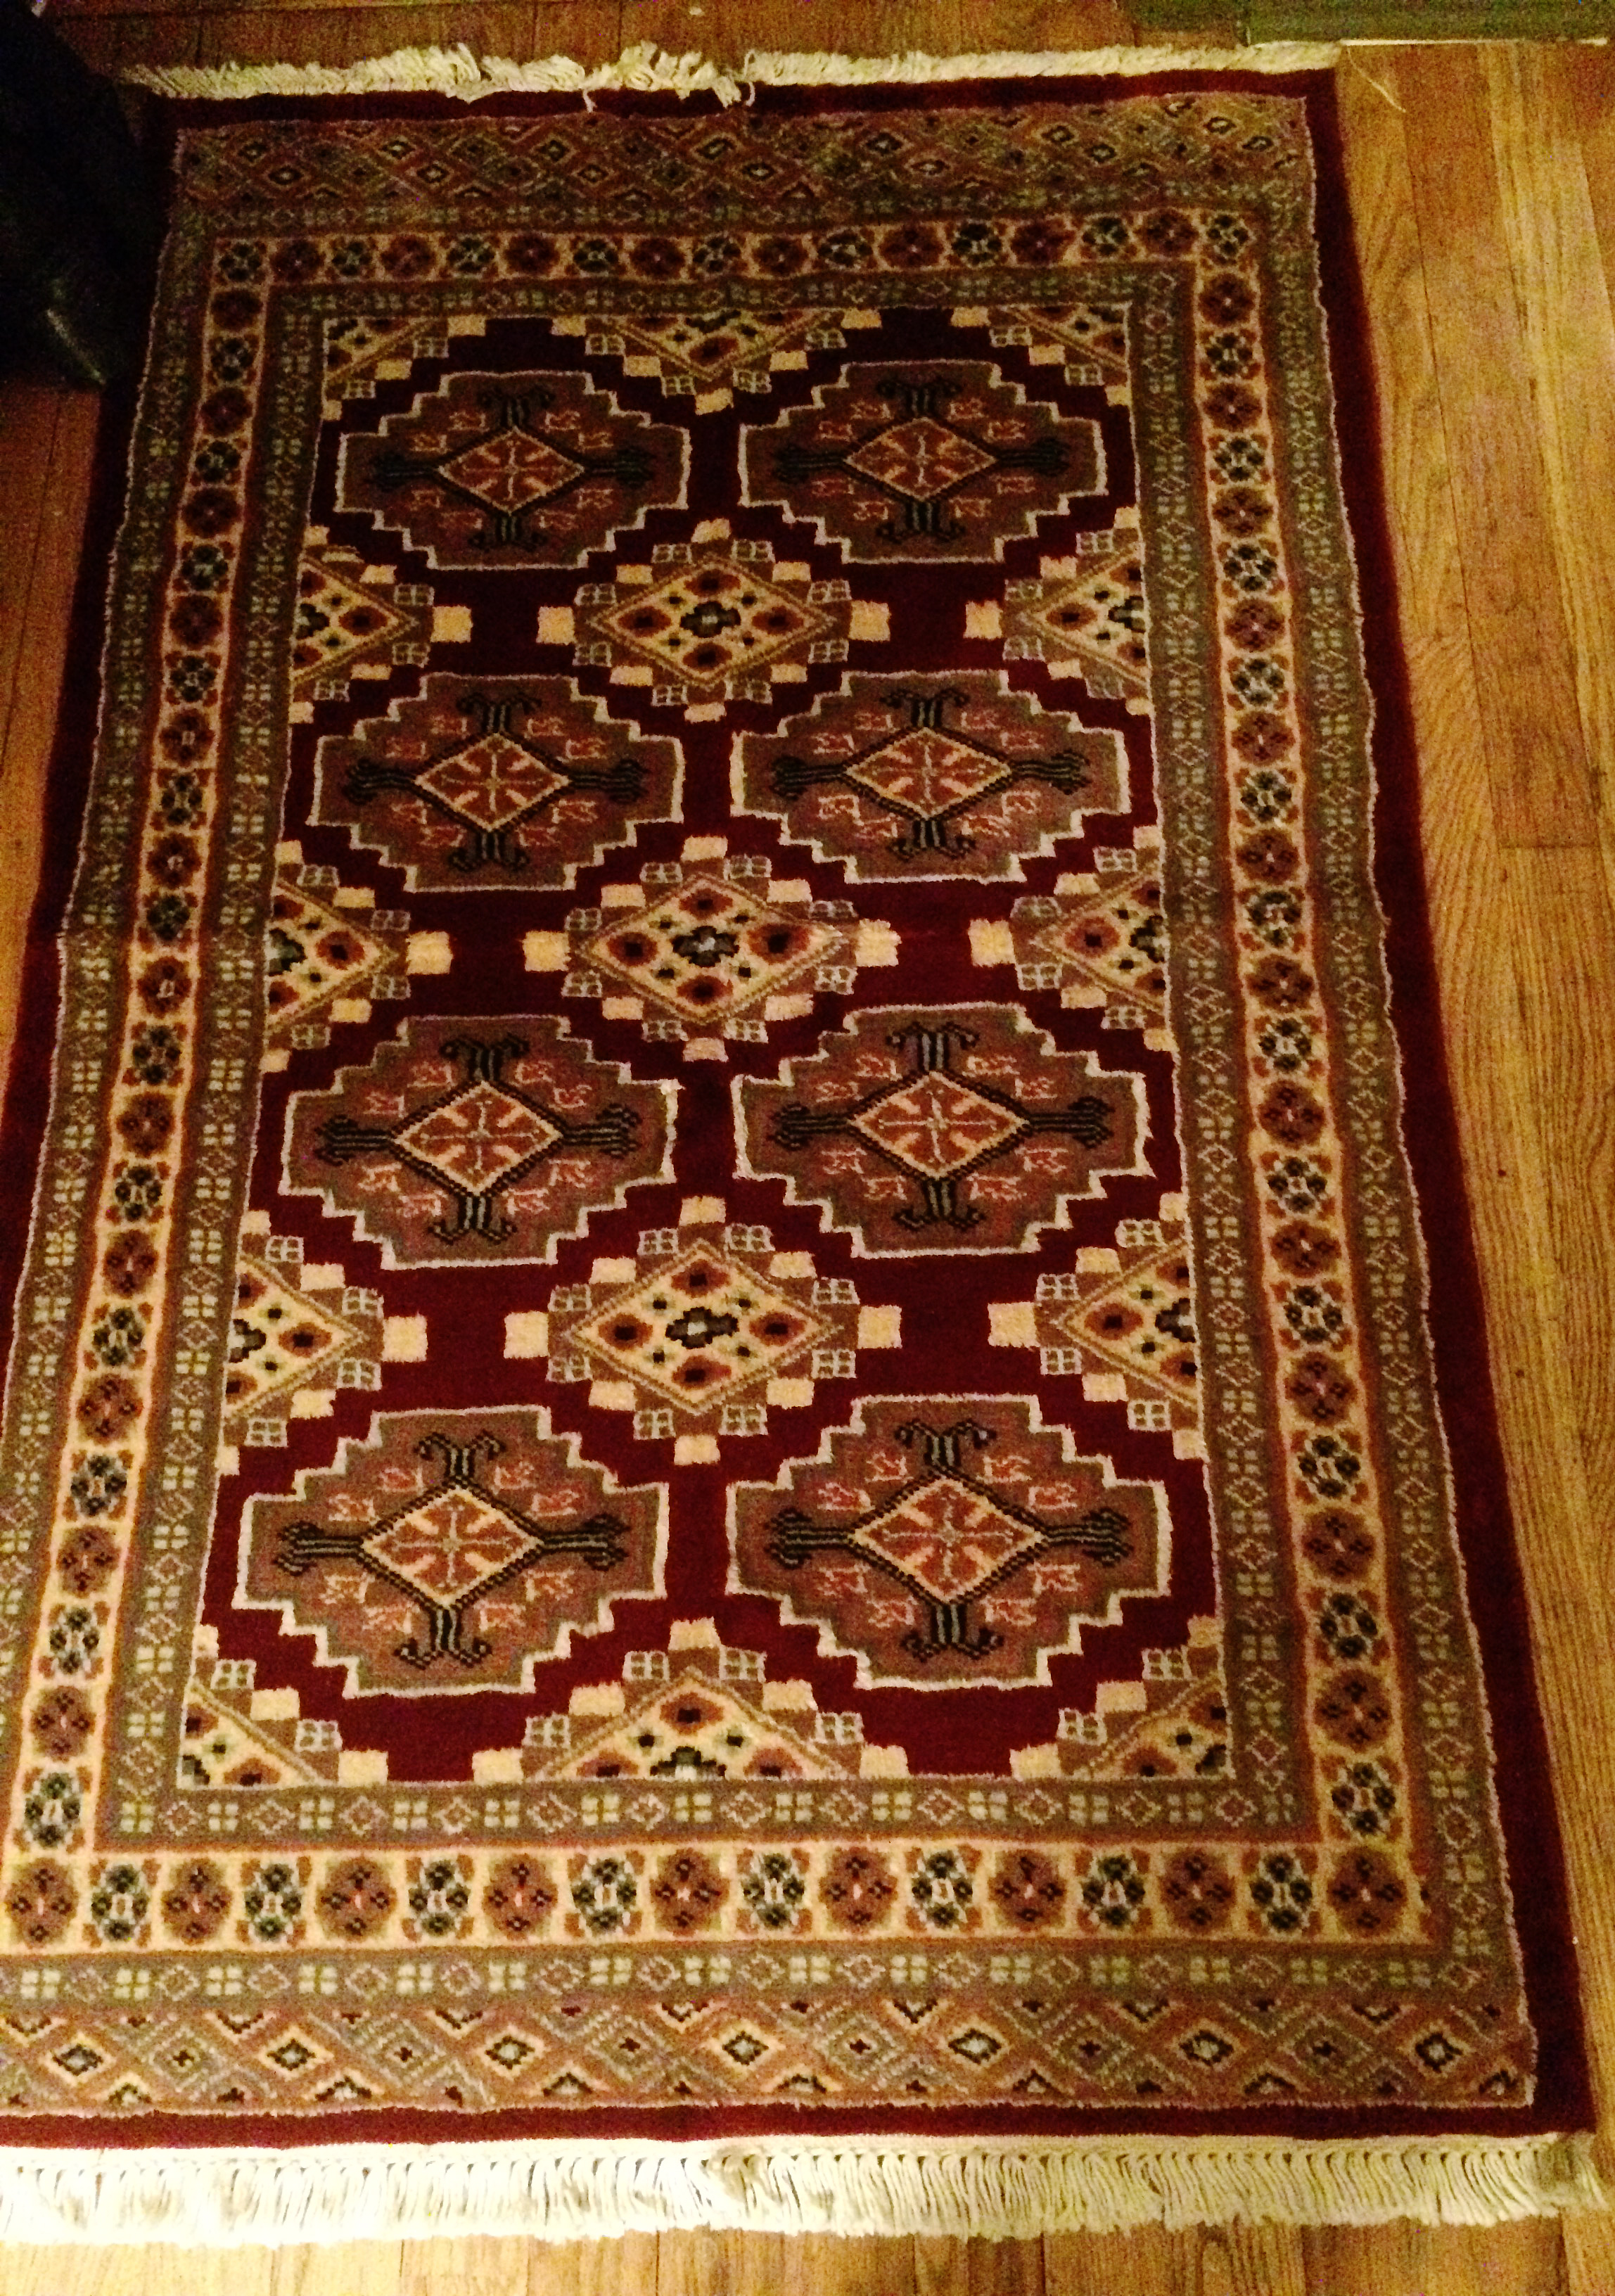
The second floor of the school was the showroom filled with all kinds of stunning rugs. Drinking a complimentary cup of tea, I wandered amongst the treasures for a good part of an hour (or maybe two). I finally decided on two carpets I wanted to purchase.
But, since I was in Egypt, the actual buying of things involved a thirty-minute bargaining session. I pretended I hadn’t already decided which rugs I liked the best and asked to see some more similar to my initial selection. I remained undecided for a significant amount of time, especially once price came into question, hemming and hawing and murmuring and looking around.
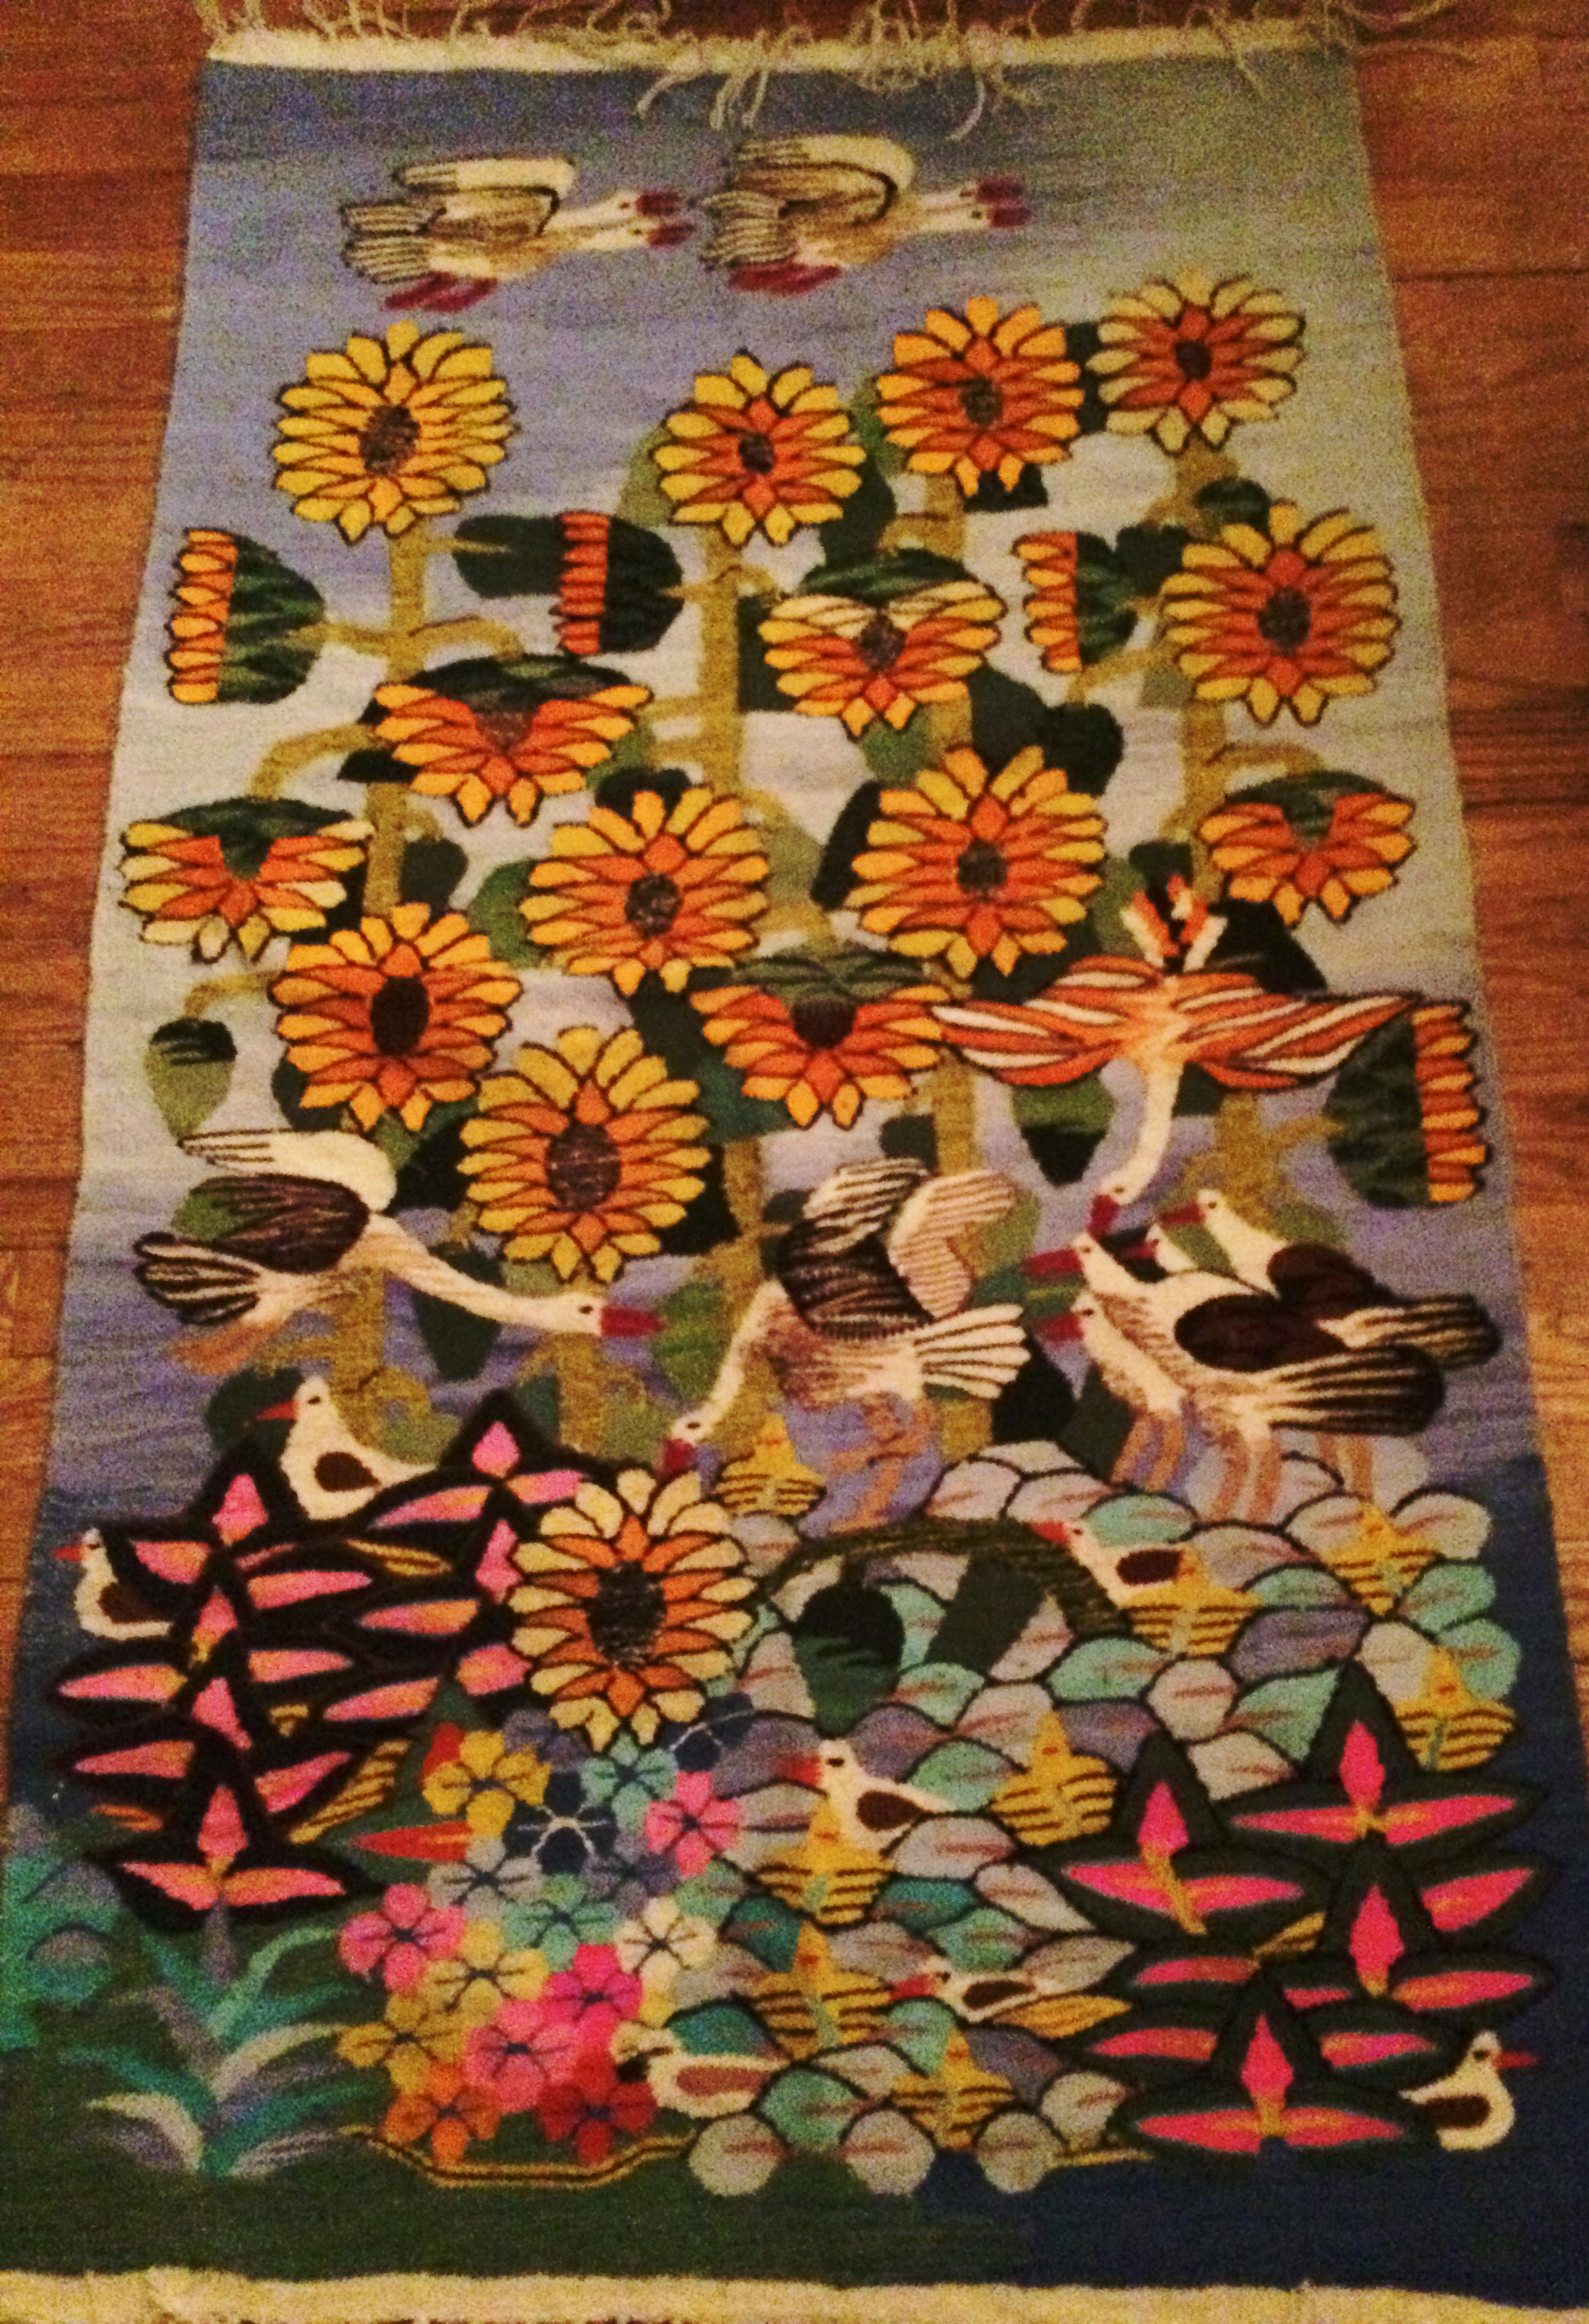
After settling on a cotton and silk rug, I then asked about the tapestries. I’d spotted the one I wanted quite some time ago. It was one of the artist done ones with yellow and orange flowers, swans, and blue sky and water with pink water lilies. After some more back and forth, we finally agreed upon a price for both the pieces I wanted.
The cherry on top
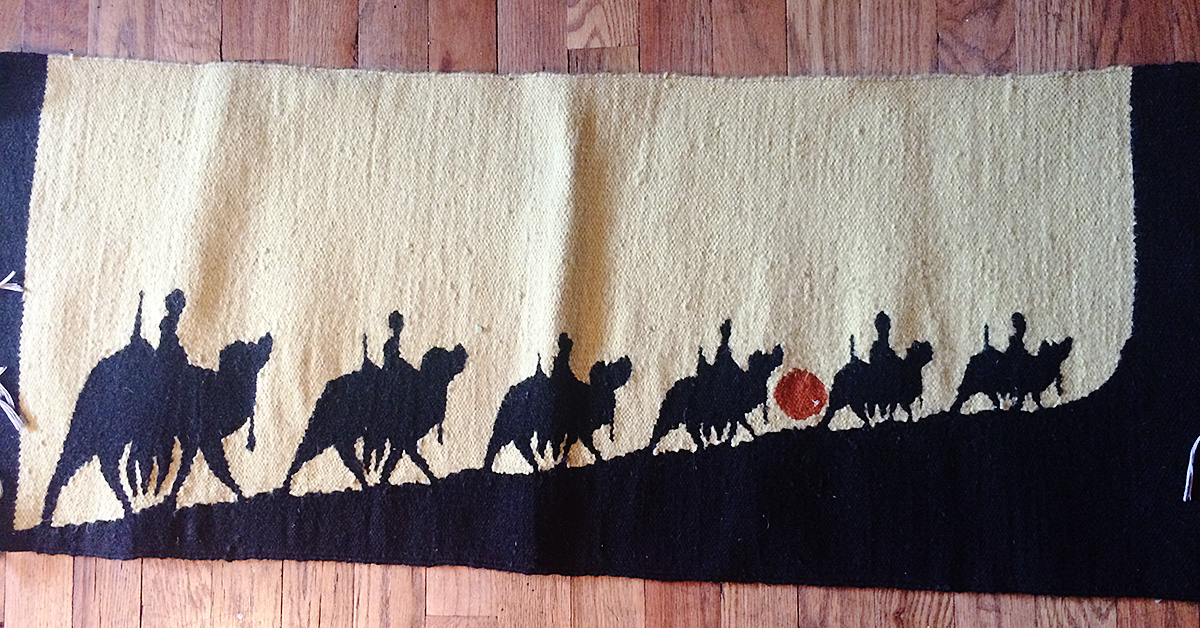
My freebie tapestry. A nice touch.
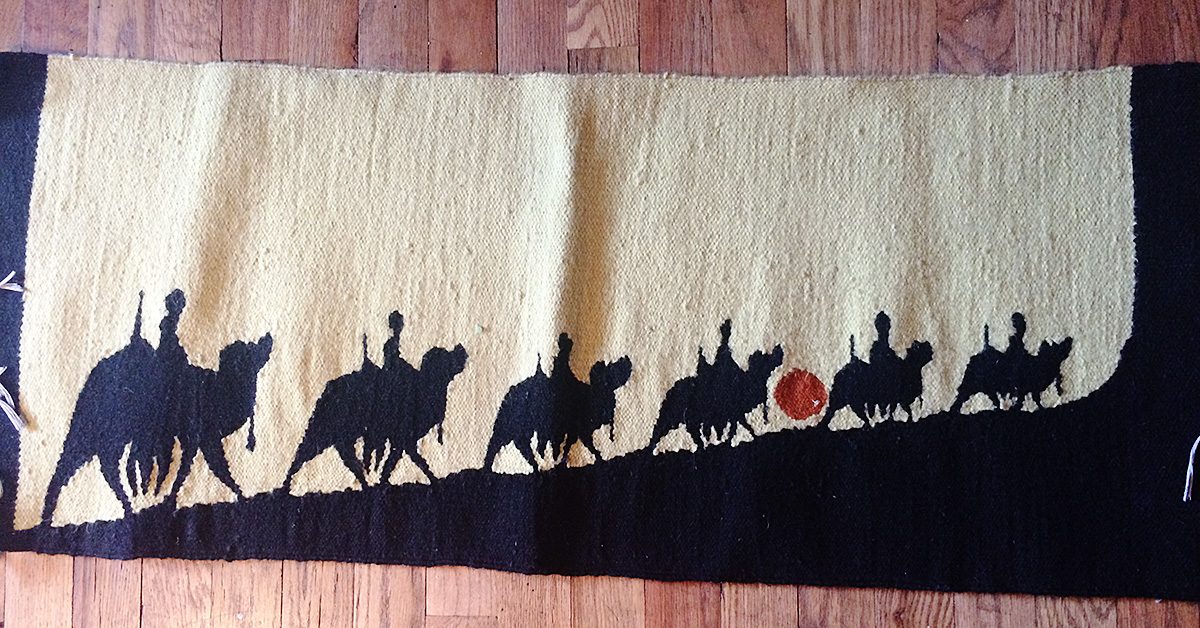
Then, in true Egyptian fashion, the salesman offered me one more tapestry I could choose from a pile as a gift. I suspect this pile consisted of the practice tapestries done by the younger students but they were all alluring in their own right and I choose a long narrow hanging of yellow with camel silhouettes.
I left the school quite happy with my purchases and the opportunity to have seen the young carpet makers at work – and to contribute to the Egyptian economy and the school.
Now, back at home in New York City, my Egyptian carpets have been happily integrated into my home carrying with them the legacy and craftsmanship of centuries.
Carpal Tunnel Syndrome (CTS) is a repetitive motion injury in the wrist.
Carpal Tunnel Syndrome (CTS) is a repetitive motion injury in the wrist. Typing, hammering, sewing and other actions can be the cause. Those some actions can cause an existing injury in to flare up. The numbing, tingling, pain and stiffness CTS causes can make it all but impossible to sew. As someone who writes for a living, CTS is pretty much a given. I don’t want to give up my livelihood or my hobbies over it. So, I’ve learned to modify. Sewing with CTS was a challenge at first, but if I can do it, so can you!
Wear a Brace
My CTS started back in highschool when I worked in an ice cream shop. Back then, we called it scooper’s wrist. I bought a cheap brace from the drug store up the street from the ice cream parlor and managed to keep going. The next time it flared up was college – as an English major I did A LOT of typing. A sturdier, more expensive brace helped with that. The things to consider are how immobile the brace keeps your wrist and comfort. Don’t be afraid to try on several at the store to check for fit and comfort.
Use the Other Hand
I’m a bit naturally ambidextrous, so this wasn’t too hard for me, but if you’re not, it could be a little harder. Gripping tiny pins is much too painful for me to do with my right hand. The CTS makes it nearly impossible. Instead, I taught myself to pin with my left hand. This wasn’t easy since it also meant holding the fabric differently. Be patient with yourself and with the process. It will come with time and practice.
Get Lefty Scissors
Just like pinning with my right hand is nearly impossible, cutting can be equally as challenging. If you’ve ever tried to use your regular scissors in your left hand, you know it’s pretty difficult. The blades are one directional. Instead, invest in a pair of lefty scissors. You’ll find that cutting with your left hand is pretty simple after that. You may need to make other modifications to the layout of your cutting surface, etc. to accommodate using the opposite hand.
Don’t let carpal tunnel syndrome take away your sewing time. Instead, try out these modifications and keep doing your favorite hobby. And don’t forget to talk to your doctor – they may have treatment options that can help long-term.
San Miguel de Allende, in the state of Guanajuato, Mexico.
I recently traveled to San Miguel de Allende, in the state of Guanajuato, Mexico for a five day writer’s retreat with two friends. Although famous in Mexico proper, many gringos have not heard of San Miguel, located the mountains at 6,200 ft. elevation, at approximately Mexico’s center (200 miles north of Mexico City and about 600 miles from the Texas border).
Although famous in Mexico proper, many gringos have not heard of San Miguel.
I’m a sewist and a writer and while I was there to work on my book, I could not tear my eyes away from the gorgeous colors of the city and the beautiful fabrics & textiles I found there.
I could not tear my eyes away from the gorgeous colors & textiles of the city.
Even the city itself reminded me of a patchwork quilt.
Even the city itself reminded me of a patchwork quilt.
Mexico is not afraid to use color, in fact it embraces bright, vibrant colors in both private and public buildings, art, and culture.
Mexico is not afraid to use color.
The culture embraces bright, vibrant colors in both private and public buildings, art, and culture.
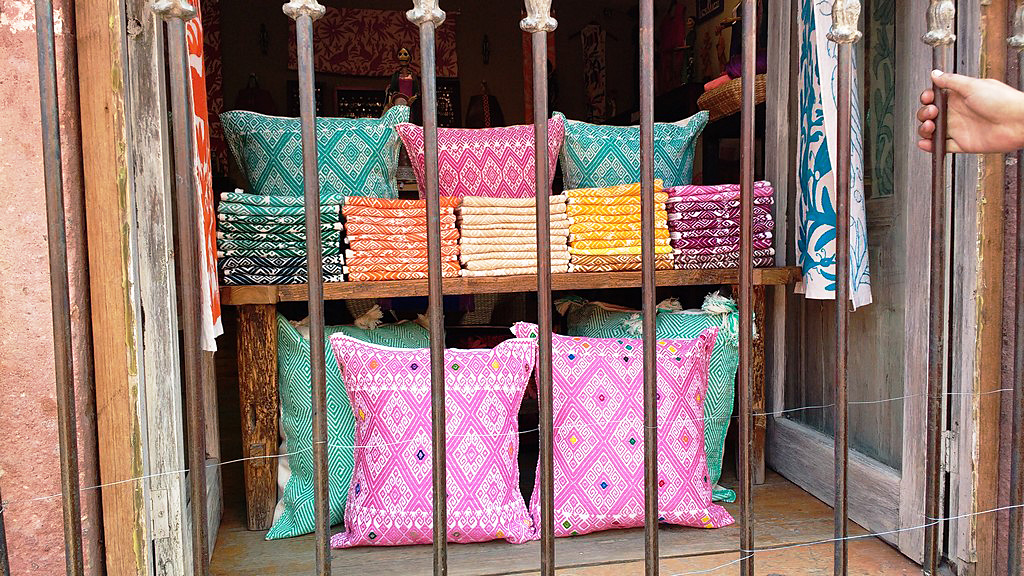
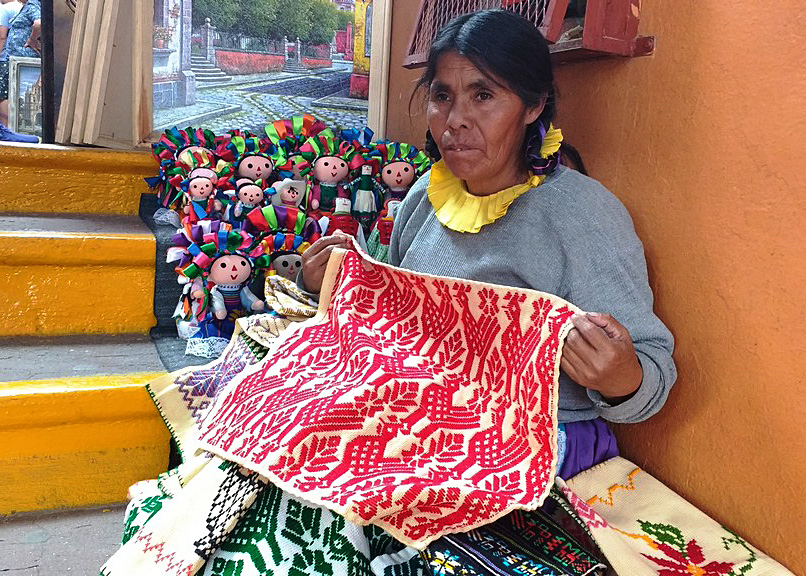
Locals claim that the birthplace of the serape is San Miguel de Allende and I was inundated with options.
Locals claim that the birthplace of the serape is San Miguel de Allende.
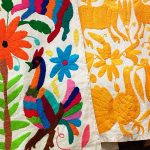
Other items on display were rugs, pillowcases, bedding sets, purses, bags, belts, guayaberas, and embroidered and woven fabrics.
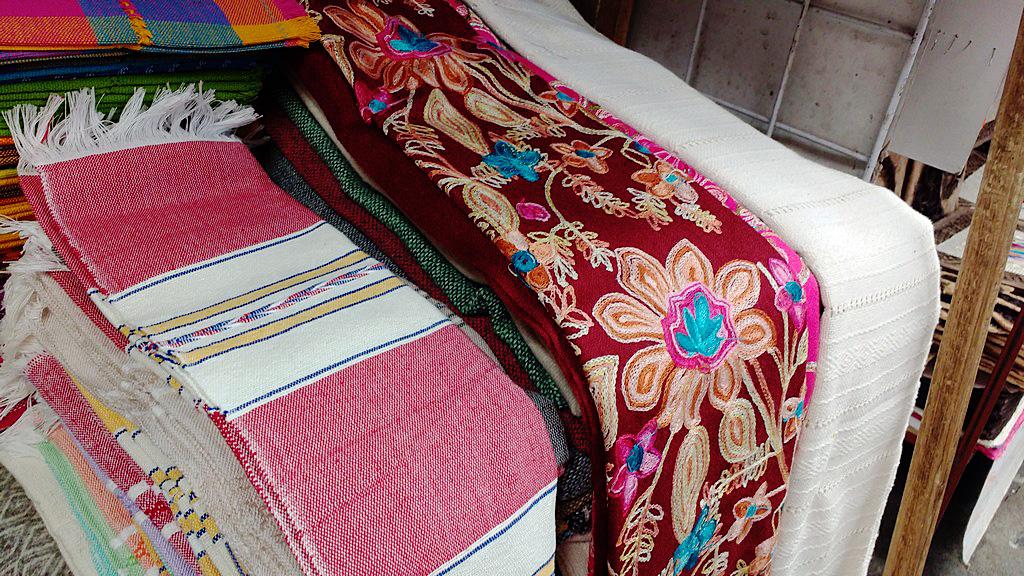
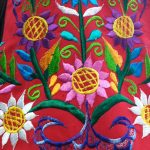
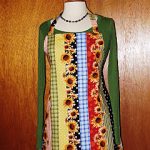
The hand embroidery I found particularly compelling. I bought a bright yellow bag with hand embroidery and my girlfriend, Lizz, bought a hand embroidered panel she plans to hang on her wall at home.
This is the panel she purchased (photo taken with permission).
This is the panel she purchased.
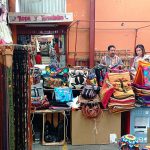
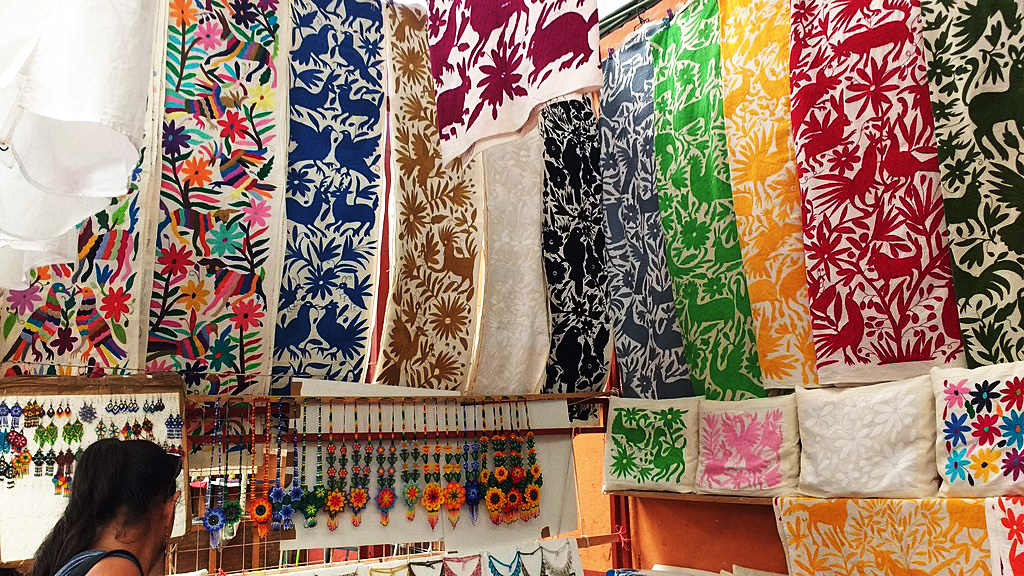
This booth was my favorite. It was located in El Mercado de Artesanías. I was so inspired that I had my pencil and paper out and took notes to plan out quilts I’d love to make with the huge, hand-embroidered panels.
This booth in El Mercado de Artesanías was my favorite.
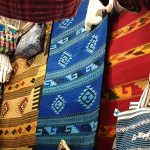
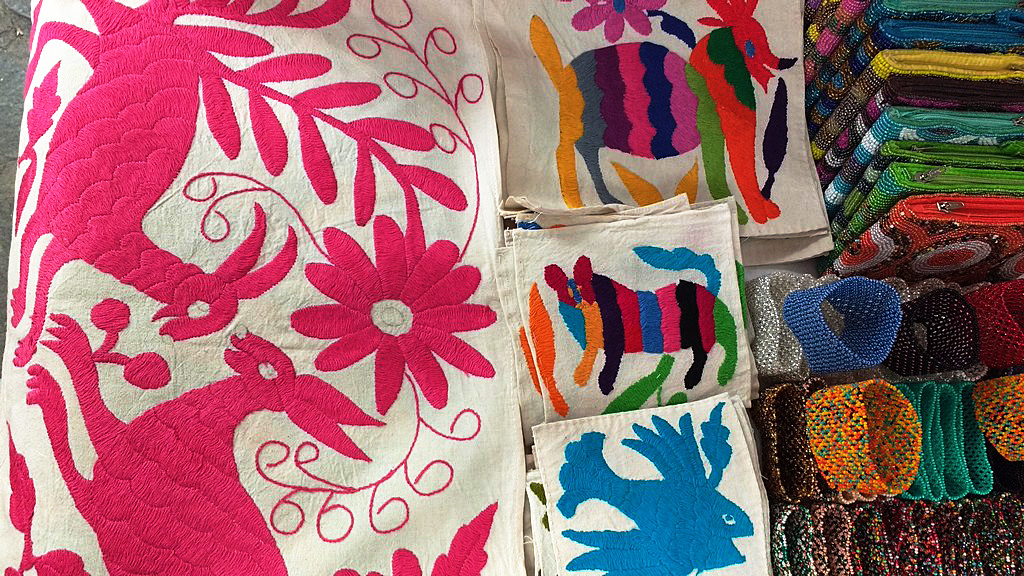
They sold smaller squares too, similar to charm packs and layer cakes. I’ve worked these into some upcoming designs as well.
I’ve worked these into some upcoming designs as well.
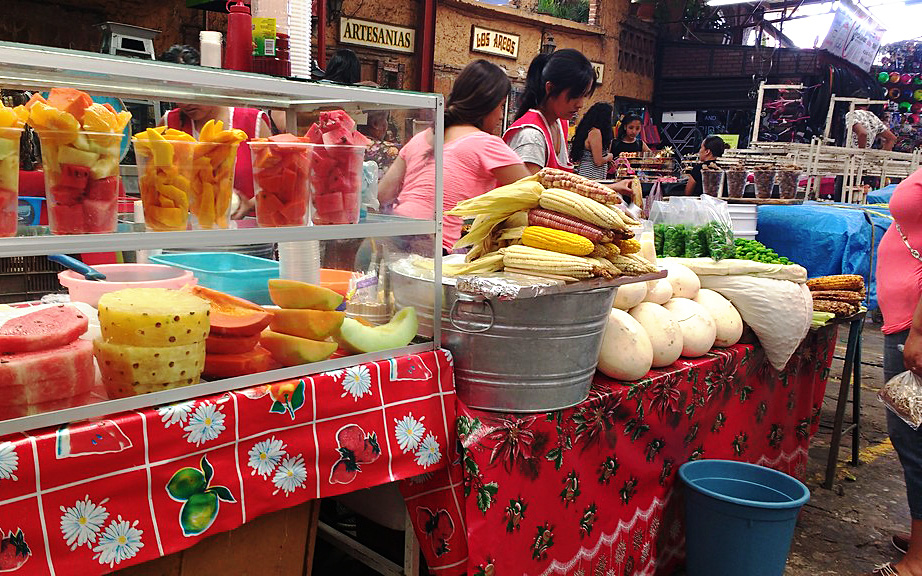
Mexico also has the best selection of oil cloth fabrics. Make sure to pick up a few yards for your stash whenever you visit.
Make sure to pick up a few yards for your stash whenever you visit.
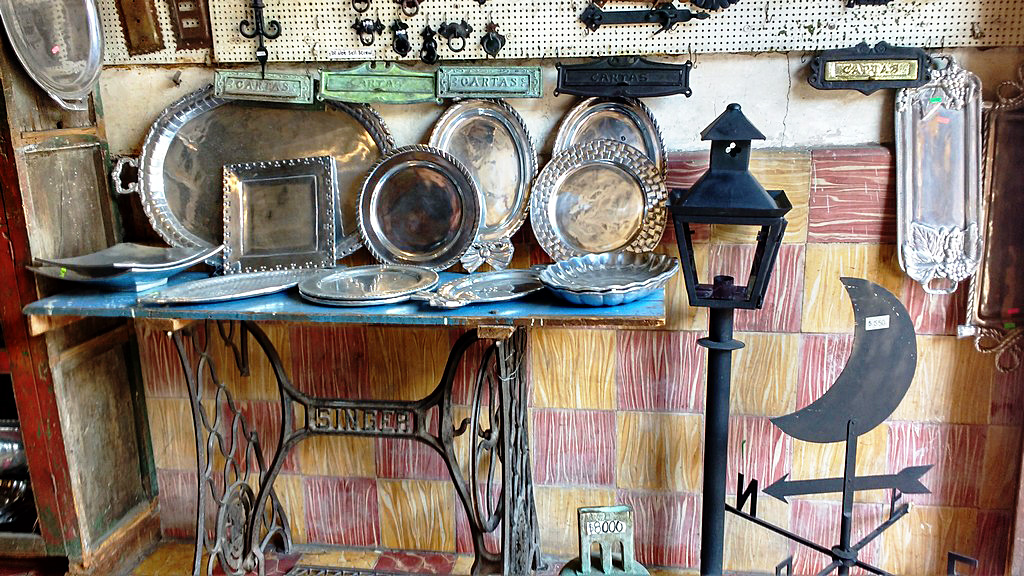
After a long day in el centro, I spotted this Singer sewing table used for display at a local tienda. Sewing is everywhere.
Sewing is everywhere.
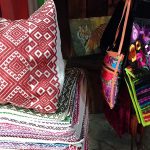
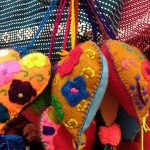
Here I’m enjoying a hard earned beer after a long day of writing, but it’s the bag in the foreground I want you focus on. Check out that embroidery and the stunning color!
Check out that embroidery & the stunning color!
I cannot wait to go back. Have you ever visited San Miguel? Did you buy any fabric while you were there? Share with us your finds in the comments.
I cannot wait to go back.
(All photos were taken with permission)
———————————————————————————– Charlotte Kaufman is a writer and sewist in Mammoth Lakes, California. She specializes in marine and home interiors and continues to fall more and more in love with quilting. You can follow her at charlottekaufman.com.
Weeks ago, I did a post where I analyzed a work of art that depicted sewing — specifically a woman sewing by a window with a child nearby. I said within that post that I would return to the overall concept in the future, and the art geek in me is so drawn to the process that a return visit to the strategy is coming your way now!
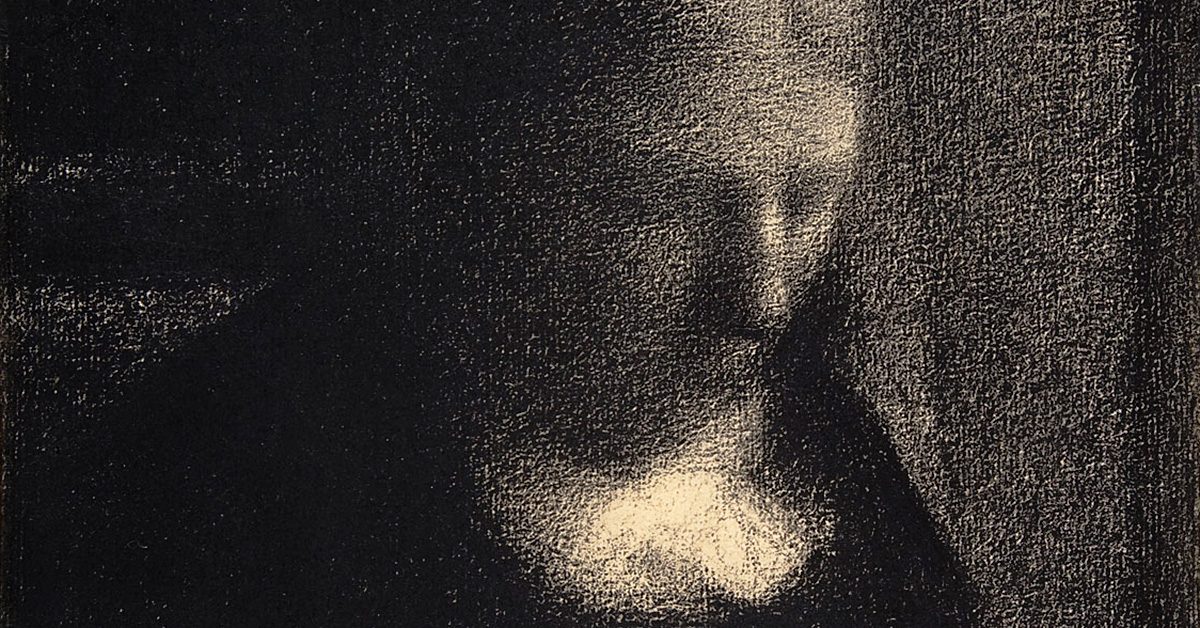
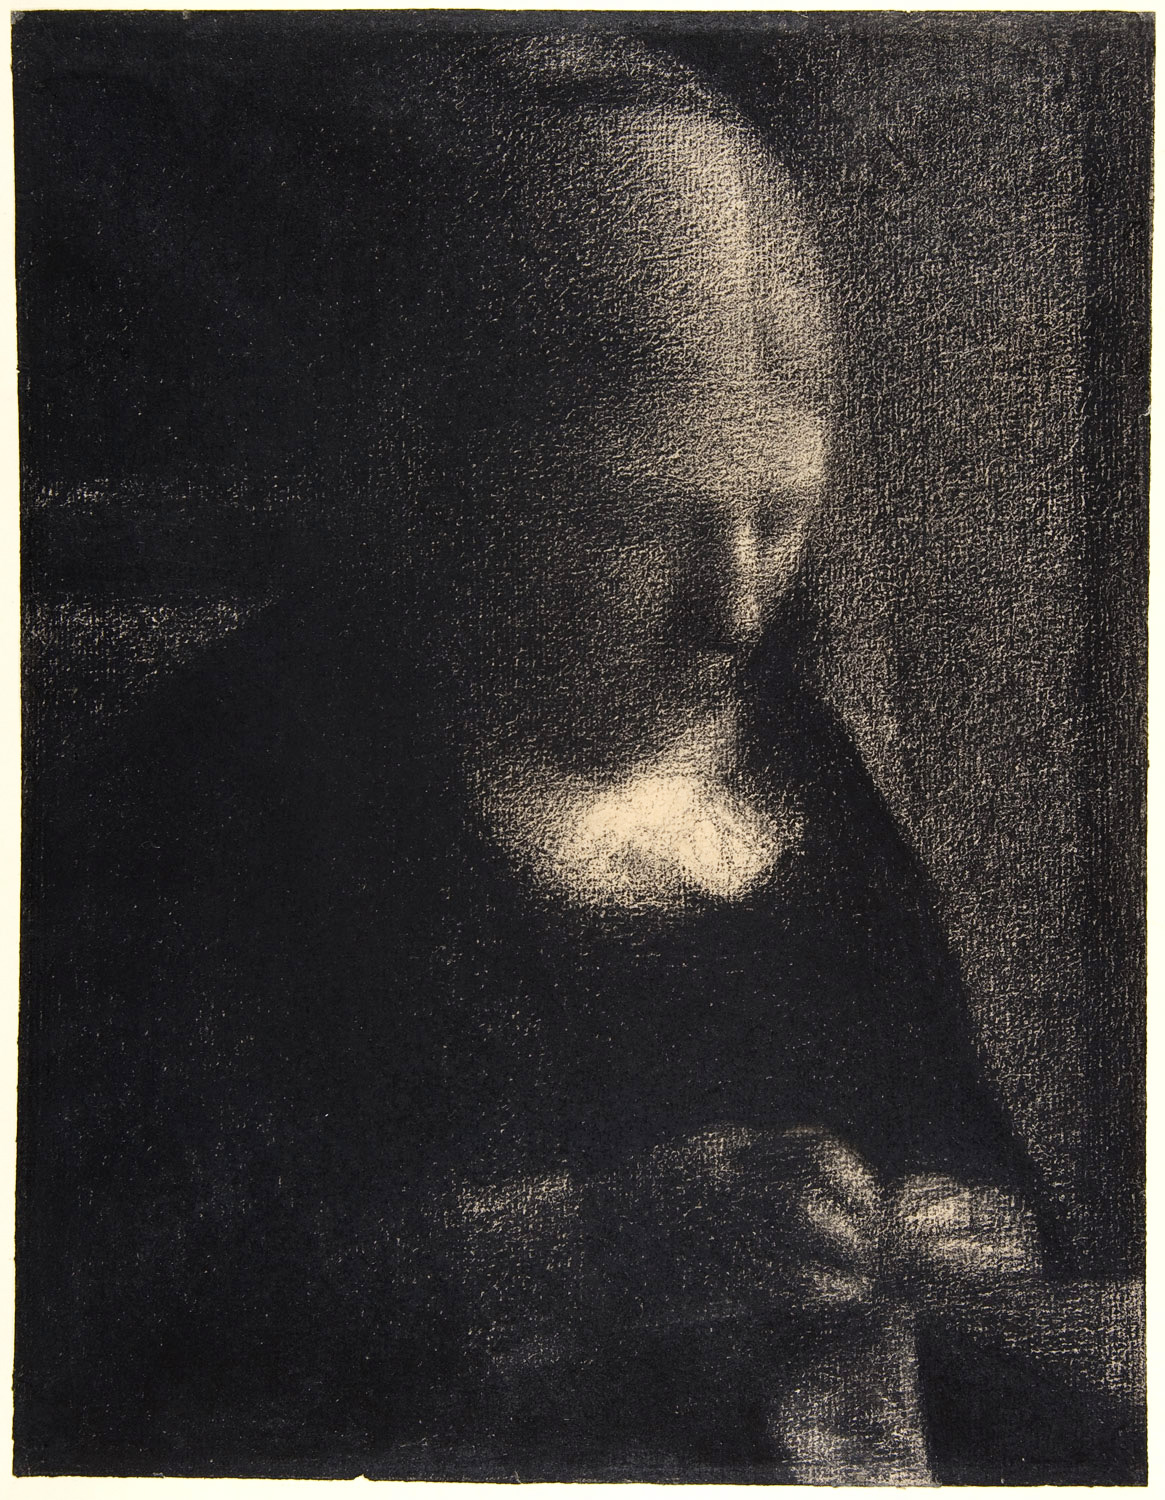
Embroidery: The Artist’s Mother
The work now being analyzed: Embroidery: The Artist’s Mother
But I suppose I’m getting ahead of myself! Perhaps we should scale it back and cover the piece’s details before we dive into what those pieces mean.
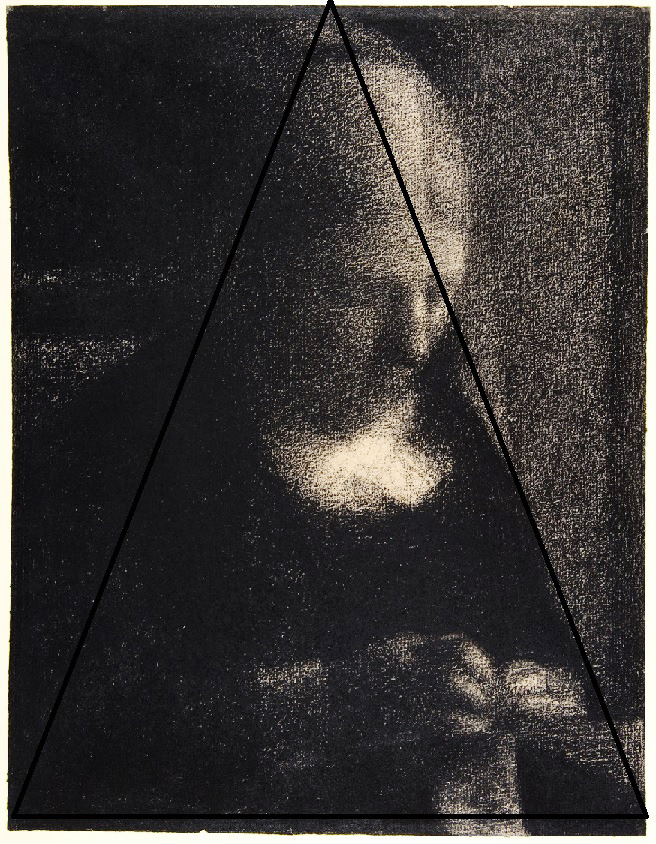
Seruat’s work that’s now being addressed, just about the whole thing can be fitted into the focal pyramid.
On my earlier post, I mentioned the concept of triangular configuration, meaning a triangle — or pyramid — could be drawn generally around the central figures of the work to bring the viewer’s focus to that section. With this drawing, most definitely that concept is employed, but it’s in a much different way than what was seen in the painting that was previously analyzed. For that earlier work, there were a number of other elements at play that surrounded the pyramid. For Seruat’s work that’s now being addressed, just about the whole thing can be fitted into the focal pyramid.
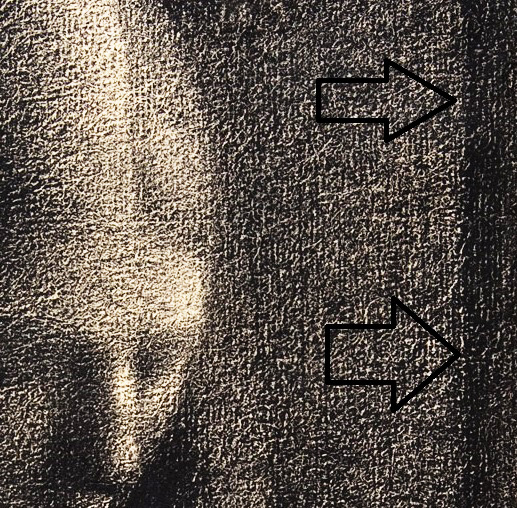
Beyond that factor, the most notable detail of this work is potentially how dark it is. There’s very little light in Embroidery — so little, in fact, that there are only a small number of areas that are bright enough to fully be differentiated. Consider what’s going on behind the woman sewing, on her left side. The work gets brighter, then darker, as if something is there that changes the light in that area. Maybe it’s a bend in the wall because she’s working by a hallway, or perhaps it’s some kind of drapery that’s hanging there. The point is that the viewer can’t know why the difference is there. He or she can only note that it is there.
The work gets brighter, then darker, as if something is there that changes the light in that area.
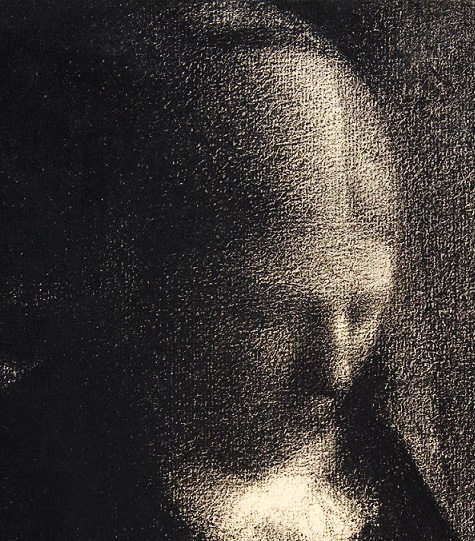
There’s a vagueness in that detail, and it’s mirrored in the blurred features of the woman herself as she sews by hand in a room that seems to be incredibly dark.In truth, without the visual proving that she’s using her hands, the viewer could easily conclude that the woman in the work has fallen asleep while sitting up. There’s no indication that her eyes are open, and a person can barely discern the woman’s mouth to know what’s happening there. Without the image of the actual sewing, the viewer could let his or her imagination run wild to decide she’s asleep and drooling, or frowning through a nightmare. The piece simply looks too vague to know from the facial expression alone.
Without the visual proving that she’s using her hands, the viewer could easily conclude that the woman in the work has fallen asleep while sitting up.
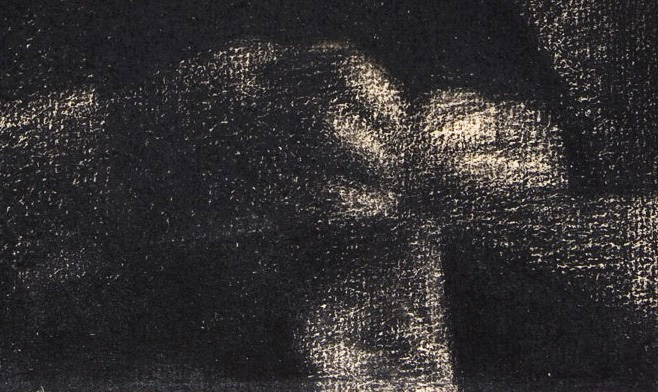
So what we perceive is a woman who is sitting in what can barely be distinguished as a chair, and the only indication to us that she is sewing is we can see the material hanging from her curved hands.
See the material hanging from her curved hands.
If I put all of that together, I just can’t arrive at a peaceful meaning. To me, the darkness shows a sadness that’s mirrored in the idea that there’s nothing of sincere noteworthiness happening around the woman aside from the sewing. Since that sewing itself is inches below the lightest part of the painting,brightness isn’t a logical label to give to that activity either in order to offer a pleasantry to her task — and, by extension, the whole image. To me, this feels more like a rendering of a woman who is almost a drone — thus, her faded features — tending to a task that leaves her so unhappy that she’s sitting in darkness and perhaps nearly dozing in her efforts.
This, to me, is not a good representation of sewing! I suppose by applying the description of the work, I can rationalize that it wasn’t the artist’s intent to create a piece that so drearily portrays the process of sewing. The site even acknowledges a positive comment that’s been given to the work, so it could be that I’m the only one who comes to these kinds of conclusions. Still, if I was going to direct someone to an art piece that I feel showcases the mood of sewing, this might not be my choice!
What do you guys think? Is it dreary and vague, like I thought, or more pleasant like the artist seemed to intend?
Moms come in all types. But most appreciate handmade gifts, especially the ones you make. Whether your mom is glitzy or sporty, a homebody or a world traveler, we’ve got you covered.
For Mother’s Day, her birthday, holiday gifts, or just because you love her, here are lots of fun project ideas you can sew for mom.
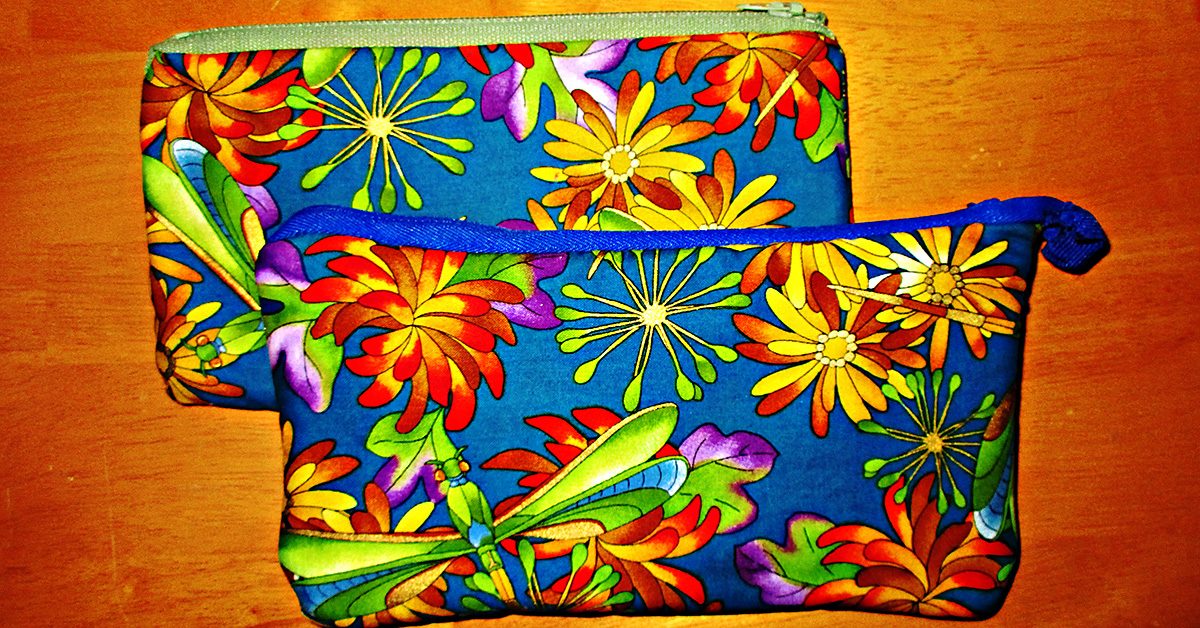
Zip bags
There are so many uses for these that zippered cases are always a good gift idea. She can use one for a cosmetics bag for her purse or travel, to hold pencils or art supplies, or anything else. I once made a matching set of these in several sizes for a gift for my mom.
She can use these to hold anything.
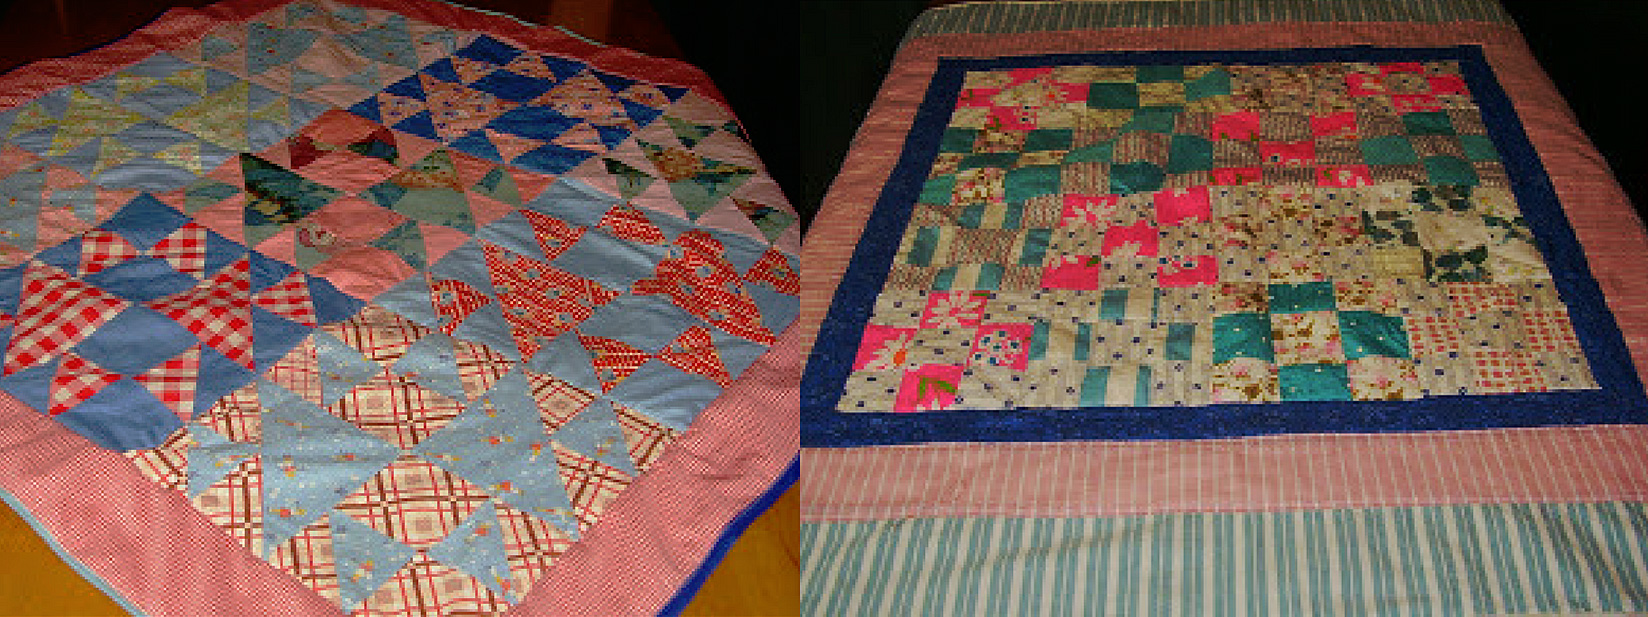
Quilt
Whether she likes to get comfy in her favorite chair or she babysits grand-babies, a lap quilt is a perfect choice to sew for mom. Make one in her favorite colors, to match her décor, or choose a special pattern.
The blocks in these quilts were pieced by my mother’s and my husband’s grandmothers. I found them in their sewing boxes & put them together with borders to make these lap quilts for our moms to share with their grand babies.
And speaking of grand kids and special quilt patterns, you could get the kids involved and make a handprint quilt for their grandmother. You can make a handprint quilt using washable fabric paint and the kids’ hands as stamps. Or you can have them trace and then cut out their hands and use these as appliqué patterns.
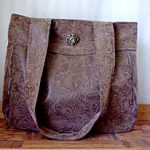
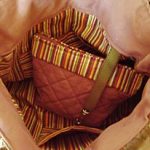
Handbag
Most ladies will appreciate a beautiful new handbag. Depending on your mom’s style, you could make her a clutch, a wristlet, a structured bag, or a casual cross-body purse or messenger bag.
The possibilities are endless here. Choose suede, an elegant stamped faux leather or other fancy fabric, a distinctive or wildly patterned print, or build her a bag based on a small piece of patchwork created just for her.
You can also make a gift set of a pretty purse with a matching zippered bag and/or glasses or cell phone case tucked inside.
Tuck a matching bag inside for the special touch.
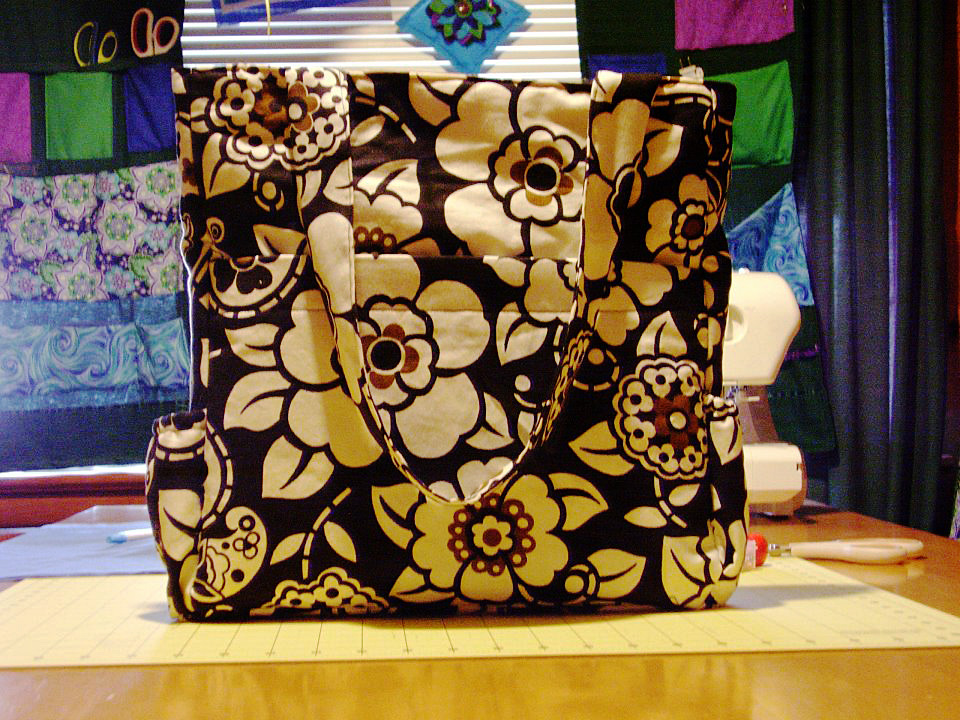
Totes
She can’t have too many tote bags since these are endlessly useful.
She can’t have too many tote bags since these are endlessly useful. Make her a stylish and sturdy tote bag for her library books, groceries, or other shopping and she will appreciate it endlessly.
Make a gorgeous XL tote in a special fabric and she will be thrilled to use it as a stylish everyday bag. Especially if you add in ample pockets and/or smaller zip bags for organizing contents.
You can make a reversible tote bag in any size and give her two bags in one. Make a canvas tote with ample pockets inside and out to create a custom beach bag she will love. Or make her a few of these cute shopping bags that collapse into their own pocket.
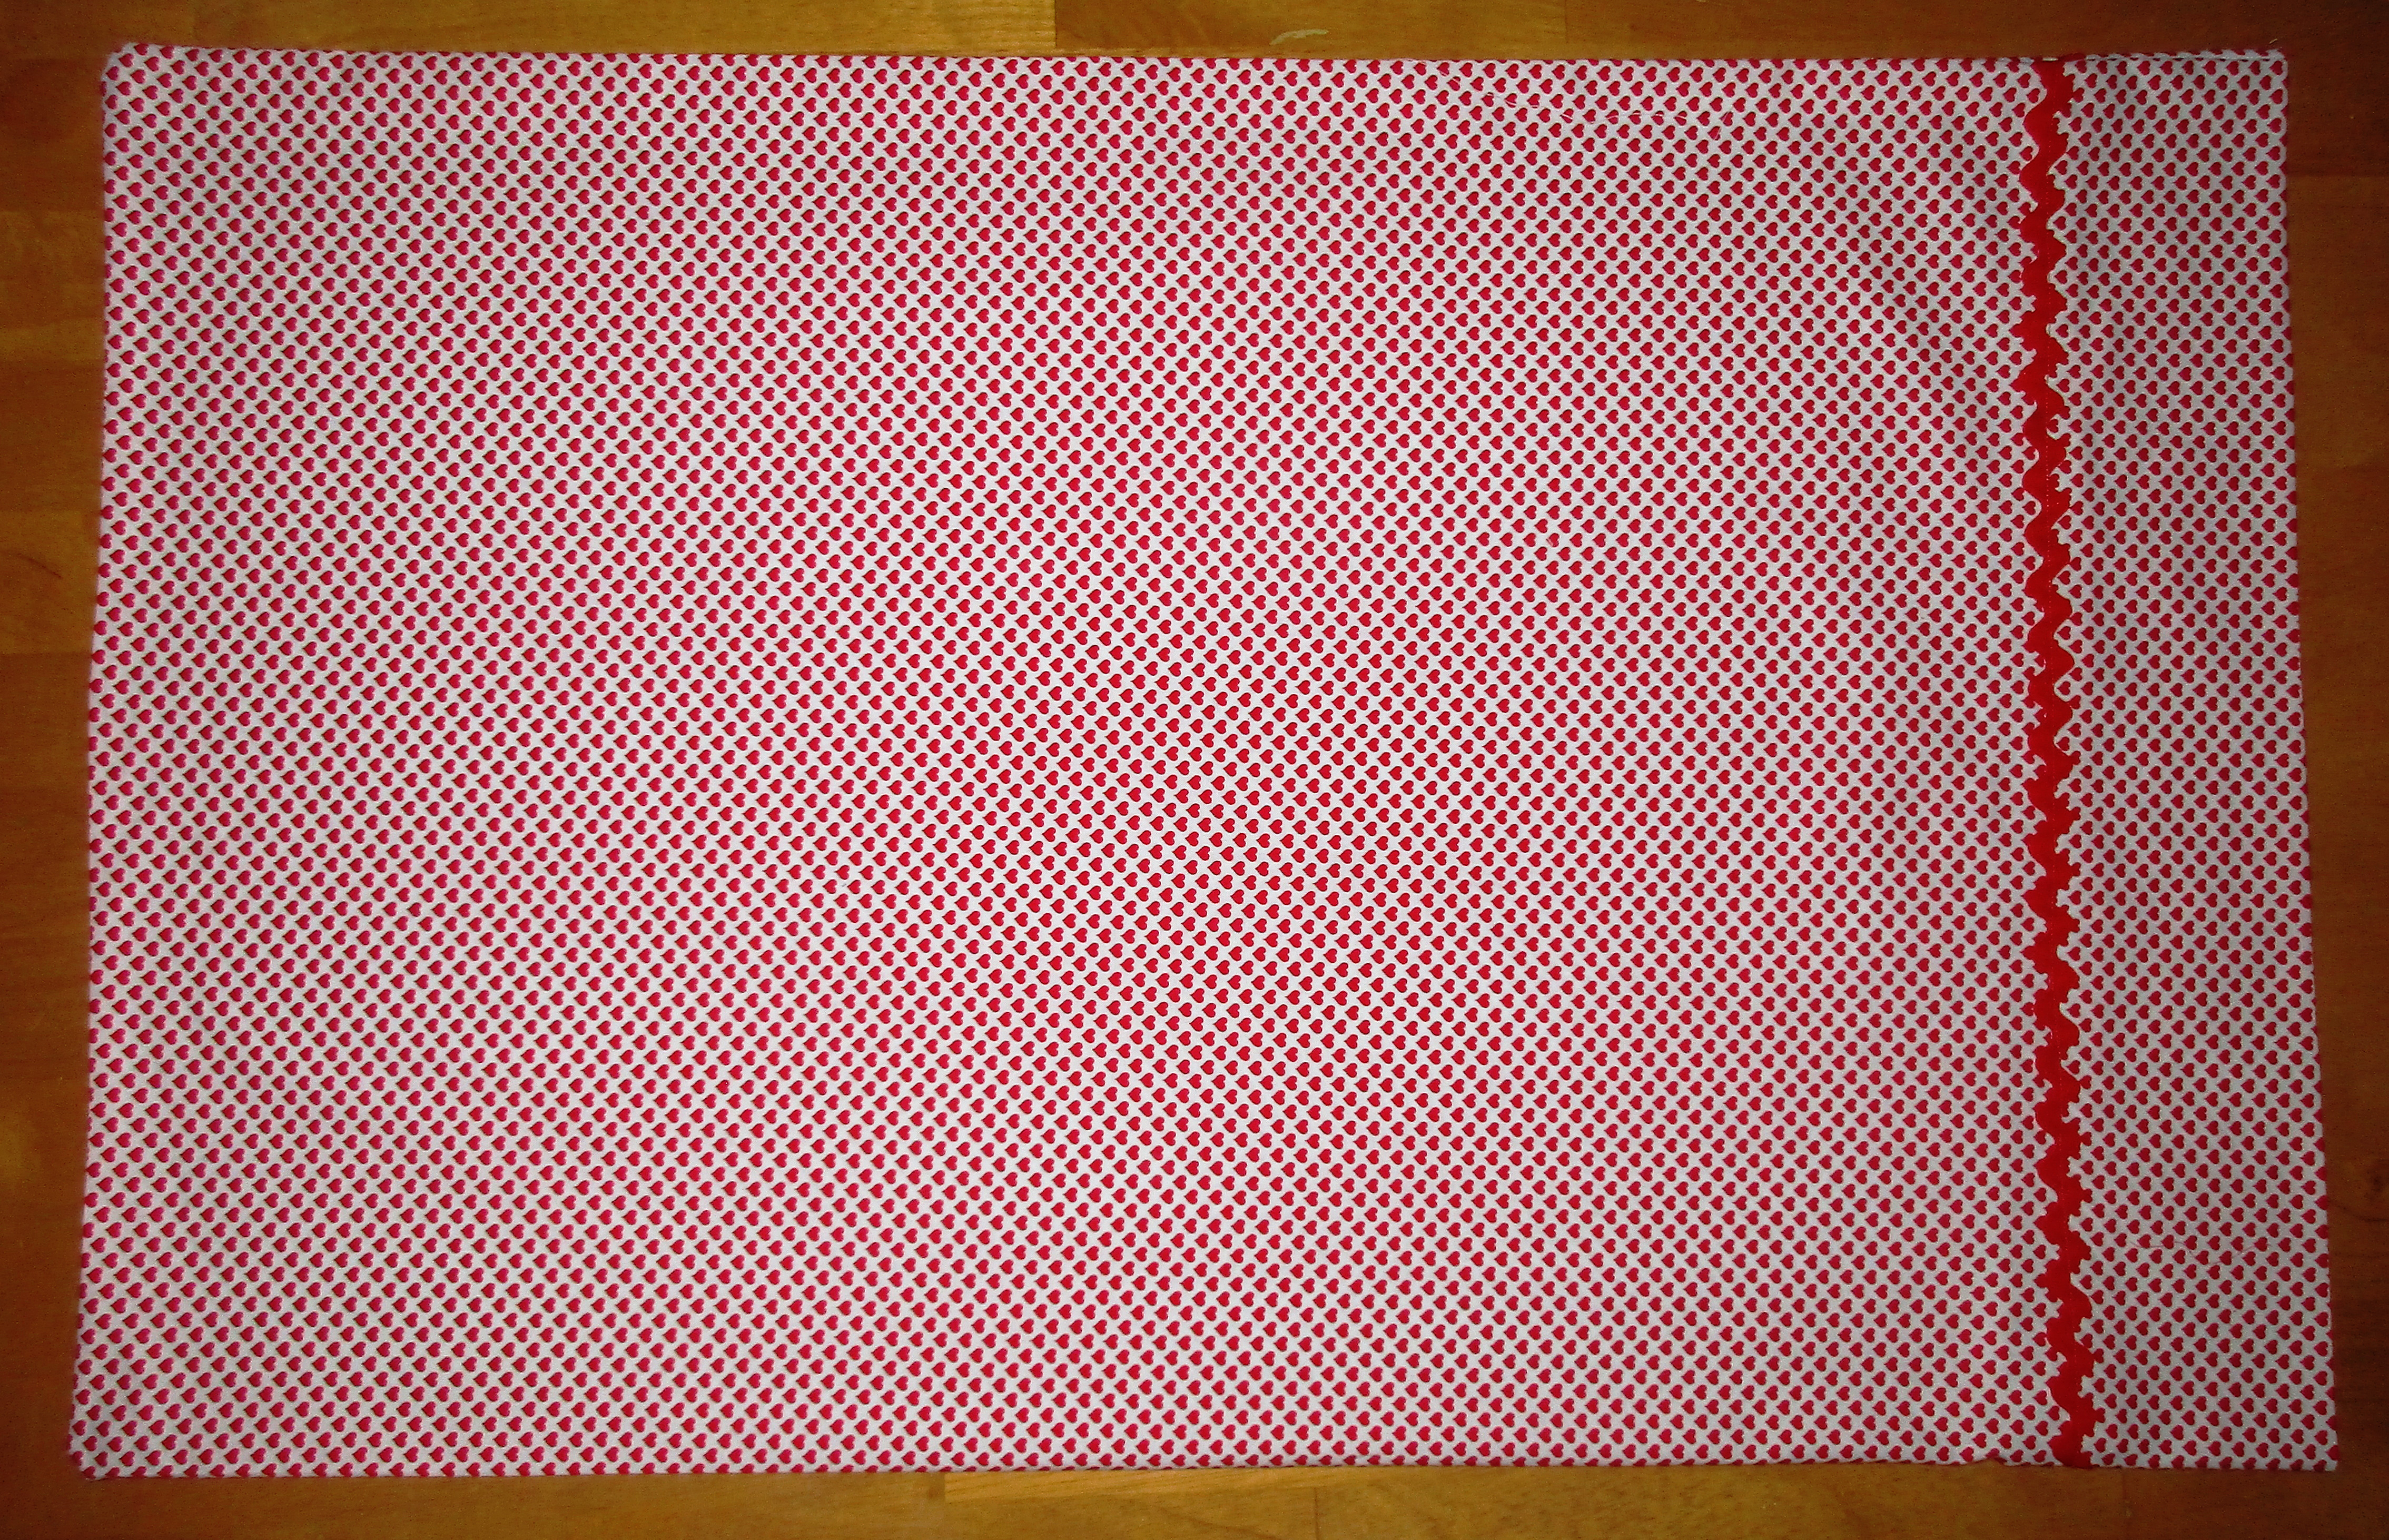
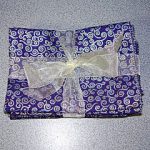
You can’t buy pillowcases as pretty as the ones you can sew. Make her a luxe pair trimmed in vintage lace. Choose a colorful patterned fabric to dress up her bed or a special motif she adores. Whether she loves owls, Star Trek, or her favorite sports team, you can make her a pillowcase from a yard of any novelty print.
You could make a pillowcase covered in hearts to remind her how much she is loved.
Sew a bouquet
A bouquet of flowers is a standard Mother’s day gift. You can sew her a bouquet of flowers that will never wilt and fade away.
Here are a lot of different ways to make fabric flowers.
Rice Pack
Whether she suffers from pains in the neck, back, tummy, or general monthly pains, an oversized microwavable rice pack heating pad will be a welcomed gift of comfort.
You can sew cozy pajamas from silk, cotton, flannel, or fleece. Make them ultra feminine with batiste and lace, or pure fun in a funky print. Start with an easy pattern from Simplicity, McCall’s, or Butterick, or use one of these tutorials.
Easy robe
Like pajamas, you can sew a robe from a lightweight or dressy fabric or from something heavier and more cozy. Robes are easy to sew. You can buy an easy robe sewing pattern or here’s a great tutorial showing how to make your own pattern using rectangles.
Apron
There are so many ways to sew aprons. You can make her a pretty half apron from just a fat quarter of fabric plus trim, a full coverage bbq style apron from a yard, a reversible apron, or a garden or craft apron.
An apron made from a fat quarter.
This one is reversible.
Cloth napkins neatly presented.
Oven mitts/ pot holders
Table runner
Placemats
Napkins
Travel bags
If your mom travels a lot, there are a lot of great gifts you could sew to help her
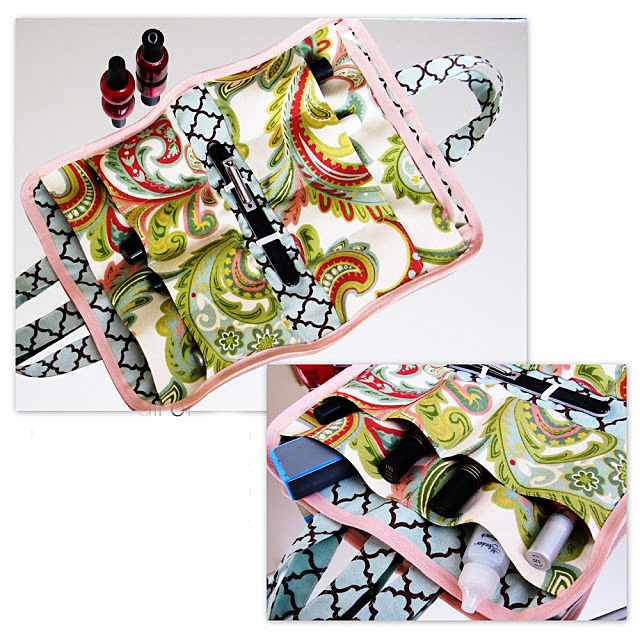
Mani/Pedi kit- Amy at Positively Splendid made this free step-by-step tutorial for making a manicure/pedicure roll-up kit to go. And a different way to make it as a pretty mani/pedi tote. You can buy mom a pretty new polish or two, too.
I got this idea from the book Travel Gear and Gifts to Make, by Mary Mulari. She says that a pareu (pa-ray’-oo) is actually a colorful Polynesian wrap skirt. But it can also be used as a shawl, head cover, scarf, swimsuit cover up, light blanket, picnic blanket, or even a knapsack for carrying stuff.
This is probably the most used and loved gift I have ever made for my mom, and it is also the simplest. She travels a lot as a car passenger, and she likes to nap with a light blanket while riding.
A pretty pareau works perfectly for that plus more.
To make one, you just hem a square or rectangle. You can make one from a 44″ or a 60″ square. Since I knew she would use it as a blanket, I made my mom’s in the larger size. And I sewed a small matching tote with a strap, for storing the pareau rolled up while not in use. I bet it has been over ten years since I made it for her, and she still raves about and uses this gift all the time.
Needlebook
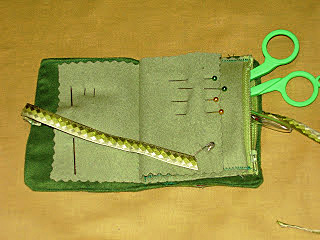
If your mom sews a lot or even just a little, she will certainly treasure a needle book you make with love just for her. You can make a simple one from felt or create a patchwork cover and include a zippered “page” for holding small scissors and other supplies.
I like to make needle books with a zippered page inside.
Fabric necklace or bracelets
Jewelry is another go-to gift for moms, but have you ever sewn jewelry? Here are some ideas you could try:
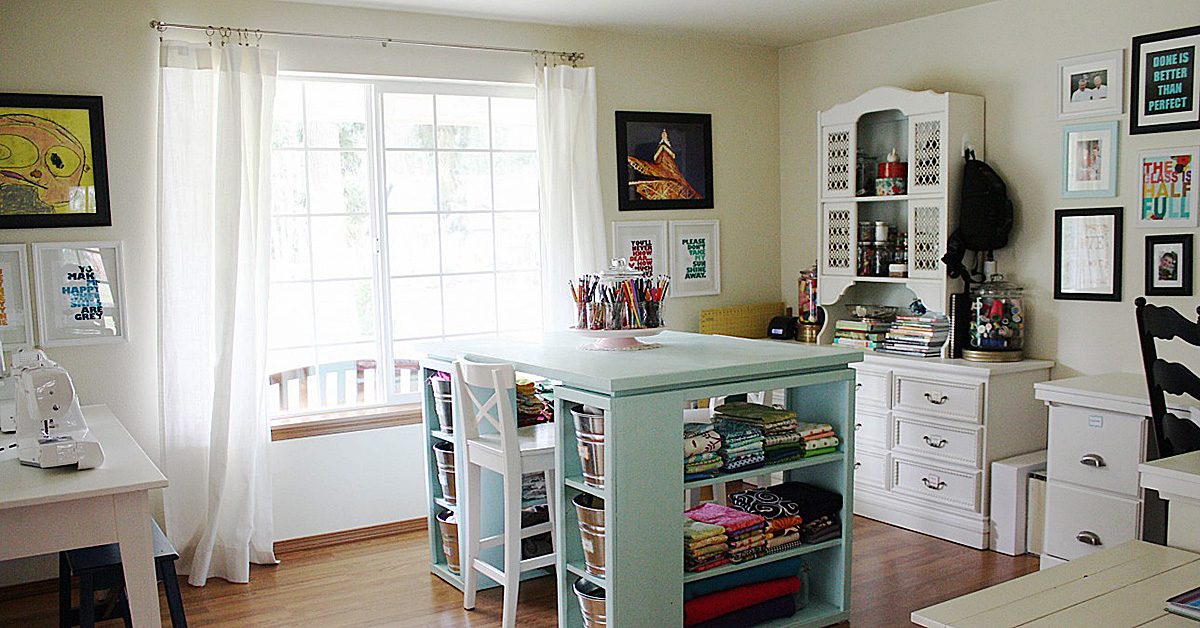
In my house, one of the best times to get some sewing done his after everyone house has gone to bed. The only problem with this is the lighting. As I’ve gotten older, I’ve found that the regular lighting in the room is not sufficient for a sewing project. Instead, I’ve come up with some ways to bring a little more light to my sewing area without taking up valuable sewing surface space.
Clip-on lights
I used to have one of these as a kid, clipped on my headboard. It was great for reading in bed at night. Now I have one clipped to my sewing desk. The head bends and swivels so I can change the angle to bring lighting to the appropriate area. Much easier than trying to do this with a flashlight between my teeth! I also have a clip-on light with a longer neck attached to the back of my chair. It comes up over my shoulder and provides lighting to the shadow areas closest to my body.
I use higher wattage bulbs to increase the total amount of light available. Personally, I prefer 120-watt (or equivalent LED) bulbs to provide light for close sewing work. Since that’s too bright for the daytime any regular lights in the room have three-way switch options. This way everyone can have the amount of light they need for whatever activity they’re doing.
I use higher wattage bulbs to increase the total amount of light available.
My daughter uses the sewing room for her own projects and does not like as much light as I do. Also, the three-way light option means that I can have less bulb lighting during the day and more natural lighting if I prefer.
I have a friend who has an overhead light with four bulbs. When she turns it on, she can choose to have either sets of two or all four bulbs lit. By placing lower wattage bulb in two of the lights and higher watt bulbs in the other two, she’s able to maximize her options.
What other ways do you work with the natural and artificial lighting in your sewing room to give you the best view?
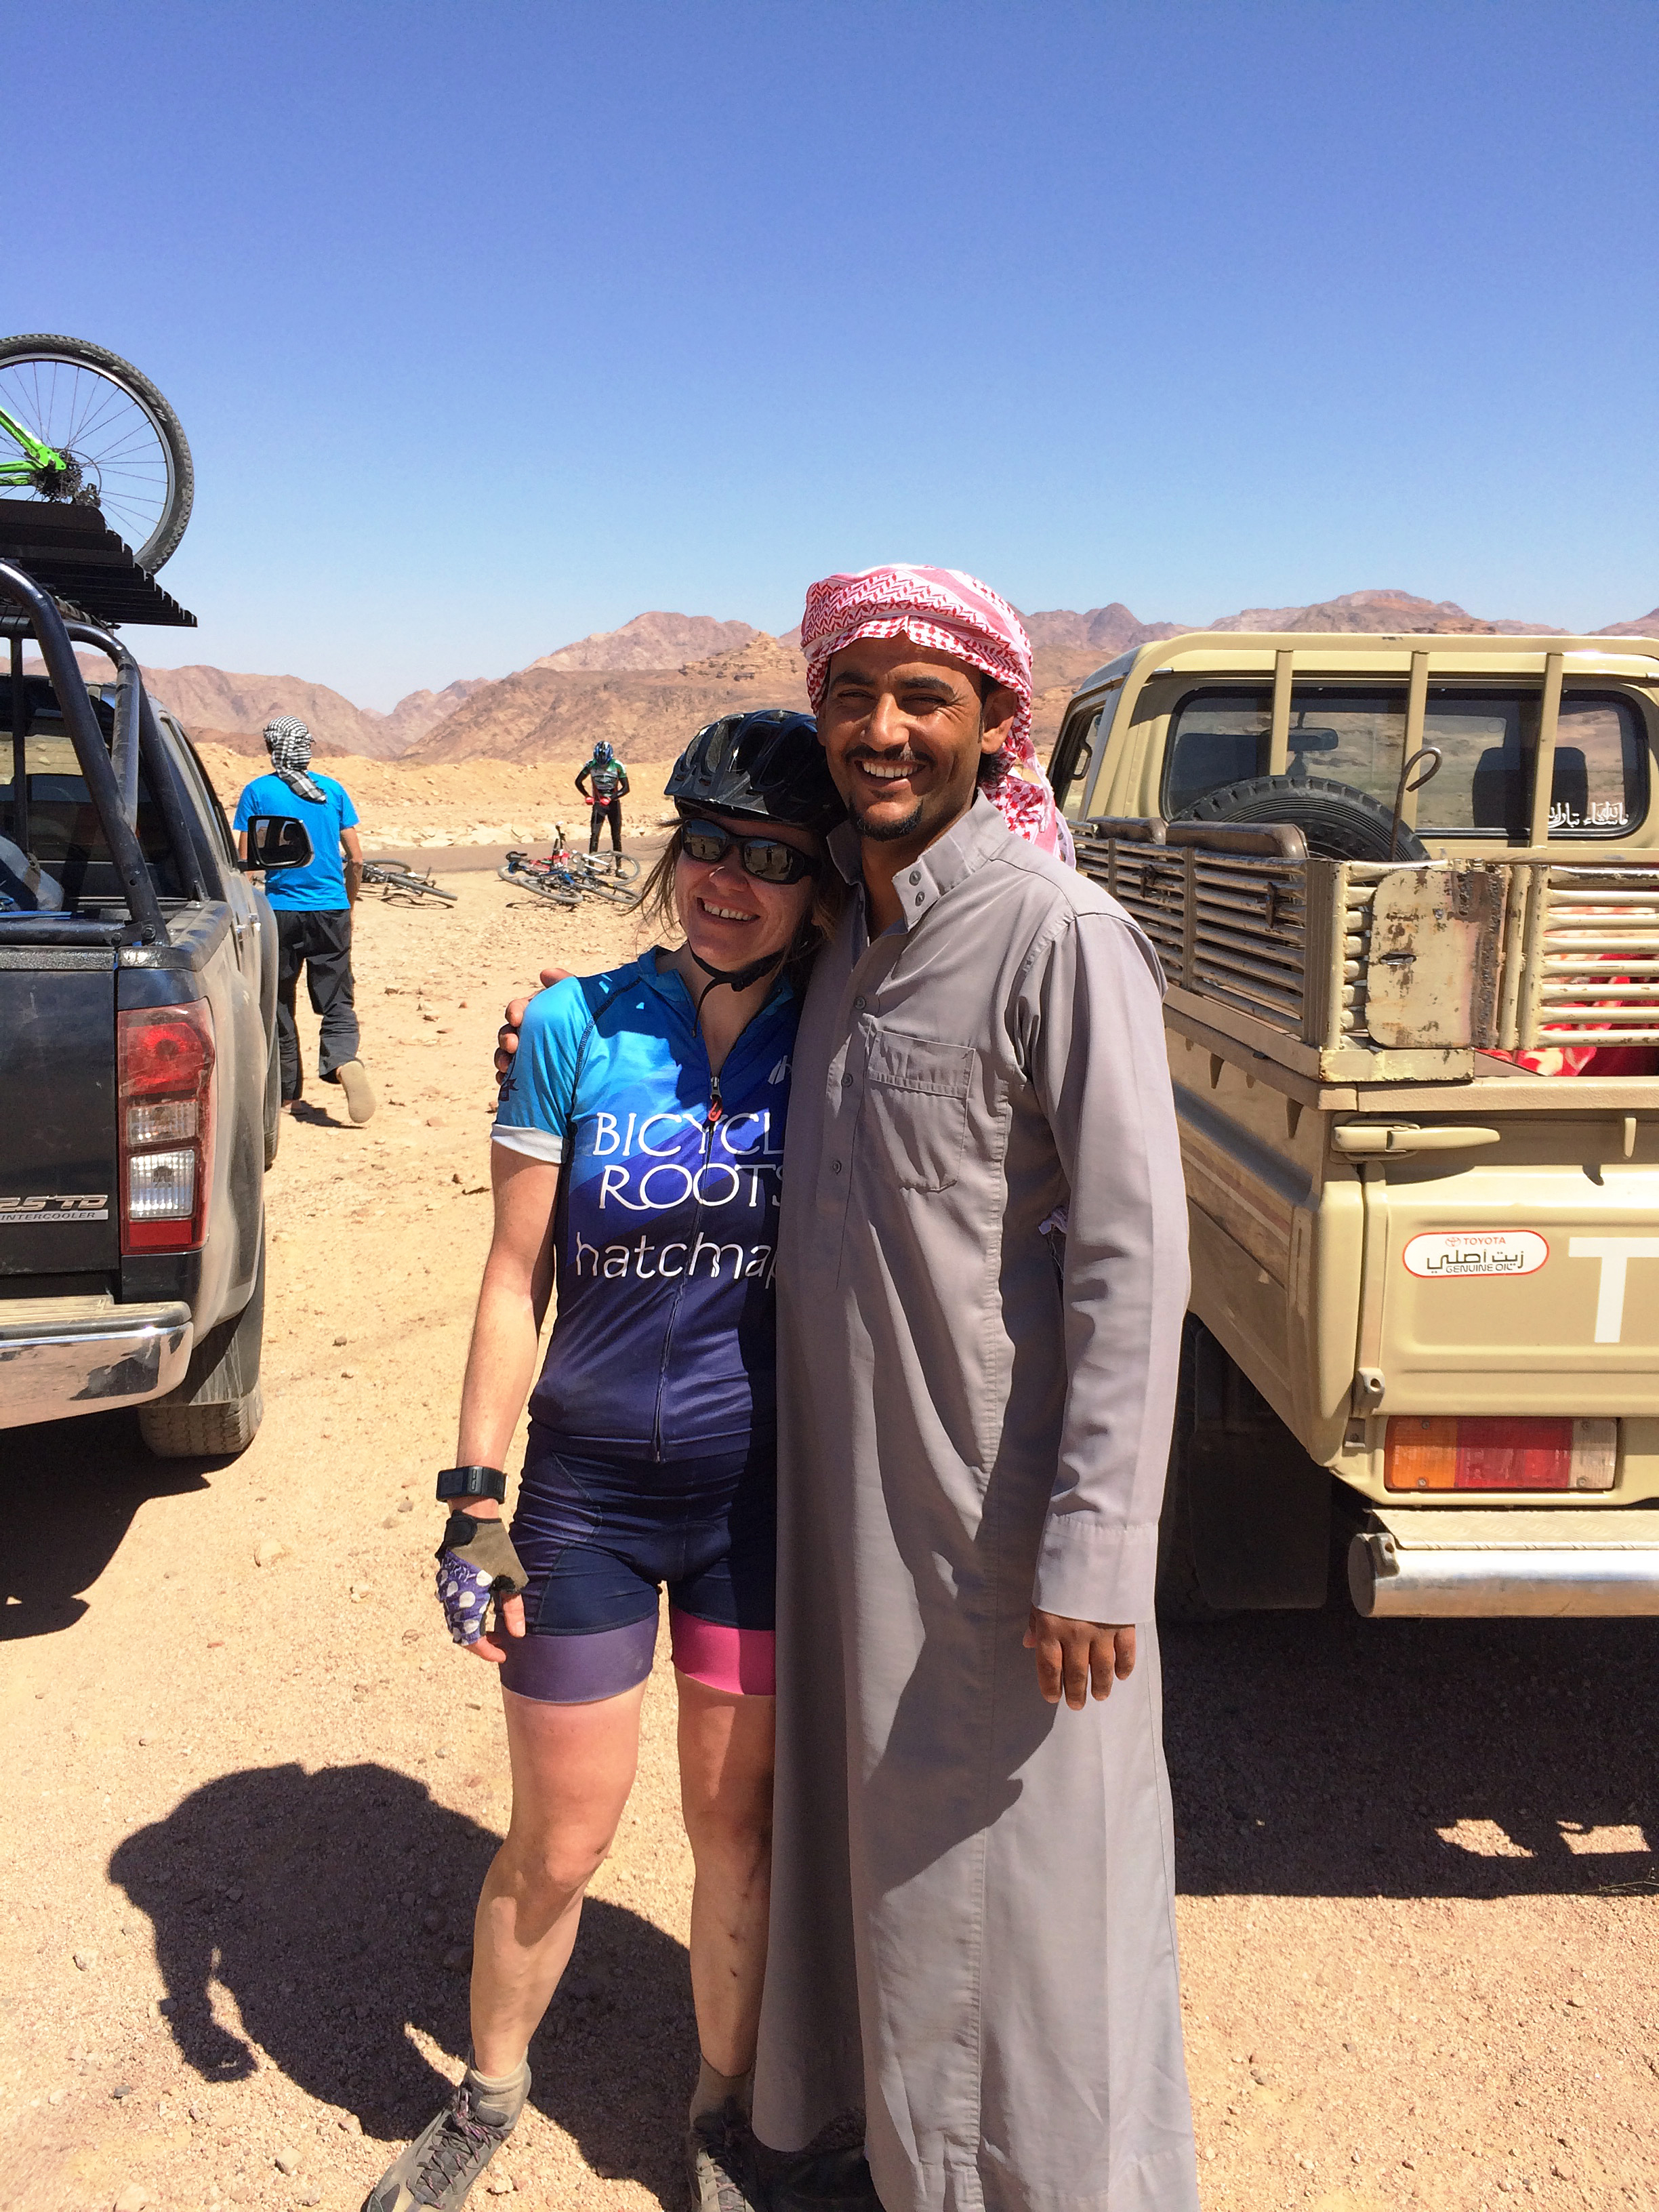
I just spent a week cycling from the Dead Sea in northern Jordan to the Red Sea in the south – spectacular views and a whole bunch of those ‘once in a lifetime’ experiences. Among other things, I spent a day wandering around The Lost City of Petra and a night in the desert in a Bedouin camp. The Bedouin are Arabic speaking nomadic people of the Middle Eastern deserts.
One of the most interesting things I noticed were the beautiful and unique fashion styling the Jordanian men displayed, especially in Petra. In the depths of that city, amongst all the rocks and caves and roman ruins, I saw where Johnny Depp’s Pirates of Penzance look was born.
Many of the young men lined their eyes with a dark substance made from the ash of a burnt tree and mixed with olive oil. As well as having a soothing humidifying affect, the mixture protects the eyes from the sun. It’s really a brilliant concoction. And it makes the lashes look especially luxurious. The camels, as well, were decked out in beautifully colored tapestries. The whole city of Petra was simply stupendous.
Desert fashion
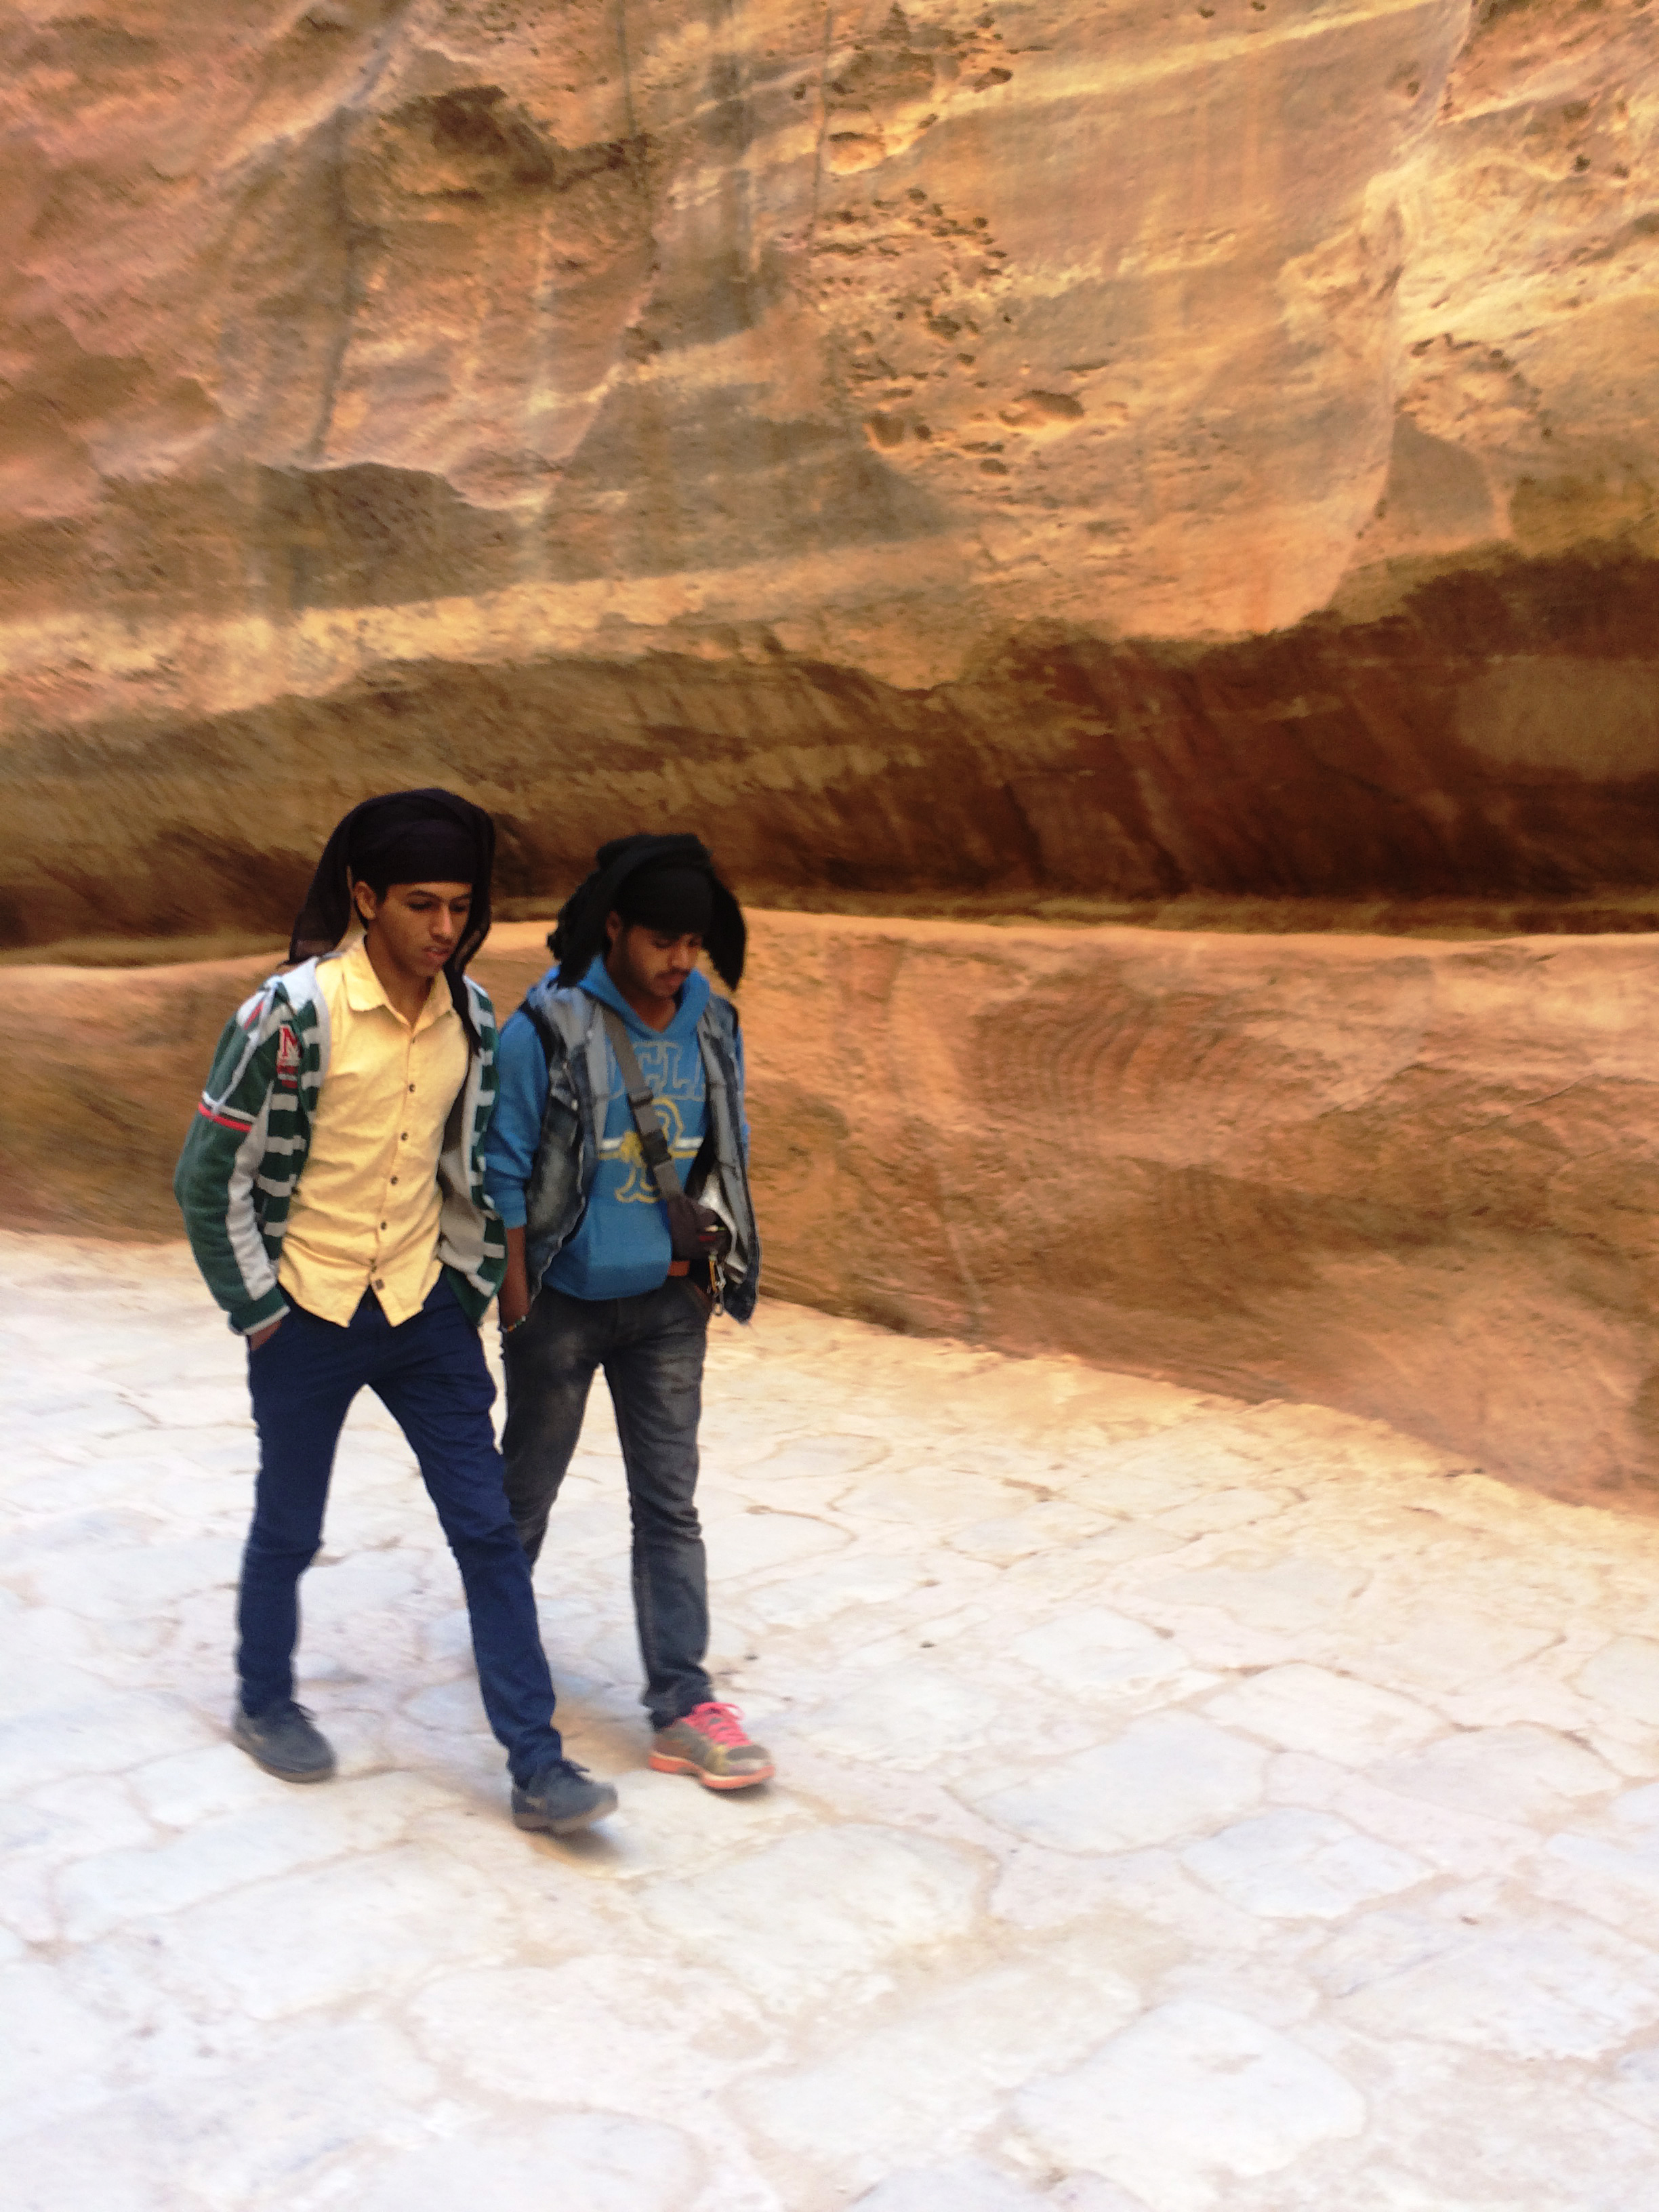
As most cultures who live in a desert climate, Jordanian’s dress in clothing that covers most of the skin. The young men were most often in skinny pants of some kind and flowing tops, sometimes in layers. But the most fascinating and beautiful component of their attire were the creative and intricate ways they wrapped their head scarves – many of them were truly works of art.
Young men in Petra.
I watched one gentlemen as he wrapped his, twisting and turning and tucking it in a series of complicated moves I couldn’t even hope to follow. When done, the scarf was piled high on his head in twists with two twirling pointed ends hanging down to his shoulders on either side. Some men implemented designs with one cascading side corner, others in the more traditional technique of shielding the back of the neck.
The scarves, or keffiyeh as they are called in the Arab world, were in various colors, though the most prevalent were the ones us westerners are used to seeing – the back and white checkered and red and white checkered varieties. This pattern is thought to have originated from an ancient Mesopotamian representation of fishing nets or ears of grain.
In Jordan, the red and white keffiyeh, also know as a shemagh mhadab, is associated with the country and its heritage. They have decorative cotton or wool tassels on the edges – the bigger the tassels, the greater the garment’s value and the status of it’s wearer.
My cycling guide, Anas, wore a black and white one that he told me was representative of his Arabic heritage. I asked him where to buy a traditional good quality authentic scarf, not one from tourist shop. He told me that downtown Amman was the place to buy them and that they would be cheaper there than in the stores catering to tourists. A scarf like his, with smaller tassels and no border, would cost anywhere from 5.00JD to 10.00JD. A fancier one with a border all around could cost up to 20.00JD. He also told me that men tied the shemagh in different ways for no other reason than how they were feeling that day. I love that.
(Just a note on currency: the Jordanian dinar is a pretty strong currency: 1.00 JD equals about 1.40USD.)
Making friends around the world
Me with a one of the Beduoin people.
I also loved the long garments worn by the Bedouin. They were most often dressed in light colored pants and a long matching light colored tunic (down to mid calf) with button closures on the front. They all looked extremely well put together. The long dress like tunic is called a thoab and is made of lightweight fabric. Under the thoab, the men normally wear a t-shirt and the long wide leg trousers called a serwal. I love how, though they all basically wear the same garments, there was still so much individual style and personality conveyed through their clothing. I think one of the most fascinating things about fashion is individual expression and how people are able to wear something in a way that allows their personality shine through.
I absolutely loved my time in Jordan. Everyone was extremely welcoming and hospital. Everywhere I went, I was greeted with, “You are welcome in Jordan.” What a truly wonderful thing.
I’m in Egypt now, writing this as I look out over the Red Sea in Dahab (I need a day of relaxing after cycling through Jordan). I know I promised to write about Egyptian textiles and the markets and I will. I’ll be in Cairo tomorrow trying out my bartering skills and will provide a full report next week.
Until then, take care and don’t forget to let your own personal style show through in whatever manner you desire.
Ma’is salama.
Hello there! I’ve been playing with something I would like to share with you.
Stitch the right sides together on all 4 sides, leaving a small space open on the last side.
Let me warn you, it is rather novel, as I haven’t seen this done before in sewing blogs or other instructions, but it works pretty well I think.
Recently, I several kinds of small baby wipes made from soft, warm flannel. Rather than 1 layer of flannel, and just a simple serger stitch, I designed them to be thicker and have no fraying edges when washed. Each square is approximately 9″ x 9″ finished as below.
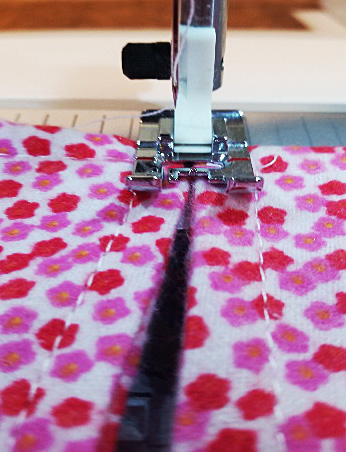
So, I used 2 pieces of the fabric, and I stitched the right sides together on all four sides, leaving a small space open on the last side to place my hand inside and pull the fabric’s right sides to the outside. What? (I heard you thinking there!)
Think of throwing a pillow case in the dryer with the inside seams showing. When dried in the dryer and smelling like Snuggle, you put your arms inside, find both far corners of the pillow case, and pull them forward to you drawing the right sides of the pillowcase to the outside or the top side. So then, I carefully ironed the edges down so I could put top-stitching about one-quarter inch from the edge of the wipe. Finished product soft, bright, cuddly wipe.
BUT WAIT! There’s more
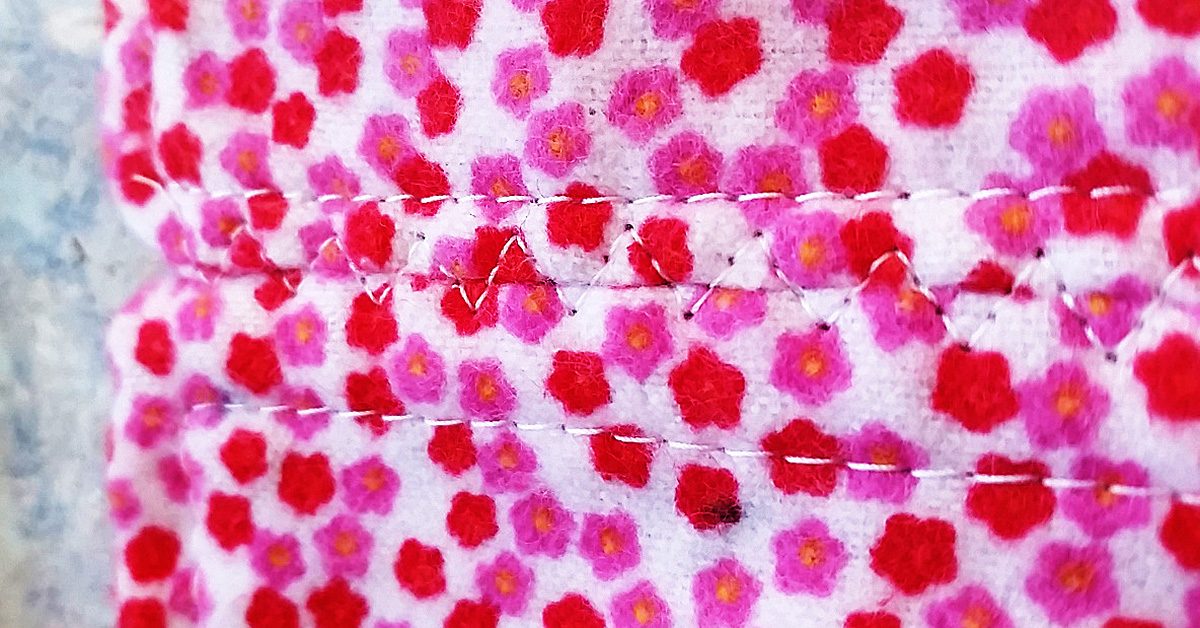
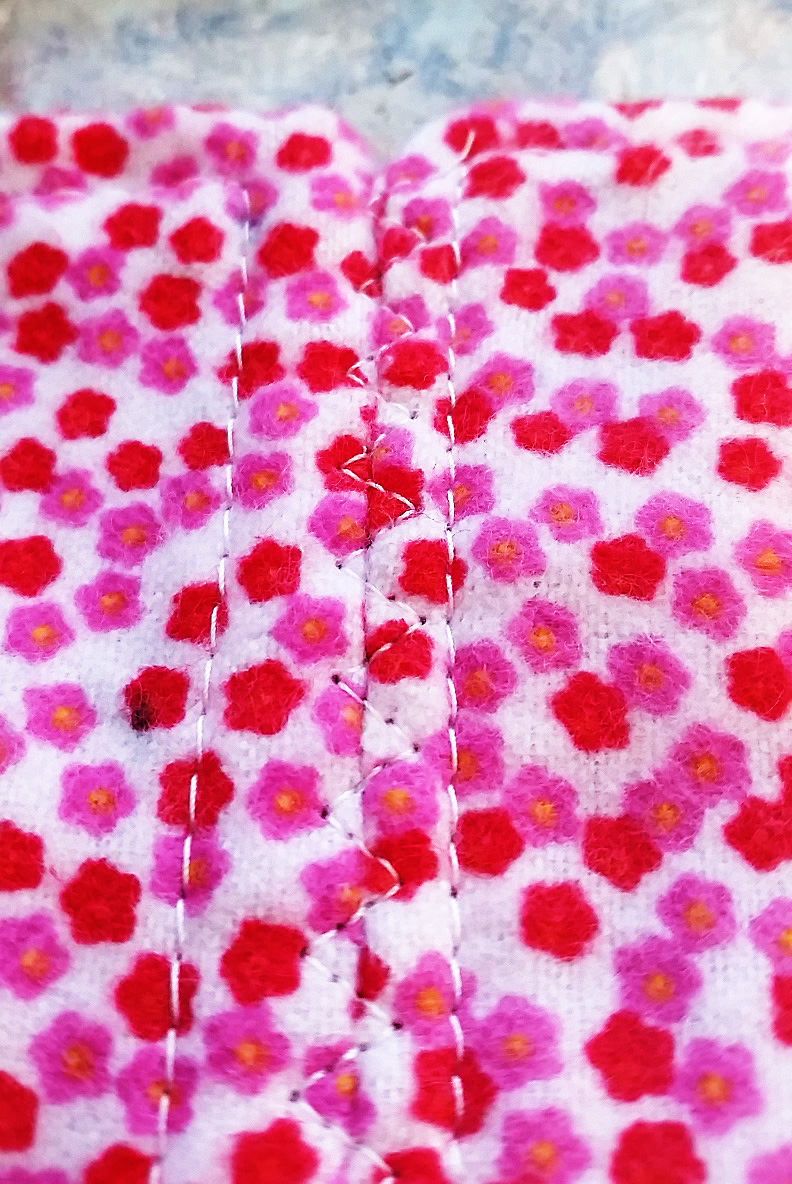
This shows how the seam was done, & it is sturdy like seam made in the traditional way.
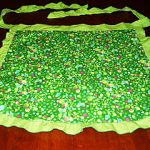
I thought why can’t I repurpose these cloths into something larger. It’s a small baby print, and with soft flannel on both sides, I brainstormed about how I can piece the two squares together without having to take the stitching apart of one side of each square to join them. That would involve doing all the squares accordingly, and would destroy my top-stitching.
This shows how the seam was done, and it is sturdy like seam made in the traditional way. This finished end to end seam reminds me of flat feld seams as used in my Pojagi pieces, although not quite. It also could be an alternate seam method for quilts without using a backing. A piece of batting could be added to each square to give a more padded feel to this alternate way of quilting, (like rag quilts but no raw edges or fringe.)
I hope you enjoyed my blog today, and I hope to see you again soon. I always welcome your experiences in sewing. After all, what would we do if we didn’t sew?
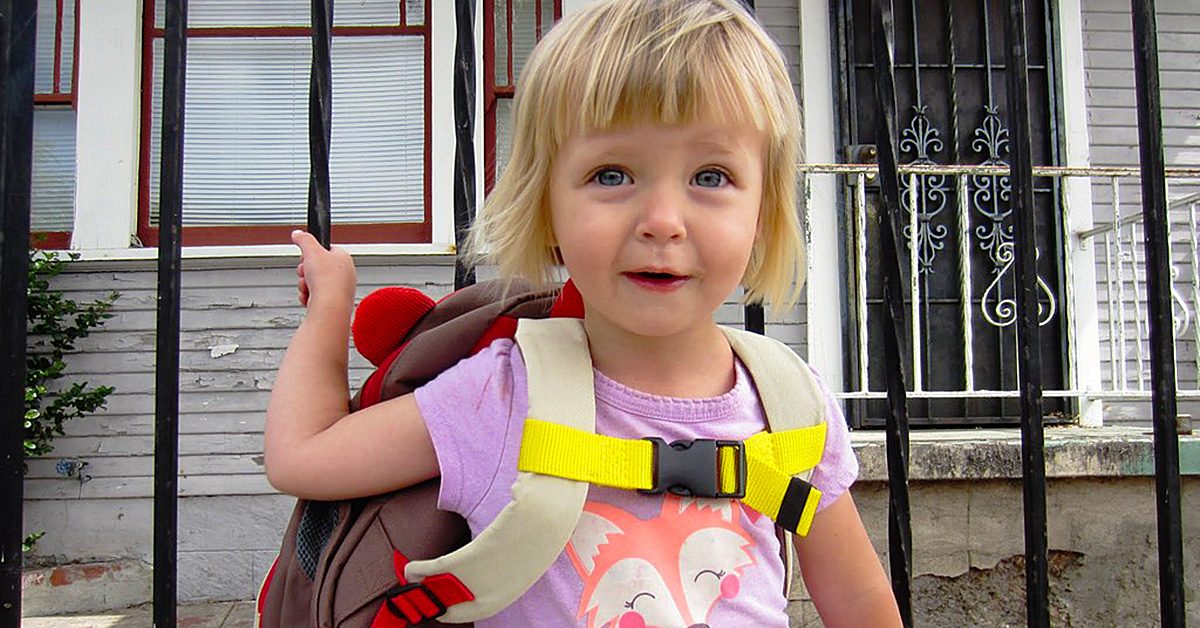
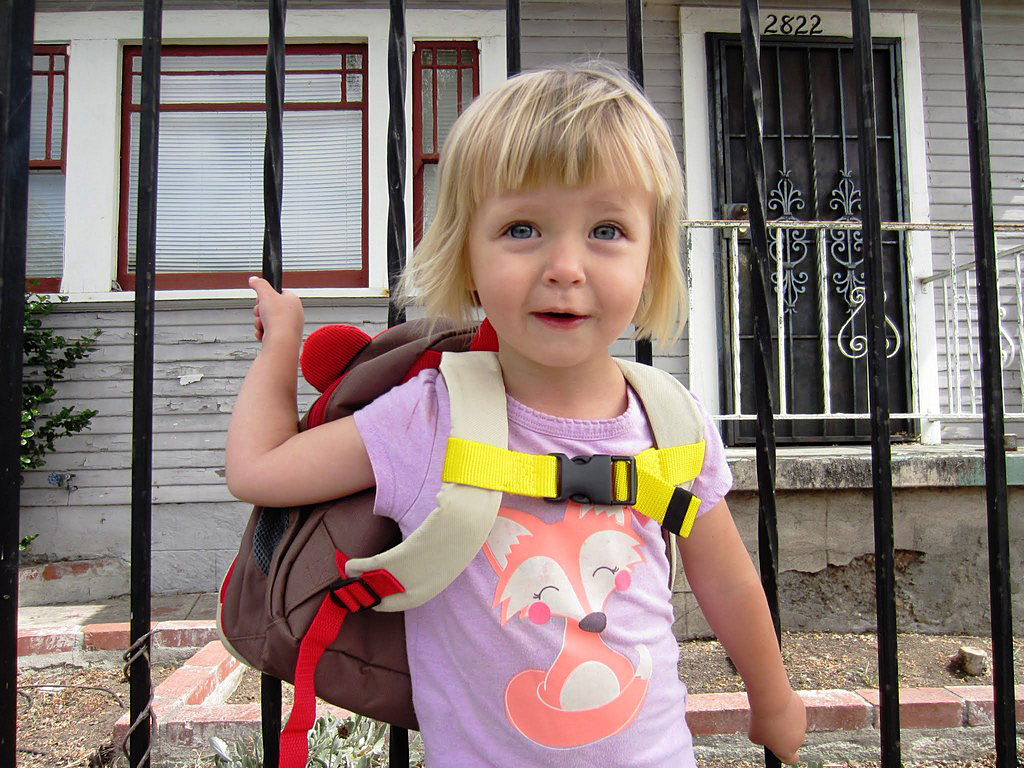
Have you seen these adorable little children’s backpacks that look like animals? They’re made by Skip Hop and retail for around $20. The only problem with them is that, like many children’s backpacks, they don’t come with a chest clip. Kids’ shoulders are tiny and their frames are narrow. This means they usually can’t keep backpack straps on when there is any weight added to their bags. For the most part I see Skip Hop backpacks slung over a parent’s shoulder, carrying the bag for their children.
Have you seen these adorable little children’s backpacks that look like animals?
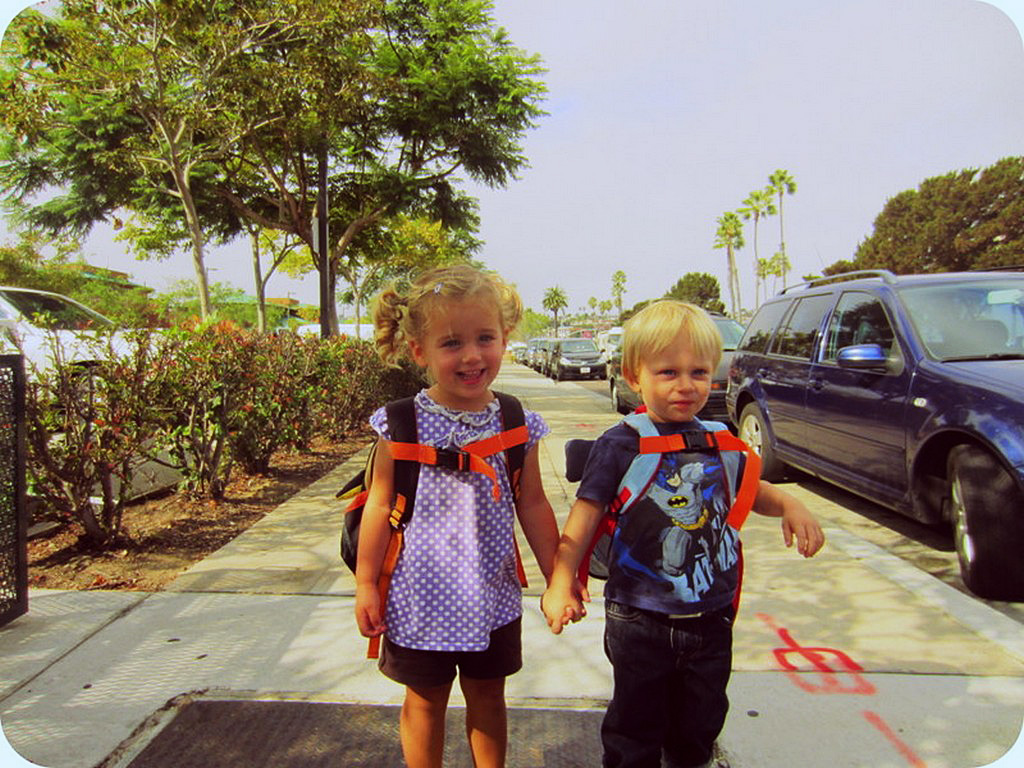
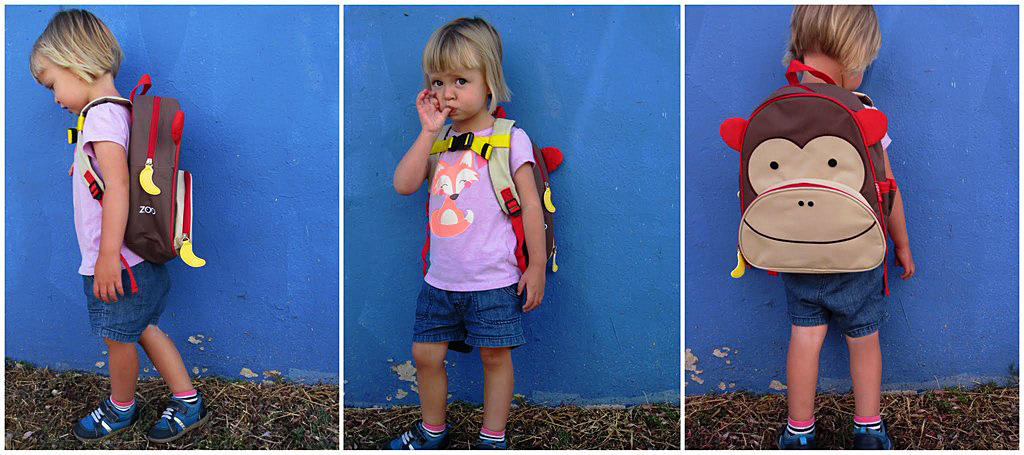
I decided to make my own chest clips for these puppies and for my friends who have the bags too. The result is a backpack that children can truly wear on their own.
A backpack that children can truly wear on their own.
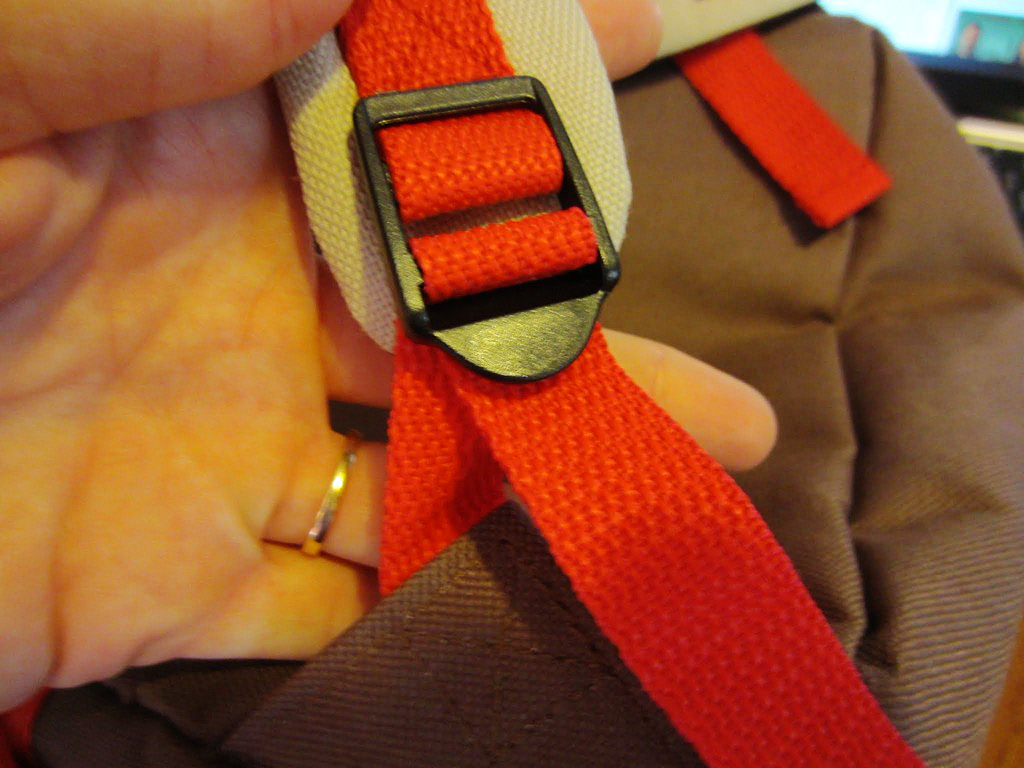
To make your own, you’ll need to unthread the backpack straps from the base of the bag.
To make your own, you’ll need to unthread the backpack straps from the base of the bag.
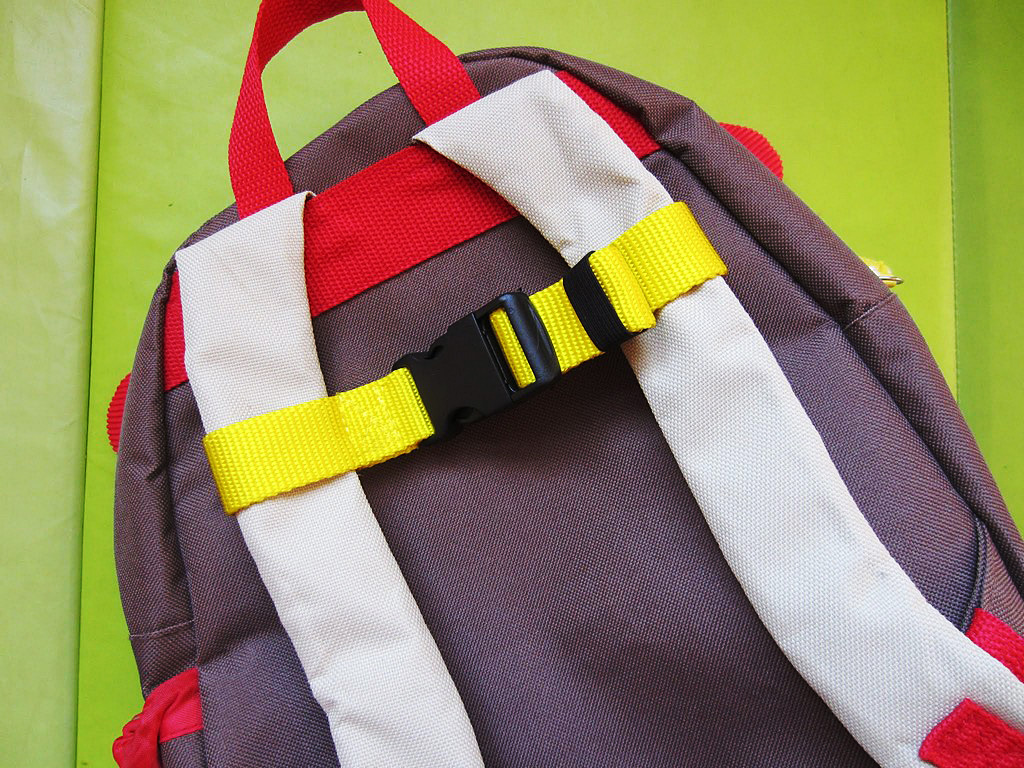
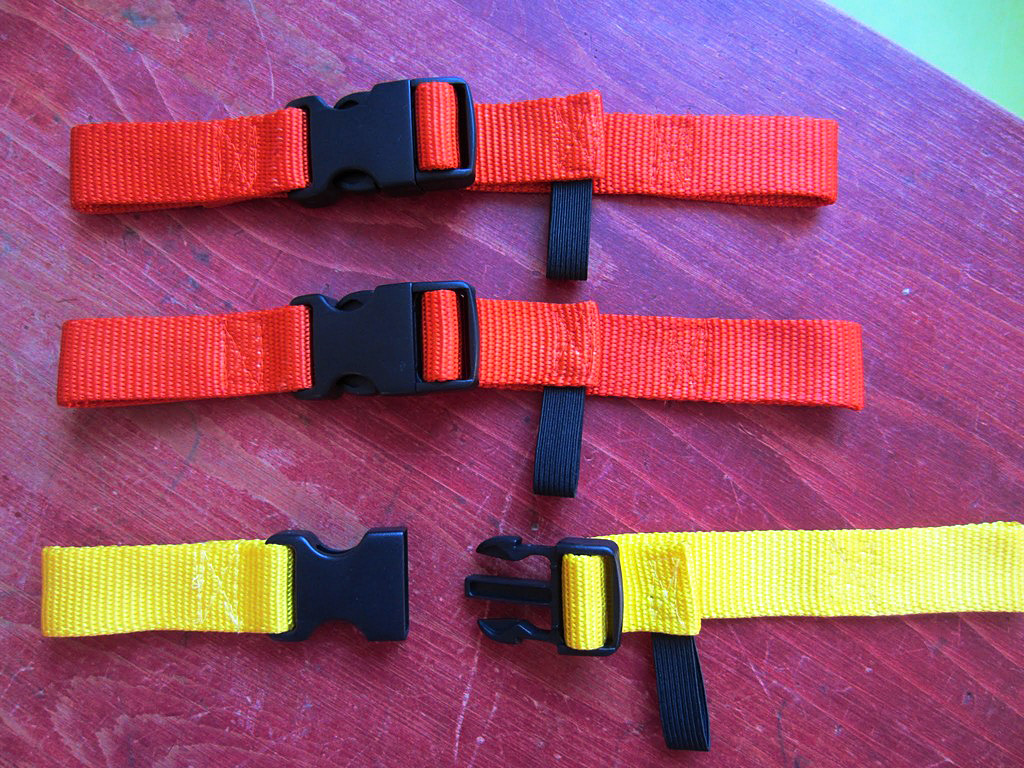
Once you’ve unthreaded the straps, you can sew a webbing piece for the right and the left strap that holds each end of your clasp. I used 1″ webbing and 1″ clasps. I got all of my supplies from StrapWorks.com.
I used 1″ webbing & 1″ clasps.
I sewed a small loop of 3/8″ black elastic on the end of the webbing so I could roll up the extra webbing and tuck it neatly into the loop. These are examples of clips I made for friends.
These are examples of clips I made for friends.
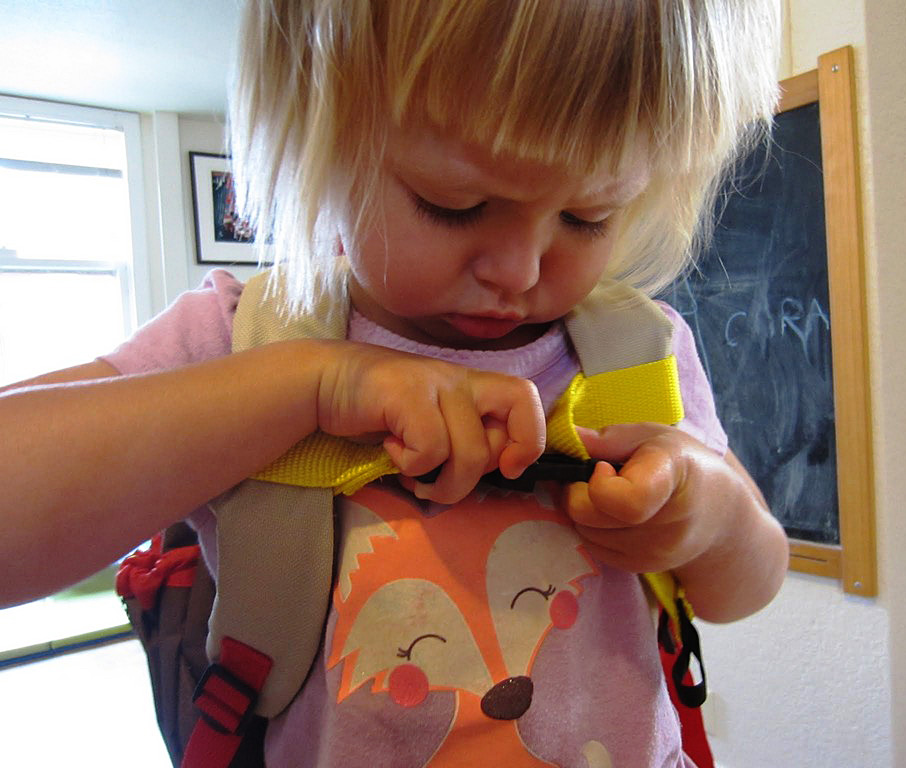
If your child is really little, they may not be able to manage the clasp on their own.
If your child is really little, they may not be able to manage the clasp on their own.
If you give them enough time to work at it though, they’ll eventually get it. It gives them a great sense of independence and freedom.
If you give them enough time to work at it though, they’ll eventually get it.
It gives them a great sense of independence & freedom.
And really, how adorable is this bag with the added chest clip?
And really, how adorable is this bag with the added chest clip?
What type of sewing hacks have you done to children’s products in your life?
What type of sewing hacks have you done to children’s products in your life?
———————————————————————————– Charlotte Kaufman is a writer and sewist in Mammoth Lakes, California. She specializes in marine and home interiors and continues to fall more and more in love with quilting. You can follow her at charlottekaufman.com.