Five Sewing Tools that will take your Sewing to the Next Level

Five Sewing Tools that will take your Sewing to the Next Level

I love the feeling of getting sewing packages in the mail, don’t you? This particular box included a new tool that I’ve been excited to try. It is part of my top five sewing tools that will take your sewing to the next level, or at the very least, make your sewing more efficient and enjoyable.

I love the feeling of getting sewing packages in the mail, don’t you?

I love the feeling of getting sewing packages in the mail, don’t you?

1. A sewing mini iron

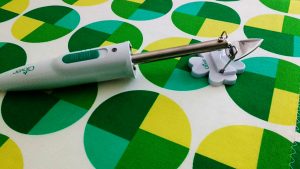
This is the Clover Mini-Iron. Isn’t it precious? I ordered it from SewingMachinesPlus.com and it is more than just an adorable accessory to your ironing board. A mini iron lets you iron hard-to-get-to seams or helps iron tiny seams on things like mini quilts.

It even comes with a little stand. Awwww.

It even comes with a little stand. Awwww.

It even comes with a little stand. Awwww.

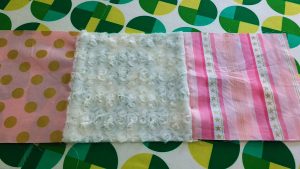
While I know I’ll have many opportunities to use this, I specifically bought it for this current project. My girls and I are working on BFF (best friends forever) quilts and the squares alternate with minky fabric.

My girls & I are working on BFF quilts with alternating minky blocks.

My girls & I are working on BFF quilts with alternating minky blocks.

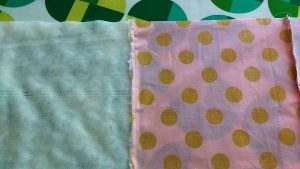
Using a regular iron to iron over the seams would be a challenge. Hot irons can melt or destroy minky fabric. (For more on how to sew with minky, check out my post here).

Here I folded the cotton fabric seam over the minky fabric and then placed a scrap of fabric over both. Then I ironed the seam down.

That’s what I’m talking about! This mini-iron is worth its weight in gold.

This mini-iron is worth its weight in gold.

This mini-iron is worth its weight in gold.

For fans of mini-quilts, or anyone who wants to iron their seams open, the mini-iron makes short work of it.
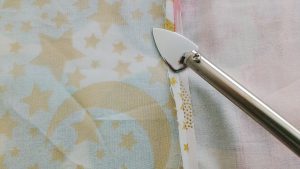
For fans of mini-quilts, or anyone who wants to iron their seams open, the mini-iron makes short work of it.

For fans of mini-quilts, or anyone who wants to iron their seams open, the mini-iron makes short work of it.

2. A rotating (rotary) cutting mat

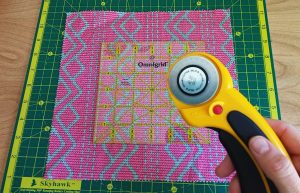
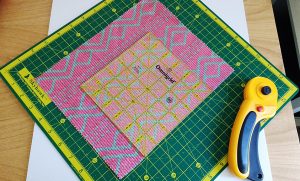
Yep, you heard me correctly. This is a cutting board that rotates on its base. If you’ve ever had a pile of HSTs (half-square triangles) or any other type of project that involved a lot of trimming, you will never look back from making this purchase. SewingMachinesPlus.com sells several different sizes.

This is a cutting board that rotates on its base.

This is a cutting board that rotates on its base.

Here you can see I’ve cut one side of the fabric square. Prior to owning a rotary mat I would have had to move my body or the fabric and the ruler to make the subsequent cuts.

Here you can see I’ve cut one side of the fabric square.

Here you can see I’ve cut one side of the fabric square.

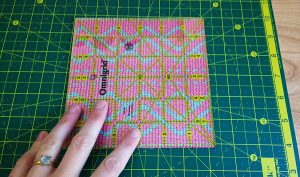
Not anymore. Look how it spins!! The base stays put while the cutting board goes for a walk.

The base stays put while the cutting board goes for a walk.

The base stays put while the cutting board goes for a walk.

Here is my square fully cut. It’s a thing of beauty, no?

Here is my square fully cut.

Here is my square fully cut.

3. Rulers and grids

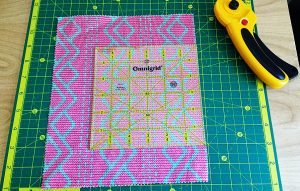
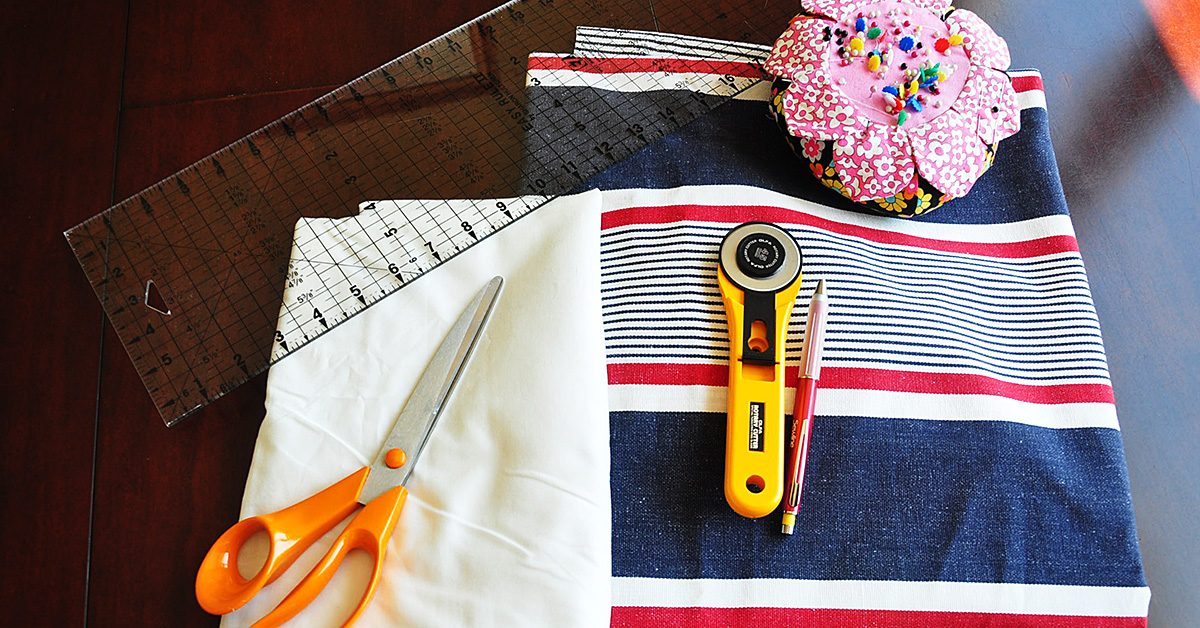
This is my assortment of rulers and grids. There is nothing like having the right tools for the job. The two square grids were purchases for projects whose final size HSTs needed to be trimmed exactly to the size of the grid.

The large grid on the bottom is 24” long and my primary ruler for measuring and cutting out my fabric. The 2” ruler is my workhorse, everyday ruler.

Lastly, I had to include a classic measuring tape. I have about seven floating around the house and in my backpack and car. You never know when you might need to measure something!

The small, black and silver ruler below the measuring tape is a seam gauge. It helps you mark precise seams at a variety of lengths.

SewingMachinesPlus.com has a wide assortment of rulers and grids: https://www.sewingmachinesplus.com/searchresults.php?search_field=omnigrid

SewingMachinesPlus.com has a wide assortment of rulers & grids.

SewingMachinesPlus.com has a wide assortment of rulers & grids.

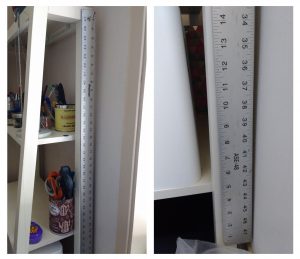
I also have this heavy, metal, 48” ruler that I use for canvas and large home interior projects, or when cutting very large lengths of fabric.

I also have this heavy, metal, 48” ruler.

I also have this heavy, metal, 48” ruler.

4. A walking foot

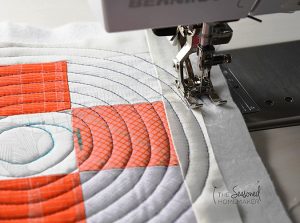
I mention my walking foot a lot in my posts here and that’s because I use it a lot. In fact as a rule, I have it installed as my go-to sewing foot and only switch out to other feet as needed. Your machine probably came with one and you tucked it away not knowing what the strange, Star Wars-like contraption was.

Get it out of the box and learn to use it! If you quilt or work with thicker fabric, your walking foot will be your best friend.

Get it out of the box & learn to use it!

Get it out of the box & learn to use it!

If your machine didn’t come with one, I guarantee the maker of your machine sells one as an accessory. Check out all the options available on SewingMachinesPlus.com here.

Image via The Seasoned Homemaker.

Image via The Seasoned Homemaker.

5. A bias tape maker

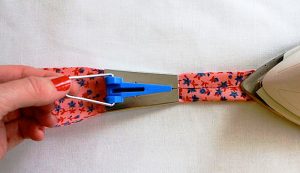
There will come a point in your sewing career when the pre-made bias tape available in stores and online just doesn’t meet your needs. When you get to that point, grab a bias tape maker, in fact, grab a few (they make different sizes of tape). With one of these humble tools you can make both single and double-fold bias tape and the sky is pretty much the limit as far as your creativity goes.

When you get to that point, grab a bias tape maker, in fact, grab a few (they make different sizes of tape).

When you get to that point, grab a bias tape maker, in fact, grab a few (they make different sizes of tape).

You can make coordinating, contrasting, or complimenting colors of bias tape to match your projects and the process is extremely quick. It won’t be as fast as using premade, but I promise it will be worth it.

Image via Made Everyday with Dana.

Image via Made Everyday with Dana.

Do you use any of these tools already in your sewing projects? What other tools would you add to a list like this? Let us know in comments!

———————————————————————————–
Charlotte Kaufman is a writer and sewist in Mammoth Lakes, California. She specializes in marine and home interiors and continues to fall more and more in love with quilting. You can follow her at charlottekaufman.com.
Sewing Project Kits: Weighing the Pros and Cons

Sewing Project Kits: Weighing the Pros and Cons

Like many things in life, sewing has a series of ways it can be done that could be different for each individual person. Once upon a time, I covered one of those details in my post about how to press your seams, and there are plenty of other ways that preference can sway the way a person sews.

Weighing the pros & cons of sewing project kits.

Weighing the pros & cons of sewing project kits.

This week, I found myself considering one of those preference details, and that involves pre-assembled kits for sewing projects. Some people might love these kits for their sewing craftiness, and others might feel that the kits come with more negative details than positive. So, as you might’ve guessed, this is the subject for today’s post: Weighing the pros and cons of sewing project kits.

Pros:

If you choose the right kit, you can have the fabric & pattern that you need to create an impressive project at your fingertips just by making this one purchase.

If you choose the right kit, you can have the fabric & pattern that you need to create an impressive project at your fingertips just by making this one purchase.

If you choose the right kit, you can have the fabric and pattern that you need to create an impressive project at your fingertips just by making this one purchase. That’s most of the project-specific details in one package, minus things like thread and general sewing requirements. All in all, these are really convenient in that regard!

You can see an example of your finished project goal before you start. In fact, you can browse project kits until you find one you feel is perfect for your taste and purpose, and you’ll have the fabric to replicate the picture without having to piece together the appearance for yourself. I can’t tell you the number of times I’ve seen a project online that I wanted to be able to create, but something as simple as not knowing or being able to find the right fabric can lead to a very different final product. The idea that a pre-assembled kit can cut out that possibility is worth thinking over.

Some of these project kits can be fairly cheap. I’ve found some online for around or under $20—which isn’t that pricey if they come with fabric. Other options can be pricier, but if you stick within your budget, you could find a project kit that doesn’t break your bank account. Even if they are pricier, it’s worth considering how much buying the individual pieces for the projects would be without the kits since the prices might still be reasonable under that kind of inspection.

Cons:

These kits can lessen your input in projects.

These kits can lessen your input in projects.

These kits can lessen your input in projects. While providing the fabric can be a pro, as I said before, it’s also a potential con if you want a project that’s more yours than the sewing kit allows. Maybe you want a gym bag like the kit shows, but you’d rather have star-print fabric than what was provided. If that’s the case, then you’d probably do better searching for a free or cheap pattern and buying your own fabric. In that scenario, even $20 could be a bit much to pay.

The process could be so specific that it doesn’t really challenge an advanced sewing enthusiast. I find the same notion to be true in regard to pre-cut blocks of fabric. If too much work is done for you, you might not be pushing yourself to grow in your craft. Like with a number of other details in life, you have to give yourself space to grow if you want to improve. If everything is given to you pre-ready for assembling, you’re cheating yourself out of bettering your own preparation skills.

Costly regrets

If you have the wrong fabric, after all, you can’t necessarily create the project you intended.

If you have the wrong fabric, after all, you can’t necessarily create the project you intended.

I’ve seen at least one review of a project kit where someone complained that the sent fabric didn’t match up perfectly to what was on the project kit image. I can’t say for sure if this is the case, and even it is, all kits wouldn’t automatically come with the same flaw. Still, it’s worth noting that at times, this could be an issue that makes the kit less impressive than expected. If you have the wrong fabric, after all, you can’t necessarily create the project you intended. Additionally, if the fabric you do receive is so against your taste that you have to replace it, then we’re back to point #1 on the cons list because removing the fabric from the kit lowers its value to where the price could be too much. Who wants to pay for a kit that’s supposed to include fabric, then have to buy extra fabric? Not me!

Given though that con #3 is based on a review that I can’t prove or disprove, I still feel like trying one of these project kits could be worth the money for a person who’s new to sewing, or at least new to sewing a specific product. I’d love to try to sew a purse, for instance, but it’s something I’ve never done. Using a kit could ease me through my first purse and help me get some familiarity with the process before I step into the world of purse-sewing more on my own.

So, I guess my thoughts now are that these sewing kits can be great for beginners, but those with more sewing experience might find them too simple and dictated to fully embrace.

Would you agree or disagree with those assessments? Are you pro-project kit? Let me know in a comment!

Brother SE1800 Sewing & Embroidery Machine Review

Brother SE1800 Sewing & Embroidery Machine Review

Brother SE1800 Sewing & Embroidery Machine Review

If you looked at my sewing room right now, you would think I was my own little sewing shop. Seriously. There are seven machines strewn out right now. Some of them have their own little stack of projects just waiting for attention, and some are lined up against a wall waiting for projects.

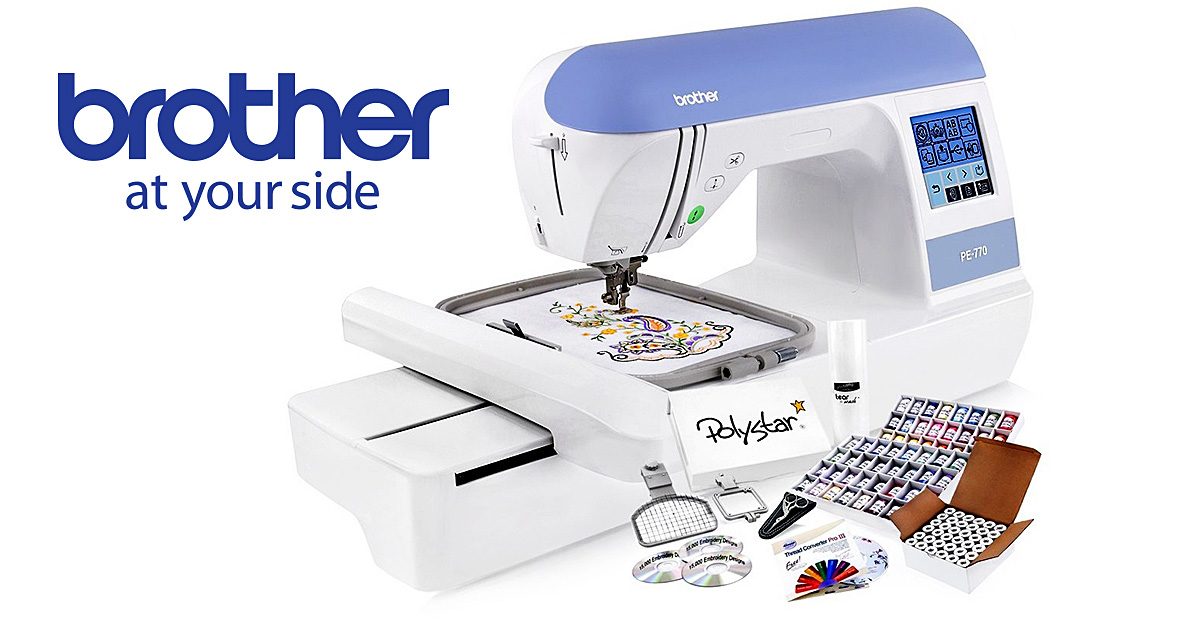
This year, I added the Brother SE1800 Embroidery And Sewing Machine to my collection. I received this machine from Sewing Machines Plus in exchange for my honest review. All opinions are my own.

First impressions

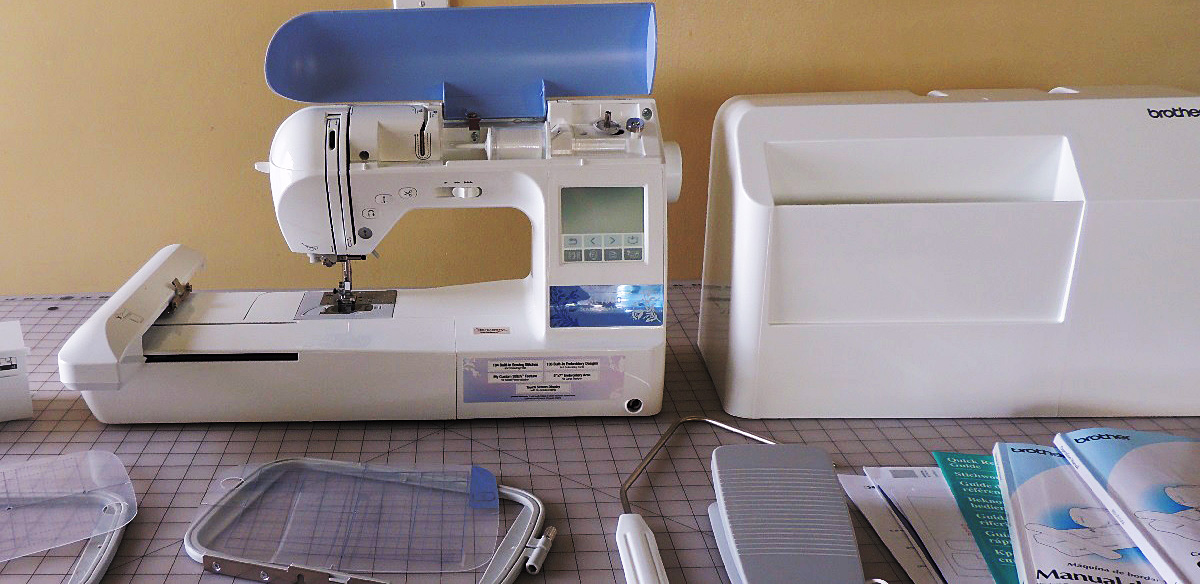
I was very pregnant when this box arrived at my doorstep — about three days after completing my “order.” So, needless to say, I thought this 39 pound box was quite heavy. Lest you think the machine itself is super heavy, you should know that there are a lot of extras included with this 22 pound machine.

I was very impressed with how quickly this machine was delivered to my front porch, and how carefully packaged it was.

After I got my machine out of the box and set up, my first impression of the Brother SE1800 was how quiet it was. In both the embroidery and the sewing modes, this is a very quiet machine.

Putting the Brother SE1800 through the tests

I wanted to put this machine through as many tests as I could, so I began by reading the owner’s manual from front to back (which I highly suggest any new owner do). I then made a list of projects I could make. My goal was to try out as many of my new machines features as I could — which was a lot.

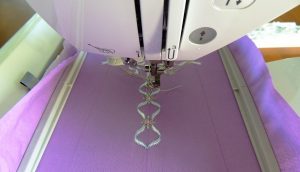
Embroidery patterns are easily downloaded to a USB, which then plugs directly into the left-hand side of the machine.

Embroidery patterns are easily downloaded to a USB, which then plugs directly into the left-hand side of the machine.

I initially set up my favorite sewing machine next to this one and planned to use the two machines together to make projects faster and smoother. However, I found myself using this combination machine for both the sewing and the embroidery parts of my sewing stack.

Switching back and forth between tasks was as easy as turning the machine off and switching the flat bed with the embroidery unit. After turning the machine back on, the display automatically switches to the proper mode.

I used this machine for basic sewing, heirloom sewing, basic smocking, embroidery and appliqué. It also has darning features I have yet to use.

The pro’s

I could go on and on telling you all the features this machine offers, but that would be boring and you can see all those details here for yourself. I will get straight to the exciting part — my favorite features.

My favorite type of machine sewing is heirloom sewing. This machine made pulling strings and sewing lace together smooth and quiet — it has been a very peaceful experience.

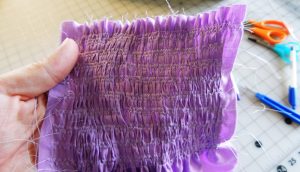
Secondly, I also enjoy smocking. Until receiving this machine I had previously only done this with a smocking machine and hand stitching. Although there is definitely a learning curve with this machine, I have thoroughly enjoyed learning a new trick to a timeless technique.

The appliqué process/instructions are different from how I normally do appliqué, but once again I enjoy learning a different technique.

I have, since receiving this machine, had a new baby. The Brother SE1800 has become one of the main machines I use now because of how quiet it is. Although this machine doesn’t replace a heavy duty machine or serger, because it’s a combination machine, it’s done every other project I’ve needed to do.

If you have never had an embroidery machine before, then I highly suggest getting one with a USB port, as this one has, so that data transfer cords are not needed when embroidering — unless you like to be attached to a computer for that part.

The con’s

If there is one thing I would change about this machine, it would be that the owner’s manual would have pictures of the included embroidery programs. The screen showed a picture of the embroidery and appliqué designs, but I wasn’t sure what the exact picture would look like until I did a test run for each one. Although it’s not that big of a deal, I did have to use extra thread and material to do a test run of each one to see it before I placed it on my desired garment.

While I'm unable to add beads & change colors smocking on the machine, I was able to save at least a day working on these side panels.

While I’m unable to add beads & change colors smocking on the machine, I was able to save at least a day working on these side panels.

Is is worth the price?

Would I have purchased this particular machine myself? Yes, I would have. Although I probably would not have paid the full amount of this machine, Sewing Machines Plus very often has sales going on, and that’s when I would have made a purchase.

Another thing that sweetens the deal is all the extras that they put in with this machine. I was able to get started trying out different features right away with all the tools and extras that came as part of this package (which you can check out here).

Overall impression

This machine is one of the three machines I have out on my sewing table right now, along with a heavy duty machine and a serger.  I’m sure that is where it will stay for quite awhile.  Though I will use the other four here and there, this combination machine really replaced them all in so many ways.

To read more details and see what I was able to do with my machine while I was running through its features, read this. If you have more questions after you have read this, please feel free to ask.


Deborah Olsen writes for gracegardenandhomestead.com from her farm & homestead deep in the heart of the Rocky Mountains.
Save on Sewing Machines This Spring

Save on Sewing Machines This Spring

March Madness – It’s Not Just for Basketball Fans

I still sew on my mom’s old Singer. It’s got its quirks and issues, but I feel close to her when I use it. Each stitch reminds me of childhood memories sewing with my mother. Like the time she came into my nursery school class and made bean bags with all of us. Or the first time she showed me how to use a pattern to make my own clothes. As much as I wouldn’t trade these memories, having a new sewing machine is appealing.

A new sewing machine has features mine doesn’t. And a new sewing machine would, in some ways, be easier to use. There have been improvements in mechanisms and needle motion since my mom’s Singer was manufactured. I’m not ready to trade up from that old Singer, but you might be. If that’s the case, Spring is the perfect time to buy from Sewing Machines Plus!

Spring Sale on Sewing Machines

As nature comes back to life and renews itself, you can renew your passion for sewing with up to $400 off sewing machines and furniture. Even with that great discount, sewing machines can take a big bite out of your budget. To help out with that, you can combine the $400 off with 0% APR financing! Check out all the items included in the Spring Sales Event from Sewing Machines Plus, including furniture, right here.

SewingMachinesPlus.com Spring Sale - shop now!

SewingMachinesPlus.com Spring Sale – shop now!

Other Spring Sales Benefits

Every purchase you make on Sewing Machines Plus that’s over $49 comes with free shipping! In most cases, purchases ship the same day and are delivered in two to five business days. Don’t miss out on your chance to save big on that new sewing machine! Whether you’re looking for a long-arm quilter, an embroidery machine, a serger/overlock machine, or a simpler sewing machine, you’ll find something amazing at the Spring Sales Event.

What sewing machine or furniture will you save on this spring?

Magic Makers and Dreamers of Dreams

Magic Makers and Dreamers of Dreams

As the tailor in the costume department on a major network television show, I often am asked to do minor sewing repairs/favors for people in other departments. I mostly don’t mind, especially if the person who is actually in need of the favor comes to ask me in person. It’s usually small things like sewing on a button or repairing a seam that has split open. If I’m not too busy and the repair will take five to ten minutes, I’ll often go ahead and do it while they wait.

If the favor-seeker is a woman, they inevitably say something like, “I always wanted to learn how to sew,” or “My mom tried to teach me but I was never interested,” or “I wish I knew how to sew.”

You’re never too old to learn

I always want to ask why they didn’t, or why don’t they now and then. Sometimes, if I think about it too much, I become a bit sad as, once again, I realize that sewing really kind of is a dying art. Along with shop and industrial arts classes, sewing certainly isn’t taught anymore in most school systems. Many people view ‘maker’ type skills as not as prestigious or “smart” as careers in finance or marketing. There’s quite a bit of research on the subject and, also, apparently a “Maker Movement”. It seems maybe people are starting to realize how important and necessary building and making skills are and how much the world really does still need true craftspeople.

I’m fascinated by anyone who has practiced and honed their skills to the point of being able to create something beautiful and functional with just their hands. When it comes to making things out of fabric or wood or metal or whatever, the true magic is in watching the thing emerge from beneath your fingers.

The importance of guidance

Jorge, who was the man who taught me how to drape, always used to say, “Just cut away all the parts that aren’t a 1930s dress,” (or whatever it was I was endeavoring to make). I suppose it’s true that not everyone has the ability to see a 1930s dress in a pile of fabric: that’s what makes some drapers and pattern makers artists. But if you do have that ability, or the ability to see a three-dimensional object and know what it would look like as a two-dimensional pattern than you owe to yourself to develop that gift. Because it’s a rare thing indeed. Or if you know a young person who has expressed interest in sewing and making things, teach them and encourage them.

Sewing and patternmaking are incredible skills to have and you can make a very lucrative career out of them. When I met Christy Rilling years ago, she was working out of her tiny East Village apartment. Now, she has a full studio and a roster of talented tailors working for her. And she tailors Michelle Obama’s clothing.

Use your hands and make something

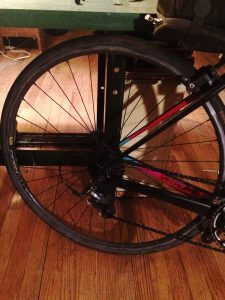
I ride my bike everywhere in the city, over all sorts of potholes and debris.

I ride my bike everywhere in the city, over all sorts of potholes and debris.

I wish more young people were interested in pursuing careers in things like furniture building, masonry, tailoring, and clock & watch repair though I do think that our schools systems are partially to blame for the lack of “interest”. The world is always in need of beautiful & unique things and the individuals who can make them. By beauty, I mean anything that is lovingly & expertly crafted – from a simple wood chair to an intricate mechanical pocket watch, to a bias cut dress that hugs the body it was made for just right to a hand built bicycle wheel.

Have you ever watched someone build a bicycle wheel? It’s kind of amazing. I recently had one built for my bike. When the wheel was done and on my bike, I was struck suddenly by the immense importance of that wheel to be well built. I mean, I ride my bike everywhere in the city, over all sorts of potholes and debris and I trust, completely without thinking, that that wheel will do its intended job and not suddenly crumple under the pressure. That’s a big trust when you really think about it.

I will say here that I do have a locally owned bike shop https://www.bicycleroots.com I always go to and my friend, who owns the shop, is the only one I’d trust to build me a wheel. Which brings me to my next point.

The most valuable commodity: People

Relationships and trust are key when it comes to building a business around your skill, sewing or otherwise. When it comes to sewing and patternmaking, your goal is most always to make a person look their very best. If you do that, they will come to realize the value in having something made or altered just for them and they’ll come back and they’ll also send their friends.

So encourage some aspiring maker today if you can and tell them it’s an extremely wonderful thing if they think they might want to do this making thing for a living someday. Because there’s always room for more magic makers in this world.

Make More Time to Sew, Part Two

Make More Time to Sew, Part Two

Here are more tips to make more time to sew

Here are more tips to make more time to sew.
Hi! I hope you found part one of this series helpful for making more time to sew. I saved my favorite productivity hacks for this week. Here are new ideas for how to make more time to sew; hopefully these will help you, too.

Automate systems

If you can’t get someone else to go for your groceries, could you streamline and automate your system by meal planning and ordering the groceries online, for example, rather than wandering grocery store aisles with your cart?

An easy system for meal planning definitely helps me to make more time.

Another example: some people do laundry on a certain day of the week, but I can’t imagine that. I do laundry every day, automatically. Or I did, anyway; I battled laundry and gave up significant amounts of time to taking care of laundry with love for my family.

Finally, I managed to eliminate laundry backups and piles by doing a load or two — through to completion of putting them away, without exception — every day.

And my work on getting this system into an automated rhythm paid off for me even further. My husband surprised me by offering to take over this daily management! I happily loaded laundry onto my don’t do list and that gives me more time every day.

Keep reading to see more ideas for easy automation of regularly recurring tasks.

Keep reading to see more ideas for easy automation of regularly recurring tasks.

Just having an automated system of where you always put your keys, phone, and other items, for example, could potentially save many minutes of time spent searching for your things.

The same goes for your sewing tools and space, of course. Keep your machines next to their thread, for example. Arrange a hot iron and pressing board within your reach from your sewing machine when you make patchwork. Always know exactly where everything you need is by having a dedicated place for everything and keep everything always in its place when not in use. These little tweaks can save a lot of time for more sewing.

Speaking of systems:

Take a tip from the king of Twitter. I am talking about Jack Dorsey. Dorsey is one of Twitter’s founders and its first CEO. And when Twitter performance was lagging in 2011, he came back as CEO to turn the company around. Dorsey also founded Square, the app that turns a cell phone into a card scanner and enabled everyday folks to easily accept credit card payments.  For a time, he was CEO of both giant operations.

This productivity whiz shared his secret by talking about how he themes his days. When I read his descriptions about how he handles marketing, communications, and growth on Wednesdays, and culture and recruiting on Fridays, for example, I sensed a way to make more time and I started thinking about this.

Keep it simple, silly: easy to remember themes

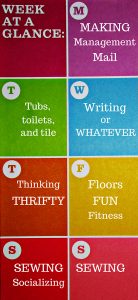
For this to work for me, it had to be simple and easy to remember. After working with different iterations of this idea, my current themes for my days include things like:

Monday

Mail and management on Mondays. Some folks might prefer to use the OHIO rule (only handle it once) for mail. For me, though, I prefer to deal with the last week’s incoming mail quickly and all at once on Mondays.

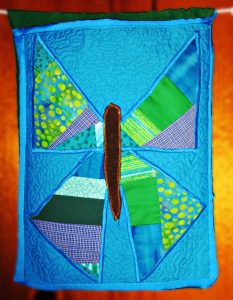
I made this butterfly organizer pocket to hold my mail for dealing with on Mondays.

I made this butterfly organizer pocket to hold my mail for dealing with on Mondays.

Management for me means I am paying bills, scheduling tasks, planning my next week and reviewing the previous week, following up on things, etc.

You could have Making on Mondays, and fit sewing and other projects in on this day every week.

Tuesday

I clean tubs, toilets, and tile on Tuesdays.

Or how about teaching on Tuesdays? You could teach yourself or someone else how to do something new.

Wednesday

For me, Wednesdays are devoted exclusively to writing, and I try to do not much else, because I am currently writing more than one book.

If you don’t have much writing to do, you might like to have whatever Wednesdays instead, for maximum scheduling freedom on hump days.

Sewing could definitely fit into Whatever Wednesday!

If you are in the once a week laundry camp, you could do your washing on Wednesdays.

Thursday

Thrifty Thursdays. I used to choose to do my shopping on this day, since following the thrifty theme helped me not to make impulse purchases or otherwise spend unwisely.

Now that shopping is on my don’t do list, I am helping to free time from excess management on Mondays by theming Thursdays for thinking, too. I allow myself to invest a larger percentage of this day for reading and learning new things.

Friday

Floors, FUN, fitness, and friends on Fridays- I use Fridays for fitting in all these things.

I try to schedule most of our outings, field trips, hikes and other outdoor activities, and also playdates or informal dinner parties with friends, on Fridays.

I also do a good bit of sewing under the umbrella of fun on Fridays. This would be for fun new project ideas, just playing with patchwork or starting a new quilt, stuff that is fun. I wouldn’t do mending on a Friday, since that isn’t as much fun.

We have family time every day here, but if yours doesn’t live with you, maybe you could use Fridays for family time, if this will help you.

I’ll also tell you about a tool that can save a ton of time from Friday’s floor cleaning task. I have a lot of hardwood and other hard floors, and also a pack of boys and a dog. So cleaning floors used to take up what felt like half my day on Fridays.

Luckily, a steam mop is a huge helper that cuts this task from tedious chore to so fast and effective it is almost fun to clean floors.

These are not all made equal, however. I love the well-designed Luna Plus steam mop system, especially because of its handy extra uses in the bathroom. This baby can save time on the floors on Fridays, and the tub and tile on Tuesdays, too.

It cleans twice as well as you can, and in half the time!

Saturday

Sew on Saturdays.

Here are some ideas to get you started thinking about your own themes for every day of the week.

Here are some ideas to get you started thinking about your own themes for every day of the week.

I would advise against any temptation to have Saturday shopping as a theme! That is based on my own opinions, however; you should do what makes you happy.

If you normally shop on Saturdays, could you move to using thrifty Thursdays for this? Then you could save money for more sewing equipment and supplies and a whole day of the week for sewing. I’d love to help you save time AND money, so do consider this option.

Some folks might like to theme their Saturdays for socializing. I do this some weeks myself.

Sunday

Sew on Sundays, too!

It is fortunate that there are two days of the week beginning with S! And it makes perfect sense when theming your days to plan two days of sewing, if you want to make more time to sew.

Of course you could also devote all or part of either Saturday or Sunday to Service or as your Sabbath day of rest and reflection.

And wait, there’s more!

This series will be continued to part three, next week, because I’ll like to show you a few more ways to make more time. And I’ll share a video I am working on for you, where I’ll give you more details and inspiration about all the ideas from this series.

Until then, happy sewing. I hope these tricks can help you to make more time for sewing this week, and I hope you get to enjoy making something you’ll love.

80s Prom Dress Hack

80s Prom Dress Hack

For the most part, I use my sewing skills for myself, and my immediate family. Sometimes, however, I get to help friends out. As was the case this week when my friend, Tania, asked if I could help her with a costume for a party this weekend. The theme was 80s Night and she had found an authentic 80s Prom Dress that ALMOST fit her. She just needed the dress to work for that one night. I was game to help her make it happen.

Verdict

When she brought over the dress I assessed three main issues:

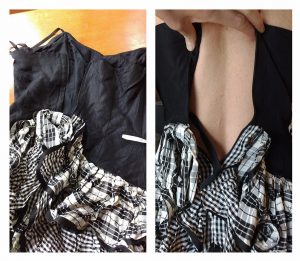
  1. The zipper was broken on the left side of the plaque.
  2. There were two rips to the right of the right-side zipper.
  3. Her rib cage was wider than the fit of the dress. We would need to somehow expand the torso piece of the dress to get it to fit her for an evening.
I decided to extend the circumference of the dress by creating a fabric plaque that would be sewn onto the left side of the zipper opening.

I decided to extend the circumference of the dress by creating a fabric plaque that would be sewn onto the left side of the zipper opening.

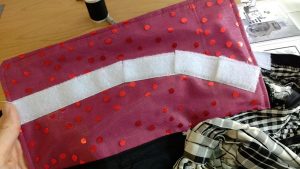
The good news is that these were all problems I could tackle. I decided to extend the circumference of the dress by creating a fabric plaque that would be sewn onto the left side of the zipper opening (I cut off the broken zipper) and would attach via Velcro to the right side of the zipper opening.

The good news is that these were all problems I could tackle.

The good news is that these were all problems I could tackle.

Resourceful fabric recycling

Tania brought two gift bags with her that we planned to use as extra fabric. They were glittery and shiny and would match the dress and the theme of the party. From the red bag I cut out the larger plaque.


I sewed it directly onto where the zipper would have zipped up on the left side of the dress opening.

I sewed it directly onto where the zipper would have zipped up on the left side of the dress opening.

I sewed it directly onto where the zipper would have zipped up on the left side of the dress opening.

Patches?! We don’t need no stinking patches

Then I tackled the holes. I used the gray gift bag fabric to support the fabric under where the rips were and then zig zag stitched several lines of stitching to patch the rips (Remember this just needed to work for one night).


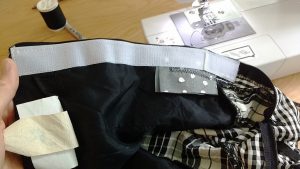
Here you can see the gray gift bag fabric on the underside of the dress. I sewed Velcro to the right side of the dress opening, sewing right over the invisible zipper.

Here you can see the gray gift bag fabric on the underside of the dress.

Here you can see the gray gift bag fabric on the underside of the dress.

Measure twice – cut once

For this part, I had her put the dress on and then we fit the dress to exactly the width she felt comfortable in. I used my Clover Chaco-liner Pen to draw a line where the other side of the Velcro needed to be sewn on. The curve at the end is where the lower portion of the still working zipper zipped up to meet the straight line of the back piece.

The curve at the end is where the lower portion of the still working zipper zipped up to meet the straight line of the back piece.

The curve at the end is where the lower portion of the still working zipper zipped up to meet the straight line of the back piece.

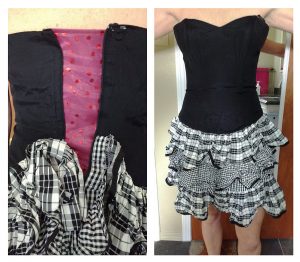
Ta da!!! The red fabric + Velcro expanded the corset piece perfectly. On the right you can see her in the dress after we’d finished. The dress is a little roomy in the bust, but she will be wearing a strapless bra to fill that in.

I’m so glad I could help my friend out with my sewing skills.

I’m so glad I could help my friend out with my sewing skills.

I’m so glad I could help my friend out with my sewing skills.

Have you ever helped someone DIY a costume?

———————————————————————————–
Charlotte Kaufman is a writer and sewist in Mammoth Lakes, California. She specializes in marine and home interiors and continues to fall more and more in love with quilting. You can follow her at charlottekaufman.com.
How to Make More Time to Sew

How to Make More Time to Sew

You can make more time to sew

Do you have more ideas and things you’d like to make than time to do them?

No matter how many ideas that is, the right answer is no.

You can make more time to do anything you want, including sewing.

Here are my tips & tricks for finding more time.

Here are my tips & tricks for finding more time.

Productivity has become one of my passions. In fact, I am outlining a book I’ll write about many productivity hacks I have learned. I’ll share a few of these with you.

Make More Time to Sew

Set up for success

You need an efficient, working sewing system, including machines and workspace. That’s not to say that you can’t use a kitchen table if you don’t have dedicated space. In that case, a big part of your system would be keeping that kitchen table clean and never allowing piles of things to accumulate there. That way, you can whip out your sewing machine and get to work whenever you find a chunk of time to sew.

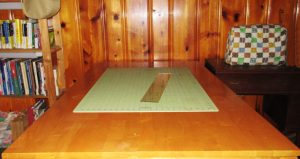
Keep work spaces clear & ready for working whenever you find time to sew.

Keep work spaces clear & ready for working whenever you find time to sew.

You do not want to waste time having to clear a space to sew. Keep your spaces clean and clear. Have backups of all machines, if you can. And keep them clean and in good working order. I gave tips about this when I laid out rules for keeping your sewing room in order.

The don’t-do list

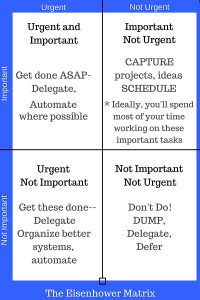
Use the Eisenhower Matrix for prioritizing tasks. Start your don’t do list by dumping all the tasks in the not important, not urgent quadrant.

Use the Eisenhower Matrix for prioritizing tasks. Start your don’t do list by dumping all the tasks in the not important, not urgent quadrant.

Here is a great way to grab all kinds of time.

What are you currently doing that someone else could do?

If you are a parent, for example, that job is about raising competent people. And doing things for kids is often a disservice to both of you. It was awfully helpful for me and my kids when I realized this.

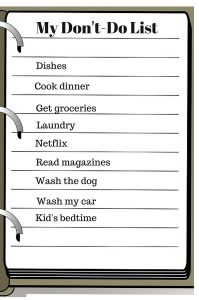
My own don’t do list started with only one item I could think to move there—washing dishes. It stayed like that for a long time. Gradually, I started finding things to add and helpers to give tasks to. My don’t do list is quite long by now.

My don’t do list now includes going shopping for groceries, for example. I order groceries online, and my husband is willing to go to the grocery store and pick them up. So I never go out for groceries at all anymore!

This is liberating and frees up all kinds of time to sew.

You can say no!

Do not feel obliged to accept all invitations or requests for your help. Be helpful and social, but remember the rule: don’t do for others what they can do for themselves.

Here is another helpful rule to keep in mind when thinking about your don’t do list: Only do what only you can do.

Right now, I’m busy doing so much that only I can do that I have delegated a lot of tasks to others & gained time by having a long don’t do list.

Right now, I’m busy doing so much that only I can do that I have delegated a lot of tasks to others & gained time by having a long don’t do list.

When you are looking at items on your plate and deciding which things to dump, it might be helpful to think of the 10-10-10 question. Just ask what difference a particular task will make in ten minutes, in ten months, and ten years. If it doesn’t matter much in any of these timelines, then perhaps that is a task you can let go and include on your don’t do list.

You can use this question to clearly see and reorder your priorities if necessary, so it is a helpful tool in other ways, too

Capture all your ideas

Achieve a mind like water that is free to flow in whatever container it finds itself by emptying it of all those things you do want to do.

Don’t use your brain power for keeping track of ideas and plans. Write these down. You need to regularly drain your brain, or download data to paper or digital file.

Use a notebook, card file, or organize lists on an app. The important thing is to have a system for tracking all your ideas, projects, and tasks. And use it!

How to Make More Time to Sew

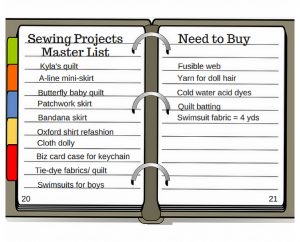
I’ll recommend my two favorite ideas for this: a bullet journal or bujo, as these are affectionately known online, and a kanban, which comes from the system known as kaizen.

Bullet Journal

A bullet journal is a notebook with numbered pages and an index in the front. This helps to organize your lists and information so you can find it. You can have project lists, lists of next actions and Most Important Tasks, books you’d like to read, garments or quilts you want to sew, ideas, sketches. The point is to use it to capture everything you want to keep track of, rather than using your headspace for this.

Use an index in the front & number bullet journal pages to easily find all your lists.

Use an index in the front & number bullet journal pages to easily find all your lists.

Kanban

A kanban board is a central tool in the system known as kaizen (“change for better” or “continuous improvement). I find it to be incredibly helpful.

A kanban board is simply three columns: to-do, doing, and done. I have used a white board and also a tri fold board and post-it notes to organize a kanban for some big projects before. Now I use free Trello boards to do this digitally.

My kanban board for today.

My kanban board for today.

The trick to making kanban work for you is to limit the Doing column, and keep it moving. My advice would be to use no more than three doing cards at a time. I allow an absolute maximum of five on mine, but try to keep it to three or just two.

Move these doing cards quickly to done, in a continual stream. The way to successfully do this is to make highly actionable tasks. “Make a quilt,” for example is a PROJECT, not a task or next action. Break projects into next actions. So the first task for “make a quilt,” might be to settle on a design, or if you’ve done that, plan and buy all the fabrics. Next actions in order would then be, prewash fabrics, iron fabrics, cut patchwork pieces, assemble patchwork, finish quilt top, make a quilt sandwich and pin, quilt, bind.

I hope these time saving tips help you. There’s more; I saved my favorite productivity hacks for finding more time to sew for part two of this series, next week.

T-Shirt Quilts: Superhero Style!

T-Shirt Quilts: Superhero Style!

Superhero movies are a pretty big thing these days, and I find little shame in saying that I’m a fan of some of them myself. Even in my childhood days, I remember watching the X-Men, Ninja Turtles, Power Rangers… I even liked the old-school Adam West Batman TV series.

As the years rolled on and high school surrounded me, X-Men was made into a movie and began the string of Marvel films that have been hitting theaters for years. And, sure, the X-Men movies mutilated my favorite character’s personality, but they still brought me joy in themselves, and in sparking a series of movies about characters I admittedly wasn’t overly familiar with — like Iron Man and Captain America. That might sound ridiculous coming from a superhero fan, but I wasn’t really into the comic books — just what TV and movies brought me in my favorite shows (which might be a bit embarrassing!).

Avengers assemble!

I’ve taken such a shine to some of these newer-to-me superhero characters — Avengers!!!

I’ve taken such a shine to some of these newer-to-me superhero characters — Avengers!!!

Since that first X-Men movie though, I’ve taken such a shine to some of these newer-to-me superhero characters — Avengers!!! — that I’ve fake-married a number of them in the Game of Life. Now, that is appreciation!

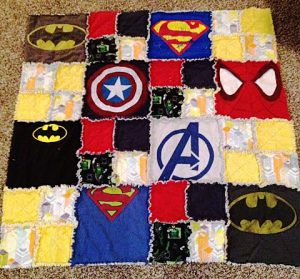
These characters and stories are so remarkable to me that I would love to have some kind of sewing project that’s superhero-related, and I’ve been thinking about my options. As a quilter, I could make a superhero quilt, but I’d want to do something a bit more interesting than just buy collage-types of fabrics and make squares out of them. This week, I was doing sewing research, and I came across a wonderful option: a t-shirt quilt that’s superhero-based.

Hip, cozy, fun!

This week, I was doing sewing research, & I came across a wonderful option: a t-shirt quilt that’s superhero-based.

This week, I was doing sewing research, & I came across a wonderful option: a t-shirt quilt that’s superhero-based.

There are plenty of solid reasons for making a t-shirt quilt, not the least of which is that it’s a good use of fabric you might have in your house since it’s created from t-shirts. In fact, having the shirts already is the best strategy because if you don’t have them, buying them brand new could cost you some serious money! Think about how much you’d spend by paying $20 per shirt with maybe one block coming from each. That’s an expensive project!

But, there’s an alternative if you don’t have those shirts! You could keep an eye out for used ones at local stores or online shops, like I’m thinking of doing. If you can buy them cheap, maybe one shirt here and one there, you could end up with enough tops for a whole quilt without ever breaking your bank!
If you can buy them cheap, maybe one shirt here & one there, you could end up with enough tops for a whole quilt without ever breaking your bank!

If you can buy them cheap, maybe one shirt here & one there, you could end up with enough tops for a whole quilt without ever breaking your bank!

Use what you’ve got

As I said though, having the t-shirts already at your disposal is the best tactic, but not only because there’s no additional fabric purchase for that top layer of the quilt. Another good detail is that you can use this process to declutter your home. How many times do you go through your closet and end up with clothes you never wear? How often do you find yourself needing more room to store your things? If you make use of your graphic t-shirts in a quilt, you’re clearing out space in a productive, creative way that you can use for years to come for practical purposes — and that’s not a bad takeaway from going through your clothes for things to toss!
If you use your own shirts, it also comes with the additional bonus of being able to add sentimental value to the quilt beyond knowing that it’s something you made yourself. Once it’s finished, you could look over your blocks and recall memories that are tied to each piece. Maybe you bought the Iron Man top while on a fun shopping spree with your best friend. Maybe you wore that Black Widow t-shirt to a concert you had a blast at. Maybe you were wearing a Hulk shirt when you got the news that your niece was born. A number of memories could be tucked away in a fun, energetic quilt that primarily came from clothes you had in your closet — low budget, close-to-the-heart, and organization-friendly!
Quilt block paneling

For a superhero t-shirt quilt, you have yet another bonus of the quilt actually mimicking the set-up of a comic book because comic books, too, are given in blocks.

For a superhero t-shirt quilt, you have yet another bonus of the quilt actually mimicking the set-up of a comic book because comic books, too, are given in blocks.

For a superhero t-shirt quilt, you have yet another bonus of the quilt actually mimicking the set-up of a comic book because comic books, too, are given in blocks. Honestly, the connection is so reasonable that making a quilt for comic book superheroes seems like a fairly flawless link. I’m pretty excited to put this idea into action, even if I have to build up my superhero shirts to do it!

For those of you who do have a ton of graphic t-shirts, you could get started on this kind of project in the same way you would for any other quilt. For those of you who don’t, be like me and start keeping an eye out for cheap, used options to buy and store until you get enough to make your crazy-awesome quilt!  If you do these things, a superhero quilt could be in your future, and if you’re a nerd like me, that’s a good prospect!

Fabric Scrap Projects

Fabric Scrap Projects

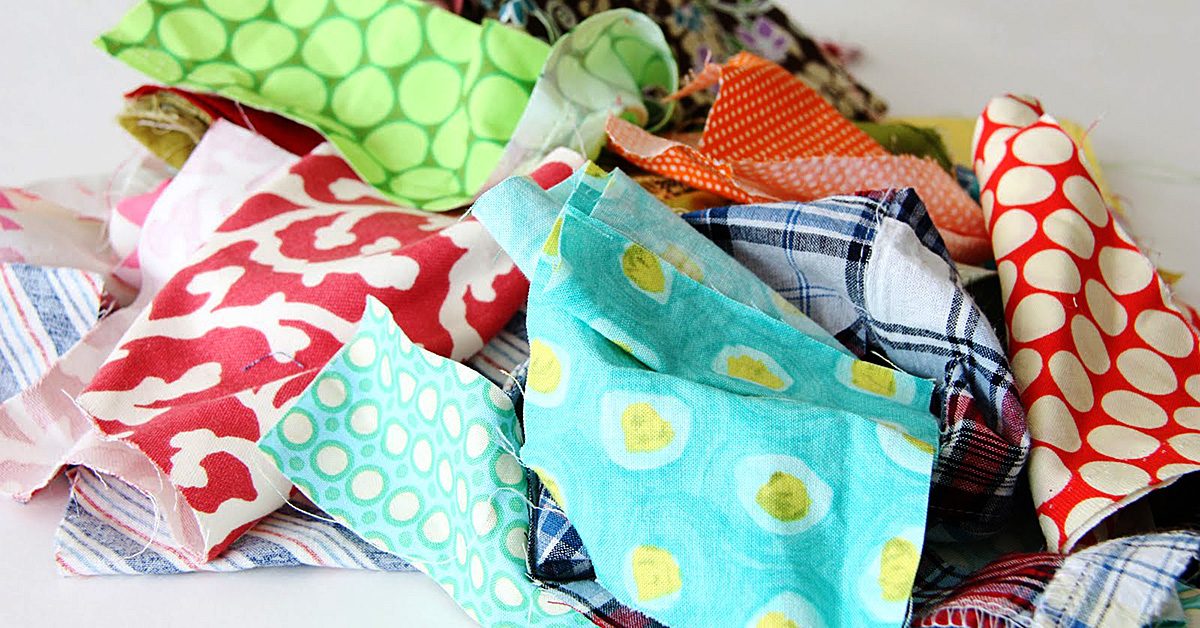
If you’re anything like me, you’ve got a huge stash of fabric scraps. You don’t want to toss them since the pieces are big enough to be used for SOMETHING. But you also don’t really know what you’ll use them for. I’ve recently made it a mission of sorts to use my fabric scraps before I buy any new fabric. That’s led me to come up with projects, many of which allow me to upcycle other items as well.

Cat litter bucket small ottoman

I’ve been looking for a small ottoman to go with my living room love seat for a while. I hadn’t found anything I liked, that was the right size and that matched my décor. Then, I hit upon an idea!

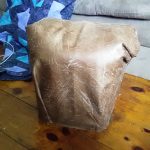
With four cats in the house, I buy large tubs of cat litter on a regular basis. They pile up until I either find a use for them or make room in the recycling bin. I also had in my scrap bucket some brown faux suede upholstery fabric that goes nicely with the décor and nearly matched the love seat color. Perfect! I grabbed the litter bucket and layered the bottom with sand to make it a little heavy so it wouldn’t tip easily. Then, I hot glued a pile of polyester stuffing on the top of the bucket and cut off the handle.

Finally, I cut the upholstery fabric scrap to fit around the bucket and wrapped the bucket the same way you might wrap a Christmas or birthday present. Some beads of hot glue and voila! A comfy ottoman that’s also cat approved.

Hair scrunchy

Those of us with long hair know the importance of having a great hair tie for every outfit. Using my fabric scrap stash I’ve come up with a way to make a scrunchies to match every piece of clothing I’ve made. It’s super easy! All you need is a rubber hair elastic like you buy at any drugstore or grocery store.

Cut a piece from your fabric scrap that’s long enough to go around the hair elastic. With right side out, encircle the hair elastic in your chosen fabric. Use pins to keep it in place and to be sure it wrinkles and folds in enough places to make you happy. Tuck in the raw edges and hand sew the fabric, being sure the fabric remains loose around the hair elastic. Then simply rotate the fabric so the seam you’ve made is on the inside of the scrunchy circle. Place in your hair and be the envy of all.

What other fabric scrap ideas do you have?